
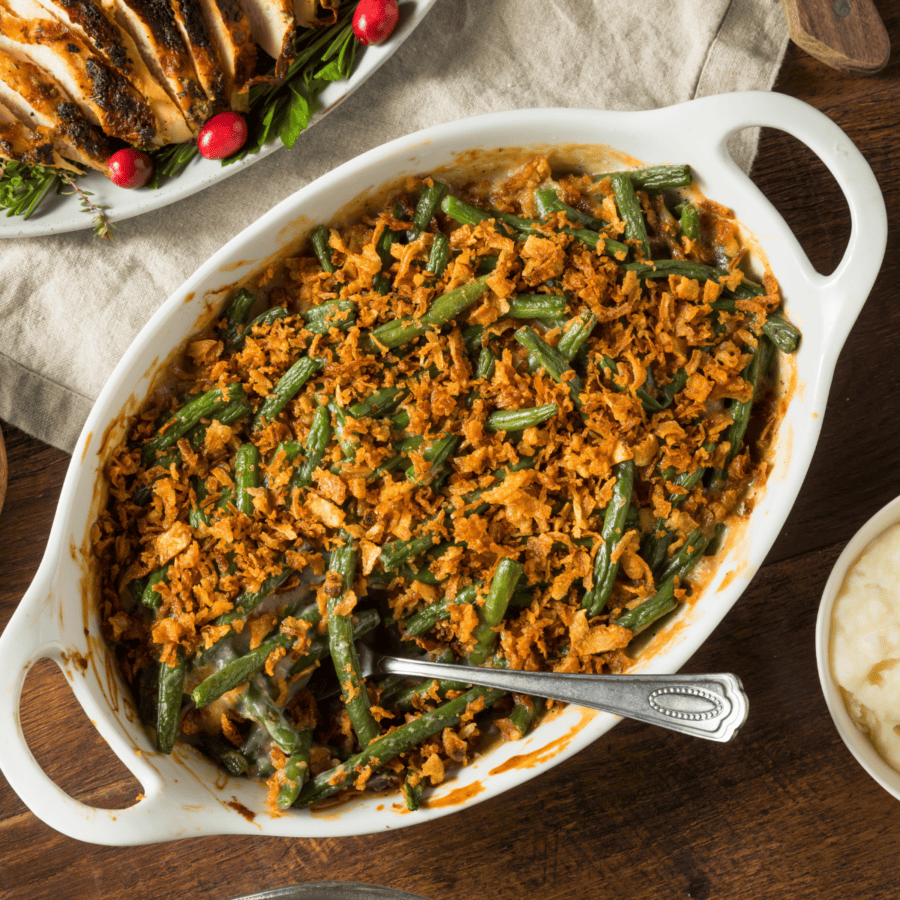
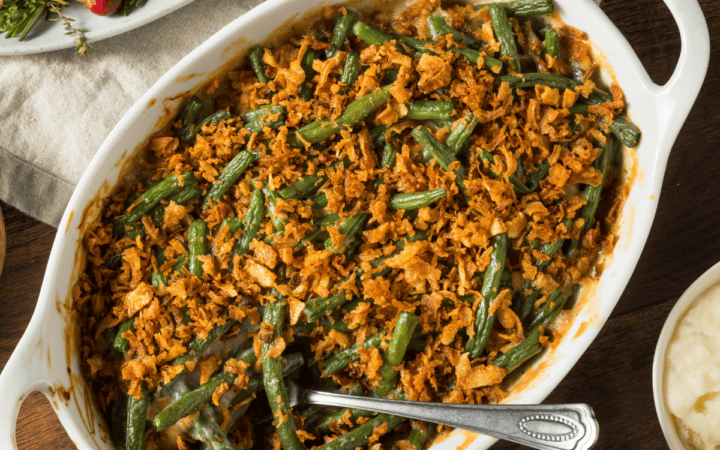
If you’re a fan of classic green bean casserole but want to skip the canned cream of mushroom soup, you’re in for a treat! This Crockpot Green Bean Casserole offers the same comforting flavors with a homemade twist. With a few simple ingredients and the convenience of a slow cooker, you’ll have a side dish that’s sure to become a family favorite.
Why This Will Be Your Favorite Holiday Side Dish
- Convenient. Easily prepared in a crockpot, saving you time and effort.
- Homemade Flavor . Say goodbye to canned cream of mushroom soup and enjoy a casserole with a homemade touch.
- Perfect for Any Occasion . Ideal for family dinners, potlucks, or holiday gatherings.
- Customizable. Adjust the ingredients to suit your taste preferences.
Crockpot green bean casserole combines convenience, tradition, and delicious flavors, making it a favorite side dish for holiday celebrations.
How Do You Keep Green Bean Casserole From Being Soupy?
To prevent green bean casserole from being soupy, you can follow these tips:
- Use Fresh or Thawed Green Beans. Fresh green beans or thawed frozen green beans will have less moisture than frozen ones. If you use frozen beans, make sure to thaw and drain them before incorporating them into the casserole.
- Add Cornstarch Slurry . If you find that your green bean casserole is too soupy near the end of the cooking time, you can create a cornstarch slurry by mixing cornstarch with a small amount of cold water. Stir this mixture into the slow cooker and let it cook for an additional 15-30 minutes to thicken.
- Adjust the Lid Positioning . During the last part of the cooking time, you can slightly crack the lid of the slow cooker to allow excess moisture to evaporate. This can help thicken the casserole.
Ingredients You’ll Need
- Fresh Green Beans - Opt for fresh green beans for the best texture, but you can use frozen if needed.
- Mushrooms - Sliced mushrooms add a savory and earthy flavor.
- Onion - Finely chopped onion enhances the overall taste.
- Garlic - Minced garlic adds depth to the dish.
- Chicken Broth - For a flavorful base to cook the green beans.
- Heavy Cream - Adds creaminess to the casserole.
- Flour - Helps thicken the sauce.
- Butter - Adds richness to the dish.
- Salt and Pepper - To season according to taste.
- Fried Onions - For a crispy topping.
How To Make Crockpot Green Bean Casserole
- Prepare the Ingredients . Trim the ends of the green beans and slice the mushrooms, onions, and garlic.
- Sauté Vegetables . In a skillet, sauté the mushrooms, onions, and garlic in butter until softened.
- Create the Sauce. Sprinkle flour over the sautéed vegetables, stir to combine, and cook briefly. Slowly add chicken broth and heavy cream, stirring constantly until the mixture thickens.
- Layer in the Crockpot . Place the trimmed green beans in the crockpot and pour the sauce over them. Mix well to ensure the green beans are evenly coated.
- Cook Slowly . Cover and cook on low for 4-6 hours or until the green beans are tender.
- Top and Serve . Before serving, sprinkle fried onions on top for a crispy finish.
- Garnish and Enjoy . Transfer the casserole to a serving dish, garnish with additional fried onions if desired, and serve!

Tips And Tricks
Making Crockpot Green Bean Casserole is a breeze, but a few tips can make the process even smoother:
- Fresh vs. Frozen . While fresh green beans are recommended for optimal texture, you can use frozen in a pinch. Thaw them before adding them to the crockpot.
- Creaminess Level. Adjust the amount of heavy cream based on your desired level of creaminess. Some prefer a richer casserole, while others may like it lighter.
- Seasoning . Feel free to add herbs like thyme or rosemary for an extra layer of flavor.
Variations
Customize your Crockpot Green Bean Casserole with these creative variations:
- Cheesy Twist- Sprinkle shredded cheddar or Parmesan cheese on top during the last 30 minutes of cooking for a cheesy finish.
- Bacon Bliss - Add cooked and crumbled bacon to the casserole for a smoky flavor.
- Nutty Crunch - Mix in chopped almonds or crispy chopped pecans for added crunch.
What To Serve With Crockpot Green Bean Casserole
Crockpot green bean casserole is a classic side dish that pairs well with a variety of other dishes. Here are some ideas for what to serve with it:
- Roast Turkey - Green bean casserole is a popular side dish for holiday meals, and it complements the flavors of roasted turkey.
- Mashed Potatoes - The creamy texture of mashed potatoes contrasts nicely with the crunch of green bean casserole. It’s a comforting combination.
- Stuffing - Whether it’s traditional stuffing or a modern twist, it pairs well with green bean casserole, especially during holiday feasts.
- Cranberry Sauce - The tartness of cranberry sauce provides a delightful contrast to the savory flavors of green bean casserole.
How Many Days Is Green Bean Casserole Good For?
Crockpot Green Bean Casserole can be stored in an airtight container in the refrigerator for up to 3-4 days. Reheat in the microwave or oven for a quick and delicious leftover meal.
Can You Freeze It?
While the texture of the green beans may change slightly, you can freeze the casserole for up to 2-3 months. Thaw in the refrigerator before reheating.
More Delicious Vegetable Sides
- Air Fryer Broccoli
- Cheesy Potatoes
- Air Fryer Asparagus
- Greek Green Beans
- Candied Carrots
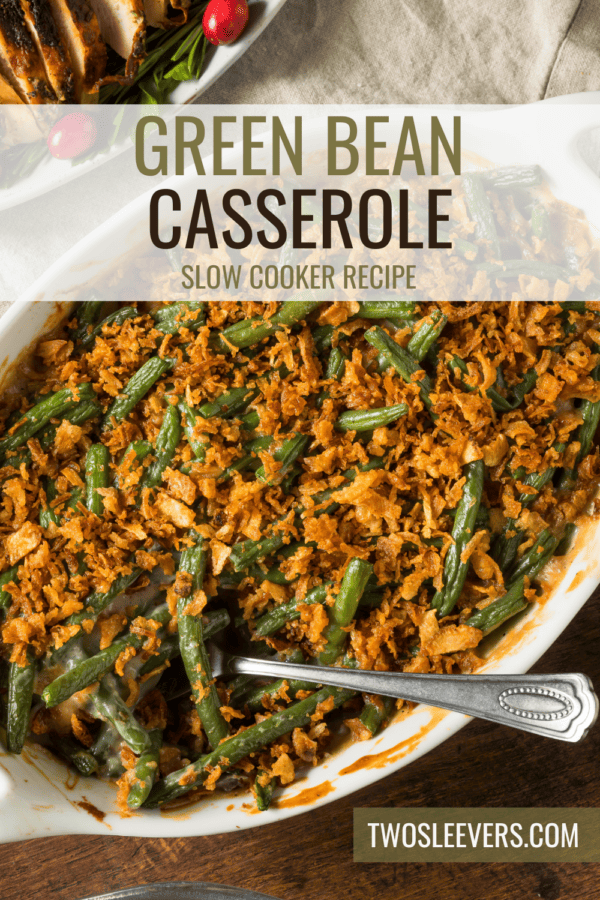
Crockpot Green Bean Casserole | Slow Cooker Green Bean Recipe
Ingredients
- ▢ 2 pounds Fresh Green Beans , trimmed and washed
- ▢ 2 ounces Mushrooms , diced
- ▢ 1 Onion , minced
- ▢ 3 cloves Garlic , minced
- ▢ 1 cup Chicken Broth
- ▢ 1 cup Heavy Cream
- ▢ 1/4 cup All Purpose Flour
- ▢ 4 tbsp Unsalted Butter
- ▢ 1/2 tsp Kosher Salt
- ▢ 1/4 tsp Black Pepper
- ▢ 1 1/2 cups Fried Onions
Instructions
- Prepare the Ingredients . Trim the ends of the green beans and slice the mushrooms, onions, and garlic.
- Sauté Vegetables . In a skillet, sauté the mushrooms, onions, and garlic in butter until softened.
- Create the Sauce. Sprinkle flour over the sautéed vegetables, stir to combine, and cook briefly. Slowly add chicken broth and heavy cream, stirring constantly until the mixture thickens.
- Layer in the Crockpot . Place the trimmed green beans in the crockpot and pour the sauce over them. Mix well to ensure the green beans are evenly coated.
- Cook Slowly . Cover and cook on low for 4-6 hours or until the green beans are tender.
- Top and Serve . Before serving, sprinkle fried onions on top for a crispy finish.
- Garnish and Enjoy . Transfer the casserole to a serving dish, garnish with additional fried onions if desired, and serve!
Get support & connect with our community on Facebook!

If you already signed up, you should have received an email with a password to give you unlimited access to our FREE Printable Library. The password is case sensitive. Enter it below and get printing!
Password:

Crockpot Green Bean Casserole | Slow Cooker Green Bean Recipe
Ingredients
- 2 pounds Fresh Green Beans trimmed and washed
- 2 ounces Mushrooms diced
- 1 Onion minced
- 3 cloves Garlic minced
- 1 cup Chicken Broth
- 1 cup Heavy Cream
- 1/4 cup All Purpose Flour
- 4 tbsp Unsalted Butter
- 1/2 tsp Kosher Salt
- 1/4 tsp Black Pepper
- 1 1/2 cups Fried Onions
Instructions
- Prepare the Ingredients . Trim the ends of the green beans and slice the mushrooms, onions, and garlic.
- Sauté Vegetables . In a skillet, sauté the mushrooms, onions, and garlic in butter until softened.
- Create the Sauce. Sprinkle flour over the sautéed vegetables, stir to combine, and cook briefly. Slowly add chicken broth and heavy cream, stirring constantly until the mixture thickens.
- Layer in the Crockpot . Place the trimmed green beans in the crockpot and pour the sauce over them. Mix well to ensure the green beans are evenly coated.
- Cook Slowly . Cover and cook on low for 4-6 hours or until the green beans are tender.
- Top and Serve . Before serving, sprinkle fried onions on top for a crispy finish.
- Garnish and Enjoy . Transfer the casserole to a serving dish, garnish with additional fried onions if desired, and serve!
Crockpot Green Bean Casserole | Slow Cooker Green Bean Recipe https://twosleevers.com/crockpot-green-bean-casserole/
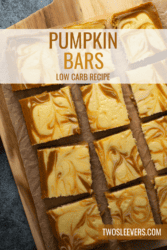
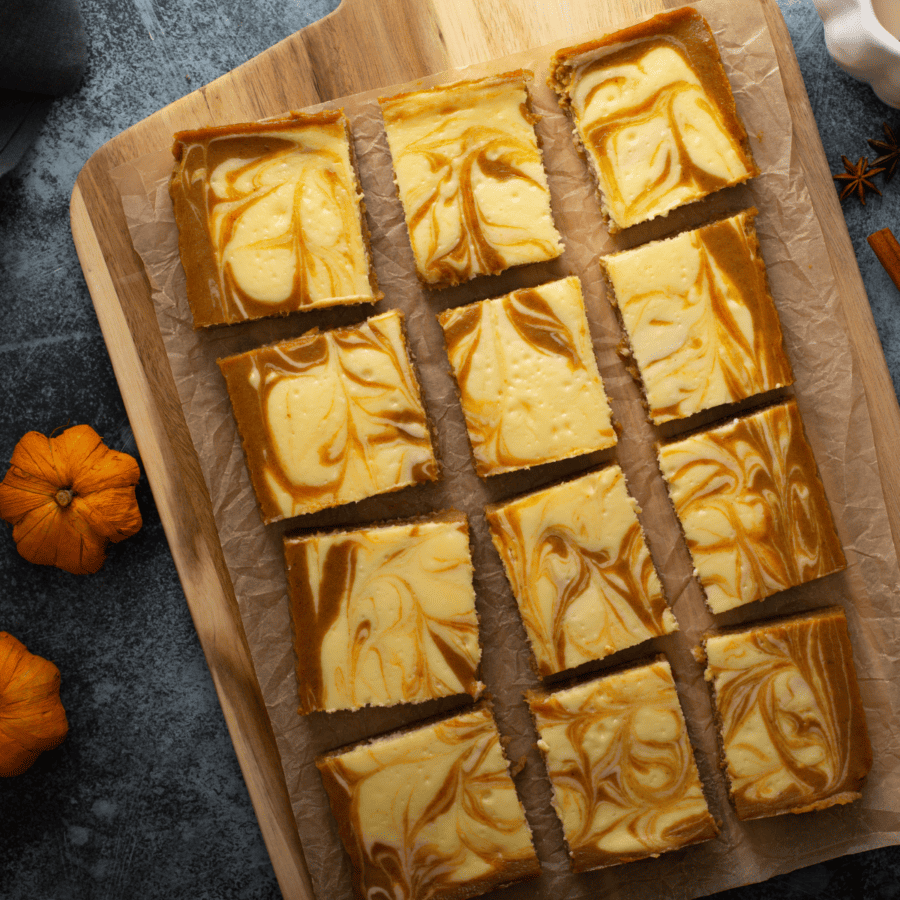
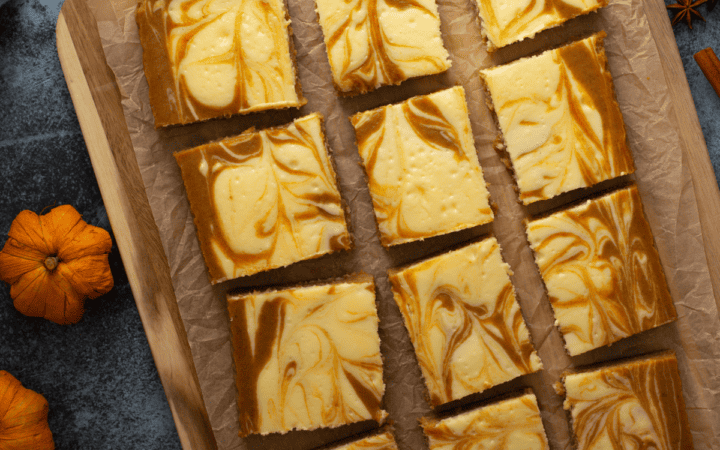
Low Carb Pumpkin Bars with Cheesecake Swirl are a harmonious blend of velvety pumpkin goodness and creamy cheesecake decadence, all while keeping your carb count in check.
Why You’ll Love This Pumpkin Dessert
- Easy. Mix up the pumpkin bar batter, create a simple cheesecake swirl, combine the two, and bake for a simple dessert recipe.
- Delicious. Packed full of fall flavors, you’ll love that this is both tasty and keto-friendly.
- Low Carb. Minimal net carbs per serving means you can enjoy your favorite meals while still having enough carbs left for the day to enjoy dessert too!
Indulging in the flavors of fall doesn’t have to mean sacrificing your commitment to a low-carb lifestyle. These Low-Carb Pumpkin Bars with Cheesecake Swirl offer the perfect balance of seasonal comfort and mindful eating.
What Are Pumpkin Bars Made Of?
Pumpkin Bars
- Almond Flour
- Coconut Flour
- Swerve
- Baking Powder
- Cinnamon
- Nutmeg
- Ginger
- Salt
- Pumpkin Puree
- Eggs
- Coconut oil
- Vanilla Extract
Cheesecake Swirl
- Cream Cheese
- Swerve
- Egg
- Vanilla Extract
How To Make Pumpkin Bars
- Prepare the Dry Pumpkin Bar Base. Preheat your oven to 350°F and line an 8x8-inch baking pan with parchment paper. In a bowl, whisk together the almond flour, coconut flour, sweetener, baking powder, cinnamon, nutmeg, ginger, and salt.
- Create the Wet Pumpkin Mixture. Add the pumpkin puree, eggs, melted coconut oil or butter, and vanilla extract. Mix until well combined. Spread the pumpkin batter evenly into the prepared baking pan.
- Create the Cheesecake Swirl. In a separate bowl, beat the softened cream cheese until smooth. Add the sweetener, egg, and vanilla extract. Mix until creamy and well incorporated.
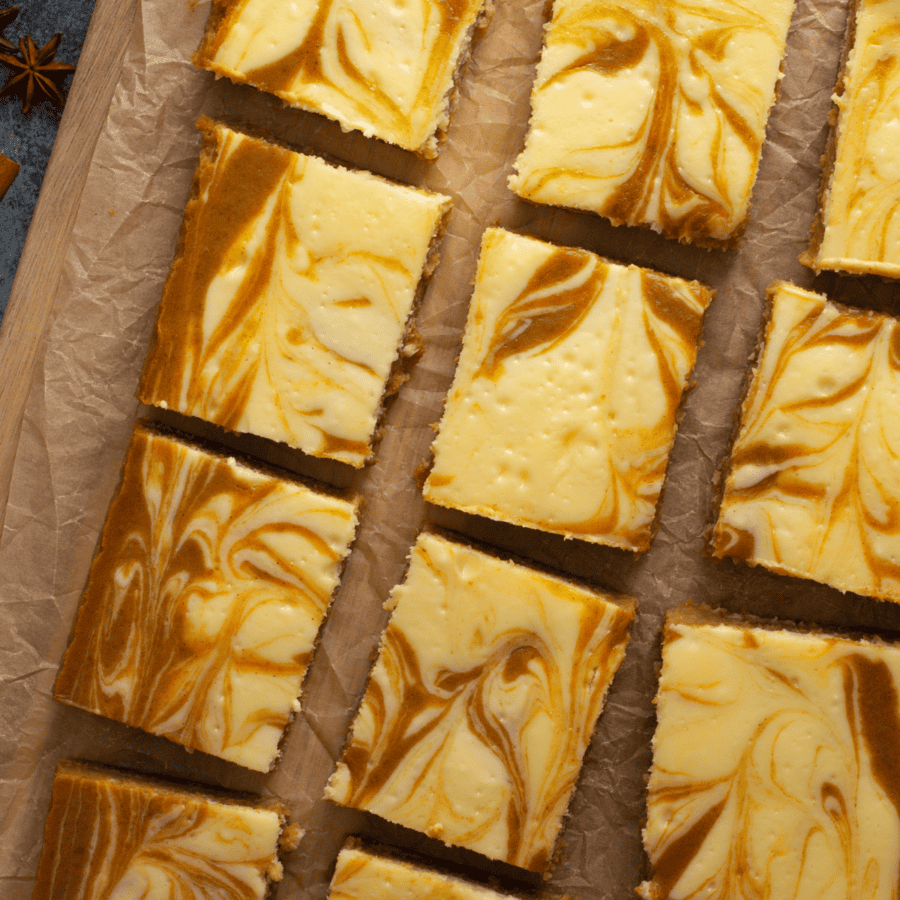
- Swirling the Cheesecake. Drop spoonfuls of the cheesecake mixture onto the pumpkin batter in the pan. Use a knife or toothpick to gently swirl the cheesecake mixture into the pumpkin batter, creating a marbled effect.
- Bake Them Up. Place the pan in the preheated oven and bake for 25-30 minutes, or until the bars are set and a toothpick inserted into the center comes out clean.
- Cool and Serve . Remove from the oven and let the bars cool in the pan for about 15 minutes. Then, lift them out using the parchment paper overhang and transfer them to a wire rack to cool completely. Refrigerate the bars for at least 2 hours to allow them to firm up. When ready to serve, cut the bars into squares and dust with a sprinkle of ground cinnamon, if desired.
Tips And Tricks
Creating delicious low-carb pumpkin bars with a cheesecake swirl requires some thoughtful ingredient choices and baking techniques. Here are some tips and tricks to help you make the best low carb dessert:
- Pumpkin Puree- Use unsweetened canned pumpkin puree (NOT PUMPKIN PIE FILLING) as the main ingredient. Pumpkin is relatively low in carbs and adds a wonderful fall flavor.
- Portion Control - Cut the bars into appropriate serving sizes to manage carb intake. A smaller portion can satisfy your sweet tooth without exceeding your carb limit.
- Cooling Time - Allow the bars to cool completely before cutting. This helps them set and makes slicing easier.
Variations
Low carb pumpkin bars with cheesecake swirl are a versatile treat that can be customized with various flavors and ingredients. Here are some creative variations to try:
- Chocolate Chip Pumpkin Bars - Fold in sugar-free chocolate chips to the pumpkin batter before swirling in the cheesecake mixture for a delightful chocolatey twist.
- Pecan Pumpkin Bars - Sprinkle chopped toasted pecans on top of the cheesecake swirl for added crunch and nutty flavor.
- Maple Walnut Pumpkin Bars- Mix chopped walnuts into the pumpkin batter and drizzle with a sugar-free maple-flavored syrup before baking.
What To Serve With Them
Low Carb Pumpkin Bars with cheesecake swirl are a delicious and satisfying treat on their own, but if you’re looking to complement their flavors or create a well-rounded dessert experience, here are some ideas for what to serve with them:
- Whipped Cream- A dollop of freshly whipped cream adds a light and airy contrast to the richness of the pumpkin bars. You can even flavor the whipped cream with a hint of vanilla or cinnamon.
- Low Carb Ice Cream - Serve a scoop of creamy vanilla ice cream alongside the pumpkin bars for a delightful combination of warm and cold textures.
- Caramel Sauce - Drizzle a small amount of caramel sauce over the pumpkin bars for an extra touch of sweetness and indulgence. Ensure you’re using a sugar-free or low carb option to keep this a guilt-free bite.
- Chopped Nuts - Sprinkle chopped toasted nuts, such as pecans or walnuts, over the pumpkin bars to add a crunchy texture and nutty flavor.
Can Pumpkin Bars Be Left Out?
Pumpkin bars with a cheesecake swirl should not be left out at room temperature for extended periods of time, especially since they contain dairy-based ingredients like cream cheese. Both the pumpkin and cheesecake components of the bars can be sensitive to temperature and can spoil if not stored properly.
Properly stored, in an airtight container, they can be refrigerated for up to 3-5 days.
Can You Freeze Them?
If you want to extend the shelf life further, consider freezing the pumpkin bars. Wrap individual bars tightly in plastic wrap and place them in an airtight container or freezer-safe bag. They can be frozen for up to 2-3 months.
To thaw, place the bars in the refrigerator overnight.
More Low Carb Desserts
- No Bake Peanut Butter Bars
- Peanut Butter Fat Bombs
- Keto French Silk Pie
- Low Carb Key Lime Pie
- Sugar Free Jello Mousse
- Gluten Free Pumpkin Bread

Low Carb Pumpkin Bars | Pumpkin Cheesecake Bars
Ingredients
Dry Pumpkin Bar Base
- ▢ 1 cup Almond Flour
- ▢ 1/4 cup Coconut Flour
- ▢ 1/2 cup Swerve
- ▢ 1 tsp Baking Powder
- ▢ 1 tsp Cinnamon
- ▢ 1/2 tsp Nutmeg
- ▢ 1/2 tsp Ginger
- ▢ 1/4 tsp Kosher Salt
Wet Pumpkin Mixture
- ▢ 1 cup Pumpkin Puree
- ▢ 3 Eggs
- ▢ 1/3 cup Unsalted Butter , melted
- ▢ 1 tsp Vanilla Extract
Cheesecake Swirl
- ▢ 8 oz Cream Cheese
- ▢ 3 tbsp Swerve
- ▢ 1 Egg
- ▢ 1 tsp Vanilla Extract
Instructions
- Prepare the Dry Pumpkin Bar Base. Preheat your oven to 350°F and line an 8x8-inch baking pan with parchment paper. In a bowl, whisk together the almond flour, coconut flour, sweetener, baking powder, cinnamon, nutmeg, ginger, and salt.
- Create the Wet Pumpkin Mixture. Add the pumpkin puree, eggs, melted coconut oil or butter, and vanilla extract. Mix until well combined. Spread the pumpkin batter evenly into the prepared baking pan.
- Create the Cheesecake Swirl. In a separate bowl, beat the softened cream cheese until smooth. Add the sweetener, egg, and vanilla extract. Mix until creamy and well incorporated.
- Swirling the Cheesecake. Drop spoonfuls of the cheesecake mixture onto the pumpkin batter in the pan. Use a knife or toothpick to gently swirl the cheesecake mixture into the pumpkin batter, creating a marbled effect.
- Bake Them Up. Place the pan in the preheated oven and bake for 25-30 minutes, or until the bars are set and a toothpick inserted into the center comes out clean.
- Cool and Serve . Remove from the oven and let the bars cool in the pan for about 15 minutes. Then, lift them out using the parchment paper overhang and transfer them to a wire rack to cool completely. Refrigerate the bars for at least 2 hours to allow them to firm up. When ready to serve, cut the bars into squares and dust with a sprinkle of ground cinnamon, if desired.
Get support & connect with our community on Facebook!
Don’t forget to check out my other Ketocookbooks.
Keto Instant Pot, Keto Fat Bombs, Sweets, & Treats , and Easy keto in 30 minutes.

