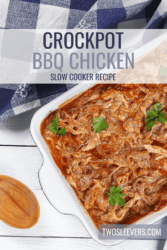
If you’re a fan of tender, smoky, and finger-licking BBQ chicken, you’re in for a treat! This Crockpot BBQ Chicken recipe is a game-changer for busy cooks who crave the mouthwatering flavors of barbecue without the hassle of grilling.
Why You’ll Love This Recipe
- Effortless Cooking . This recipe takes the stress out of barbecue. No need to tend to a grill for hours; just set it and forget it in your crockpot.
- Tender and Juicy . The slow cooking process ensures your chicken turns out incredibly tender and juicy, with flavors that permeate every bite.
- Versatile . You can use this BBQ chicken in various ways – in sandwiches, wraps, salads, or as a main dish with your favorite sides.
- Feeding a Crowd . Whether you’re hosting a backyard BBQ or a potluck dinner, this recipe can easily be scaled up to serve a large group.
With minimal hands-on time, this Crockpot BBQ Chicken recipe delivers maximum flavor and tenderness. Whether you’re enjoying it at a summer picnic or for a comforting weeknight dinner, this dish is sure to be a crowd-pleaser.
Is It OK To Put Raw Chicken In A Slow Cooker?
Yes, it is safe to put raw chicken in a slow cooker, but there are important food safety guidelines to follow to ensure that the chicken cooks properly and doesn’t pose a health risk. Here are some key points to keep in mind when using raw chicken in a slow cooker:
- Use Fresh Chicken. Start with fresh, uncooked chicken. Ensure that the chicken is not past its expiration date and has been stored at a safe temperature.
- Proper Cooking Temperature . Chicken should be cooked to an internal temperature of at least 165°F to ensure that it is safe to eat. Use a meat thermometer to check the temperature of the chicken in the thickest part.
- Avoid Overfilling . Don’t overfill your slow cooker. Leave some space at the top to allow for proper heat circulation and cooking. Overcrowding can result in uneven cooking and may lead to food safety issues.
Do I Need To Brown Chicken Before It Goes In TheSlow Cooker?
Browning chicken before placing it in the slow cooker is not always necessary, but it can enhance the flavor and appearance of your dish.
Browning or searing caramelizes the surface of the chicken, which can add depth and richness to the overall flavor of your slow-cooked meal.
Does Chicken Need To Be Covered With Liquid In The Crock Pot?
Chicken does not necessarily need to be fully submerged in liquid in the crockpot, but there should be enough liquid to prevent it from drying out and sticking to the pot.
Ingredients You’ll Need
- Boneless Skinless Chicken Breasts
- Barbecue Sauce
- Brown Sugar
- Apple Cider Vinegar
- Worcestershire Sauce
- Smoked Paprika
- Garlic Powder
- Onion Powder
- Salt and Pepper
How To Make Crockpot BBQ Chicken
- Season the chicken . Start by seasoning your chicken breasts or thighs with salt, pepper, garlic powder, and onion powder. This gives your chicken a fantastic flavor base.
- Create a BBQ-infused liquid . In a separate bowl, whisk together the barbecue sauce, brown sugar, apple cider vinegar, Worcestershire sauce, and smoked paprika. This sauce will be the star of the show, infusing your chicken with rich, smoky flavor.
- Cover the chicken in sauce. Place the seasoned chicken in your crockpot and pour the BBQ sauce mixture over it. Make sure the chicken is well-coated.
- Slow cook the BBQ chicken . Set your crockpot to low heat and let it cook for 6-8 hours. The slow cooking allows the chicken to absorb all the delicious flavors, becoming incredibly tender.
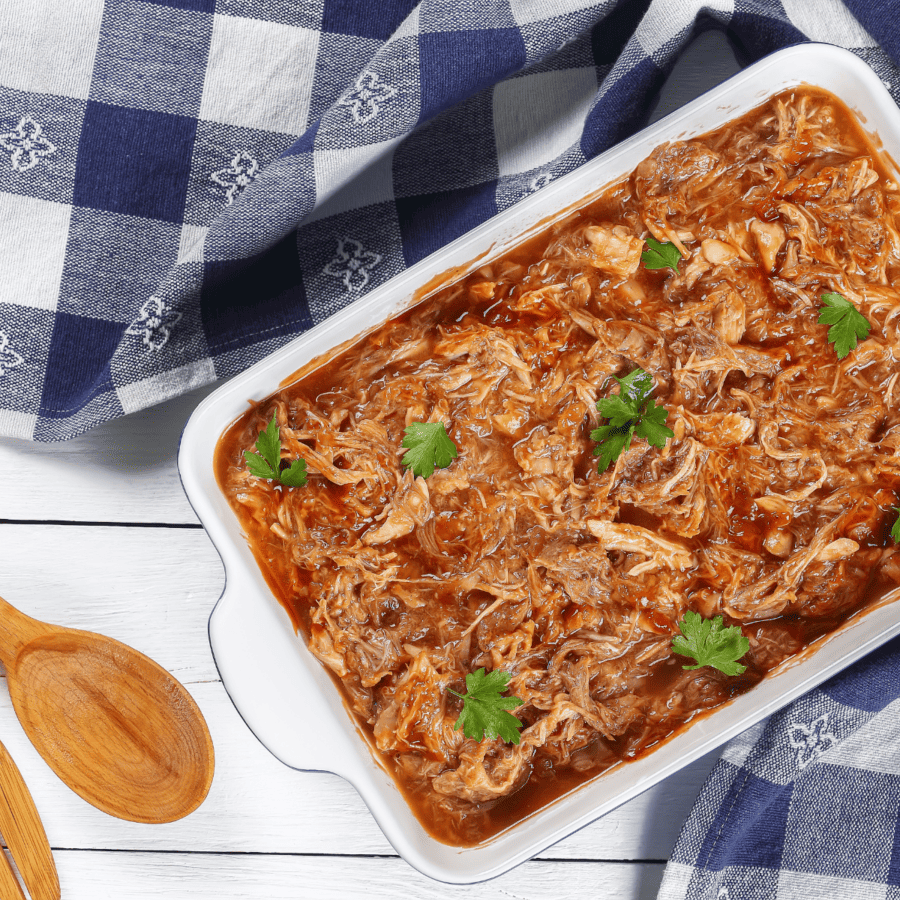
- Shred the cooked chicken . Once the chicken is fully cooked, shred it using two forks right in the crockpot. The chicken should easily fall apart, soaking up even more of that delectable sauce.
- Stir and coat . Give everything a good stir, ensuring the shredded chicken is evenly coated in the BBQ sauce.
- Serve and enjoy ! Serve your Crockpot BBQ Chicken in sandwiches, wraps, or on a plate with your favorite sides like coleslaw, baked beans, or cornbread.
Tips And Tricks
Making Crockpot BBQ chicken is convenient and delicious, and here are some tips and tricks to ensure your dish turns out perfectly:
- Chicken Choice - You can use boneless, skinless chicken breasts or thighs, depending on your preference. Thighs tend to be juicier, while breasts are leaner.
- Sauce Selection - Feel free to use your favorite barbecue sauce brand or even make your own for a personalized touch.
- Sweetness Level - Adjust the brown sugar to your taste. If you like it sweeter, add a bit more; if you prefer it tangier, reduce the sugar.
- Flavor Enhancements - Experiment with additional seasonings like cayenne pepper, chili powder, or liquid smoke for extra depth of flavor.
- Toppings - Load up your sandwiches or wraps with coleslaw, pickles, or thinly sliced red onions for a burst of freshness and crunch.
Variations
Crockpot BBQ chicken is a versatile dish, and there are several variations you can explore to customize the flavor to your liking. Here are some delicious options:
- Spicy BBQ Chicken - Add some heat to your BBQ chicken by mixing in crushed red pepper flakes, cayenne pepper, or a few dashes of hot sauce to the sauce.
- Pineapple BBQ Chicken - Add a tropical touch by mixing in some crushed pineapple or pineapple juice to the BBQ sauce. The sweetness and acidity of pineapple complement the smokiness of the chicken.
- Asian BBQ Chicken - Infuse your chicken with Asian flavors by using hoisin sauce, soy sauce, ginger, and garlic in the sauce. Garnish with sesame seeds and green onions.
What To Serve With BBQ Chicken
Crockpot BBQ chicken is a versatile dish that pairs well with a variety of side dishes and accompaniments. Here are some delicious options to consider serving alongside your BBQ chicken:
- Keto Coleslaw - A creamy coleslaw adds a cool and tangy contrast to the smoky BBQ flavors. It’s a classic side dish for BBQ chicken.
- Baked Beans - Serve up some homemade or canned baked beans for a hearty and flavorful side dish. The sweetness of baked beans pairs nicely with BBQ chicken.
- Potato Salad : Creamy potato salad, whether classic or with a twist, is a great accompaniment. The creamy texture complements the smokiness of the chicken.
- Macaroni and Cheese - A cheesy cauliflower mac and cheese side dish is a comfort food favorite and a perfect match for BBQ chicken.
- Instant Pot Corn on the Cob - Grilled or boiled corn on the cob is a classic BBQ side. You can brush it with butter and sprinkle with seasoning for extra flavor.
How Long Does It Last?
Crockpot BBQ chicken can be stored safely in the refrigerator for 3 to 4 days.
After cooking, allow the chicken to cool to room temperature before transferring it to an airtight container. Refrigerate it promptly to ensure food safety.
Can You Freeze It?
If you have leftovers that you can’t consume within that time frame, consider freezing them for longer storage. Properly stored, frozen Crockpot BBQ chicken can maintain its quality for up to 2 to 3 months.
When you’re ready to enjoy your leftovers, allow them to defrost in the refrigerator overnight before reheating in the slow cooker, microwave, or stove top, until warmed through.
More EasyChicken Recipes
- Instant Pot BBQ Chicken
- Instant Pot Butter Chicken
- Crockpot Chicken Noodle Soup
- Keto Chicken Tenders
- Creamy Garlic Chicken
- Crockpot Buffalo Chicken Dip
- Crock Pot White Chicken Chili

Crockpot BBQ Chicken | Slow Cooker BBQ Chicken Recipe
Ingredients
- ▢ 6 Chicken Breasts
- ▢ 1 cup BBQ Sauce
- ▢ 1/4 cup Brown Sugar
- ▢ 1/4 cup Apple Cider Vinegar
- ▢ 2 tbsp Worchestershire Sauce
- ▢ 1 tbsp Smoked Paprika
- ▢ 1 tsp Garlic Powder
- ▢ 1 tsp Onion Powder
- ▢ 1 tsp Salt
- ▢ 1/2 tsp Black Pepper
Instructions
- Season the chicken . Start by seasoning your chicken breasts or thighs with salt, pepper, garlic powder, and onion powder. This gives your chicken a fantastic flavor base.
- Create a BBQ-infused liquid . In a separate bowl, whisk together the barbecue sauce, brown sugar, apple cider vinegar, Worcestershire sauce, and smoked paprika. This sauce will be the star of the show, infusing your chicken with rich, smoky flavor.
- Cover the chicken in sauce. Place the seasoned chicken in your crockpot and pour the BBQ sauce mixture over it. Make sure the chicken is well-coated.
- Slow cook the BBQ chicken . Set your crockpot to low heat and let it cook for 6-8 hours. The slow cooking allows the chicken to absorb all the delicious flavors, becoming incredibly tender.
- Shred the cooked chicken . Once the chicken is fully cooked, shred it using two forks right in the crockpot. The chicken should easily fall apart, soaking up even more of that delectable sauce.
- Stir and coat . Give everything a good stir, ensuring the shredded chicken is evenly coated in the BBQ sauce.
- Serve and enjoy ! Serve your Crockpot BBQ Chicken in sandwiches, wraps, or on a plate with your favorite sides like coleslaw, baked beans, or cornbread.
Get support & connect with our community on Facebook!
Nutrition
Don’t forget to check out my otherBest-selling Instant Pot Cookbooks!
Indian Instant Pot , Keto Instant Pot, Instant Pot Fast and Easy , Healthy Instant Pot & Vegetarian Instant Pot .


If you already signed up, you should have received an email with a password to give you unlimited access to our FREE Printable Library. The password is case sensitive. Enter it below and get printing!
Password:

Crockpot BBQ Chicken | Slow Cooker BBQ Chicken Recipe
Ingredients
- 6 Chicken Breasts
- 1 cup BBQ Sauce
- 1/4 cup Brown Sugar
- 1/4 cup Apple Cider Vinegar
- 2 tbsp Worchestershire Sauce
- 1 tbsp Smoked Paprika
- 1 tsp Garlic Powder
- 1 tsp Onion Powder
- 1 tsp Salt
- 1/2 tsp Black Pepper
Instructions
- Season the chicken . Start by seasoning your chicken breasts or thighs with salt, pepper, garlic powder, and onion powder. This gives your chicken a fantastic flavor base.
- Create a BBQ-infused liquid . In a separate bowl, whisk together the barbecue sauce, brown sugar, apple cider vinegar, Worcestershire sauce, and smoked paprika. This sauce will be the star of the show, infusing your chicken with rich, smoky flavor.
- Cover the chicken in sauce. Place the seasoned chicken in your crockpot and pour the BBQ sauce mixture over it. Make sure the chicken is well-coated.
- Slow cook the BBQ chicken . Set your crockpot to low heat and let it cook for 6-8 hours. The slow cooking allows the chicken to absorb all the delicious flavors, becoming incredibly tender.
- Shred the cooked chicken . Once the chicken is fully cooked, shred it using two forks right in the crockpot. The chicken should easily fall apart, soaking up even more of that delectable sauce.
- Stir and coat . Give everything a good stir, ensuring the shredded chicken is evenly coated in the BBQ sauce.
- Serve and enjoy ! Serve your Crockpot BBQ Chicken in sandwiches, wraps, or on a plate with your favorite sides like coleslaw, baked beans, or cornbread.
Crockpot BBQ Chicken | Slow Cooker BBQ Chicken Recipe https://twosleevers.com/crockpot-bbq-chicken/

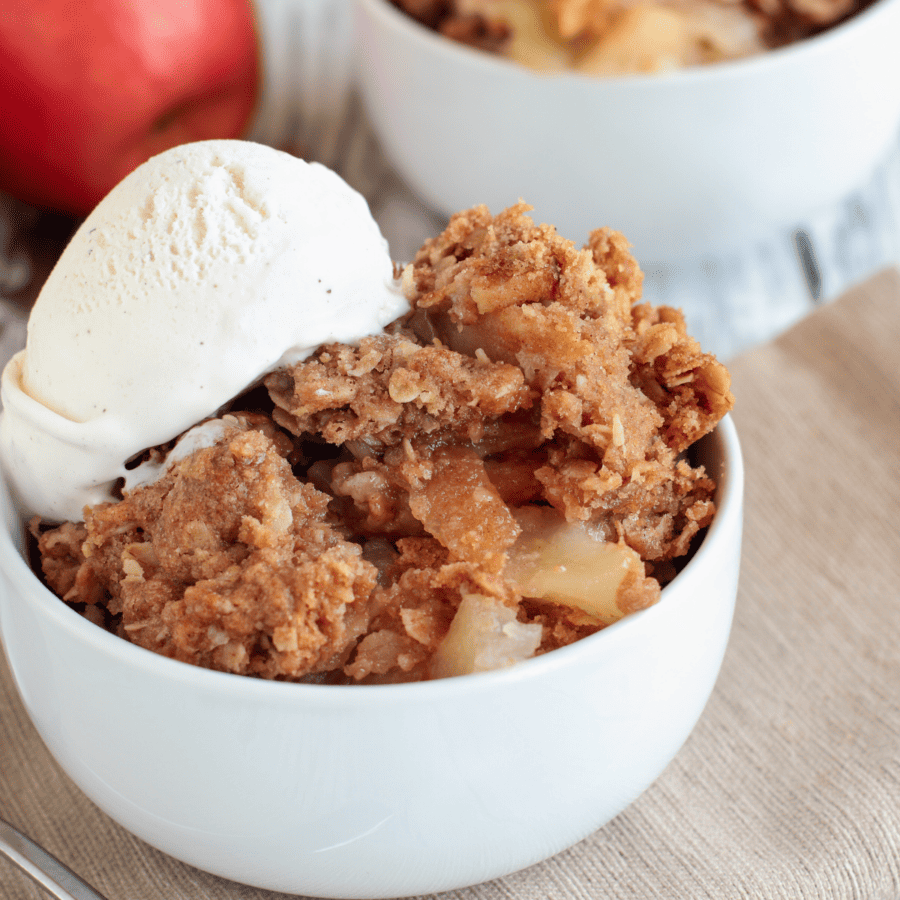
If you’re a fan of comforting desserts that combine the sweetness of baked apples with a crispy, buttery topping, you’re in for a treat! Learn how to make the easiest Homemade Apple Crumble recipe. You’ll achieve that perfect balance between tender, spiced apples and a golden, crunchy crumble topping that’s downright irresistible.
Why This Will Be Your New Favorite Apple Crumble Recipe
- Quick and Easy - Ready in under an hour, this apple crumble is a simple and satisfying dessert for any occasion.
- Homemade Comfort - Indulge in the warm, fragrant aroma of baked apples and cinnamon, evoking the feeling of a cozy, homemade treat.
- Versatile - Serve it as is, with a scoop of ice cream, or a dollop of whipped cream. It’s a dessert that adapts to your preferences.
- Family Favorite - Loved by both kids and adults, it’s a dessert that brings generations together.
This Homemade Apple Crumble is a timeless dessert that celebrates the natural sweetness of apples while delivering the satisfying contrast of a buttery, crunchy topping. Whether shared with loved ones or enjoyed as a personal treat, it’s a dessert that embodies the essence of comfort and simplicity.
Are Apple Crumbles Good?
Absolutely! Apple crumbles are a beloved dessert, cherished for their rustic charm and delightful taste. The combination of soft, tender apples mixed with cinnamon and sugar, topped with a crispy, buttery crumble is pure comfort in a dish.
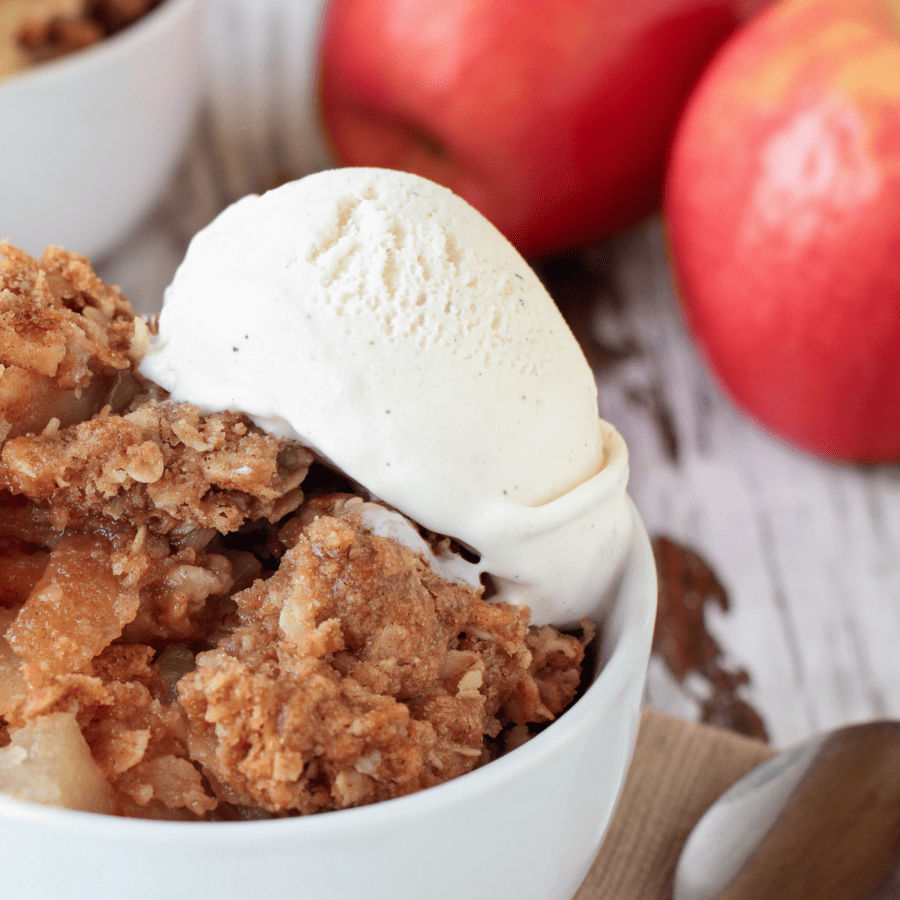
It’s especially good when served warm with a scoop of vanilla ice cream, allowing the cold and creamy contrast to mingle with the warm and spiced apples.
What Is The Difference Between Apple Crisp And Apple Crumble?
The primary difference between apple crisp and apple crumble is the composition of their toppings. Crisp has an oat-based, crunchy topping, while crumble has a simpler, crumbly topping without oats. Both desserts are delicious and comforting, and the choice between them often comes down to personal preference for texture and flavor.
What Is The Secret To Crunchy Crumble?
The secret to achieving a crunchy crumble topping in your apple crumble is a combination of factors and techniques:
- Cold Butter . Use cold, unsalted butter. The cold butter creates steam as it melts in the oven, which helps create those lovely, crispy pockets in the crumble topping.
- Rolled Oats . Rolled oats add texture and contribute to the crunchiness of the crumble. Make sure to use rolled oats, not quick oats, as they hold their texture better.
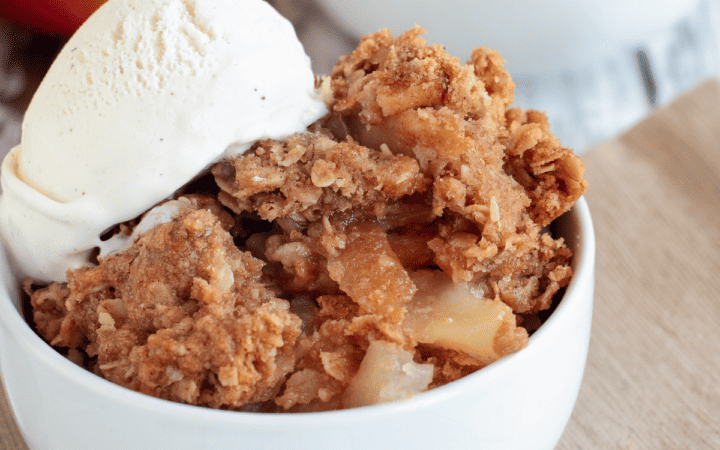
- Bake Until Golden . Bake the crumble until it’s golden brown and the filling is bubbling. This usually takes around 30-40 minutes in a preheated oven at 350-375°F. Keep an eye on it, as baking times can vary.
Ingredients You’ll Need
- Apples - Choose a mix of sweet and tart apples like Granny Smith and Honeycrisp for the best flavor.
- Lemon Juice - Adds a touch of acidity to brighten up the apple filling.
- Granulated Sugar - Sweetens the apples and helps create a delicious syrup as they bake.
- Cinnamon and Nutmeg - The dynamic duo of spices that infuse the apples with warmth and depth of flavor.
- All-Purpose Flour - Forms the base of the crumble topping.
- Rolled Oats - Adds texture and a nutty flavor to the topping.
- Brown Sugar - Provides sweetness and a slight caramel note.
- Salt - Balances the sweetness and enhances the overall flavor.
- Unsalted Butter - Creates a rich, buttery crumble topping.
How To Make Apple Crumble
- Prepare the Apple Filling . Peel, core, and slice the apples into thin wedges. Toss them with lemon juice, granulated sugar, cinnamon, and nutmeg. Arrange the apple mixture evenly in a baking dish.
- Make the Crumble Topping. In a separate bowl, combine all-purpose flour, rolled oats, brown sugar, and a pinch of salt. Cut in cold, diced unsalted butter until the mixture resembles coarse crumbs.
- Bake to Perfection. Sprinkle the crumble mixture evenly over the apples. Bake in a preheated oven until the topping is golden brown, and the apples are tender and bubbling. Allow it to cool slightly before serving.
Tips And Tricks
- Add in some nuttiness . For an extra layer of flavor, add a handful of chopped nuts like walnuts or pecans to the crumble topping.
- Spice it up . Experiment with different spices. Try a pinch of cardamom or ginger for a unique twist on the classic.
- Keep it perfectly portioned . Serve individual portions in ramekins for an elegant presentation.
- Brown to perfection . If the crumble begins to brown too quickly, cover it loosely with aluminum foil to prevent over-browning while the apples continue to cook.
Variations
- Mixed Berry Crumble - Replace some or all of the apples with a mix of your favorite berries like strawberries, blueberries, and raspberries.
- Peach and Raspberry Crumble - Combine sliced peaches and raspberries for a delightful summer twist.
- Maple Pecan Crumble - Add maple syrup to the apple filling and sprinkle chopped pecans in the crumble topping.
- Cherry Almond Crumble - Use sweet or tart cherries and incorporate almond extract into the filling.
What To Serve With This Apple Crumble Recipe
- Serve warm with a scoop of vanilla ice cream for a classic pairing.
- Drizzle with caramel sauce for extra indulgence.
- A dollop of freshly whipped cream or a spoonful of yogurt complements the crumble’s flavors beautifully.
How Long Does It Last?
If you plan to consume the apple crumble within the day, you can leave it at room temperature, covered with a clean kitchen towel or loosely tented with foil. It’s best to keep it in a cool, dry place away from direct sunlight. The topping may lose some of its crispness if left at room temperature for an extended period.
Can You Freeze It?
Yes, you can freeze this apple crumble recipe to enjoy it at a later time. Here’s how to freeze apple crumble properly:
- Cool Completely: Allow the apple crumble to cool completely at room temperature. This helps prevent excess moisture buildup when freezing.
- Portion: If you’ve made a large batch, consider portioning the crumble into individual servings or family-sized portions. This makes it easier to thaw and reheat only what you need.
- Wrap Well: Use aluminum foil or plastic wrap to tightly wrap the portions of apple crumble. Alternatively, you can place them in an airtight container. If you’re freezing individual servings, wrap each one separately.
- Label and Date: It’s essential to label and date the wrapped or containerized crumble. This helps you keep track of how long it’s been in the freezer.
- Freeze: Place the wrapped or containerized crumble in the freezer. Try to lay them flat to maximize freezer space and to ensure even freezing.
Apple crumble can typically be frozen for up to 2-3 months. For the best quality, try to consume it within this time frame.
More Delicious Desserts
- Air Fryer Cinnamon Rolls
- Coffee Cake Muffins
- Keto French Silk Pie
- No Bake Peanut Butter Bars
- Peach Cobbler
- Healthy Apple Crisp
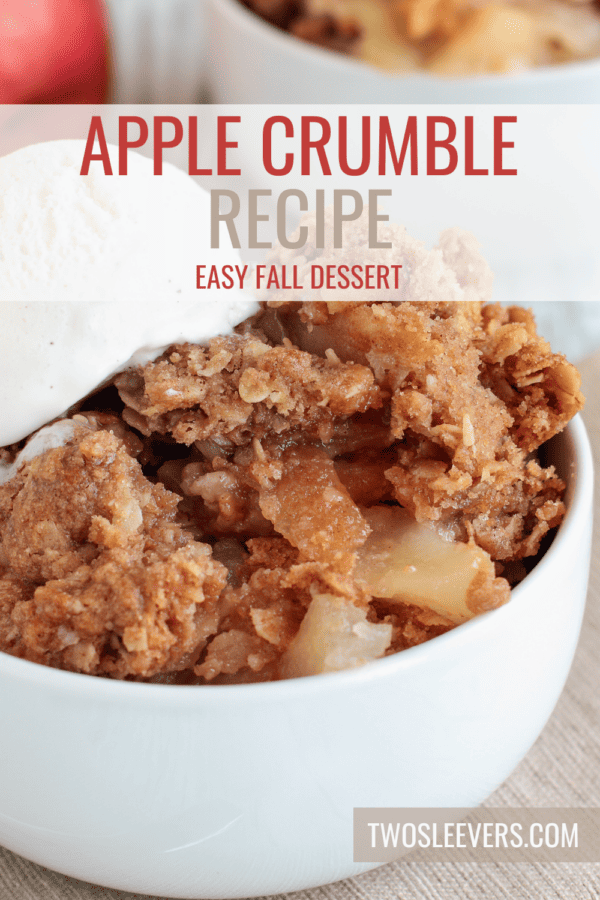
Apple Crumble Recipe | Quick and Easy Apple Dessert
Ingredients
For The Filling
- ▢ 6 Apples
- ▢ 1/2 cup Granulated Sugar
- ▢ 1 tbsp Lemon Juice
- ▢ 1 tsp Ground Cinnamon
- ▢ 1/4 tsp Ground Nutmeg
- ▢ 2 tbsp All Purpose Flour
For The Crumble
- ▢ 1 cup Rolled Oats
- ▢ 1/2 cup All Purpose Flour
- ▢ 1/2 cup Brown Sugar
- ▢ 1/4 tsp Salt
- ▢ 1/2 cup Unsalted Butter
Instructions
- Prepare the Apple Filling . Peel, core, and slice the apples into thin wedges. Toss them with lemon juice, granulated sugar, cinnamon, and nutmeg. Arrange the apple mixture evenly in a baking dish.
- Make the Crumble Topping. In a separate bowl, combine all-purpose flour, rolled oats, brown sugar, and a pinch of salt. Cut in cold, diced unsalted butter until the mixture resembles coarse crumbs.
- Bake to Perfection. Sprinkle the crumble mixture evenly over the apples. Bake in a preheated oven until the topping is golden brown, and the apples are tender and bubbling. Allow it to cool slightly before serving.
