
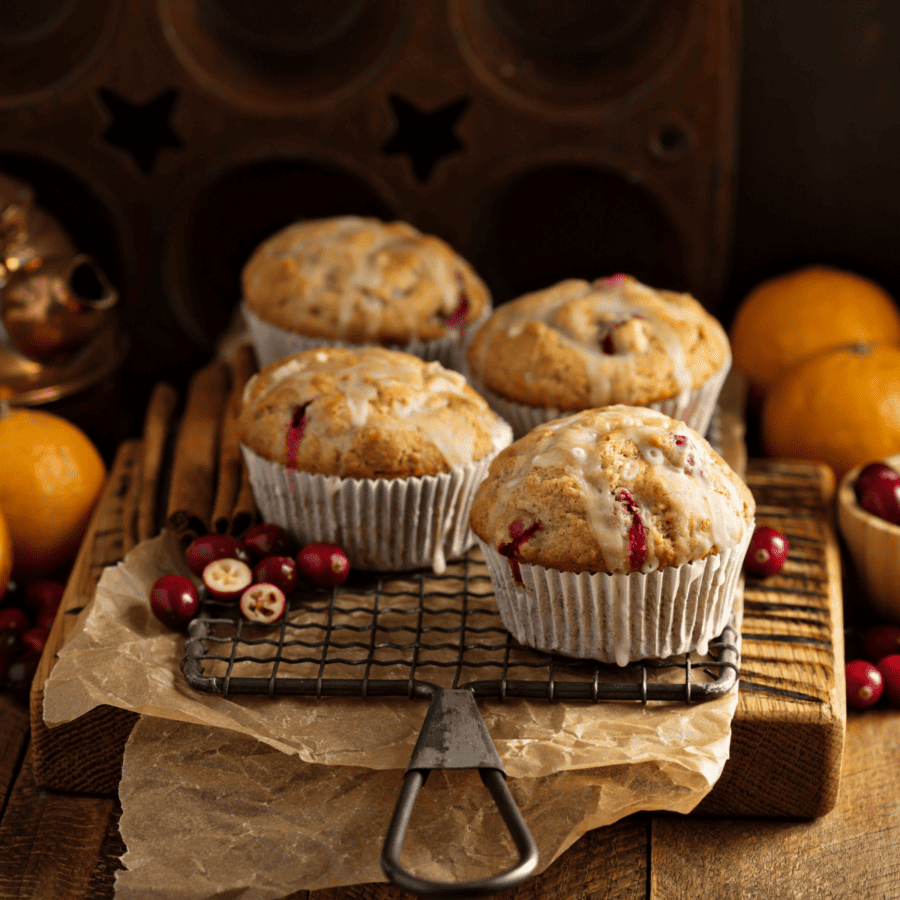
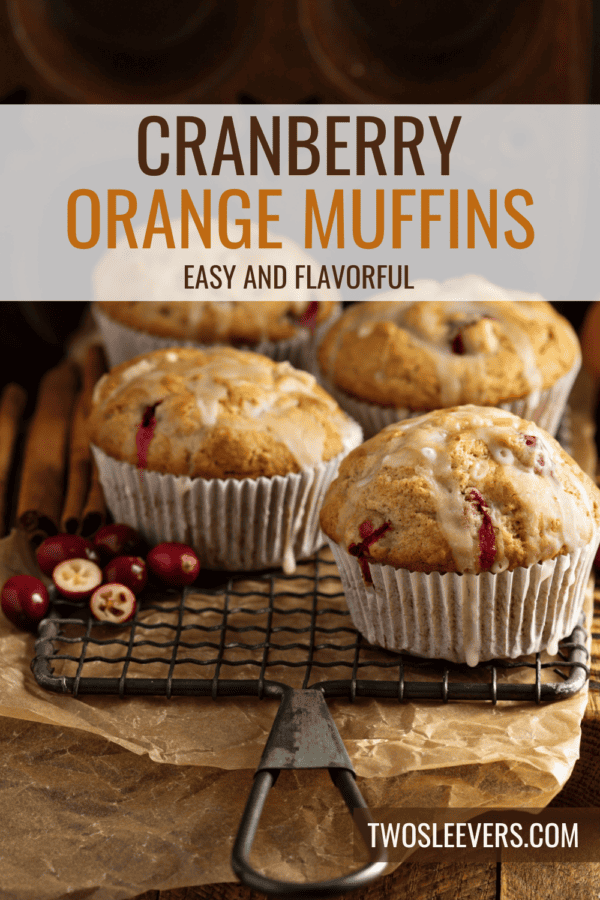
If you’re looking for a new low-carb treat, get ready for a delightful bite with these muffins! Learn how to make these irresistible Low Carb Cranberry Orange Muffins that strike the perfect balance between sweet and tart, all while fitting into your low-carb lifestyle.
Why These Will Be Your Favorite Low Carb Breakfast
- Low Carb Delight . These muffins are tailored for those following a low-carb diet, making them a guilt-free indulgence.
- Incredible Flavor . The zesty orange zest and tangy cranberries combine to create a flavor explosion in every bite.
- Quick and Easy . With simple ingredients and easy steps, these muffins are ready to enjoy in no time.
- Perfectly Portable . Ideal for breakfast on the go or as a satisfying snack whenever your cravings strike.
These Low Carb Cranberry Orange Muffins are a delightful way to satisfy your cravings while staying on track with your low-carb lifestyle. Their zesty orange flavor and bursts of cranberry tanginess will keep you coming back for more. Enjoy them as a quick breakfast or a tasty snack any time of the day!
Can You Substitute Dried Cranberries For Fresh In Muffins?
Yes, you can substitute dried cranberries for fresh cranberries in muffins. However, there are a few considerations to keep in mind:
- Quantity - Dried cranberries are sweeter and more concentrated in flavor than fresh cranberries. As a general rule, you can use about half the amount of dried cranberries as fresh cranberries. For example, if a recipe calls for 1 cup of fresh cranberries, you can use 1/2 cup of dried cranberries.
- Preparation - Unlike fresh cranberries, dried cranberries do not need to be chopped or prepared in any way before adding them to the muffin batter. Simply measure the desired amount and add them directly.
- Sweetness - Dried cranberries are usually sweetened, so take this into account when adjusting the sugar content in your muffin recipe. If you’re using sweetened dried cranberries, you may want to reduce the amount of added sugar in the muffin batter slightly.
Are Cranberry Muffins Healthy?
cranberry muffins can be part of a healthy diet if made with nutritious ingredients and consumed in moderation.
When baking or purchasing cranberry muffins, pay attention to the ingredient list, portion size, and nutritional content to make choices that align with your health goals. Homemade muffins allow you to control the ingredients, making it easier to create a healthier version.
Ingredients You’ll Need
- Almond Flour- It provides structure and moisture to the muffins, helping them to rise and achieve a tender texture.
- Coconut Flour- It helps absorb excess moisture and contributes to the texture of the muffins. However, because it’s highly absorbent, only a small amount is needed.
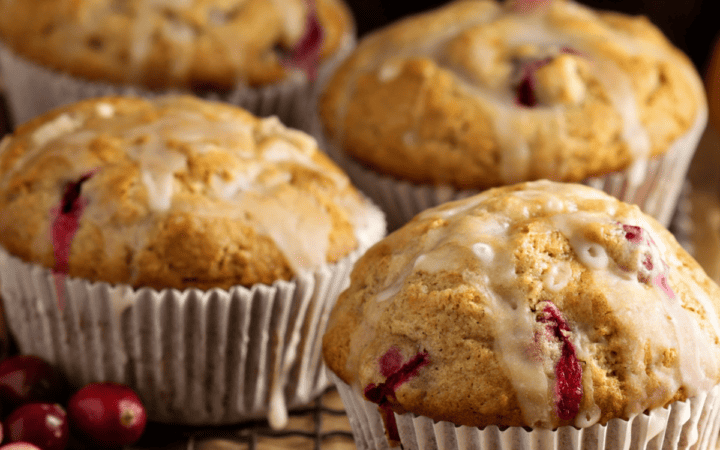
- Cranberries- Cranberries, whether fresh or frozen, are a key ingredient in cranberry orange muffins. They add tartness, a burst of flavor, and a pop of color to the muffins.
- Zest of One Orange - It adds a bright, citrusy aroma and flavor to the muffins, complementing the tartness of the cranberries.
- Low-Carb Sweetener- Provides the sweetness necessary to balance the tart cranberries and enhance the overall flavor.
- Unsalted Butter- Melted butter adds moisture and richness to the muffins. It also contributes to the tender crumb and flavor.
- Unsweetened Almond Milk- Helps create the desired batter consistency and moist texture without adding lactose or sugar.
- Eggs- Eggs act as binders and provide structure to the muffins. They also add moisture and contribute to the muffins’ rise during baking.
- Baking Powder- Helps the muffins rise and become light and fluffy.
- Vanilla Extract- Vanilla extract enhances the flavor of the muffins by adding a subtle, sweet aroma and taste.
- Salt - A small amount of salt is added to balance the sweetness and enhance the overall flavor profile of the muffins.
How To Make Cranberry Orange Muffins
- Preheat and Prepare . Begin by preheating your oven to 350°F. Line a muffin tin with paper liners or grease it lightly to prevent sticking.
- Dry Ingredients: In a mixing bowl, combine the almond flour, coconut flour, baking powder, and a pinch of salt. Stir well to ensure an even distribution of ingredients.
- Orange Zest . Grate the zest from one orange and add it to the dry mixture. The orange zest will infuse the muffins with a bright, citrusy flavor.
- Wet Ingredients . In another bowl, whisk together the melted butter, almond milk, eggs, vanilla extract, and your choice of low-carb sweetener. Mix until the sweetener is fully dissolved.
- Combine and Fold . Pour the wet mixture into the dry ingredients and gently fold them together. Be cautious not to overmix; a few lumps are perfectly fine.
- Cranberry Magic . Gently fold in the cranberries. The cranberries will burst with tartness when baked, providing a delightful contrast to the sweetness.
- Fill and Bake . Divide the muffin batter evenly among the prepared muffin cups. You should have enough for about 12 muffins. Bake in the preheated oven for 20-25 minutes or until a toothpick inserted into the center comes out clean.
- Cool and Enjoy . Remove the muffins from the oven and let them cool in the pan for a few minutes before transferring them to a wire rack to cool completely. Enjoy these delightful cranberry orange muffins while they’re still warm, or store them for later.

Tips And Tricks
Here are some tips and tricks to help you make delicious low-carb cranberry orange muffins:
- Chop the Cranberries . If using fresh cranberries, chop them into smaller pieces or halve them. This ensures that the cranberries are evenly distributed throughout the muffins and prevents them from sinking to the bottom.
- Prevent Dense Muffins . Because coconut flour is highly absorbent, it’s essential not to overmix the batter. Mix until just combined to avoid a dense, gummy texture. The batter should be thick but still pourable.
- Let the Batter Rest . After mixing the batter, allow it to rest for a few minutes. This gives the coconut flour time to absorb the liquids, resulting in a better texture.
Variations
Here are some variations and flavor twists you can try with your low-carb cranberry orange muffins:
- Cranberry Walnut Muffins - Add chopped walnuts or pecans to the batter for a delightful nutty crunch and extra flavor.
- Cream Cheese Filling - Create a cream cheese filling by mixing softened cream cheese with a sweetener and a hint of vanilla extract. Dollop a spoonful into the center of each muffin before baking for a delightful surprise.
- Cinnamon Spice - Incorporate ground cinnamon or pumpkin pie spice into the batter for a warm, comforting flavor profile.
- Dark Chocolate Chips - If you’re a chocolate lover, fold in some sugar-free dark chocolate chips for a delightful chocolate-cranberry-orange combination.
What To Serve With Cranberry Orange Muffins
Cranberry orange muffins are a delightful treat on their own, but they can be even more enjoyable when paired with complementary foods and beverages. Here are some ideas for what to serve with cranberry orange muffins:
- Butter or Cream Cheese - Spread a little butter or cream cheese on a warm cranberry orange muffin for a creamy and slightly tangy contrast to the muffin’s sweetness.
- Fresh Fruit - Fresh fruit, such as sliced strawberries, oranges, or a mixed fruit salad, adds a refreshing and healthy component to your breakfast or snack.
- Yogurt - A dollop of Greek yogurt or vanilla yogurt can provide creaminess and a touch of protein to your meal. It pairs nicely with the fruity flavors of the muffins.
How Long Do They Last?
Cranberry orange muffins, like many baked goods, have a limited shelf life. Here’s a general guideline for how long cranberry orange muffins typically last under different storage conditions:
- Room Temperature - When stored at room temperature in an airtight container or wrapped in plastic wrap, cranberry orange muffins can stay fresh for about 2 to 3 days. Beyond this time, they may start to lose their freshness and become dry.
- Refrigerator - If you want to extend the freshness of your muffins, you can store them in the refrigerator. Properly stored in an airtight container or sealed plastic bag, they can last for up to 5 to 7 days. Keep in mind that refrigeration can potentially alter the texture of the muffins, making them slightly denser.
Can You Freeze Them?
For longer-term storage, cranberry orange muffins can be frozen. Wrap each muffin individually in plastic wrap or aluminum foil to prevent freezer burn, and then place them in an airtight container or resealable freezer bags.
Properly stored in the freezer, cranberry orange muffins can maintain their quality for up to 2 to 3 months.
More Delicious Low Carb Breakfast Recipes
- Keto Pancakes
- High Protein Waffles
- Low Carb Blueberry Muffins
- Ham And Cheese Frittata
- Keto Breakfast Casserole
Cranberry Orange Muffins | Low Carb Cranberry Muffin Recipe
Ingredients
- ▢ 2 cups Almond Flour
- ▢ 1/4 cups Coconut Flour
- ▢ 1 cup Cranberries
- ▢ Orange Zest , from 1 orange
- ▢ 1/2 cup Erythritol
- ▢ 1/2 cup Unsalted Butter , melted
- ▢ 1/2 cup Unsweetened Almond Milk
- ▢ 3 Eggs
- ▢ 1 tbsp Baking Powder
- ▢ 1 tsp Vanilla Extract
- ▢ 1/4 tsp Kosher Salt
Instructions
- Preheat and Prepare . Begin by preheating your oven to 350°F. Line a muffin tin with paper liners or grease it lightly to prevent sticking.
- Dry Ingredients: In a mixing bowl, combine the almond flour, coconut flour, baking powder, and a pinch of salt. Stir well to ensure an even distribution of ingredients.
- Orange Zest . Grate the zest from one orange and add it to the dry mixture. The orange zest will infuse the muffins with a bright, citrusy flavor.
- Wet Ingredients . In another bowl, whisk together the melted butter, almond milk, eggs, vanilla extract, and your choice of low-carb sweetener. Mix until the sweetener is fully dissolved.
- Combine and Fold . Pour the wet mixture into the dry ingredients and gently fold them together. Be cautious not to overmix; a few lumps are perfectly fine.
- Cranberry Magic . Gently fold in the cranberries. The cranberries will burst with tartness when baked, providing a delightful contrast to the sweetness.
- Fill and Bake . Divide the muffin batter evenly among the prepared muffin cups. You should have enough for about 12 muffins. Bake in the preheated oven for 20-25 minutes or until a toothpick inserted into the center comes out clean.
- Cool and Enjoy . Remove the muffins from the oven and let them cool in the pan for a few minutes before transferring them to a wire rack to cool completely. Enjoy these delightful cranberry orange muffins while they’re still warm, or store them for later.
Get support & connect with our community on Facebook!

If you already signed up, you should have received an email with a password to give you unlimited access to our FREE Printable Library. The password is case sensitive. Enter it below and get printing!
Password:
Cranberry Orange Muffins | Low Carb Cranberry Muffin Recipe
Ingredients
- 2 cups Almond Flour
- 1/4 cups Coconut Flour
- 1 cup Cranberries
- Orange Zest from 1 orange
- 1/2 cup Erythritol
- 1/2 cup Unsalted Butter melted
- 1/2 cup Unsweetened Almond Milk
- 3 Eggs
- 1 tbsp Baking Powder
- 1 tsp Vanilla Extract
- 1/4 tsp Kosher Salt
Instructions
- Preheat and Prepare . Begin by preheating your oven to 350°F. Line a muffin tin with paper liners or grease it lightly to prevent sticking.
- Dry Ingredients: In a mixing bowl, combine the almond flour, coconut flour, baking powder, and a pinch of salt. Stir well to ensure an even distribution of ingredients.
- Orange Zest . Grate the zest from one orange and add it to the dry mixture. The orange zest will infuse the muffins with a bright, citrusy flavor.
- Wet Ingredients . In another bowl, whisk together the melted butter, almond milk, eggs, vanilla extract, and your choice of low-carb sweetener. Mix until the sweetener is fully dissolved.
- Combine and Fold . Pour the wet mixture into the dry ingredients and gently fold them together. Be cautious not to overmix; a few lumps are perfectly fine.
- Cranberry Magic . Gently fold in the cranberries. The cranberries will burst with tartness when baked, providing a delightful contrast to the sweetness.
- Fill and Bake . Divide the muffin batter evenly among the prepared muffin cups. You should have enough for about 12 muffins. Bake in the preheated oven for 20-25 minutes or until a toothpick inserted into the center comes out clean.
- Cool and Enjoy . Remove the muffins from the oven and let them cool in the pan for a few minutes before transferring them to a wire rack to cool completely. Enjoy these delightful cranberry orange muffins while they’re still warm, or store them for later.
Cranberry Orange Muffins | Low Carb Cranberry Muffin Recipe https://twosleevers.com/cranberry-orange-muffins/
The holiday season is here, and that means it’s time for delightful treats that capture the spirit of winter. Whether you’re making homemade gifts or simply want to enjoy a sweet and minty snack, our Peppermint Bark recipe is the perfect choice. With its combination of smooth, rich chocolate and the refreshing crunch of peppermint candy, this festive treat is sure to become a holiday favorite.
Why You’ll Love These Festive Flavors
- Holiday Cheer . Peppermint bark is a quintessential holiday treat that adds a festive touch to any gathering or gift exchange.
- Effortless to Make . This recipe is incredibly easy, and the results are impressive. You don’t need to be a seasoned baker to create this delightful treat.
- Versatile . Peppermint bark makes a fantastic gift for friends, family, teachers, and colleagues. You can also serve it at holiday parties or enjoy it as a sweet snack.
- Lasting Freshness . Peppermint bark stores well, so you can make it in advance and have it ready for special occasions.
Peppermint bark is a delightful treat that embodies the essence of the holiday season. Whether you’re sharing it with loved ones or savoring it by the fireplace, it’s a classic indulgence that brings joy to the season. Make a batch of this sweet and minty confection, and let the holiday festivities begin!
What Is The Difference Between Peppermint And Peppermint Bark?
Peppermint and peppermint bark are related but distinct concepts in the world of confectionery:
- Peppermint Peppermint is a flavor derived from the peppermint plant, a hybrid of watermint and spearmint. It has a refreshing and slightly sweet flavor with a cool, minty taste. Peppermint is commonly used as a flavoring in various candies, desserts, beverages, and even personal care products. Peppermint-flavored items can range from peppermint candies to peppermint ice cream and minty beverages like peppermint hot chocolate.
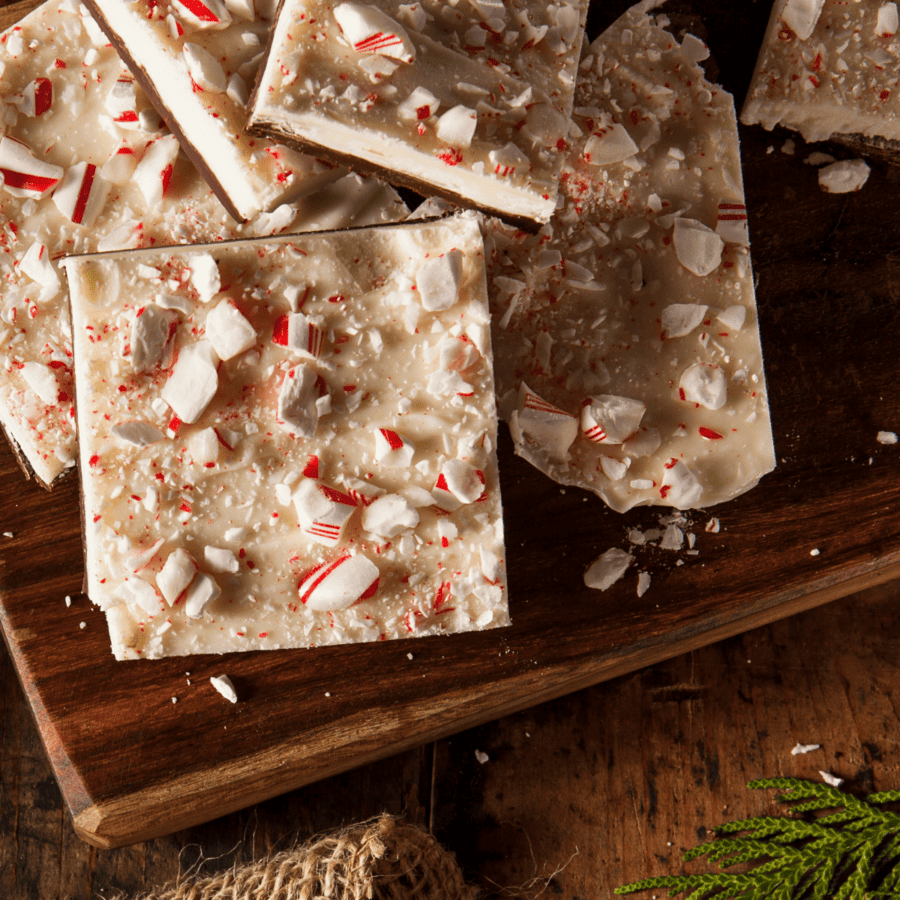
- Peppermint Bark Peppermint bark is a specific type of holiday confection or candy. It typically consists of two layers: a bottom layer of dark chocolate (or sometimes milk chocolate) and a top layer of white chocolate flavored with peppermint extract. Crushed peppermint candies or candy canes are sprinkled on top of the white chocolate layer before it fully hardens. This adds a festive touch and provides a contrasting texture and intense peppermint flavor. Peppermint bark is often broken into irregular pieces or shards, making it easy to share and enjoy during the holiday season.
How To Keep Peppermint Bark From Separating
Peppermint bark can sometimes separate if not made properly or if it’s exposed to temperature fluctuations. To prevent this from happening, follow these tips:
- Avoid Overheating . Be cautious not to overheat the chocolate when melting it. Use a double boiler or a microwave on low power and in short bursts. Stir frequently to ensure even melting.
- Use High-Quality Chocolate . High-quality chocolate with a good cocoa butter content is less likely to separate. Avoid using chocolate chips that may contain stabilizers.
- Peppermint Extract . When adding peppermint extract, use it sparingly. Too much extract can cause the chocolate to seize or become soft.
- Layering . Ensure that the bottom chocolate layer is fully set and hardened before adding the white chocolate layer. This prevents the two layers from mixing and helps maintain a clean separation.
What Is Peppermint Bark Made Of?
- White chocolate- The white chocolate serves as the top layer of the peppermint bark. It’s melted and flavored with peppermint extract to create a sweet and minty contrast to the dark chocolate layer. It provides a smooth and creamy texture, making up the upper portion of the bark.
- Dark chocolate- Dark chocolate forms the bottom layer of the peppermint bark. It’s melted and spread on the baking sheet to create the base. Dark chocolate provides a rich and slightly bitter chocolate flavor that complements the sweetness of the white chocolate and the peppermint candies.
- Peppermint Extract - Peppermint extract is added to the white chocolate. This extract infuses a delightful and refreshing mint flavor into the white chocolate layer. It’s what gives peppermint bark its signature minty taste.
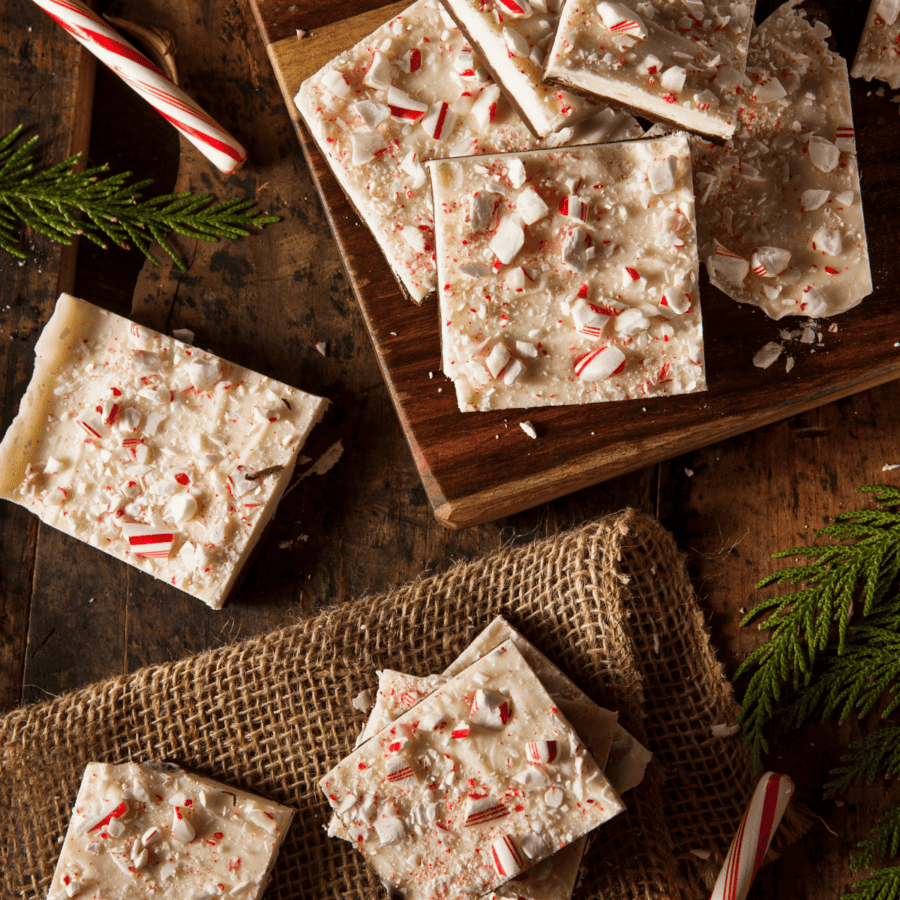
- Crushed Candy Canes- The crushed candy canes or peppermint candies are sprinkled on top of the white chocolate layer while it’s still soft. These candies provide the delightful crunch and intense peppermint flavor that makes peppermint bark so iconic. They also add a festive and visually appealing element to the bark’s appearance.
How To Make Peppermint Bark
- Prepare the Pan . Line a baking sheet with parchment paper, making sure it overhangs on the sides for easy removal.
- Melt the Dark Chocolate . In a microwave-safe bowl, melt the finely chopped dark chocolate in 20-30 second intervals, stirring well each time. Be careful not to overheat the chocolate.
- Spread the Dark Chocolate . Once the dark chocolate is smooth, pour it onto the prepared baking sheet. Use a spatula to spread it evenly, creating a thin layer.
- Chill the Dark Chocolate . Place the baking sheet in the refrigerator for about 20-30 minutes, or until the dark chocolate has set.
- Melt the White Chocolate . In another microwave-safe bowl, melt the finely chopped white chocolate using the same method as before. Stir in the peppermint extract.
- Layer the White Chocolate . Remove the baking sheet from the refrigerator and pour the melted white chocolate over the dark chocolate layer. Quickly spread it evenly.
- Add Crushed Peppermints . While the white chocolate is still soft, sprinkle the crushed candy canes or peppermint candies evenly over the top. Gently press them into the chocolate with a spatula.
- Chill to Set . Return the baking sheet to the refrigerator and let the peppermint bark set for at least 1-2 hours, or until it’s completely firm.
- Break into Pieces . Once the bark is set, lift it out of the pan using the parchment paper overhang. Place it on a cutting board and break it into pieces of your desired size. Irregular shapes are part of the charm!
Tips And Tricks
Making peppermint bark is a delightful holiday treat, and with the right tips and tricks, you can create a beautiful and delicious version. Here are some tips to help you make it perfectly every time:
- Add Peppermint Extract Sparingly . Peppermint extract is potent, so add it gradually and taste as you go. You can always add more if needed. Too much extract can overpower the bark.
- Line Your Pan . Line your baking pan or sheet with parchment paper or a silicone baking mat. This makes it easier to remove the bark once it’s set and ensures it doesn’t stick to the pan.
- Layer Carefully . When adding the white chocolate layer over the dark chocolate, pour it gently and spread it without pressing down too hard. This helps maintain a distinct separation between the layers.
Variations
Peppermint bark is a delightful holiday treat, and you can get creative with variations to suit your taste or explore different flavors. Here are some variations to try:
- Nutty Bark - Enhance the texture by adding chopped nuts like almonds, pistachios, or hazelnuts. The combination of nuts and peppermint provides a nice crunch.
- Caramel Swirl Bark - Swirl in some caramel sauce or dulce de leche to the dark chocolate layer before adding the white chocolate. The caramel and peppermint combination is delightful.
- Cookies and Cream Bark - Crush chocolate sandwich cookies (like Oreos) and blend them into the white chocolate layer. This creates a cookies and cream twist on classic peppermint bark.
- Dark Chocolate Orange Bark - Infuse the dark chocolate layer with orange zest and a touch of orange extract. The combination of dark chocolate, orange, and peppermint is refreshing.
What To Use It For
Peppermint bark is a delightful holiday treat that can be used in various ways:
- Enjoy as a Snack . The most common way to use peppermint bark is to simply break it into pieces and enjoy it as a sweet and minty snack. It’s perfect for satisfying your sweet tooth during the holiday season.
- Gifts and Stocking Stuffers . It makes for a wonderful homemade gift. You can package it in decorative tins, boxes, or cellophane bags and give it to friends, family, or coworkers. It’s a thoughtful and delicious present.
- Dessert Platter . Include it on your holiday dessert platter alongside other sweets and treats. Its vibrant colors and festive appearance make it an eye-catching addition to your dessert spread.
- Hot Chocolate Stirrers . Add a piece to your hot chocolate. As it melts, it will infuse your hot cocoa with a delightful peppermint flavor.
Does Peppermint Bark Go Bad?
Peppermint bark can have a relatively long shelf life of 2-3 weeks if stored properly. It typically doesn’t go bad in the same way that perishable foods do. However, over time, it can experience changes in texture, flavor, and appearance, especially if not stored correctly.
To keep peppermint bark at its best, store it in an airtight container in a cool, dry place. It’s essential to protect it from moisture and temperature fluctuations. Avoid exposure to direct sunlight.
Peppermint bark can develop a whitish film on the surface over time. This is called “bloom” and is the separation of the cocoa butter from the other ingredients. While it doesn’t look as appealing, it’s safe to eat and doesn’t affect the flavor.
More Chocolate Treats
- Keto Hot Chocolate
- Sugar Free Chocolate Chips
- Keto Chocolate Chaffles
- Keto French Silk Pie
- Gluten Free Chocolate Cake

Peppermint Bark Recipe | How To Make Peppermint Bark
Ingredients
- ▢ 12 oz Dark Chocolate Chips
- ▢ 12 oz White Chocolate Chips
- ▢ 1/2 tsp Peppermint Extract
- ▢ 1/2 cup Crushed Candy Canes
Instructions
- Prepare the Pan . Line a baking sheet with parchment paper, making sure it overhangs on the sides for easy removal.
- Melt the Dark Chocolate . In a microwave-safe bowl, melt the finely chopped dark chocolate in 20-30 second intervals, stirring well each time. Be careful not to overheat the chocolate.
- Spread the Dark Chocolate . Once the dark chocolate is smooth, pour it onto the prepared baking sheet. Use a spatula to spread it evenly, creating a thin layer.
- Chill the Dark Chocolate . Place the baking sheet in the refrigerator for about 20-30 minutes, or until the dark chocolate has set.
- Melt the White Chocolate . In another microwave-safe bowl, melt the finely chopped white chocolate using the same method as before. Stir in the peppermint extract.
- Layer the White Chocolate . Remove the baking sheet from the refrigerator and pour the melted white chocolate over the dark chocolate layer. Quickly spread it evenly.
- Add Crushed Peppermints . While the white chocolate is still soft, sprinkle the crushed candy canes or peppermint candies evenly over the top. Gently press them into the chocolate with a spatula.
- Chill to Set . Return the baking sheet to the refrigerator and let the peppermint bark set for at least 1-2 hours, or until it’s completely firm.
- Break into Pieces . Once the bark is set, lift it out of the pan using the parchment paper overhang. Place it on a cutting board and break it into pieces of your desired size. Irregular shapes are part of the charm!
