


A complete guide to making Instant Pot Yogurt. Step by step directions to use your electric pressure cooker for yogurt, greek yogurt, sweetened yogurt, yogurt tubes, and cold start yogurt, as well as a section on troubleshooting homemade yogurt.
WHY MAKE YOGURT AT HOME?
When you can buy yogurt at the store for very little money, why bother making your own? Here are a few reasons why people like home-made yogurt.
- No additives . No need to add sugar, gum, gelatin, or other additives. Milk. Yogurt starter. Done.
- Choice of milk. Whole milk, 2% milk, skim milk, goat milk, sheep’s milk, or even yogurt made with half and half–all of this is possible with Homemade Yogurt.
- Non-dairy milk yogurt. With a little know-how, you can make almond milk yogurt, soy milk yogurt, or coconut milk yogurt. If you want a dairy-free yogurt, making it at home is a fine way to do it.
- Mild or Tart. The longer you let it incubate, the more tart your yogurt. Usually, it sets in about 8 hours. If you let it keep incubating for 12 hours, you will have a very tart yogurt. So you have some control over the final product.
- Flavorings and sweetness of choice. Some of us like plain yogurt. Some of us like cardamom yogurt, or Vietnamese sweet yogurt. Some want to use a keto sweetener. Making yogurt at home lets you make any variation you prefer. You can also add vanilla extract or oddly enough, Crystal Light if you want to keep it low sugar yogurt.
- Sense of accomplishment. Honestly, this alone is reason enough to do it. It’s easy. It’s fun. Your kids will love doing it with you.
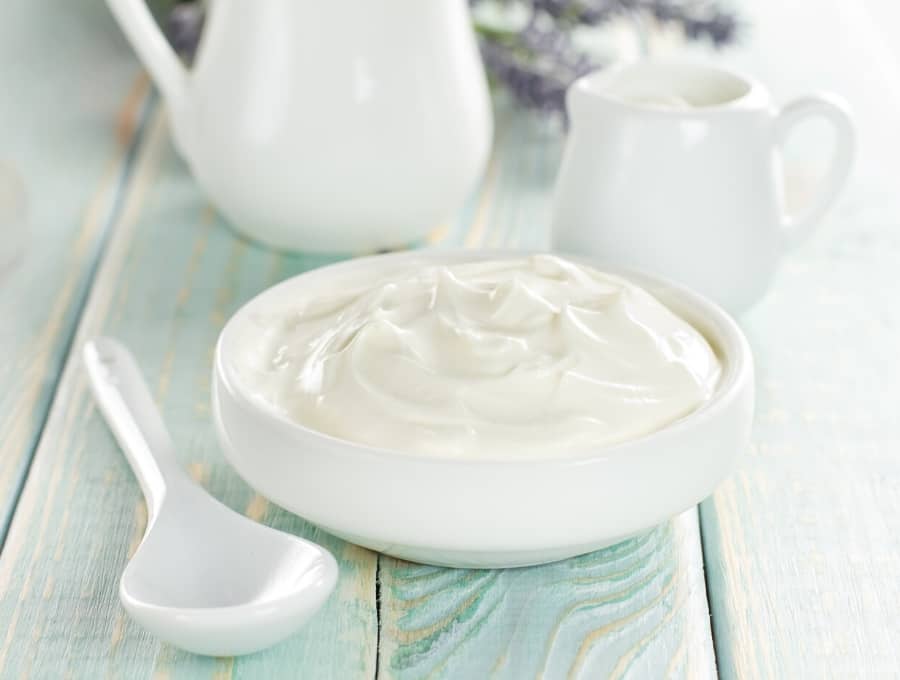
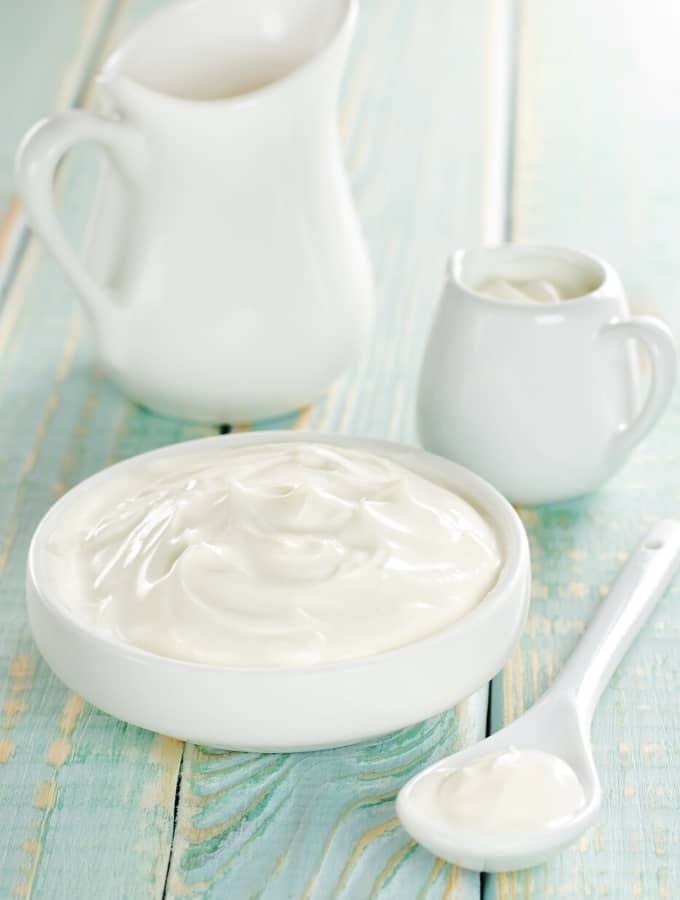
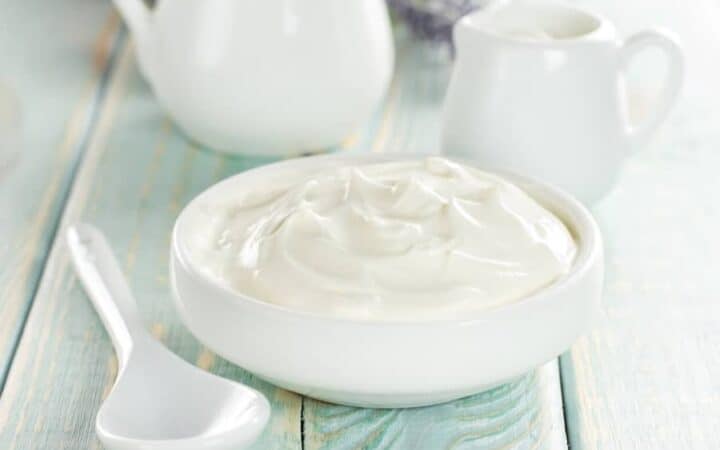
The creamy consistency of homemade Greek yogurt can be used in a variety of recipes , or you can simply add it to your morning smoothie or enjoy it by itself with some fruit , coconut and nuts garnished on top.
How to Make Homemade Instant Pot Yogurt | Hot Start Method
- Heat the milk. Pour 1/2 gallon milk into the Instant Pot liner. Place the lid and set your valve to VENTING or use a glass lid .
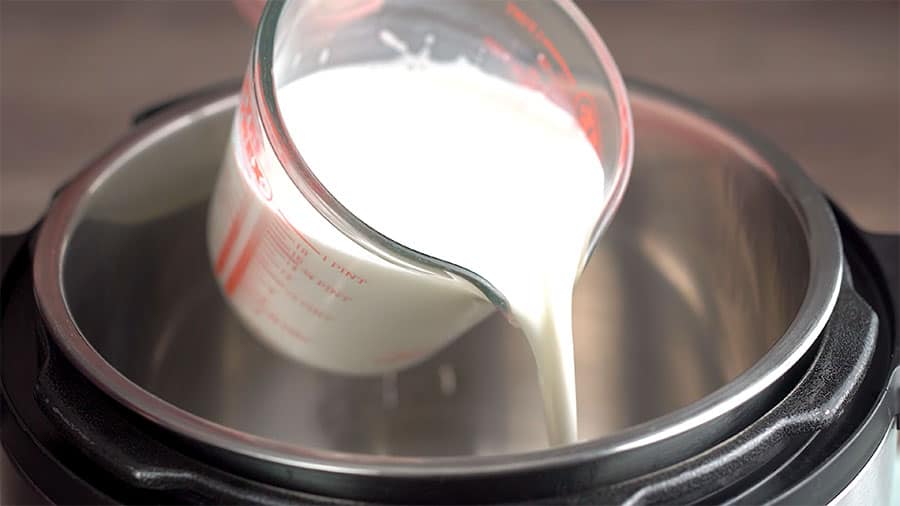
Pour cold milk into Instant Pot Po
- Press YOGURT until it says BOIL. You will be heating your milk to 180F. When the Pot beeps, test with a thermometer and then turn off the pot.
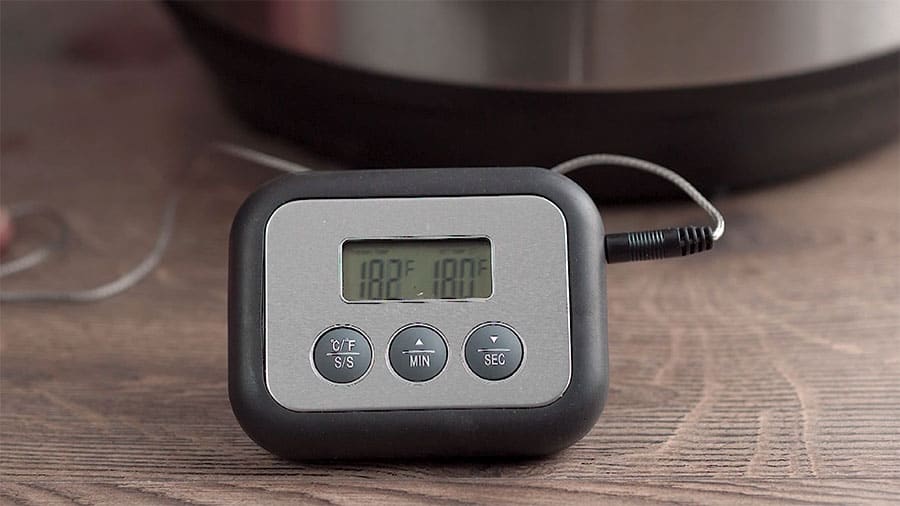
- Cool Milk. Place the pot in a sink of water, with the water coming up to halfway up the sides of the pot. Leave the thermometer in and when the milk reaches 110F, you are ready to proceed.
- Mix Starter. Using a whisk, blend together the warm and about 2 tablespoons of full-fat plain Greek yogurt with active, live cultures such as Lactobacillus bulgaricus . Do NOT use sweetened yogurt.
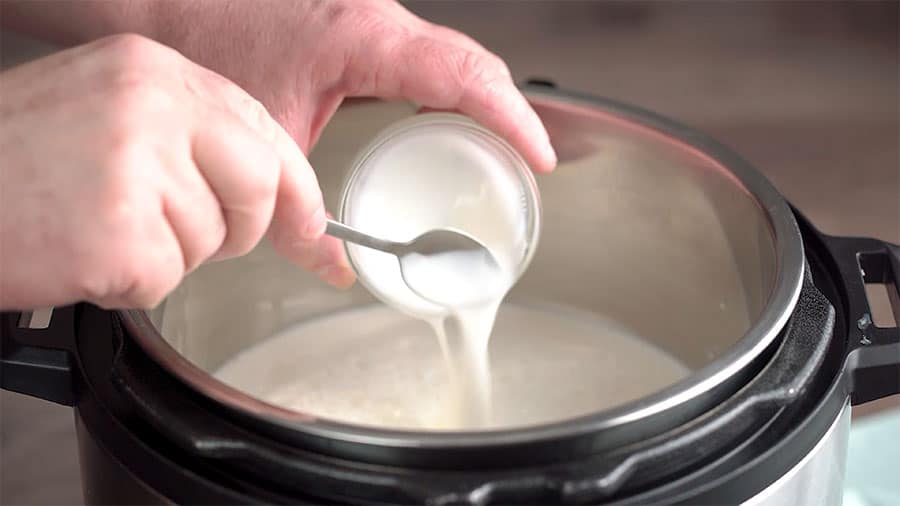
Add starter yogurt
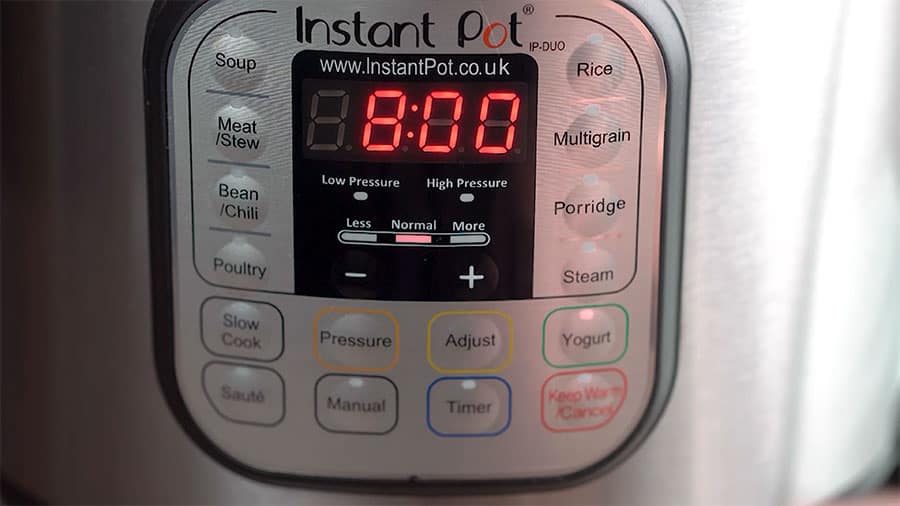
- Incubate . Put the Instant Pot Liner back into the machine. Press YOGURT again and set it for 8 hours. Place the lid and set your valve to VENTING or use a glass lid .
- Chill . Place the yogurt in the fridge overnight. This helps the yogurt set properly without getting tart, and it gets thicker.

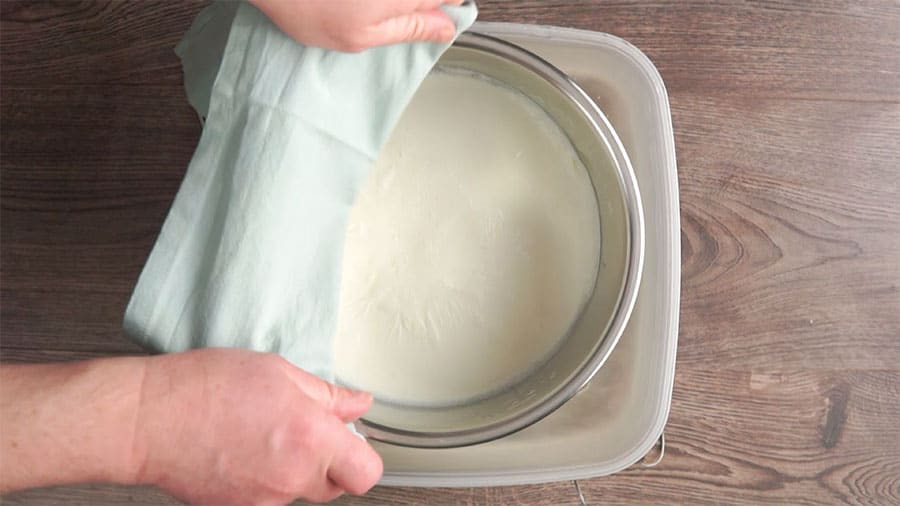
- Drain . Once the yogurt is set, you want to strain out the whey if you want Greek Yogurt, or you can eat it as it is.
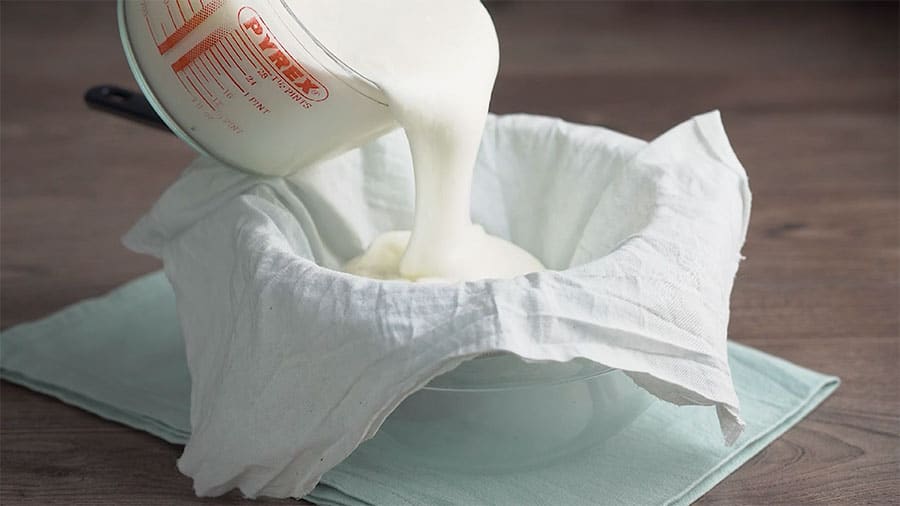
You can use cheesecloth or a large coffee filter in a large stainless strainer, place the strainer over a bowl and let it drip in the fridge overnight.
Alternatively, you can buy a Cuispro Donvier yogurt maker which is easier to clean up. For larger quantities of yogurt, a Eurocuisine Greek Yogurt Maker works better.
Sweeten or flavor. I find it best to sweeten the yogurt after it is drained so you’re not draining your lovely honey down the drain. You can use honey, agave, or a keto-friendly sweetener. You could also consider adding sugar-free syrups .
Store . Place into individual yogurt jars and refrigerate for up to a week.
WHY HEAT THE MILK TO 180F TO MAKE YOGURT?
Many people believe that you get thicker yogurt from doing this. When you heat milk, the protein in milk denatures. This denatured protein intertwines with the casein from the yogurt and creates a thicker yogurt.
Here’s what I have found. If you use UHT milk, you can skip the heating step, and still get very thick yogurt. If you use UHT Ultra-Filtered milk like Fairlife, you can get excellent yogurt.
What is Cold Start Yogurt?
Cold Start Yogurt is when you start with room temperature milk and place it in the Instant Pot . You skip the whole first step of heating the milk, then cooling the milk, so it also referred to as the No-Boil Method.
Find the directions and video for how to make Instant Pot Cold Start Yogurt here.
Tips & Tricks for Perfect Instant Pot Yogurt
- Use HTC milk, Ultra-filtred milk or high protein milk like Fairlife for thick, yogurt especially for cold start yogurt.
- Do not use sweetened flavored yogurt.
- Use yogurt with live cultures .
- Use greek yogurt as your starter. Since extra whey has been drained out, it has more live cultures per tablespoon.
- Save 2-4 tablespoons of your yogurt as a starter before your family devours all of that deliciousness.
- If you intend to use it within a week, the starter will do fine in the fridge. Any longer than that, and you will want to freeze the starter .
- You can also make the yogurt in jars rather than the Instant Pot liner, as I did with this Vietnamese Yogurt recipe.
No Instant Pot? No problem! Find directions on how to make homemade greek yogurt in a slow cooker, in your oven, or on your countertop here.
Troubleshooting Instant Pot Yogurt
People in the Instant Pot Community WAY overthink yogurt. It’s not complicated!
But if you’ve never made it before, you may have a few questions. So here’s your troubleshooting guide with the most commonly asked questions about making yogurt.
Your starter was no good or weak. 2. Your milk was too hot. 3. You need to let it ferment longer. You can always add more starter to your milk/yogurt mixture and allow it to ferment again.
It hasn’t yet set. 2. You need to let it chill in the refrigerator. 3. The milk you used was thin. 4. You need to drain it using te methods described above.
You let the yogurt ferment too long. 2. The temperature around the yogurt was too warm, allowing the fermentation to proceed faster than anticipated. 3. Simply add some delicious sweeteners such as agave nectar, sugar or honey! 4. One way to stop yogurt from fermenting as quickly is to break up the curd. Using a spoon, stir up the yogurt. Usually, this stops it from fermenting as fast.
It is not. Ancient cultures have been making yogurt for centuries without access to refrigeration. It was in fact, a way to preserve milk without refrigeration. As long as it’s not too tart, and has no mold on it, it’s good to go.
It smells sour, and there’s a lot of extra liquid on top. Sometimes you see a visible bubbling and active fermenting. Throw it out.
Homemade yogurt usually lasts for 5-7 days with no issues. Since it’s not sealed in a plastic container, and since it doesn’t contain preservatives, it doesn’t last quite as long as commercially prepared yogurt.
Yup! Blend together 1 cup yogurt, 1 cup fresh berries or other fruit, a tablespoon or two of honey, and about 1/4 cup of milk. Make it a nice pouring consistency, and put into these refillable tubes.
LOOKING FOR DELICIOUS YOGURT RECIPES? LOOK NO FURTHER!
- Indian Lassi
- Indian Yogurt Soup | Instant Pot Gluten-Free Indian Kadhi
- Borani Persian Yogurt Spinach Dip
- Instant Pot Indian Chicken Curry with Spinach & Yogurt
- Labneh Dip
- Cardamom Yogurt (Noosa style)
- Vietnamese Yogurt
- Mango Frozen Yogurt
- Saffron Scented Yogurt
Instant Pot Yogurt | Hot Start Method
Equipment
- Instant Pot
Ingredients
- ▢ 1/2 gallon Whole Milk
- ▢ 2 tablespoons Full-Fat Greek Yogurt , plain, full fat
Instructions
Instant Pot Hot Start Yogurt
- Heat the milk. Pour 1/2 gallon milk into the Instant Pot liner. Place the lid and set your valve to VENTING or use a glass lid .
- Press YOGURT until it says BOIL. You will be heating your milk to 180F. When the Pot beeps, test with a thermometer and then turn off the pot.
- Cool Milk. Place the pot in a sink of water, with the water coming up to halfway up the sides of the pot. Leave the thermometer in and when the milk reaches 110F, you are ready to proceed.
- Mix Starter. Using a whisk, blend together the warm and about 2 tablespoons of full-fat plain Greek yogurt with active, live cultures such as Lactobacillus bulgaricus . Do NOT use sweetened yogurt.
- Put the Instant Pot Liner back into the machine. Press YOGURT again and set it for 8 hours. Place the lid and set your valve to VENTING or use a glass lid .
- Place the yogurt in the fridge overnight. This helps the yogurt set properly without getting tart, and it gets thicker.
- Once the yogurt is set, you want to strain out the whey if you want Greek Yogurt, or you can eat it as it is. You can use cheesecloth or a large coffee filter in a large stainless strainer, place the strainer over a bowl and let it drip in the fridge overnight. Alternatively, you can buy a Cuispro Donvier yogurt maker which is easier to clean up. For larger quantities of yogurt, a Eurocuisine Greek Yogurt Maker works better.
- I find it best to sweeten the yogurt after it is drained so you’re not draining your lovely honey down the drain. You can use honey, agave, or a keto-friendly sweetener. You could also consider adding sugar-free syrups .
- Place into individual yogurt jars and refrigerate for up to a week.
Watch The Video
Tips & Tricks for Perfect Instant Pot Yogurt
- Use HTC milk, Ultra-filtred milk or high protein milk like Fairlife for thick, yogurt especially for cold start yogurt.
- Do not use sweetened flavored yogurt.
- Use yogurt with live cultures .
- Use greek yogurt as your starter. Since extra whey has been drained out, it has more live cultures per tablespoon.
- Save 2-4 tablespoons of your yogurt as a starter before your family devours all of that deliciousness.
- If you intend to use it within a week, the starter will do fine in the fridge. Any longer than that, and you will want to freeze the starter .
- You can also make the yogurt in jars rather than the Instant Pot liner, as I did with this Vietnamese Yogurt recipe.
Get support & connect with our community on Facebook!
Nutrition

If you already signed up, you should have received an email with a password to give you unlimited access to our FREE Printable Library. The password is case sensitive. Enter it below and get printing!
Password:

Instant Pot Yogurt | Hot Start Method
Ingredients
- 1/2 gallon Whole Milk
- 2 tablespoons Full-Fat Greek Yogurt plain, full fat
Instructions
Instant Pot Hot Start Yogurt
- Heat the milk. Pour 1/2 gallon milk into the Instant Pot liner. Place the lid and set your valve to VENTING or use a glass lid .
- Press YOGURT until it says BOIL. You will be heating your milk to 180F. When the Pot beeps, test with a thermometer and then turn off the pot.
- Cool Milk. Place the pot in a sink of water, with the water coming up to halfway up the sides of the pot. Leave the thermometer in and when the milk reaches 110F, you are ready to proceed.
- Mix Starter. Using a whisk, blend together the warm and about 2 tablespoons of full-fat plain Greek yogurt with active, live cultures such as Lactobacillus bulgaricus . Do NOT use sweetened yogurt.
- Put the Instant Pot Liner back into the machine. Press YOGURT again and set it for 8 hours. Place the lid and set your valve to VENTING or use a glass lid .
- Place the yogurt in the fridge overnight. This helps the yogurt set properly without getting tart, and it gets thicker.
- Once the yogurt is set, you want to strain out the whey if you want Greek Yogurt, or you can eat it as it is. You can use cheesecloth or a large coffee filter in a large stainless strainer, place the strainer over a bowl and let it drip in the fridge overnight. Alternatively, you can buy a Cuispro Donvier yogurt maker which is easier to clean up. For larger quantities of yogurt, a Eurocuisine Greek Yogurt Maker works better.
- I find it best to sweeten the yogurt after it is drained so you’re not draining your lovely honey down the drain. You can use honey, agave, or a keto-friendly sweetener. You could also consider adding sugar-free syrups .
- Place into individual yogurt jars and refrigerate for up to a week.
Tips & Tricks for Perfect Instant Pot Yogurt
- Use HTC milk, Ultra-filtred milk or high protein milk like Fairlife for thick, yogurt especially for cold start yogurt.
- Do not use sweetened flavored yogurt.
- Use yogurt with live cultures .
- Use greek yogurt as your starter. Since extra whey has been drained out, it has more live cultures per tablespoon.
- Save 2-4 tablespoons of your yogurt as a starter before your family devours all of that deliciousness.
- If you intend to use it within a week, the starter will do fine in the fridge. Any longer than that, and you will want to freeze the starter .
- You can also make the yogurt in jars rather than the Instant Pot liner, as I did with this Vietnamese Yogurt recipe.
Instant Pot Yogurt | Hot Start Method https://twosleevers.com/instant-pot-yogurt-homemade/

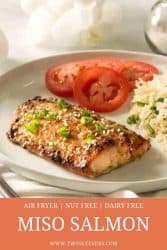


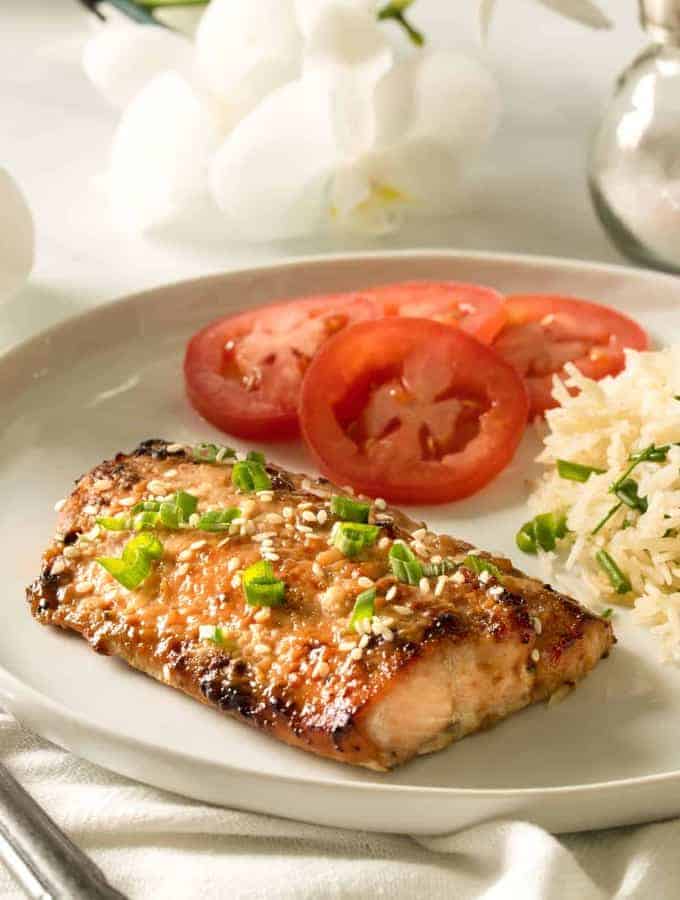
This delectable Miso Salmon recipe is an Asian-inspired salmon dish that you really must try! It’s a seafood lovers dream!

Why This Miso Salmon Recipe Is So Amazing
As you probably know if you’ve spent any time on my blog, I’m a big fan of kitchen gadgets. Pretty much anything that can make a meal faster, easier or more convenient is sure to make its way into my kitchen.
And few gadgets have been as convenient and time-saving as my air fryer. From entrees to appetizers , desserts and more, the air fryer has been one of my go-to gadgets when it comes to making a recipe easier and lower maintenance. This Miso Salmon recipe is a fine example of that.
If you’re a seafood lover, salmon is likely one of your favorite dishes. And if you’re a fan of salmon, you’re going to love my Miso Salmon recipe.
This Asian-inspired salmon dish is the perfect combination of sweet and savory and it comes out perfectly moist and flaky every time thanks to the air fryer. It’s a fantastic salmon dish that any seafood lover is sure to love!
This dish is so good you’ll never believe that it’s so simple to make. You simply whisk the sauce ingredients together, pour it over the salmon, then cook it in the air fryer for just 12 minutes.
This Miso Salmon recipe is a quick and delicious dish that’s done in under 30 minutes from beginning to end! No long recipe steps, no excessive preparation and no long cook times.
It’s delightfully sweet and salty and far more elegant and delicious than any store-bought quick meal option. Not to mention it’s far healthier!
How To Make a Low Carb Miso Salmon
- Whisk. In a small bowl combine Truvia, soy sauce, hot water, miso , garlic, ginger and pepper. Whisk to combine. If you are not keto / low carb , use brown sugar.
- Cover. Place salmon fillets on a plate. Pour half the sauce over the fillets, flip them over, and cover the other side of the salmon with the sauce.
- Cook. Spray air fryer basket with nonstick vegetable oil spray. Place the sauce-covered salmon into the air fryer basket. Set fryer to 400°F for 12 minutes. Halfway through, brush additional miso sauce on top.
- Finish. Top fillets with sesame seeds and scallions.
Tips & Tricks For Making Perfect Air Fryer Miso Salmon
- Air Frying. Air fryers make the best seafood ever , and they do so without making your whole house smell like fish.
- Test the Temp. The best way to know if seafood is done enough is to use a meat thermometer . Salmon is done when it reaches an internal temperature of 145F.
- Tongs. You also want silicone-tipped tongs so that you don’t inadvertently tear the seafood as you try to turn it.
- Marinating. Don’t marinate the fish for too long otherwise, it gets a little bit mealy. I’d say no more than 30 minutes at the outside, but ideally, 5-10 minutes is more than enough.
- Leftovers. You can use any leftovers in a salad or over rice if you aren’t keto.
- Subs. You can also use any type of thick fish steaks with the same marinade.
- Oven. For making in an oven, cook at 400 F for 12 minutes and then broil for 1-2 minutes until the top is crispy.
More Of Our Best Salmon Recipes
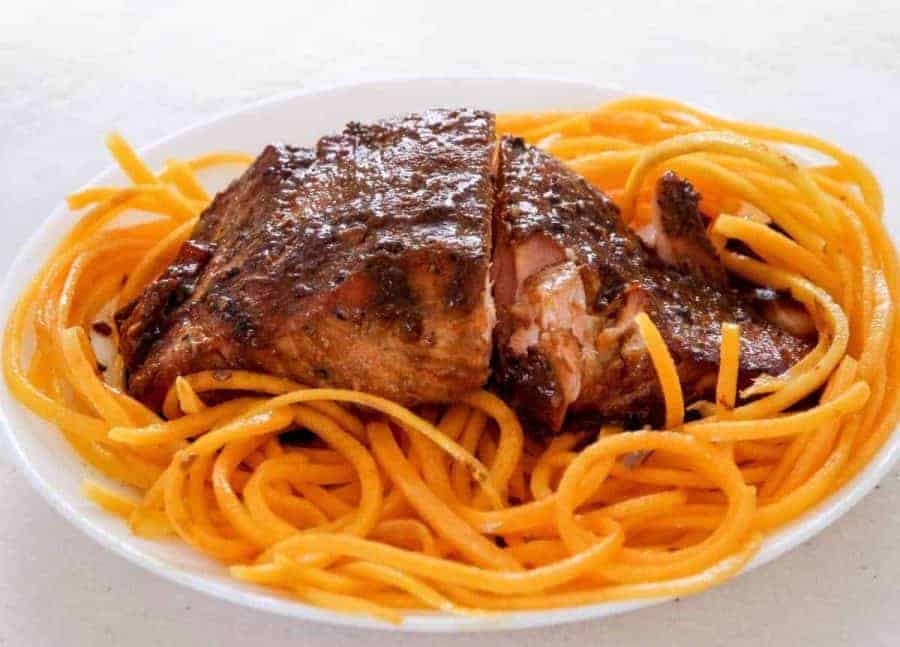
Ginger Orange Salmon
- If you enjoyed this salmon recipe you’re sure to love my Pressure Cooker Salmon With Orange Ginger Sauce ! It’s gluten-free, low carb and made easily in your Instant Pot.
- This little Smoked Salmon Cheese Appetizer looks elegant but is simplicity itself to make.
- A Crazy-Good Salmon Dip recipe that only tastes expensive.
- Another great salmon recipe is my Salmon Bok Choy . It’s a delicious Asian inspired dish that’s low carb, gluten-free and made in under 30 minutes thanks to the help of an air fryer.
- Instant Pot Quinoa Salad With Salmon - A delicious and nutritious meal that’s so very easy to make.
- A great Keto Salmon recipe - this Pesto Salmon is a delicious, light meal perfect for summer.

Air Fryer Low Carb Miso Salmon
Equipment
- Ninja Air Fryer
- Silicone Tongs
- Silicone Basting Brush
- Meat Thermometer
Ingredients
- ▢ 2 teaspoons Truvia , or 2 tablespoons brown sugar
- ▢ 2 tablespoons Soy Sauce
- ▢ 2 tablespoons white miso
- ▢ 1 teaspoons Minced Garlic
- ▢ 1 teaspoon Minced Ginger
- ▢ 1/2 teaspoon Cracked Black Pepper
- ▢ Non-Stick Cooking Spray
- ▢ 2 5-oz Salmon Fillets
- ▢ 1 teaspoon Sesame Seeds
- ▢ 2 Chopped Green Scallions , thinly sliced for garnish
Instructions
In a small bowl combine brown sugar, soy sauce, hot water, miso , garlic, ginger and pepper. Whisk to combine.
Place salmon fillets on a plate. Pour half the sauce over the fillets, flip them over, and cover the other side of the salmon with the sauce.
Spray air fryer basket with nonstick vegetable oil spray. Place the sauce-covered salmon into the air fryer basket. Set fryer to 400°F for 12 minutes. Halfway through, brush additional miso sauce on top.
Top fillets with sesame seeds and scallions.
The best way to know if seafood is done enough is to use a meat thermometer . Salmon is done when it reaches an internal temperature of 145F.
You also want silicone-tipped tongs so that you don’t inadvertently tear the seafood as you try to turn it.
Don’t marinate the fish for too long otherwise, it gets a little bit mealy. I’d say no more than 30 minutes at the outside, but ideally, 5-10 minutes is more than enough.
You can use any leftovers in a salad or over rice if you aren’t keto.
You can also use any type of thick fish steaks with the same marinade.
For making in an oven, cook at 400f for 12 minutes and then broil for 1-2 minutes until the top is crispy.
Get support & connect with our community on Facebook!
Nutrition
And don’t forget to check out my air fryer cookbooks! Every day easy air fryer , and Air Fryer Revolution .

