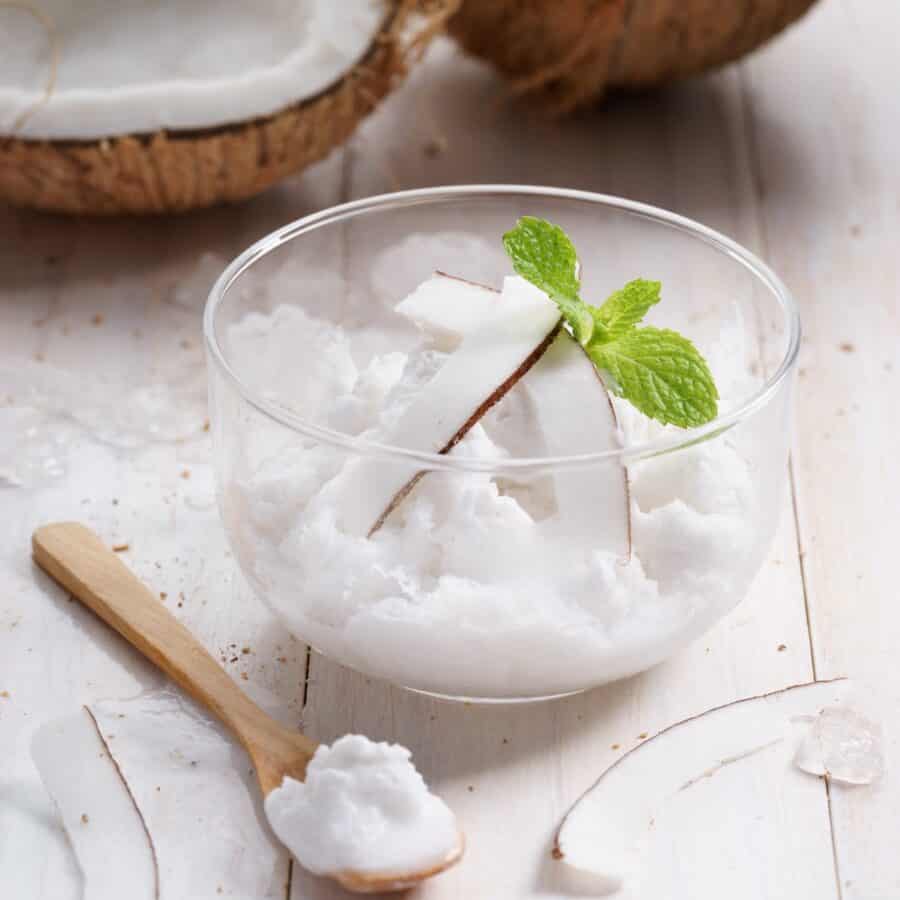
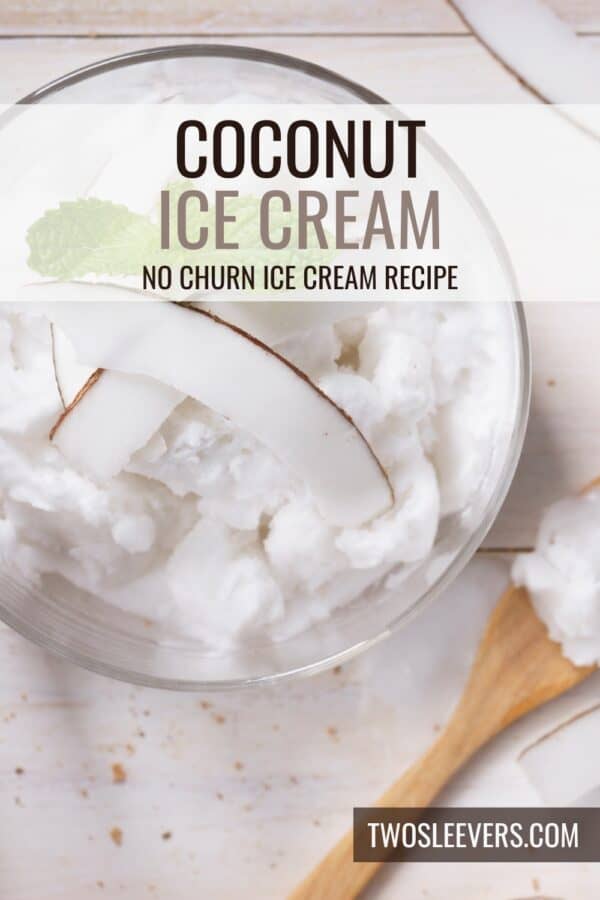
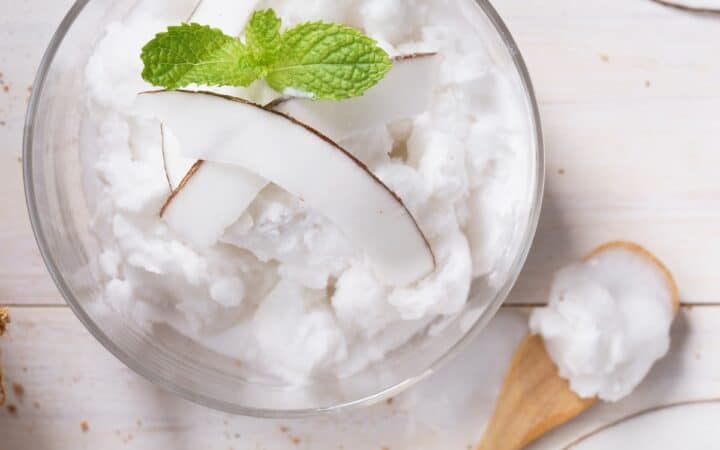
If you’re a fan of the creamy, tropical flavors of coconut, you’re in for a treat! Learn how to make the easiest No Churn Coconut Ice Cream. You’ll achieve that perfect balance between a creamy texture and rich coconut flavor while indulging in irresistible tropical vibes.

Why You’ll Love This Incredible Ice Cream
- Simple. Ready in under 10 minutes of prep time with no ice cream maker needed.
- Easy. Just mix, freeze, and enjoy the perfect frozen treat.
- Dairy-Free Option. Can be made dairy-free by using coconut milk and coconut cream.
- Delicious. Packed with a rich coconut flavor that is absolutely refreshing.
With the convenience of a no-churn method, you’ve achieved a homemade ice cream that will leave your friends and family craving more. Whether you’re hosting a summer party or simply treating yourself to a delightful dessert, this coconut ice cream is guaranteed to be a hit.
What Does Coconut Ice Cream Taste Like?
Coconut Ice Cream is absolutely delicious and a favorite among ice cream enthusiasts. It offers a delectable combination of creamy texture and rich coconut flavor that appeals to a wide range of palates.
The tropical richness of coconut creates a mouthwatering and satisfying eating experience.
Is Coconut Ice Cream Healthy?
Like any treat, coconut ice cream can be enjoyed as part of a balanced diet when consumed in moderation. Paying attention to portion sizes and choosing healthier ingredient options can make it a more nutritious dessert choice.
Ingredients You’ll Need
- Coconut Cream - Provides the creamy base.
- Sweetened Condensed Milk - Adds sweetness and helps with the creamy texture.
- Vanilla Extract - Enhances the coconut flavor.
- Shredded Coconut - Adds texture and extra coconut flavor.
How To Make Coconut Ice Cream
- Prepare the Coconut Cream Base. Start by chilling a mixing bowl and beaters in the freezer for about 15 minutes. This helps in whipping the coconut cream to a fluffy consistency. In the chilled bowl, beat the coconut cream until soft peaks form.
- Add the Sweetened Condensed Milk. Gently fold in the sweetened condensed milk and vanilla extract until well combined. Be careful not to deflate the whipped coconut cream.
- Mix in Shredded Coconut. Stir in the shredded coconut until evenly distributed throughout the mixture.
- Freeze the Mixture. Transfer the mixture to a loaf pan or any freezer-safe container. Smooth the top with a spatula. Cover with plastic wrap or a lid to prevent ice crystals from forming.
- Freeze Until Firm. Freeze for at least 4-6 hours or overnight until the ice cream is firm.
- Serve and Enjoy. Scoop it into bowls or cones. Garnish with extra shredded coconut or a drizzle of chocolate if desired.
Tips And Tricks
Making No Churn Coconut Ice Cream is a delightful endeavor, and a few tips and tricks can help you achieve the best possible results. Here are some pointers to ensure your ice cream turns out creamy, flavorful, and utterly irresistible:
- Chill the Ingredients. Ensure that the coconut cream and mixing bowl are well chilled before whipping.
- Use Full-Fat Coconut Cream. This gives the ice cream a rich and creamy texture.
- Fold Gently. Be gentle when folding in the sweetened condensed milk to keep the mixture light and airy.
Variations
If you’re a fan of Coconut Ice Cream and want to try some creative variations, here are a few delicious ideas to explore:
- Chocolate- Add a swirl of chocolate syrup or mix in chocolate chips for a chocolatey twist.
- Pineapple- Stir in crushed pineapple for a tropical flavor combo.
- Mango- Add chunks of fresh or frozen mango for a refreshing and fruity ice cream.
What To Enjoy With Coconut Ice Cream
Coconut Ice Cream is a flavorful and refreshing dessert that pairs well with a variety of toppings and accompaniments. Here are some delicious options to consider serving alongside it:
- Fresh Fruit - Serve with slices of fresh pineapple, mango, or berries.
- Toasted Coconut - Sprinkle toasted coconut flakes on top for extra crunch and flavor.
- Chocolate Sauce - Drizzle with chocolate sauce for a decadent treat.
How Long Does It Last?
Homemade coconut ice cream can be stored in the freezer in an airtight container for up to 2 weeks. For the best texture and flavor, it’s best enjoyed within the first week.
More Fantastic Frozen Treats
- Keto Ice Cream
- Strawberry Popsicles
- Mango Ice Cream
- Bulletproof Popsicles
- Cookies and Cream Ice Cream
- Peanut Butter Ice Cream
Coconut Ice Cream Recipe | No Churn Coconut Ice Cream
Ingredients
- ▢ 2 cups Coconut Cream
- ▢ 14 oz Sweetened Condensed Milk
- ▢ 1 tsp Vanilla Extract
- ▢ 1 cup Shredded Coconut
Instructions
- Prepare the Coconut Cream Base. Start by chilling a mixing bowl and beaters in the freezer for about 15 minutes. This helps in whipping the coconut cream to a fluffy consistency. In the chilled bowl, beat the coconut cream until soft peaks form.
- Add the Sweetened Condensed Milk. Gently fold in the sweetened condensed milk and vanilla extract until well combined. Be careful not to deflate the whipped coconut cream.
- Mix in Shredded Coconut. Stir in the shredded coconut until evenly distributed throughout the mixture.
- Freeze the Mixture. Transfer the mixture to a loaf pan or any freezer-safe container. Smooth the top with a spatula. Cover with plastic wrap or a lid to prevent ice crystals from forming.
- Freeze Until Firm. Freeze for at least 4-6 hours or overnight until the ice cream is firm.
- Serve and Enjoy. Scoop it into bowls or cones. Garnish with extra shredded coconut or a drizzle of chocolate if desired.
Get support & connect with our community on Facebook!
Nutrition

If you already signed up, you should have received an email with a password to give you unlimited access to our FREE Printable Library. The password is case sensitive. Enter it below and get printing!
Password:

Coconut Ice Cream Recipe | No Churn Coconut Ice Cream
Ingredients
- 2 cups Coconut Cream
- 14 oz Sweetened Condensed Milk
- 1 tsp Vanilla Extract
- 1 cup Shredded Coconut
Instructions
- Prepare the Coconut Cream Base. Start by chilling a mixing bowl and beaters in the freezer for about 15 minutes. This helps in whipping the coconut cream to a fluffy consistency. In the chilled bowl, beat the coconut cream until soft peaks form.
- Add the Sweetened Condensed Milk. Gently fold in the sweetened condensed milk and vanilla extract until well combined. Be careful not to deflate the whipped coconut cream.
- Mix in Shredded Coconut. Stir in the shredded coconut until evenly distributed throughout the mixture.
- Freeze the Mixture. Transfer the mixture to a loaf pan or any freezer-safe container. Smooth the top with a spatula. Cover with plastic wrap or a lid to prevent ice crystals from forming.
- Freeze Until Firm. Freeze for at least 4-6 hours or overnight until the ice cream is firm.
- Serve and Enjoy. Scoop it into bowls or cones. Garnish with extra shredded coconut or a drizzle of chocolate if desired.
Coconut Ice Cream Recipe | No Churn Coconut Ice Cream https://twosleevers.com/coconut-ice-cream-recipe/
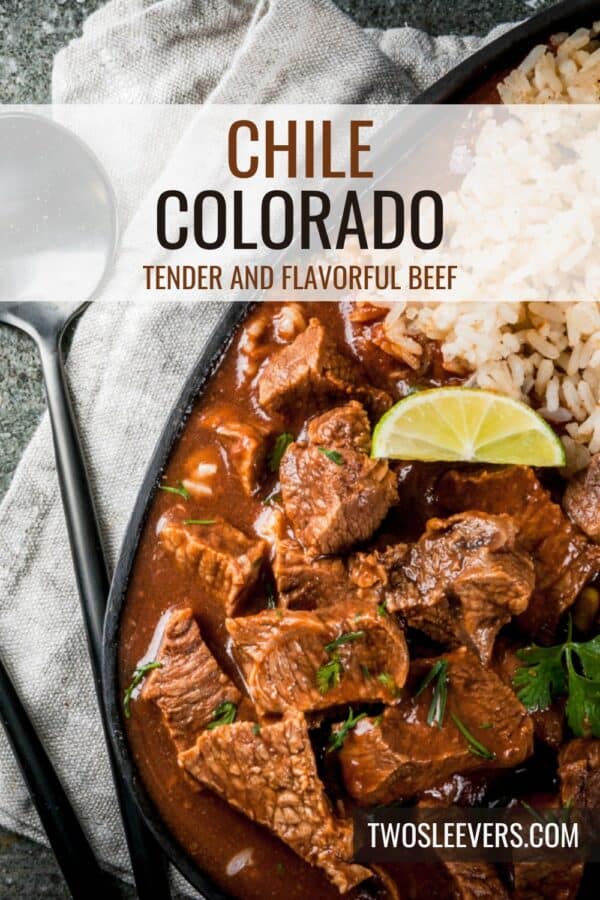
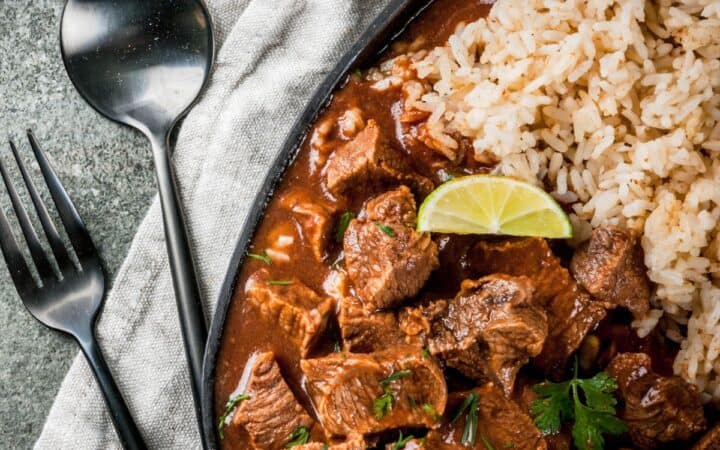
Spice Things up with a bowl of savory, rich Chile Colorado! This traditional Mexican stew features tender beef simmered in a flavorful red chile sauce. Perfect for a cozy dinner, this recipe brings authentic Mexican flavors to your table with ease.

Why You’ll Love This Brilliant Beef Recipe
- Authentic Flavor. A rich blend of dried chiles gives this stew its signature taste.
- Comforting. Perfect for a warming meal on a cool evening.
- Versatile. Serve with rice, beans, or warm tortillas.
With its deep, smoky flavor and tender chunks of pork, Chile Colorado is sure to become a family favorite.
What Is Chile Colorado?
Chile Colorado, also known as red chile stew, is a traditional Mexican dish made with tender meat simmered in a rich red chile sauce. The name “Colorado” refers to the reddish color of the stew, derived from the dried chiles used in the recipe.
Typically made with beef or pork, this stew is a staple in Mexican cuisine, known for its hearty and comforting qualities.
Is It Healthy?
Chile Colorado can be a healthy and nutritious dish, especially when prepared with lean meats, plenty of vegetables, and mindful seasoning. It offers a good balance of protein, healthy fats, and essential nutrients while being relatively low in carbohydrates.
What Is Chile Colorado Made Of?
- Chuck Roast - The main protein of the dish. Chuck roast is a flavorful cut of beef that becomes tender when simmered, making it ideal for stews like Chile Colorado.
- Olive Oil - For browning the pork. Olive oil helps to sear the meat, locking in juices and adding a depth of flavor through caramelization.
- Salt and Pepper - Enhances the natural flavors. These basic seasonings bring out the best in the beef, providing a foundational taste that complements the rich sauce.
- Dried Ancho Chiles - Ancho chiles are dried poblano peppers that provide a mild spiciness and a slightly sweet, raisin-like flavor.
- Dried Guajillo Chiles - Guajillo chiles add a moderate heat and a fruity, tangy taste, which complements the earthiness of the other chiles.
- Dried Pasilla Chiles - Pasilla chiles have a deep, smoky flavor with a hint of berry-like sweetness, enhancing the complexity of the sauce.
- Garlic -Fresh garlic infuses the sauce with a robust, aromatic flavor that enhances the richness of the beef.
- Onion - Enhances the sauce’s flavor. Onions provide a subtle sweetness and depth, balancing the bold flavors of the chiles and spices.
- Beef Broth - Forms the base of the sauce. Beef broth adds a rich, savory backbone to the sauce, enhancing the meaty flavor and providing a medium for the chiles and spices to meld.
- Cumin - Adds warmth and depth. Cumin introduces a warm, earthy flavor that complements the smoky chiles and rich beef.
- Oregano - Gives a hint of herbal flavor. Oregano adds a touch of herbal freshness that balances the deep, rich flavors of the stew.
How To Make Chile Colorado
- Prep the Chiles . Remove stems and seeds from the dried chiles. Toast them in a dry skillet over medium heat until fragrant, about 2-3 minutes.
- Soak the Chiles . Place the toasted chiles in a bowl and cover with hot water. Let them soak for 20 minutes until softened.
- Blend the Sauce . Drain the chiles and transfer them to a blender. Add garlic, onion, cumin, oregano, salt, and pepper. Pour in 2 cups of beef broth and blend until smooth.
- Cook the Beef . Season the beef cubes with salt and pepper. Heat olive oil in a large pot over medium-high heat. Brown the beef in batches, ensuring each piece is browned on all sides. Remove and set aside.
- Simmer the Stew . Return the beef to the pot. Pour the chile sauce over the beef and add the remaining 2 cups of beef broth. Bring to a boil, then reduce heat and simmer for 1.5 to 2 hours, until the beef is tender and the sauce has thickened.
- Serve . Enjoy your Chile Colorado with warm tortillas, rice, or beans. Garnish with fresh cilantro if desired.

Tips And Tricks
Creating a perfect Beef Chile Colorado involves a blend of the right ingredients, techniques, and a little bit of patience. Here are some tips and tricks to help you make the most flavorful and authentic version:
- Trimming . Trim excess fat from the beef but leave some for flavor and moisture.
- Remove Seeds . For a smoother sauce and to reduce bitterness, remove the seeds and stems from the chiles after soaking.
- Simmer Time . Simmer the beef in the chile sauce for at least 2-3 hours until the meat is tender and the flavors have melded together. You can use a slow cooker set on low for 6-8 hours or on high for 3-4 hours.
Variations
Beef Chile Colorado is a versatile dish that can be adapted to suit different tastes and dietary preferences. Here are some variations to consider:
- Pork- Substitute pork shoulder or pork butt for the beef. The cooking method remains the same, resulting in tender, flavorful pork in a rich chile sauce.
- Creamy - Stir in a bit of heavy cream or sour cream at the end of cooking for a creamy, rich sauce.
- Chocolate - Add a small piece of dark chocolate or a tablespoon of cocoa powder to the sauce for a hint of sweetness and depth, similar to a mole sauce.
What To Eat With Chile Colorado
Chile Colorado, with its rich, savory flavors, pairs well with a variety of sides that can complement and enhance your dining experience. Here are some delicious options to consider:
- Mexican Rice - A classic side that soaks up the flavorful sauce. The mild seasoning of the rice pairs well with the robust flavors of the Chile Colorado.
- Cilantro Lime Rice - Adds a fresh, zesty contrast to the rich and hearty dish.
- Refried Beans - Creamy and flavorful, these beans are a traditional Mexican side dish that complements the texture and taste of the dish.
How Long Does It Last?
Store any leftovers in an airtight container in the refrigerator for up to 4 days. Reheat it on the stove over low heat.
Can You Freeze It?
Freeze the cooled Chile Colorado in a freezer-safe container for up to 3 months. Thaw it in the refrigerator overnight before reheating.
More Mexican-Inspired Recipes
- Chicken Tostadas
- Tacos de Alambre
- Wet Burrito
- Chile Relleno
- Slow Cooker Carnitas
Chile Colorado Recipe | Beef In Red Chili Sauce
Ingredients
- ▢ 1.5 pounds Chuck Roast
- ▢ 2 tbsp Olive Oil
- ▢ 1 tsp Kosher Salt
- ▢ 1/2 tsp Ground Black Pepper
- ▢ 3 Dried Ancho Chiles
- ▢ 3 Dried Guajillo Chiles
- ▢ 2 Dried Pasilla Chiles
- ▢ 4 cloves Garlic
- ▢ 1 Onion , chopped
- ▢ 3 cups Beef Broth
- ▢ 1 tsp Cumin
- ▢ 1 tsp Oregano
Instructions
- Prep the Chiles. Remove stems and seeds from the dried chiles. Toast them in a dry skillet over medium heat until fragrant, about 2-3 minutes.
- Soak the Chiles . Place the toasted chiles in a bowl and cover with hot water. Let them soak for 20 minutes until softened.
- Blend the Sauce . Drain the chiles and transfer them to a blender. Add garlic, onion, cumin, oregano, salt, and pepper. Pour in 2 cups of beef broth and blend until smooth.
- Cook the Beef . Season the beef cubes with salt and pepper. Heat olive oil in a large pot over medium-high heat. Brown the beef in batches, ensuring each piece is browned on all sides. Remove and set aside.
- Simmer the Stew . Return the beef to the pot. Pour the chile sauce over the beef and add the remaining 2 cups of beef broth. Bring to a boil, then reduce heat and simmer for 1.5 to 2 hours, until the beef is tender and the sauce has thickened.
- Serve . Enjoy your Chile Colorado with warm tortillas, rice, or beans. Garnish with fresh cilantro if desired.
Get support & connect with our community on Facebook!
Nutrition
Don’t forget to check out my other Ketocookbooks.
Keto Instant Pot, Keto Fat Bombs, Sweets, & Treats , and Easy keto in 30 minutes.

