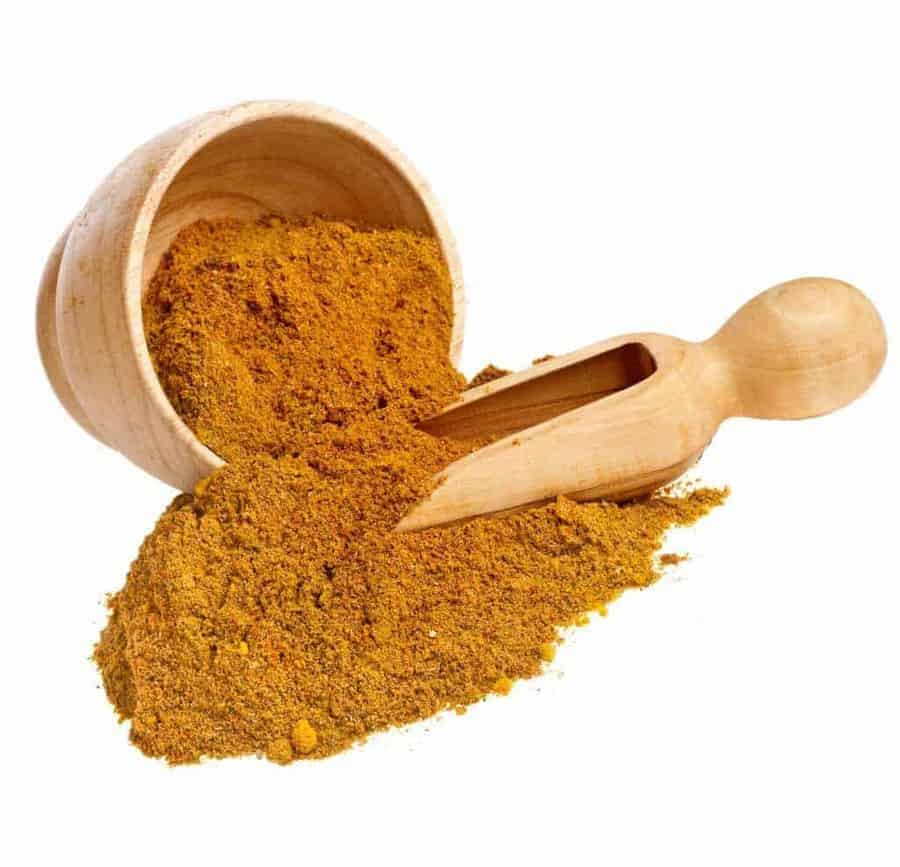
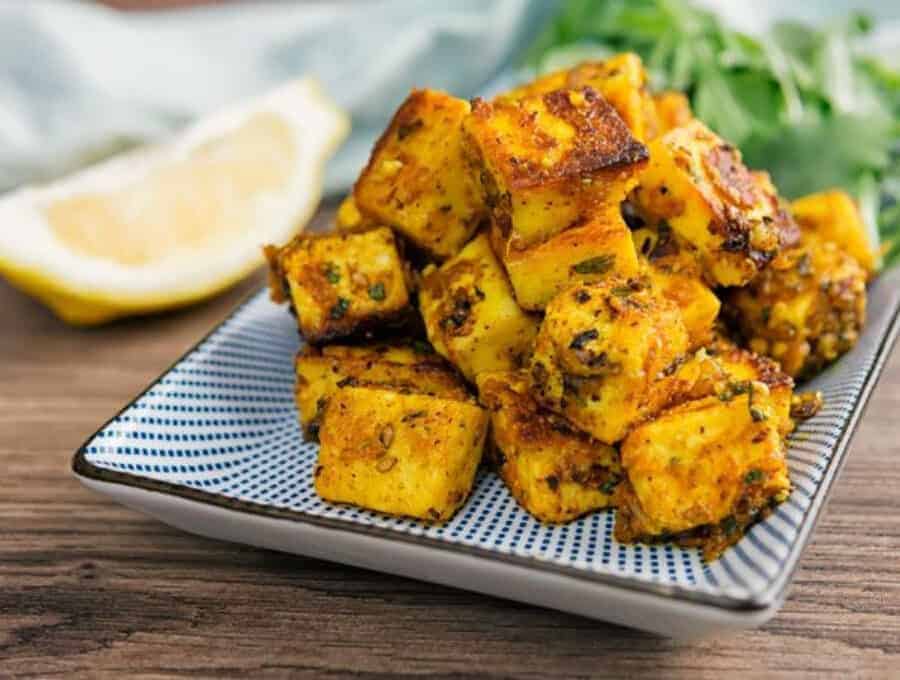
This Punjabi Garam Masala combines the floral overtones of coriander and the earthiness of cumin with a sweet mixture of cardamom and cinnamon. This masala is toasted, and when you uncap the freshly ground spices, you will revel in its rich bouquet, which more than justifies the effort.
How Is Punjabi Garama Masala Different From Classic Garam Masala?
This recipe for Punjabi Garam Masala is different from the other classic garam masala recipe . It doesn’t contain any chili peppers, and it has more of the aromatics rather than pure heat.
Here is a link to a video that shows you how to make the classic garam masala.
But the biggest difference is that this one is toasted. If you want my Cooking with Spices video below, you will see that it is possible to use the same spice in a variety of ways, but simply using raw, toasted, toasted in oil, whole, ground, etc.
I do love this as a nice change, and also a good way to use the very same spices but get a very different taste. I use this Punjabi Garam Masala in chana masala, dal makhani , sometimes in Rajma , and also in Langarwali dal which is a very Punjabi dish,
Should I Use Cinnamon Sticks or Cassia Bark?
There is one thing to keep in mind. It’s that although I’m saying cinnamon sticks below, Indian cooks often use cassia bark rather than the rolled-up cinnamon sticks you sometimes see.
I am not very precise in how I measure this, so I just sort of throw in three pieces, each about 2 inches long and call it a day.
But since cinnamon sticks are more readily available, I’m calling for those in this recipe. If you have and Indian Grocery store near you, be sure to get a little cassia bark one day and see if you can tell the difference.
Typically I can’t tell a huge difference. Just that cassia is a little spicier and a little less sweet than regular cinnamon sticks. But for this recipe, either will do.
If you’re looking for more delicious spice mixes, this Ras al Hanout is great. It’s like the Moroccan version of Indian Garam Masala. It’s great for using on meats and vegetables!
EQUIPMENT & INGREDIENTS YOU MAY NEED TO MAKE PUNJABI GARAM MASALA
- Simple but highly effective Coffee Grinder for spices
- Measuring cups
- Measuring Spoons Immersion Blender
- Cumin Seeds
- Coriander Seeds
- Black Peppercorns
- Bay Leaves
- Cinnamon sticks
WANT TO MAKE MORE HOMEMADE SPICE BLENDS?
- Egyptian Dukkah
- Lebanese 7 Spice
- Cajun Spice Mix
- Sambhar Masala
- Kafta Kabab Spice Mix
- Ras Al Hanout Spice
- Shawarma Spice Mix
- Dry Sesame Garlic Chutney
- Ethiopian Berbere
- Maharash Trian Goda Masala
- Garama Masala
- Punjabi Garam Masala
- Apple Pie Spice
Punjabi Garam Masala
Ingredients
- ▢ 1 tablespoon ( 1 tablespoon ) Coriander Seeds
- ▢ 2 teaspoons ( 1 teaspoon ) cumin seeds
- ▢ 1 teaspoon ( 1 teaspoon ) Whole Cloves
- ▢ ½ teaspoon ( 0.5 teaspoon ) Whole Black Peppercorns
- ▢ 3 ( 3 ) Cinnamon , broken up
- ▢ 3 ( 3 ) Bay Leaves , broken up
Instructions
- Place a small skillet over medium heat and add all the ingredients. Toast them until they’re fragrant but not browned, about 2 to 3 minutes. They will continue to cook for a while after you take them out of the pan, so if you’re in doubt, undercook them.
- Transfer the spices to a plate or a paper towel to cool completely. Once cool, place the spices in a coffee or spice grinder. Grind until the spices form a medium-fine powder.
- Stop the grinder several times and shake it so all the spices get under the blades and grind more evenly. When you’re finished, unplug the grinder. Holding the lid in place, turn the grinder upside down and shake the spice mixture into the lid.
- Pour the garam masala into a small jar with a tight-fitting lid. Store in a cool, dry place for 3 to 4 weeks.
Get support & connect with our community on Facebook!
Nutrition
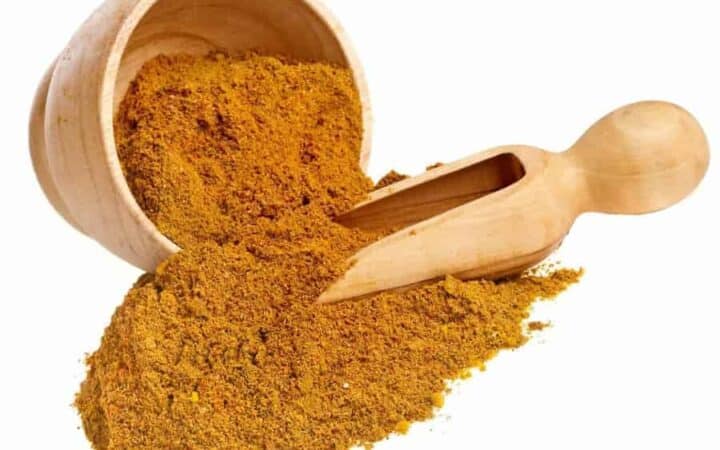

If you already signed up, you should have received an email with a password to give you unlimited access to our FREE Printable Library. The password is case sensitive. Enter it below and get printing!
Password:
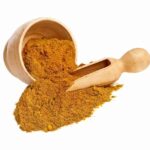
Punjabi Garam Masala
Ingredients
- 1 tablespoon Coriander Seeds
- 2 teaspoons cumin seeds
- 1 teaspoon Whole Cloves
- ½ teaspoon Whole Black Peppercorns
- 3 Cinnamon broken up
- 3 Bay Leaves broken up
Instructions
- Place a small skillet over medium heat and add all the ingredients. Toast them until they’re fragrant but not browned, about 2 to 3 minutes. They will continue to cook for a while after you take them out of the pan, so if you’re in doubt, undercook them.
- Transfer the spices to a plate or a paper towel to cool completely. Once cool, place the spices in a coffee or spice grinder. Grind until the spices form a medium-fine powder.
- Stop the grinder several times and shake it so all the spices get under the blades and grind more evenly. When you’re finished, unplug the grinder. Holding the lid in place, turn the grinder upside down and shake the spice mixture into the lid.
- Pour the garam masala into a small jar with a tight-fitting lid. Store in a cool, dry place for 3 to 4 weeks.
Punjabi Garam Masala https://twosleevers.com/punjabi-garam-masala-recipe/

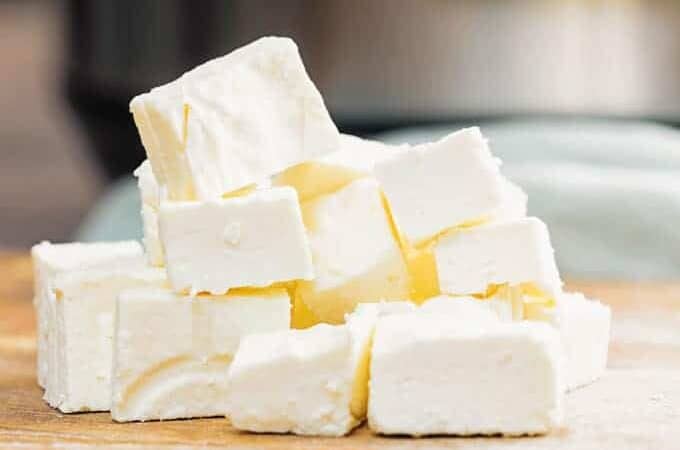
This home made Indian soft cheese is great for use in a variety of vegetarian dishes as a source of protein, and it’s so easy to make your own at home. Learn how to make paneer in the Instant Pot and on the stovetop .
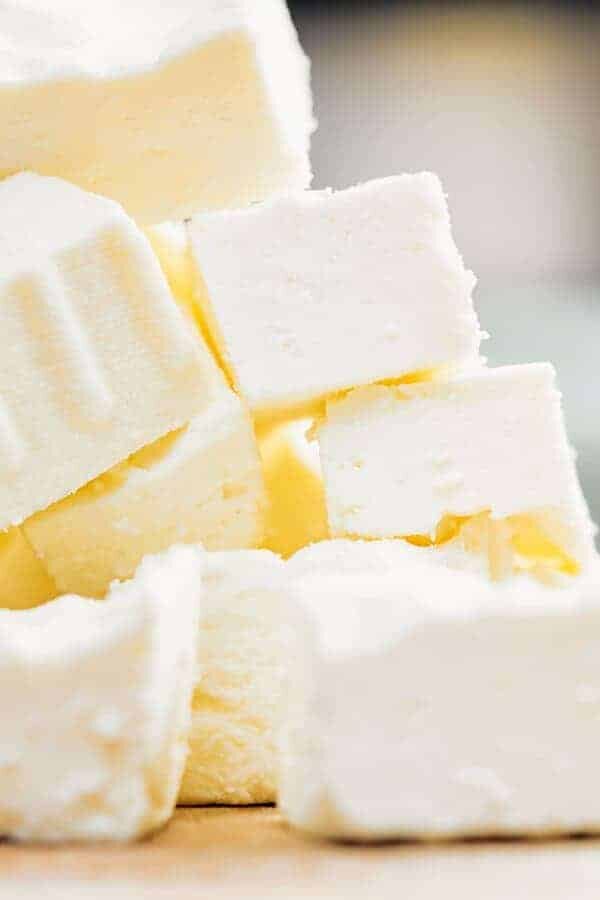
Paneer is one of my favorite Indian ingredients, it’s a great way to add flavor and texture to so many main dishes and sides . It’s made with only 2 ingredients and is low carb , vegetarian and soy-free .
I love the ease of making this in my Instant Pot as it only takes 20 minutes to make a batch, but I will also share with you how to make it on the stovetop , which is still effortless!
What Is Paneer?
Paneer is a fresh cheese that is commonly used n the Indian subcontinent. It’s also called poneeer, fonir, chhana and chhena .
A non-aged soft cheese that doesn’t melt. It’s made with just two ingredients, milk and vinegar, and it’s so easy to make your own at home.
What Does It Taste Like?
Paneer is a mild tasting cheese, creamy and milky. It is similar to other fresh cheeses like ricotta or cottage cheese. There is no added salt in this cheese, so it can be bland when eaten by itself, but it makes for a great ingredient in so many dishes.
How Long Does It Keep?
Homemade paneer will keep in the fridge for 2-3 days. It’s best to store the paneer in an airtight container in water so that it retains it’s moisture.
You can also freeze the paneer and it will keep well for several months. Thaw it in the fridge overnight before using, or to defrost it quickly you can submerge it in a bowl of warm water until it is soft.
Why Make Paneer At Home?
You can of course, buy paneer from stores or online, but it’s so much better when you make it at home and this recipe will rival that made in restaurants.
It’s much creamier, not to mention kinder on your purse! I like to make a few batches and freeze them so I have it on hand.
It is also up to you to make very creamy paneer, by using half and half, or a lighter version, but using full milk. I would not advise using skim milk, as it doesn’t always taste rich enough, nor does it adhere together as much as it should.
Can You Make Paneer In The Instant Pot?
Well guess what? You can make Paneer in your Instant Pot , and under pressure at that.
The beauty of that of course, is no baby-siting that boiling milk that’s just waiting sneakily for you to get distracted so it can go burn itself, leaving the whole house smelling of burned milk forever.
If only you knew how often that has happened to me. It’s pitiful.
Okay, I have a confession. When I started out trying to make the paneer, I started like any sensible person would, on the Yogurt mode. Never mind that I never boil milk for making yogurt , I was sure that this way would not burn the half and half I was going to use.
But I got impatient. I am not sure how long it’s meant to take to boil the milk on the Yogurt setting but I decided I’d had enough of staring at the half and half I was using and thought, “Oh to heck with it! I’m just going to pressure cook it and we’ll see what happens.”
To get the most paneer out of your milk, you really need to stir well and boil so that the milk separates properly and completely. Clearly, if it heats up well and boils, that process is hastened.
So logically, it made sense that pressure cooking would work. I just wasn’t sure if you could make paneer under pressure without burning the half and half or milk.
And of course, as the pictures show, you can indeed. Now here’s an important note . Please do not use skim or 2% milk. Use either whole milk, half and half, or cream. I use half and half and it is a good in-between from regular doodh (milk) paneer and malai (cream) paneer.
So if you’re looking for an easy paneer recipe , this is the one you need. It’s so simple, it’s crazy.
Watch A video to learn how to make homemade Paneer cubes
Step by Step Instant Pot Paneer Indian Soft Cheese Recipe
- Add half and half and vinegar to the Instant pot or electric pressure cooker.
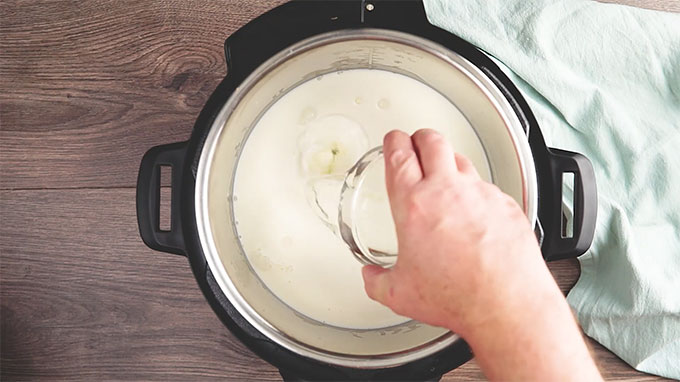
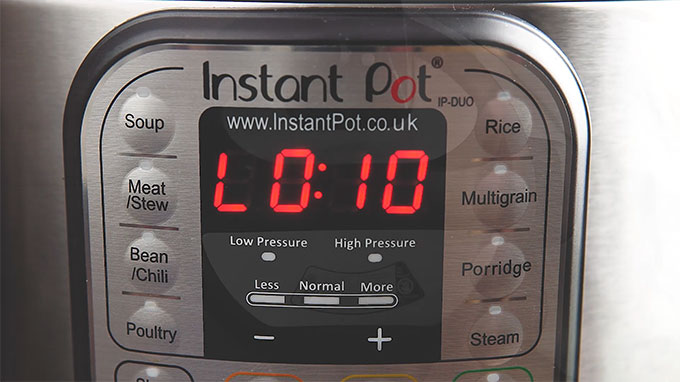
- Cook the milk and vinegar under LOW pressure for 4 minutes. If you do not have a low-pressure setting, cook at high pressure for 2 minutes.
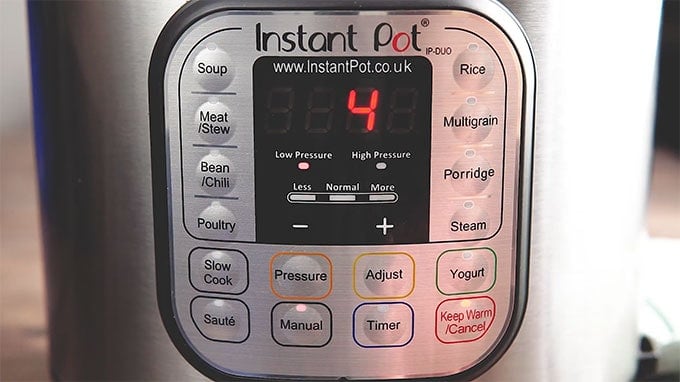
- Allow the pressure to release naturally for 10 minutes. Release remaining pressure. This step is important as the milk continues to separate during this time, so do not rush it.
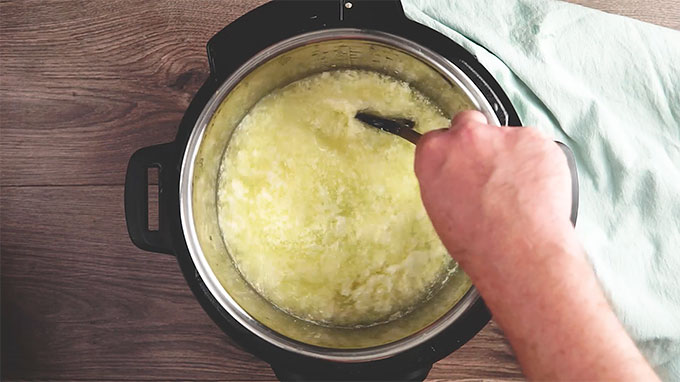
- When you open the pot, you should see the half and half has separated. See the tips section below if your milk is giving you trouble.
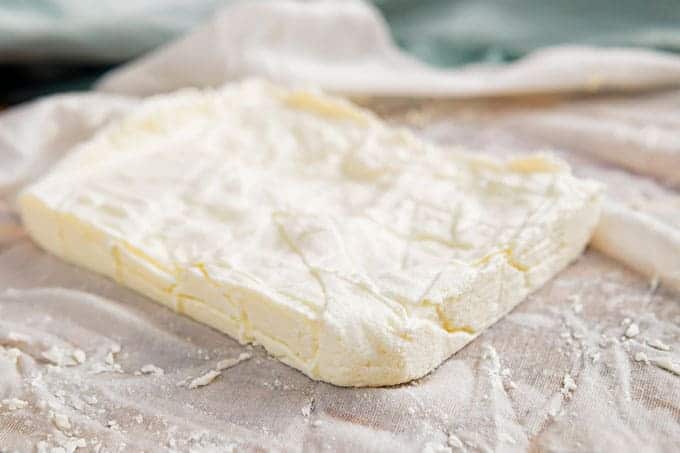
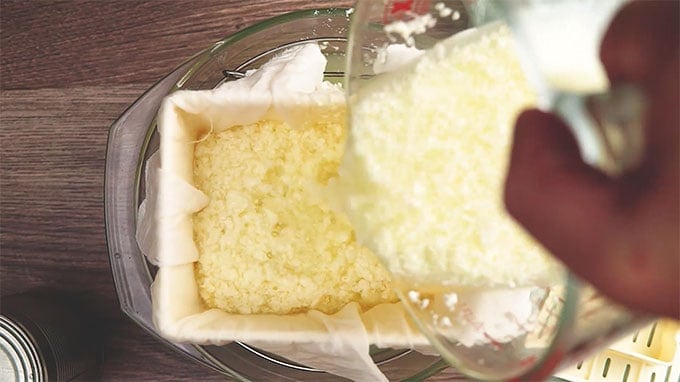
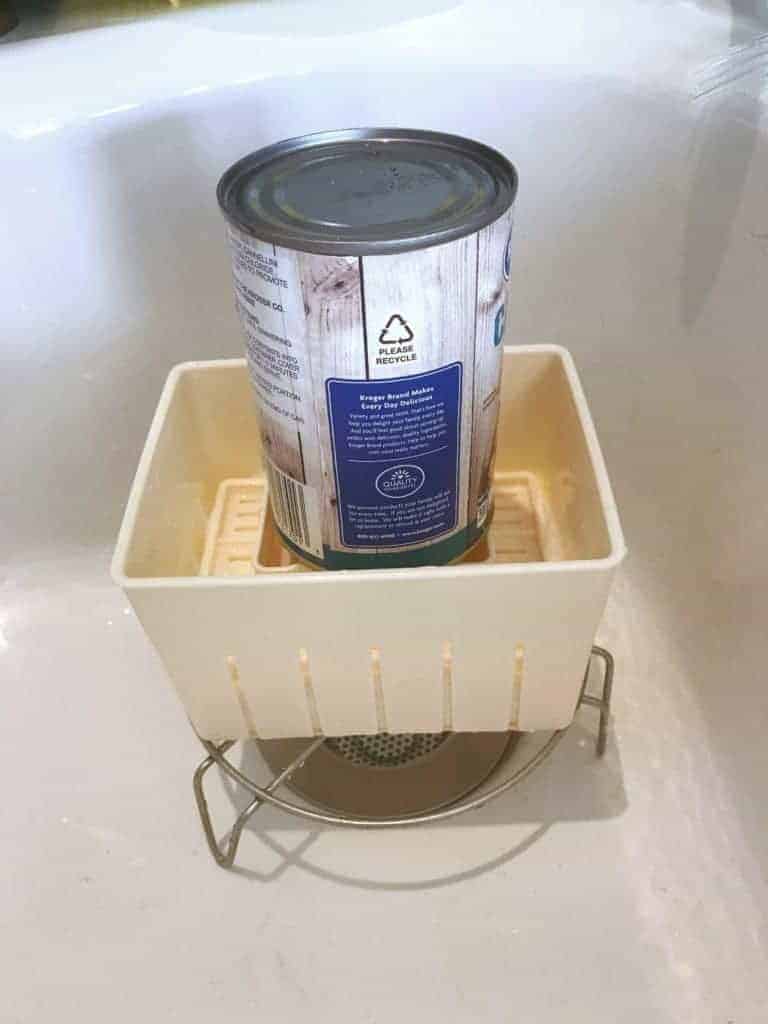
- Line a tofu press with cheesecloth. Pour the whey and curds into a tofu press. If you do not have one, just line a colander with the cheesecloth. Once you pour in the whey and curds, you can make a ball out of the cheesecloth to shape your paneer into a lovely round sphere.
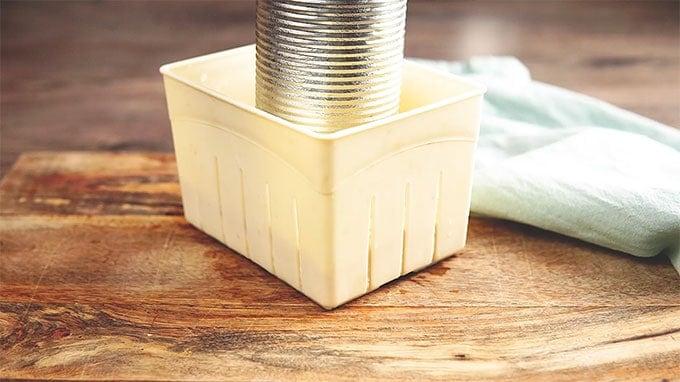
- Place a heavy weight of some kindf on this. The photo shows one can, but feel free to use 2-3 cans. Let the paneer rest for an hour or so to compress down into a creamy, delicious block of cheese.
- Remove the paneer, peel away the cheesecloth and try not to finish it all before you use it in a recipe!
You can certainly drain and compress the paneer without fancy schmancy gadgets, but I happen to like schmancy gadgets so I got myself this handy little tofu maker . It was so cute and adorable! I put it on a trivet in the sink and placed a can of beans on it to help it drain.
You can use a cheesecloth or a coffee filter in a strainer or colander, and place a weight on it as I did.
How To Make Paneer On TheStovetop
Making the paneer on the stovetop is still easy, but it does require you to keep an eye on that boiling milk.
- Pour the milk into a large pot and bring it to a boil .
- When the milk is boiling, add in the vinegar .
- Take the pot off of the heat and let cool for 5 minutes.
- Strain and press the cheese, as you would for the Instant Pot method (scroll down to the recipe card for the full details or see the step by step photos above) .
Tips and Tricks for Making Paneer At Home
- DO NOT USE UHT MILK. DO NOT USE MILK WITH CARRAGEENAN ADDED. Yes I know I’m yelling, but I cannot emphasize this enough. Your milk will just not separate as it should. At all.
- Please do not use skim or 2% milk . Use either whole milk, half and half, or cream. I use half and half and it is a good in-between from regular doodh (milk) paneer and malai (cream) paneer.
- If your paneer is crumbly , it’s a sign you didn’t press it either long enough, or with a heavy enough weight. If in doubt, place 2-3 cans on top of it so it compresses down beautifully.
- Tips for making the paneer in a pressure cooker If you open up the Instant pot and your paneer hasn’t separated, your milk had some kind of personal issues. In this case, try putting the pot on Sauté and cooking it some more. You may need to add some more vinegar in this case. If your pressure cooker does not have a low-pressure setting, cook on high pressure for 2 minutes.
- Tips for making the paneer on the stovetop To speed up the process of bringing the milk to a boil, you can place a lid on the pot. Be sure to keep your eye on it though as it can easily boil over and leave a mess on your hob. Make sure that the milk is boiling before you add the vinegar. Adding it too early can cause the paneer to be crumbly. Boil the milk in a heavy-bottomed pan or dutch oven . It will distribute the heat more evenly and you will be less likely to scorch the milk.
- Here’s that link once again to the Paneer Maker on Amazon that I used to make Paneer.
- This paneer is great with the leftover butter chicken sauce.
Recipes Using Paneer
Paneer Tikka
- Paneer Tikka
- Matar Paneer
- Palak Paneer
MoreIndian Recipes
- Instant Pot Vegetarian Paneer Biryani
- Indian Lassi
- Instant Pot Indian Pilau
- Fish Saag
- South Indian Chicken Curry
- Easy Indian Curry Recipe
- Chicken Tikka Masala
- Bhindi Masala
I just know you will love this easy homemade paneer recipe, I use it in so many dishes! Whether you make it in the pressure cooker or on the hob, it will come out so creamy and delicious!
Instant Pot Paneer Indian Soft Cheese
Equipment
- Instant Pot
- TOFU PRESS PANEER PRESS
Ingredients
- ▢ 1 quart ( 1 quart ) Half and Half
- ▢ 1/4 cup ( 63.75 g ) White Vinegar
Instructions
- Pour half and half and vinegar into the Instant pot and cook at low pressure for 4 minutes. Allow the pressure to release naturally for 10 minutes. Release remaining pressure.
- When you open the pot, the milk will have separated into curds and a watery whey. Stir this well.
- Pour the mixture through cheesecloth (saving the whey for other uses).
- Gather up the cheesecloth and put a heavy weight on it to let the whey drain and for the paneer to form a cohesive block or ball.
- I used this handy dandy tofu maker to form a nice square block and weighted it down with a can of beans to help the whey drain. This will take about 1-2 hours.
Watch The Video
- DO NOT USE UHT MILK. DO NOT USE MILK WITH CARRAGEENAN ADDED. Yes I know I’m yelling, but I cannot emphasize this enough. Your milk will just not separate as it should. At all.
- Please do not use skim or 2% milk . Use either whole milk, half and half, or cream. I use half and half and it is a good in-between from regular doodh (milk) paneer and malai (cream) paneer.
- If your paneer is crumbly , it’s a sign you didn’t press it either long enough, or with a heavy enough weight. If in doubt, place 2-3 cans on top of it so it compresses down beautifully.
- Tips for making the paneer in a pressure cooker If you open up the Instant pot and your paneer hasn’t separated, your milk had some kind of personal issues. In this case, try putting the pot on Sauté and cooking it some more. You may need to add some more vinegar in this case. If your pressure cooker does not have a low-pressure setting, cook on high pressure for 2 minutes.
- Tips for making the paneer on the stovetop Please read the post for detailed instructions on making stovetop paneer. To speed up the process of bringing the milk to a boil, you can place a lid on the pot. Be sure to keep your eye on it though as it can easily boil over and leave a mess on your hob. Make sure that the milk is boiling before you add the vinegar. Adding it too early can cause the paneer to be crumbly. Boil the milk in a heavy-bottomed pan or dutch oven . It will distribute the heat more evenly and you will be less likely to scorch the milk.
- Here’s that link once again to the Paneer Maker on Amazon that I used to make Paneer.
- I don’t trust the nutrtitional info becuase I don’t really know how to calculate calories for the whey that goes down thedrain, or ito your bread or whatever.
Get support & connect with our community on Facebook!
Nutrition
Originally Published May 2020
Don’t forget to check out my otherBest-selling Instant Pot Cookbooks!
Indian Instant Pot , Keto Instant Pot, Instant Pot Fast and Easy , Healthy Instant Pot & Vegetarian Instant Pot .

