
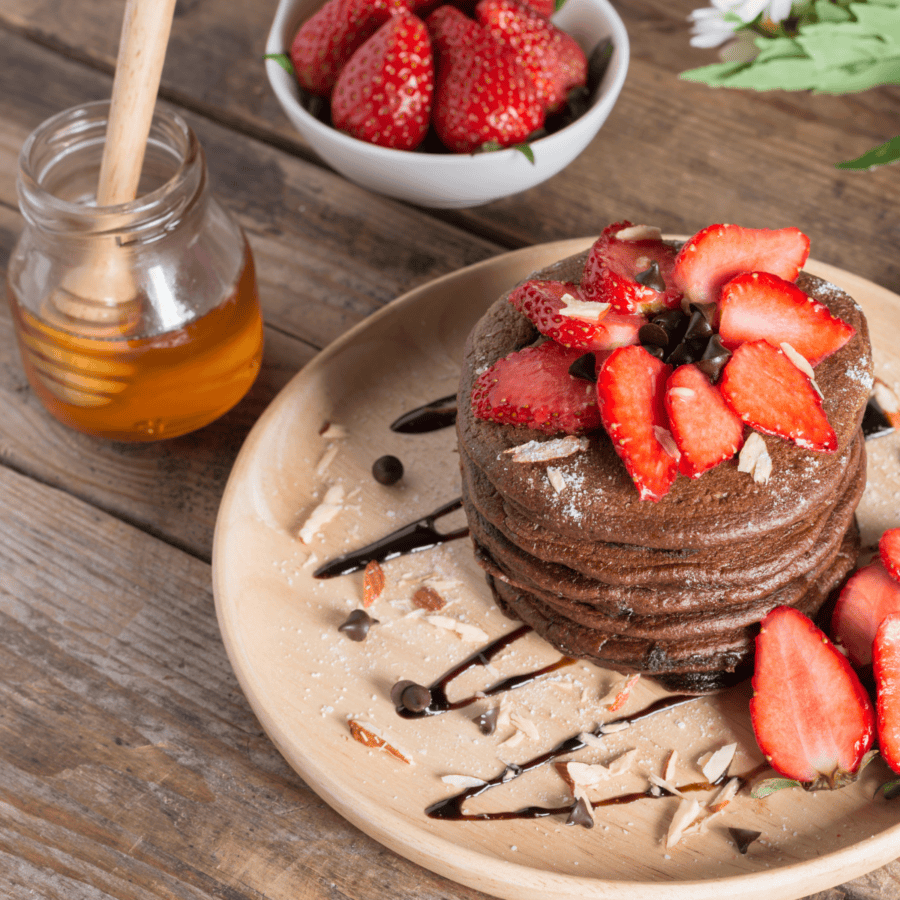
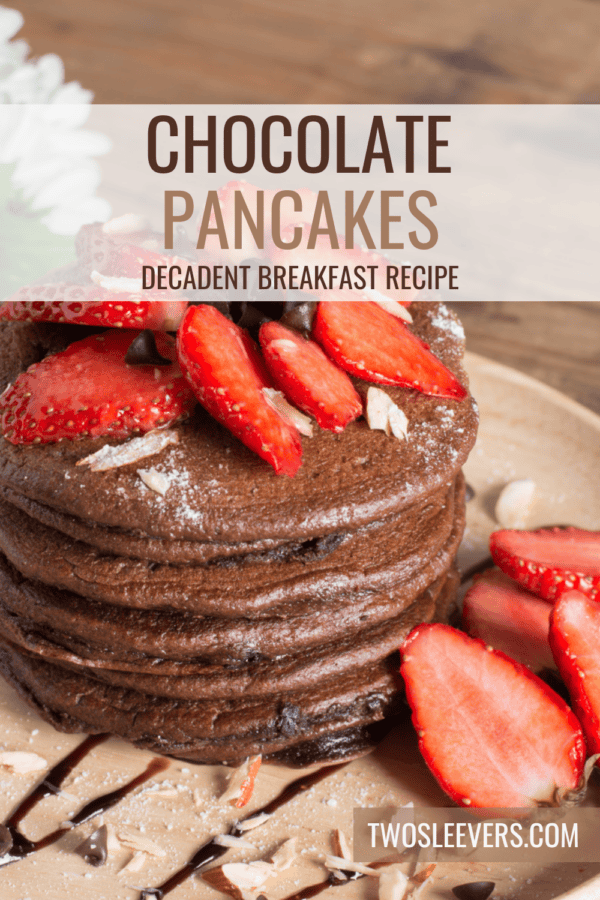
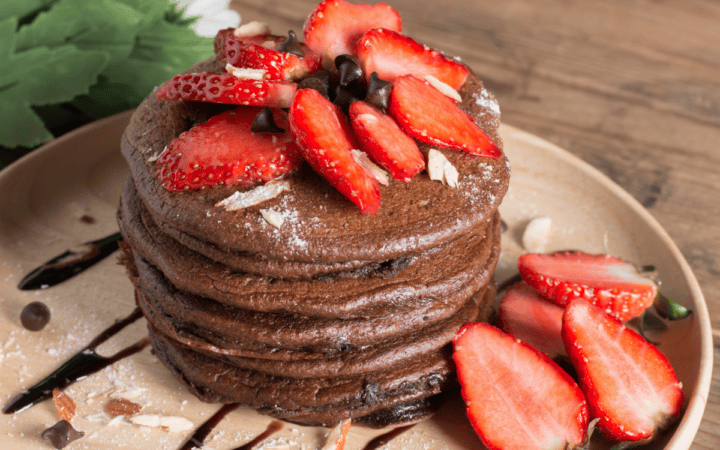
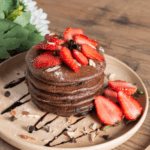
Start your morning off right with these deliciously decadent Chocolate Pancakes! This recipe turns simple ingredients into a stack of fluffy, chocolatey goodness that will make any breakfast special.

Why You’ll Love This Perfectly Sweet Breakfast
- Quick . Ready in just 25 minutes from start to finish.
- Effortless . Minimal preparation for a no-fuss cooking experience.
- Incredibly Tasty . The rich chocolate flavor combined with the fluffy texture is a breakfast dream come true.
With a few pantry staples and a bit of cocoa powder, you’ll create a breakfast treat that’s perfect for any day of the week.
What Do Chocolate Pancakes Taste Like?
Chocolate pancakes offer a delightful and indulgent taste experience that combines the rich, deep flavor of chocolate with the comforting, fluffy texture of traditional pancakes. Imagine the classic taste of pancakes but with a luscious, cocoa-infused twist.
The cocoa powder gives the pancakes a slightly bittersweet chocolate flavor, which can be further enhanced with the addition of chocolate chips for pockets of melted chocolate in every bite.
Why Are Restaurant Pancakes Fluffy?
Restaurant pancakes are often fluffier than homemade versions due to several key factors:
- Proper Mixing Technique . Restaurants often use commercial mixers that can blend ingredients uniformly without overmixing. Overmixing can develop gluten in the batter, leading to dense pancakes. The right technique involves mixing until the ingredients are just combined, leaving some lumps in the batter.
- Quality Ingredients . Many restaurants use high-quality ingredients, including fresh baking powder or baking soda, which help the pancakes rise and become fluffy. They might also use buttermilk, which reacts with the baking soda to create extra lift.
- Batter Resting Time . Allowing the batter to rest for a few minutes before cooking can result in fluffier pancakes. This rest period allows the flour to fully hydrate and the baking powder to start working, leading to better texture.
- Consistent Heat . Commercial griddles maintain a consistent and even temperature, which is crucial for cooking pancakes evenly and preventing them from becoming dense. Home stovetops can have hot spots that affect how the pancakes cook.
What Are Chocolate Pancakes Made Of?
- All-Purpose Flour - The base for the pancakes.
- Cocoa Powder - Provides the rich chocolate flavor.
- Sugar - Adds sweetness to the batter.
- Baking Powder - Ensures the pancakes are light and fluffy.
- Salt - Enhances the overall flavor.
- Milk - Creates a smooth, pourable batter.
- Egg - Adds structure to the pancakes.
- Butter - Adds richness and helps in cooking.
- Vanilla Extract - Enhances the chocolate flavor.
- Chocolate Chips - Optional, for an extra burst of chocolate.
How To Make Chocolate Pancakes
- Mix Dry Ingredients . In a large bowl, whisk together the flour, cocoa powder, sugar, baking powder, and salt.
- Combine Wet Ingredients . In another bowl, whisk together the milk, egg, melted butter, and vanilla extract.
- Combine Wet and Dry . Pour the wet ingredients into the dry ingredients and stir until just combined. Be careful not to overmix; a few lumps are okay.
- Fold in Chocolate Chips . If using, gently fold in the chocolate chips.
- Preheat the Griddle . Heat a non-stick griddle or skillet over medium heat and lightly grease with butter or cooking spray.
- Pour the Batter . For each pancake, pour about 1/4 cup of batter onto the griddle. Cook until bubbles form on the surface, then flip and cook until the other side is golden brown, about 2 minutes per side.
- Plate and Serve . Serve your chocolate pancakes hot, with your favorite toppings such as maple syrup, whipped cream, or fresh berries.
Tips And Tricks
Making delicious chocolate pancakes involves more than just the right ingredients; it’s about technique and a few kitchen tricks to ensure they turn out perfect every time. Here’s how to perfect them:
- Don’t Overmix the Batter . Overmixing can lead to tough pancakes. Stir until just combined.
- Proper Heat . Cook the pancakes over medium heat. Too hot, and they’ll burn on the outside while staying raw inside.
- Use Fresh Ingredients . Fresh baking powder ensures your pancakes are fluffy. Old baking powder may not rise as well.
- Rest the Batter . Letting the batter rest for a few minutes before cooking helps it thicken and leads to fluffier pancakes.
Variations
Chocolate pancakes are a versatile dish that can be adapted to suit a variety of tastes and dietary needs. Here are some creative variations on the classic:
- Double Chocolate- Add extra chocolate chips or chunks to the batter.
- Banana Chocolate- Fold in mashed bananas for a fruity twist.
- Mocha Pancakes - Add a tablespoon of instant coffee granules to the batter for a coffee-chocolate flavor.
- Gluten-Free Pancakes - Use a gluten-free flour blend instead of all-purpose flour.
What To Eat With Chocolate Pancakes
Chocolate pancakes pair wonderfully with various toppings and sides. Here are some great options:
- Fresh Berries - Add a burst of freshness and color.
- Whipped Cream - Adds a light, airy contrast to the rich pancakes.
- Maple Syrup - A classic choice that complements the chocolate flavor.
- Bacon or Sausage - A savory side that balances the sweetness.
How Long Do They Last?
Store any leftover pancakes in an airtight container in the refrigerator for up to 3 days. Reheat in the microwave or on a griddle for a quick breakfast option.
Can You Freeze Them?
Absolutely! Freeze the cooked and cooled pancakes in a single layer on a baking sheet, then transfer to a freezer bag. They can be reheated directly from frozen in the microwave or toaster for a convenient breakfast.
More Brilliant Breakfast Recipes
- Ham and Cheese Croissant
- Keto Blueberry Muffins
- Breakfast Scramble
- Protein Waffles
- Strata
- Apple Pie Pancakes
Chocolate Pancakes | Best Chocolate Pancake Recipe
Ingredients
- ▢ 1 cup All Purpose Flour
- ▢ 1/4 cup Cocoa Powder
- ▢ 1/4 cup Granulated Sugar
- ▢ 1 tbsp Baking Powder
- ▢ 1/4 tsp Kosher Salt
- ▢ 1 cup Milk
- ▢ 1 Egg
- ▢ 2 tbsp Unsalted Butter
- ▢ 1 tsp Vanilla Extract
- ▢ 1/2 cup Chocolate Chips
Instructions
- Mix Dry Ingredients . In a large bowl, whisk together the flour, cocoa powder, sugar, baking powder, and salt.
- Combine Wet Ingredients . In another bowl, whisk together the milk, egg, melted butter, and vanilla extract.
- Combine Wet and Dry . Pour the wet ingredients into the dry ingredients and stir until just combined. Be careful not to overmix; a few lumps are okay.
- Fold in Chocolate Chips . If using, gently fold in the chocolate chips.
- Preheat the Griddle . Heat a non-stick griddle or skillet over medium heat and lightly grease with butter or cooking spray.
- Pour the Batter . For each pancake, pour about 1/4 cup of batter onto the griddle. Cook until bubbles form on the surface, then flip and cook until the other side is golden brown, about 2 minutes per side.
- Plate and Serve . Serve your chocolate pancakes hot, with your favorite toppings such as maple syrup, whipped cream, or fresh berries.
Get support & connect with our community on Facebook!
Nutrition

If you already signed up, you should have received an email with a password to give you unlimited access to our FREE Printable Library. The password is case sensitive. Enter it below and get printing!
Password:
Chocolate Pancakes | Best Chocolate Pancake Recipe
Ingredients
- 1 cup All Purpose Flour
- 1/4 cup Cocoa Powder
- 1/4 cup Granulated Sugar
- 1 tbsp Baking Powder
- 1/4 tsp Kosher Salt
- 1 cup Milk
- 1 Egg
- 2 tbsp Unsalted Butter
- 1 tsp Vanilla Extract
- 1/2 cup Chocolate Chips
Instructions
- Mix Dry Ingredients . In a large bowl, whisk together the flour, cocoa powder, sugar, baking powder, and salt.
- Combine Wet Ingredients . In another bowl, whisk together the milk, egg, melted butter, and vanilla extract.
- Combine Wet and Dry . Pour the wet ingredients into the dry ingredients and stir until just combined. Be careful not to overmix; a few lumps are okay.
- Fold in Chocolate Chips . If using, gently fold in the chocolate chips.
- Preheat the Griddle . Heat a non-stick griddle or skillet over medium heat and lightly grease with butter or cooking spray.
- Pour the Batter . For each pancake, pour about 1/4 cup of batter onto the griddle. Cook until bubbles form on the surface, then flip and cook until the other side is golden brown, about 2 minutes per side.
- Plate and Serve . Serve your chocolate pancakes hot, with your favorite toppings such as maple syrup, whipped cream, or fresh berries.
Chocolate Pancakes | Best Chocolate Pancake Recipe https://twosleevers.com/chocolate-pancakes/
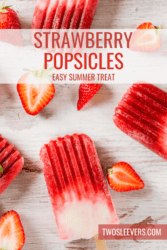
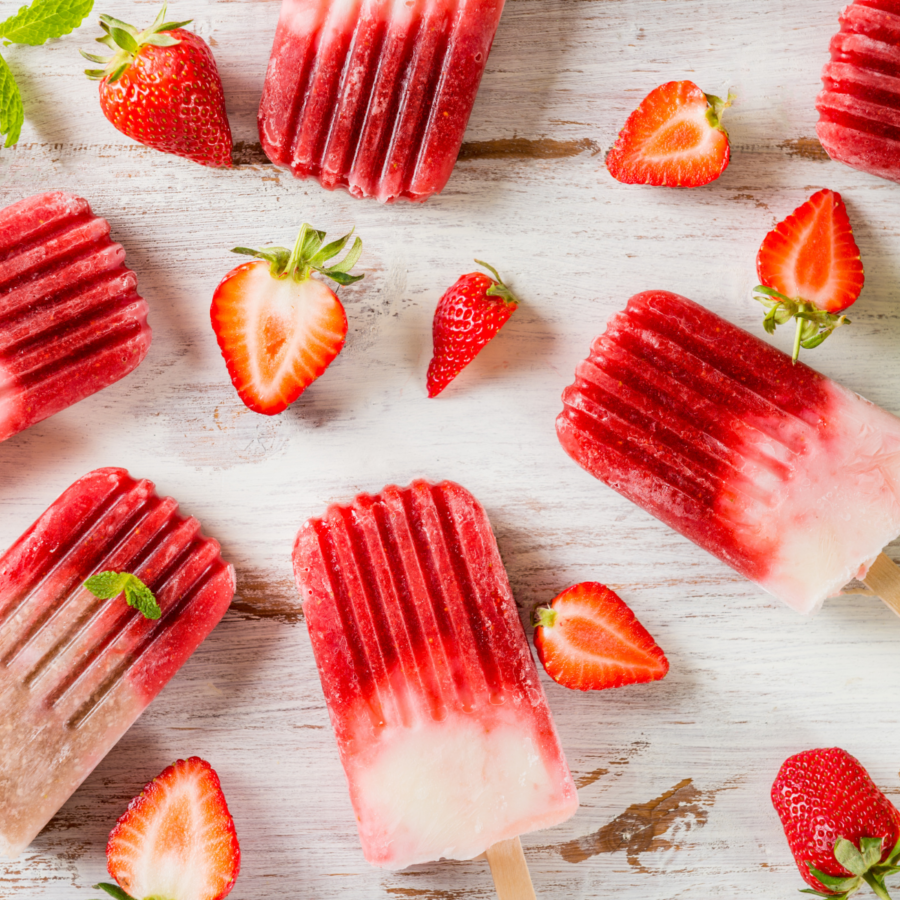
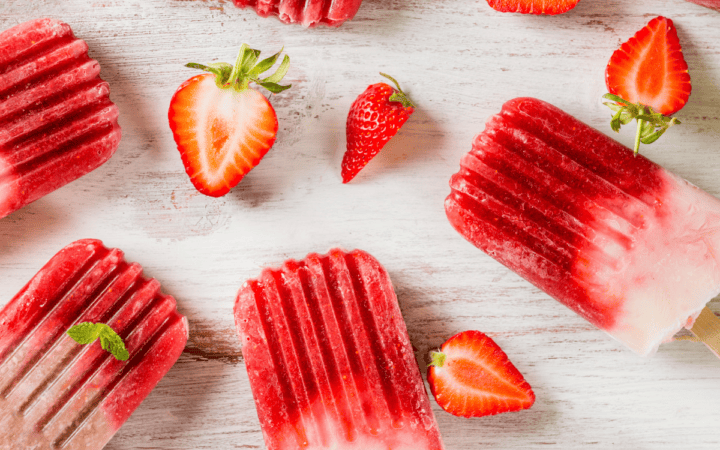
Indulge in these refreshing and fruity Strawberry Popsicles, perfect for beating the summer heat! This recipe transforms fresh strawberries into a delightful frozen treat that’s incredibly easy to make.
Why You’ll Love This Tasty Treat
- Quick. Ready in just 10 minutes of preparation.
- Effortless. Minimal ingredients and steps for a fuss-free dessert.
- Naturally Sweet. The fresh strawberries provide a natural sweetness, making it a healthier option.
- Customizable. Easy to adapt with different fruits and flavors.
Dive into this simple yet delicious method to enjoy a burst of strawberry flavor in every bite.
What Do Strawberry Popsicles Taste Like?
When you bite into a strawberry popsicle, you experience a cool, icy texture that melts in your mouth, releasing the fresh, vibrant taste of strawberries. The slight tartness from the lemon juice enhances the strawberry flavor, making each bite a perfect balance of sweet and tangy.
How To Get Popsicles Out Of The Mold
Getting popsicles out of their molds can be a bit tricky, but with the right approach, you can remove them easily without breaking or damaging them. Here’s a detailed guide to help you successfully remove your popsicles from the mold:
- Ensure Full Freezing . Make sure your popsicles are fully frozen. This typically takes about 4-6 hours, but for the best results, leave them in the freezer overnight.
- Warm Water Method . Fill a bowl or your sink with warm water. The water should be deep enough to cover the mold up to just below the top edge, avoiding getting water inside the mold itself.
- Dip the Mold. Submerge the popsicle mold in the warm water for about 20-30 seconds. Gently Wiggle the Sticks. After dipping, take the mold out of the water. Gently wiggle the popsicle sticks to see if the popsicles start to loosen.
- Pull Out Popsicles. Once the popsicles start to loosen, gently pull the sticks to slide the popsicles out of the mold.
What Are Strawberry Pops Made Of?
- Fresh Strawberries - The star of the show, providing that sweet and tangy flavor.
- Sugar - Adds a touch of sweetness, adjustable to your taste.
- Lemon Juice - Enhances the strawberry flavor and adds a slight tang.
- Water - Helps blend the mixture smoothly.
How To Make Strawberry Popsicles
- Prep the Strawberries . Start by washing and hulling the fresh strawberries. Cut them into halves for easier blending.
- Blend the Mixture . In a blender, combine the strawberries, sugar, lemon juice, and water. Blend until smooth. If you prefer a chunkier texture, blend for a shorter time.
- Pour into Molds. Pour the strawberry mixture into popsicle molds, leaving a small gap at the top for expansion. Insert the popsicle sticks.
- Freeze. Place the molds in the freezer for at least 4-6 hours or until fully frozen.
- Enjoy. Once frozen, remove the popsicles from the molds and enjoy your refreshing treat!
Tips And Tricks
Making delicious and refreshing strawberry popsicles at home is easy and fun. Here are some tips and tricks to help you create the perfect popsicles every time:
- Choose Fresh, Ripe Strawberries . Use the freshest, ripest strawberries you can find. Ripe strawberries are naturally sweeter and have a more intense flavor. Thoroughly wash the strawberries and remove the hulls before blending.
- Sweeten to Taste . Depending on the sweetness of your strawberries, you may need to add some sweetener. Consider using natural sweeteners like honey, agave syrup, or maple syrup for a healthier option.
- Blend Until Smooth . Blend the strawberries until smooth for a uniform texture. If you prefer a chunkier popsicle, you can pulse the blender a few times to leave small strawberry pieces.
Variations
Strawberry popsicles are a classic, but there are many ways to add exciting twists to this beloved treat. Here are some delicious variations to inspire your next batch:
- Strawberry Banana- Blend fresh strawberries with ripe bananas. The bananas add natural sweetness and creaminess.
- Strawberry Lemonade- Combine strawberries with freshly squeezed lemon juice and a bit of sugar or honey.
- Strawberry Yogurt- Mix strawberries with Greek yogurt or regular yogurt for a creamy, tangy popsicle.
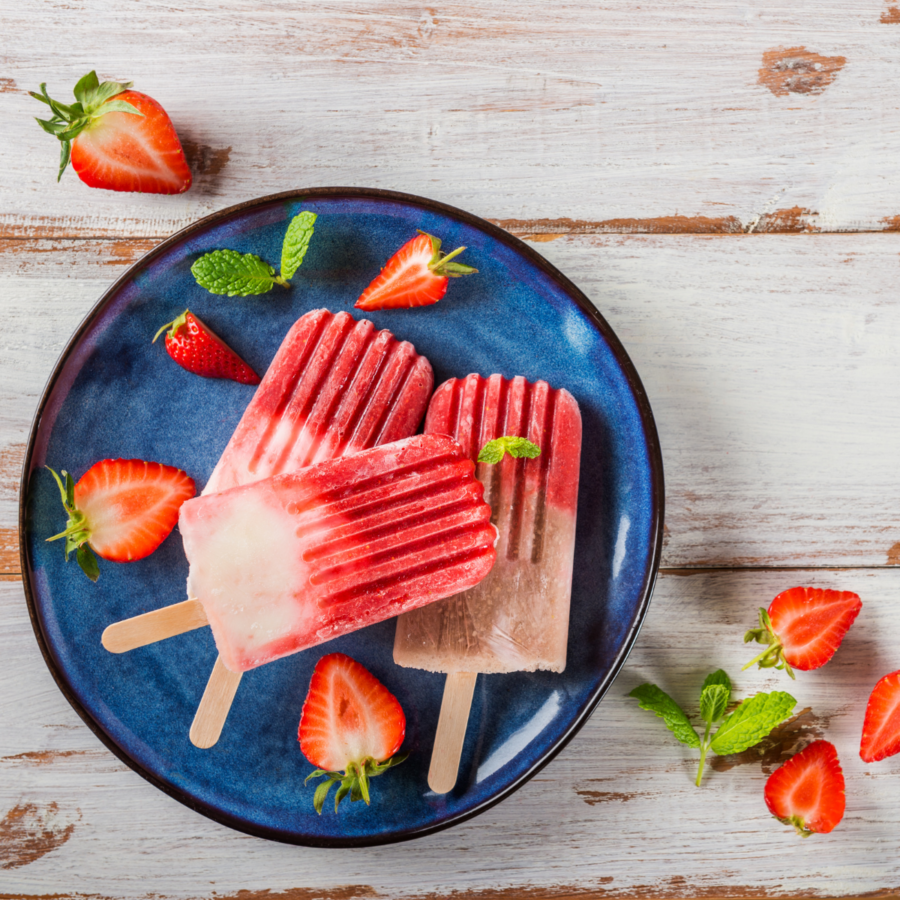
What To Enjoy With Strawberry Popsicles
Strawberry popsicles are perfect on their own but can be paired with various treats:
- Fruit Salad - Serve alongside a fresh fruit salad for a light and healthy dessert.
- Chocolate Dip - Dip the tips in melted dark chocolate and let it harden for a decadent touch.
- Lemonade - Enjoy with a glass of iced lemonade for a refreshing summer combo.
How Long Do They Last?
Store the popsicles in an airtight container in the freezer for up to 2 weeks. They are best enjoyed within the first few days for optimal freshness.
These popsicles are perfect for making ahead of time. Prepare a batch and keep them in the freezer for whenever you need a quick and refreshing treat.
More Delicious Desserts
- Banana Pudding Cake
- Watermelon Popsicles
- Peach Galette
- Gluten Free Chocolate Cake
- Keto Cheesecake Brownies
- Strawberry Mousse
- Peach Crisp

Strawberry Popsicles Recipe | Popsicles With Fresh Strawberries
Ingredients
- ▢ 2 cups Strawberries
- ▢ 1/4 cup Granulated Sugar
- ▢ 2 tbsp Lemon Juice
- ▢ 1/2 cup Water
Instructions
- Prep the Strawberries . Start by washing and hulling the fresh strawberries. Cut them into halves for easier blending.
- Blend the Mixture . In a blender, combine the strawberries, sugar, lemon juice, and water. Blend until smooth. If you prefer a chunkier texture, blend for a shorter time.
- Pour into Molds. Pour the strawberry mixture into popsicle molds, leaving a small gap at the top for expansion. Insert the popsicle sticks.
- Freeze. Place the molds in the freezer for at least 4-6 hours or until fully frozen.
- Enjoy. Once frozen, remove the popsicles from the molds and enjoy your refreshing treat!
