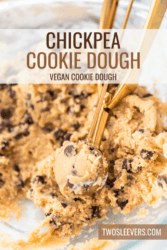
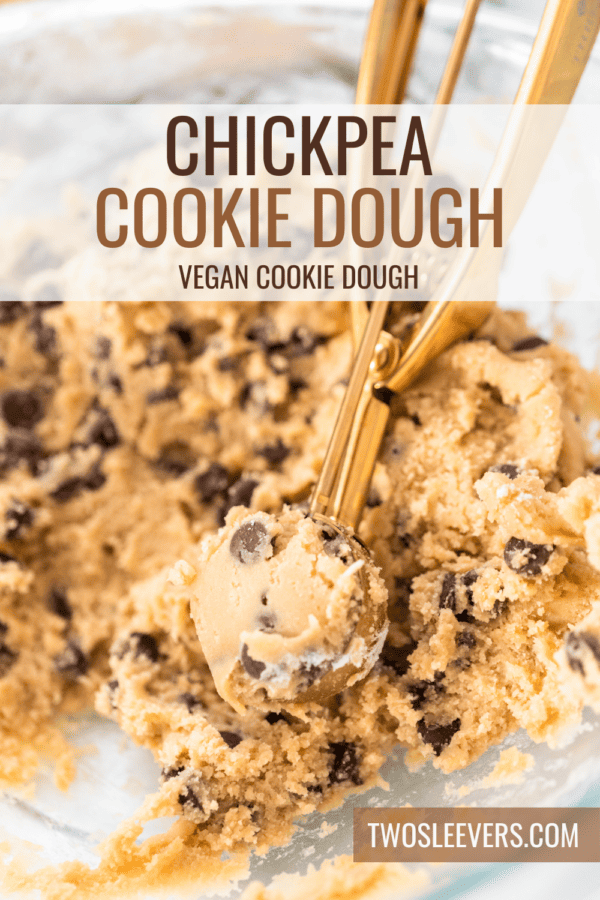
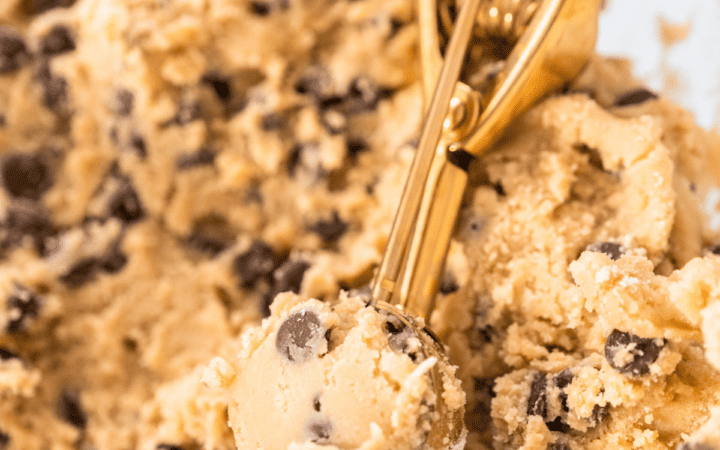
Are you ready to satisfy your sweet tooth with a guilt-free treat? Our Vegan Chickpea Cookie Dough recipe is here to delight your taste buds while keeping things vegan and nutritious. This cookie dough combines the classic flavors of chocolate chip cookies with the added goodness of chickpeas.
Why It Is Just As Good As Traditional Cookie Dough
- Irresistible Flavor . This Vegan Chickpea Cookie Dough retains all the flavors you love in traditional cookie dough, from the vanilla and chocolate chips to the rich sweetness.
- Easy to Make. Impress your friends and family with this unique and easy-to-whip-up dessert recipe . It’s perfect for a quick fix when your sweet cravings kick in.
- Vegan and Nutritious . Say goodbye to dairy and eggs with this vegan-friendly alternative. Plus, chickpeas bring a healthy dose of protein and fiber to the table.
What Makes This Cookie Dough Vegan?
If you’re wondering how we made this classic cookie dough vegan, the secret ingredient is chickpeas! Chickpeas are the star of this recipe, providing a creamy and protein-rich base that mimics the texture of traditional cookie dough. You won’t even miss the eggs or dairy.
Ingredients You’ll Need For Chickpea Cookie Dough
- Chickpeas - The heart of this recipe, chickpeas provide the creamy texture and protein boost.
- Peanut Butter - Creamy peanut butter adds richness and nutty flavor.
- Maple Syrup - For natural sweetness and a hint of caramel.
- Vanilla Extract - Infuses delightful vanilla aroma and flavor.
- Salt - Enhances the overall taste.
- Chocolate Chips - Vegan chocolate chips for that classic cookie dough experience.
How To Make Chickpea Cookie Dough
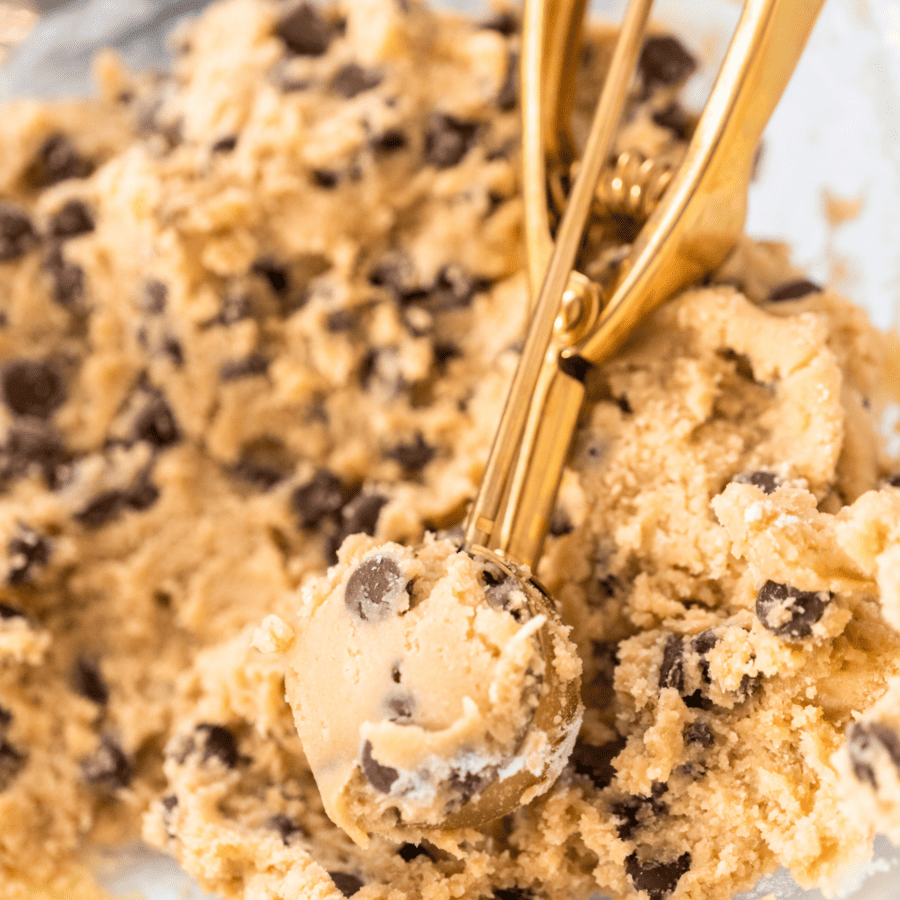
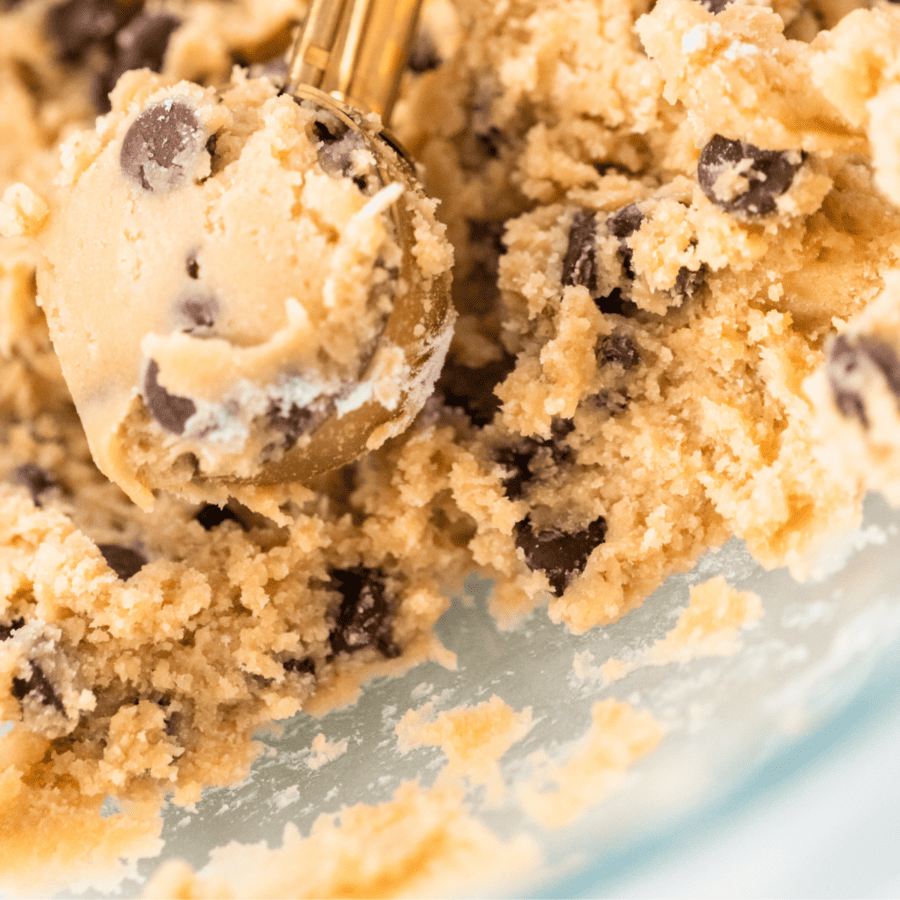
- Blend Ingredients . Combine chickpeas, peanut butter, maple syrup, vanilla extract, and a pinch of salt in a food processor. Blend until smooth and creamy.
- Fold in Chocolate Chips . Transfer the creamy mixture to a bowl and fold in vegan chocolate chips.
- Chill and Enjoy . Refrigerate your chickpea cookie dough for about 30 minutes. This step allows the flavors to meld and the texture to firm up. Then, dig in and enjoy!
Tips And Tricks
Creating the perfect Chickpea Cookie Dough is a breeze, but here are some tips to ensure your success:
- Quality Ingredients . Use high-quality vegan chocolate chips and pure vanilla extract for the best flavor.
- Texture Check . If your dough feels too dry, you can add a bit more peanut butter or a splash of plant-based milk to reach the desired consistency.
- Customization . Get creative and add extras like chopped nuts, dried fruits, or shredded coconut to your cookie dough.
- Storage . Leftover cookie dough can be stored in the refrigerator in an airtight container for up to a week.
Variations
Chickpea Cookie Dough is an ideal base for experimentation. Here are some variations to consider:
- Oatmeal Raisin - Fold in raisins and oats for a classic oatmeal raisin cookie dough flavor.
- Double Chocolate - Mix in cocoa powder along with your chocolate chips for a double chocolate delight.
- Almond Joy - Add shredded coconut and chopped almonds for a taste reminiscent of an Almond Joy candy bar.
- Pumpkin Spice - Incorporate pumpkin puree and pumpkin pie spice for a seasonal twist.
What To Enjoy With Chickpea Cookie Dough
While this Vegan Chickpea Cookie Dough is a treat on its own, you can elevate your experience by pairing it with:
- Vegan Ice Cream - Serve a scoop of your favorite vegan ice cream alongside your cookie dough for a sensational dessert.
- Fruit Dippers - Sliced apples, strawberries, or banana slices make excellent dippers for your cookie dough.
- Smoothie Bowls - Use your cookie dough as a topping for your favorite smoothie bowl for an extra burst of flavor and texture.
How Long Does It Last?
If you store your vegan cookie dough in an airtight container in the refrigerator, it can typically last for up to one week. It’s essential to keep it well-sealed to prevent it from drying out or absorbing any odors from the fridge.
Can You Freeze It?
For longer-term storage, you can freeze vegan cookie dough. Place the dough in an airtight container or wrap it tightly in plastic wrap or aluminum foil. When properly stored in the freezer, vegan cookie dough can last for up to three months.
More Of OurBest Cookie Recipes
- Low Carb Chocolate Chip Cookies
- Keto Ginger Cookies
- Almond Flour Cookies
- Thumbprint Cookies
- Keto Cream Cheese Cookies
Chickpea Cookie Dough | Vegan Cookie Dough Recipe
Ingredients
- ▢ 30 oz Canned Chickpeas , rinsed and drained
- ▢ 1 cup Creamy Peanut Butter
- ▢ 1/2 cup Maple Syrup
- ▢ 2 tsp Vanilla Extract
- ▢ 1/4 tsp Salt
- ▢ 1/2 cup Vegan Chocoate Chips
Instructions
- Blend Ingredients . Combine chickpeas, peanut butter, maple syrup, vanilla extract, and a pinch of salt in a food processor. Blend until smooth and creamy.
- Fold in Chocolate Chips . Transfer the creamy mixture to a bowl and fold in vegan chocolate chips.
- Chill and Enjoy . Refrigerate your chickpea cookie dough for about 30 minutes. This step allows the flavors to meld and the texture to firm up. Then, dig in and enjoy!
Get support & connect with our community on Facebook!

If you already signed up, you should have received an email with a password to give you unlimited access to our FREE Printable Library. The password is case sensitive. Enter it below and get printing!
Password:
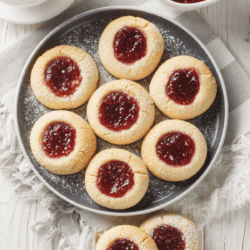
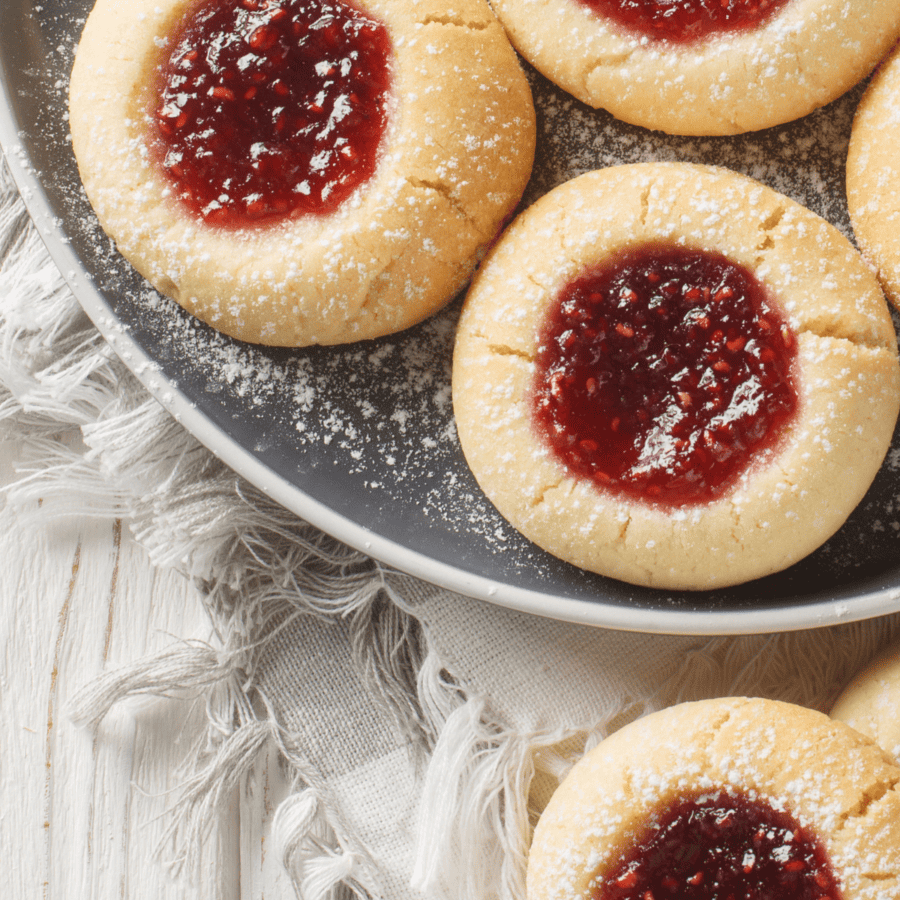
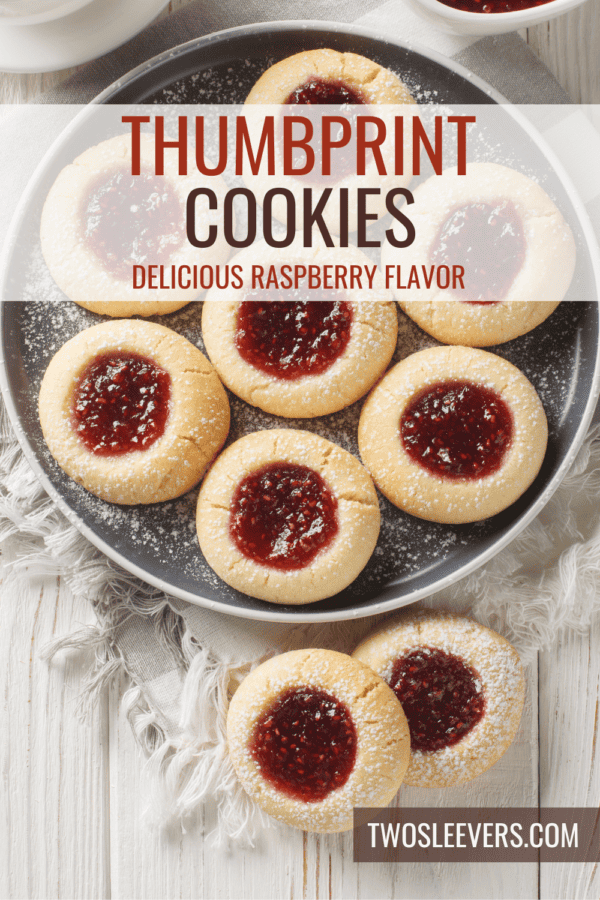
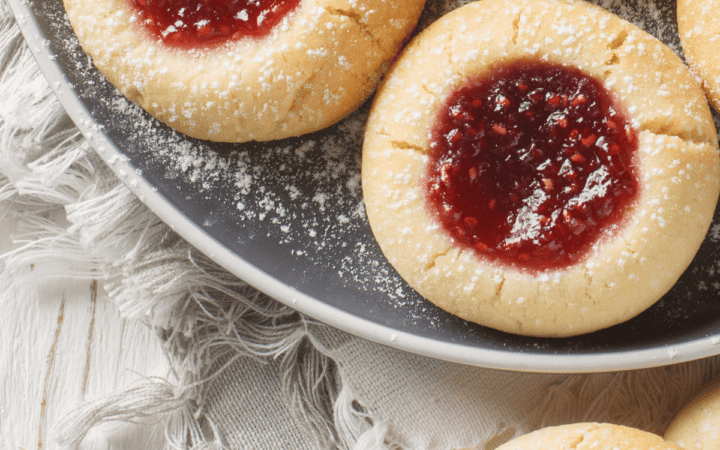
Satisfy your sweet tooth with our delectable Raspberry Thumbprint Cookies recipe. These delightful treats combine the buttery richness of shortbread cookies with a burst of tangy raspberry jam in every bite. Whether you’re baking for the holidays or just craving something sweet, these cookies are a must-try.

Why You’ll Love This Fruit-Flavored Dessert
- Irresistible Flavor . The combination of buttery cookie dough and sweet-tart raspberry jam creates a flavor explosion that’s simply irresistible.
- Easy to Make . Impress your family and friends with this beautiful dessert that is surprisingly easy to whip up. They make a great addition to any cookie platter.
- Versatile . Customize your thumbprint cookies with different fruit jams or preserves to suit your taste preferences. Apricot, strawberry, or blackberry are excellent alternatives to raspberry.
With their delightful crumbly texture and vibrant raspberry centers, these thumbprint cookies are a delightful treat for any occasion.
Why Are They Called Thumbprint Cookies?
Thumbprint cookies are called “thumbprint cookies” because of the distinctive method used to create a well or indentation in the center of each cookie. Typically, a thumb or the back of a spoon is gently pressed into the dough to make this signature thumbprint shape.
Why Do My Thumbprint Cookies Spread?
Ensuring that your thumbprint cookies maintain their shape and don’t overspread during baking requires proper preparation and careful steps. Here are some things to take into consideration before getting started:
- Chilled Dough . After mixing the cookie dough, refrigerate it for about 30 minutes. Chilled dough spreads less while baking, resulting in cookies with a better shape.
- Create Thumbprints Carefully . Use your thumb or the back of a measuring spoon to make an indentation in the center of each cookie. Be gentle to avoid cracking the dough.
- Preheat Your Oven . Make sure your oven is fully preheated to the specified temperature before placing the cookies inside. This helps them set quickly and hold their shape.
Why Is My Thumbprint Cookie Dough Crumbly?
If your thumbprint cookie dough is crumbly, there are several possible reasons for this issue. Here are some common factors and solutions to help you achieve the ideal cookie dough consistency:
- Dry Ingredients Ratio . One of the most common reasons for crumbly cookie dough is an incorrect ratio of dry ingredients, particularly flour. If you added too much flour, the dough can become dry and crumbly. Solution - To fix this, try adding a small amount of liquid (such as milk or water) to the dough, one tablespoon at a time, until it reaches the desired consistency. Be cautious not to overmix, as this can make the cookies tough.
- Overmixing . Overmixing the cookie dough can lead to a crumbly texture. Excessive mixing can develop gluten, which can result in a dry and tough cookie. Solution - Mix the dough only until the ingredients are combined. Overmixing should be avoided. Once the ingredients are integrated, stop mixing.
- Insufficient Binding Agent . The egg or egg yolk in the dough acts as a binding agent. If you didn’t use enough egg or egg yolk, the dough can be crumbly. Solution . Check the recipe and make sure you added the correct amount of eggs or egg yolks. If needed, add an extra yolk or a small amount of beaten egg to improve the dough’s consistency.
- Overworking the Dough . If you knead or handle the dough excessively, it can become crumbly. Thumbprint cookies are typically delicate and should not be overworked. Solution - Handle the dough gently when shaping the cookies. Avoid kneading or pressing it too much.
Ingredients You’ll Need
- Butter - Unsalted butter is the base of these cookies, providing richness and flavor.
- Granulated Sugar - Adds sweetness to the cookie dough.
- Egg Yolk - The yolk contributes to the tender texture of the cookies.
- Vanilla Extract - Infuses a delightful vanilla aroma and flavor.
- All-Purpose Flour - The main dry ingredient for the cookie dough.
- Salt - Enhances the overall flavor of the cookies.
- Raspberry Jam - Fills the thumbprints with fruity goodness.
- Powdered Sugar - For a dusting of sweetness on top.
How To Make Thumbprint Cookies
- Prepare the Cookie Dough . Cream together butter and sugar until light and fluffy. Add egg yolk and vanilla extract, then gradually mix in the flour and salt until the dough forms.
- Chill the Dough . Wrap the cookie dough in plastic wrap and refrigerate it for about 30 minutes.
- Shape and Fill . Roll the dough into small balls and place them on a baking sheet. Make an indentation in each cookie with your thumb or the back of a measuring spoon. Fill each indentation with raspberry jam.
- Bake to Perfection . Bake the cookies in a preheated oven until they’re golden brown around the edges.
- Cool and Enjoy . Allow the cookies to cool on a wire rack. Once cooled, dust them with powdered sugar for an extra touch of sweetness.
Tips And Tricks
Creating the perfect Raspberry Thumbprint Cookies can be a delightful baking experience. Here are some tips and tricks to help you make these delicious cookies with ease and precision:
- Softened Butter . Ensure that your butter is softened to room temperature before using it in the cookie dough. This makes it easier to cream with sugar and results in a smoother dough.
- Chill the Dough . After mixing the cookie dough, wrap it in plastic wrap and refrigerate it for about 30 minutes. Chilled dough is less likely to spread during baking, helping your cookies maintain their shape.
- Consistent Cookie Sizes . Keep the cookie sizes consistent to ensure even baking. Using a cookie scoop can help with this.
Variations
Thumbprint cookies are incredibly versatile, and you can get creative with various flavor combinations and fillings. Here are some delightful variations to try:
- Strawberry- Swap out the raspberry jam for strawberry jam or preserves for a different fruity twist.
- Chocolate- Fill the thumbprints with chocolate ganache or Nutella for a rich and indulgent treat.
- Cherry -Use cherry jam or cherry preserves for a sweet and vibrant filling.
- Cream Cheese and Fruit- Combine cream cheese with your choice of fruit preserves for a creamy and fruity center.
What To Enjoy With Thumbprint Cookies
These cookies are delightful on their own, but you can enhance your serving by pairing them with:
- Tea or Coffee - Enjoy these cookies with a hot cup of tea or coffee for a comforting treat.
- Ice Cream - Serve Raspberry Thumbprint Cookies alongside vanilla ice cream for a decadent dessert.
- Milk - Dunking these cookies in a glass of cold milk is a classic choice.
Should You Refrigerate Thumbprint Cookies?
Thumbprint cookies can be stored at room temperature in an airtight container for a few days, usually up to a week, without the need for refrigeration.
If your thumbprint cookies have a highly perishable filling, such as fresh fruit or dairy-based fillings like cream cheese or custard, it’s advisable to refrigerate them to prevent spoilage and foodborne illnesses.
Can You Freeze Them?
Yes, you can freeze these cookies for up to three months. Make sure they’re well wrapped to prevent freezer burn. Thaw at room temperature before serving.
More Of OurBest Cookie Recipes
- Almond Flour Cookies
- Keto Ginger Cookies
- Low Carb Chocolate Chip Cookies
- Cookie Dough Bites
- Air Fryer Chocolate Chip Cookies
Thumbprint Cookies Recipe | Raspberry Thumbprint Cookies
Ingredients
- ▢ 1/2 cup Unsalted Butter , softened
- ▢ 1/3 cup Granulated Sugar
- ▢ 1 Egg Yolk
- ▢ 1 tsp Vanilla Extract
- ▢ 1 1/4 cup All Purpose Flour
- ▢ 1/4 tsp Salt
- ▢ 1/3 cup Raspberry Preserves
- ▢ Powdered Sugar , for dusting
Instructions
- Prepare the Cookie Dough . Cream together butter and sugar until light and fluffy. Add egg yolk and vanilla extract, then gradually mix in the flour and salt until the dough forms.
- Chill the Dough . Wrap the cookie dough in plastic wrap and refrigerate it for about 30 minutes.
- Shape and Fill . Roll the dough into small balls and place them on a baking sheet. Make an indentation in each cookie with your thumb or the back of a measuring spoon. Fill each indentation with raspberry jam.
- Bake to Perfection . Bake the cookies in a preheated oven until they’re golden brown around the edges.
- Cool and Enjoy . Allow the cookies to cool on a wire rack. Once cooled, dust them with powdered sugar for an extra touch of sweetness.
Get support & connect with our community on Facebook!

Chickpea Cookie Dough | Vegan Cookie Dough Recipe
Ingredients
- 30 oz Canned Chickpeas rinsed and drained
- 1 cup Creamy Peanut Butter
- 1/2 cup Maple Syrup
- 2 tsp Vanilla Extract
- 1/4 tsp Salt
- 1/2 cup Vegan Chocoate Chips
Instructions
- Blend Ingredients . Combine chickpeas, peanut butter, maple syrup, vanilla extract, and a pinch of salt in a food processor. Blend until smooth and creamy.
- Fold in Chocolate Chips . Transfer the creamy mixture to a bowl and fold in vegan chocolate chips.
- Chill and Enjoy . Refrigerate your chickpea cookie dough for about 30 minutes. This step allows the flavors to meld and the texture to firm up. Then, dig in and enjoy!
Chickpea Cookie Dough | Vegan Cookie Dough Recipe https://twosleevers.com/chickpea-cookie-dough/
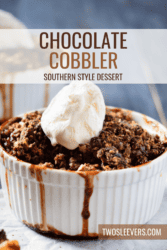
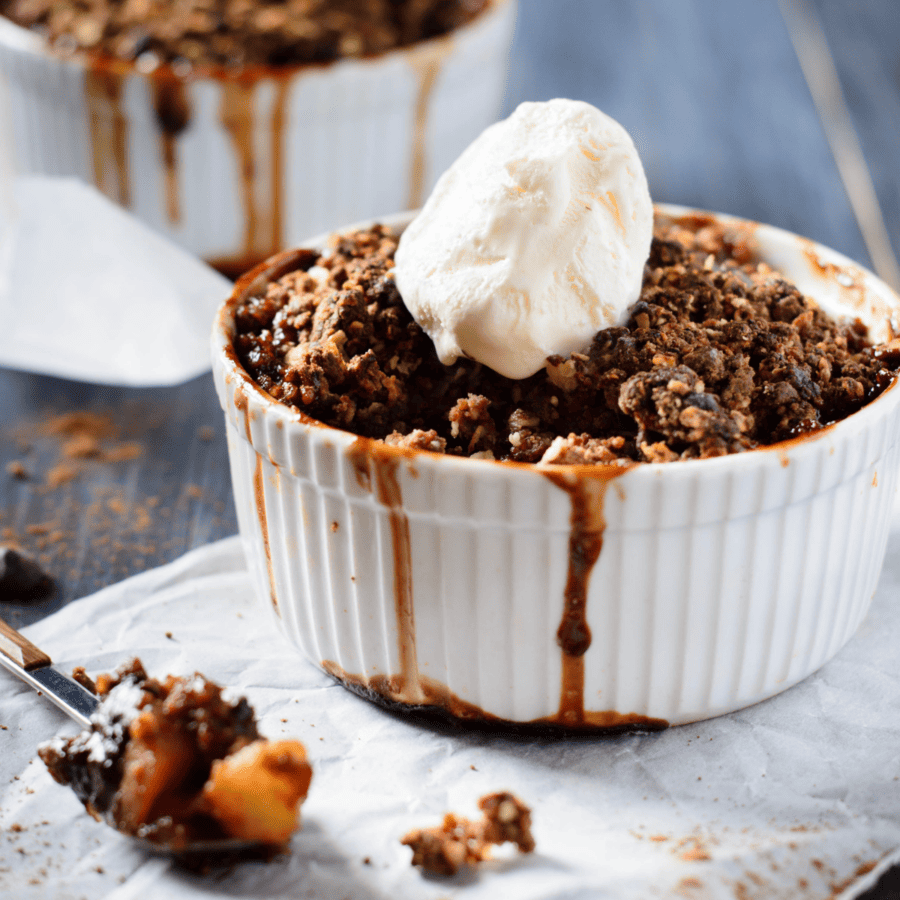
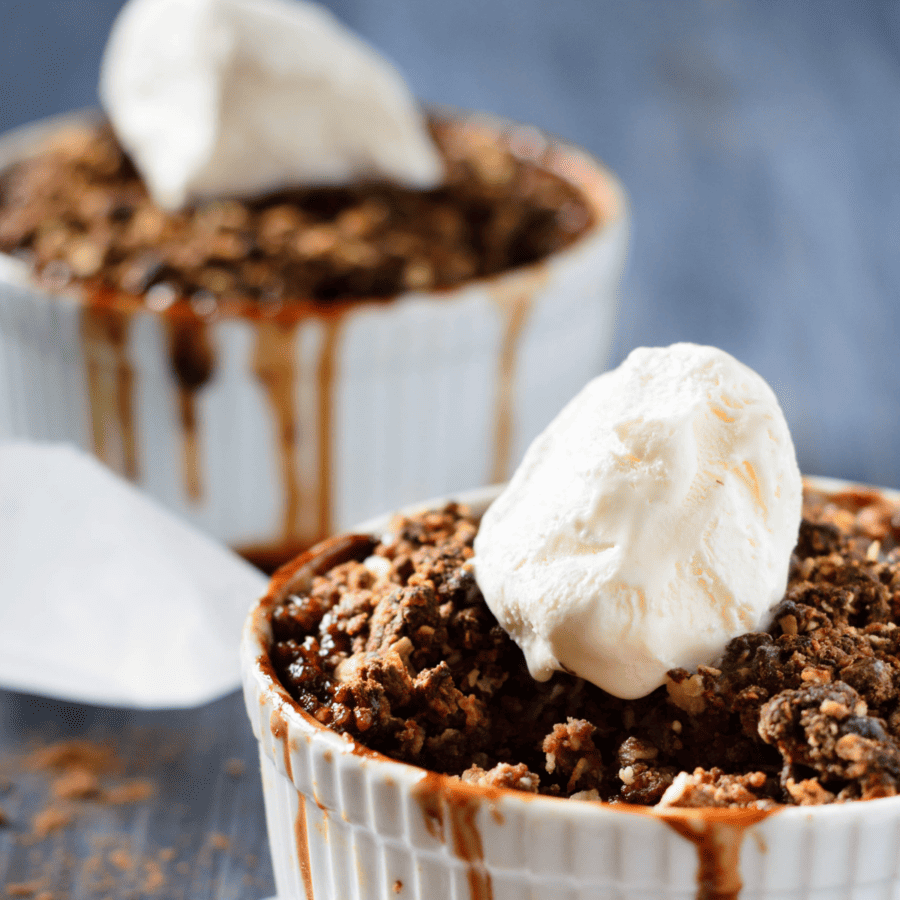
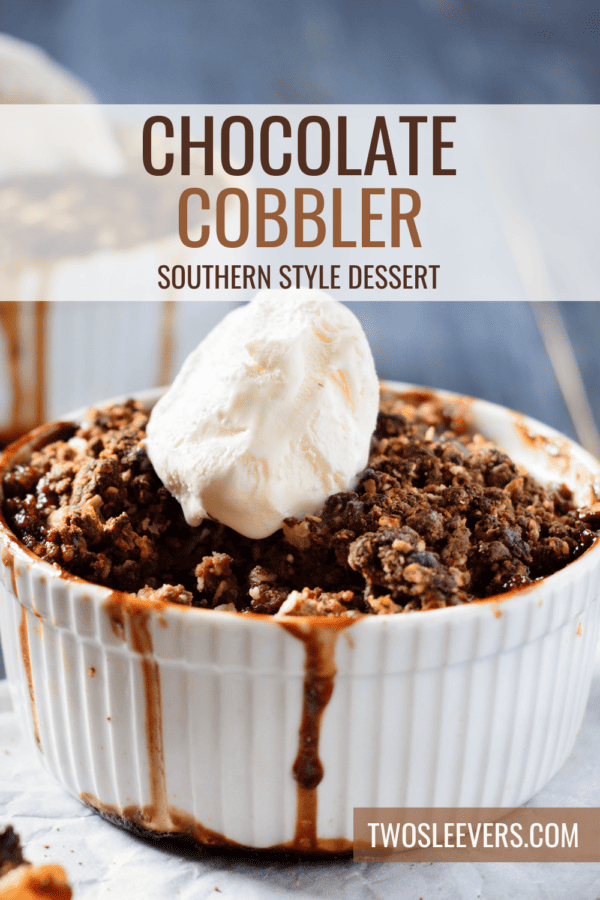
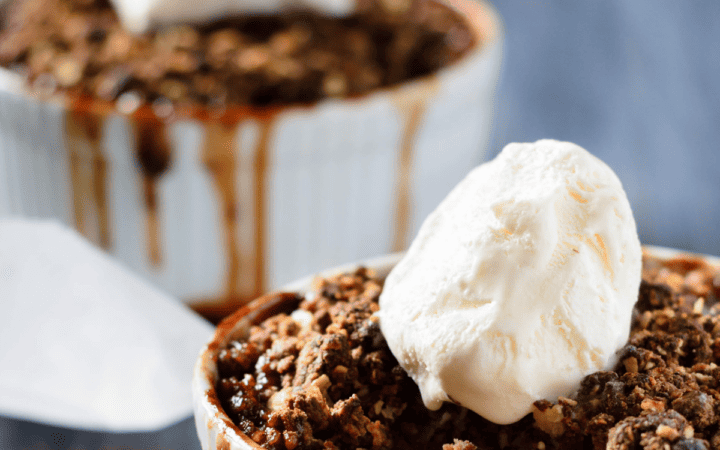
If you’re craving a rich, chocolatey dessert that’s easy to make and absolutely divine, you’re in for a treat! Dive into the world of decadence with this mouthwatering Chocolate Cobbler recipe. It’s the perfect union of a gooey, fudgy base and a delightful, crumbly topping.
Why You’ll Love This Decadent Dessert
- Decadent Chocolate Flavor . Chocolate cobbler is a chocolate lover’s dream. The rich, intense chocolate flavor permeates every bite, satisfying your sweet cravings with a deep cocoa taste.
- Gooey and Moist Texture . The magic of chocolate cobbler lies in its dual texture. As it bakes, the batter creates a soft, cake-like layer on top, while underneath, a gooey, fudgy chocolate sauce forms. This delightful combination of textures adds to the overall indulgence.
- Easy and Quick to Make . Chocolate cobbler is a dessert that’s not only delicious but also easy to prepare. With simple ingredients and minimal steps, you can whip up a delightful chocolate treat without spending hours in the kitchen.
Chocolate cobbler is a delightful and uncomplicated dessert that brings together the irresistible qualities of chocolate, gooey textures, and ease of preparation, making it a favorite for anyone with a sweet tooth.
Why Do They Call It Cobbler?
The term “cobbler” in the context of a dessert refers to a dish consisting of a fruit or savory filling poured into a baking dish and covered with a batter, biscuit, or dumpling topping. The name “cobbler” is believed to have originated in the United States, and its exact origin is a bit unclear. There are a few theories about how the dessert got its name:
- Resemblance to Cobblestones - One theory suggests that the name “cobbler” may have originated because the topping resembles cobblestones. The dropped or “cobbled” dough on top of the fruit filling might have reminded someone of the cobbled streets.
- Patching Together Ingredients - Another theory is that the term reflects the “patched” or uneven appearance of the dough on top. The dough is often dropped onto the fruit filling in a rustic fashion, giving it a cobbled-together look.
What Is Chocolate Cobbler Made Of?
Here’s a breakdown of the key ingredients used in making chocolate cobbler and their roles in the recipe:
- All-Purpose Flour - Acts as the foundation for the cobbler, providing structure and a light texture. The flour combines with other ingredients to create the batter. It contributes to the overall structure and texture of the cobbler.
- Quick Oats - Added to the topping mixture to create a unique twist on the classic chocolate cobbler.
- Cocoa Powder- Enhances the chocolate flavor, providing an intense chocolatey experience. Cocoa powder is the primary source of chocolate flavor in the cobbler. Choosing a high-quality cocoa powder ensures a rich and satisfying chocolate taste.
- Sugar- Sugar is a sweetening agent that balances the bitterness of cocoa powder and enhances the overall sweetness of the cobbler. It contributes to the flavor profile of the dessert.
- Baking Powder- Baking powder is a leavening agent that helps the cobbler rise during baking. It creates air pockets in the batter, resulting in a light and fluffy texture.
- Salt- Salt is a flavor enhancer that brings out the richness of the chocolate and balances the sweetness.
- Milk- Milk contributes moisture to the cobbler batter, ensuring it has the right consistency for baking. It also adds a creaminess to the texture.
- Melted Butter- Melted butter adds richness and a buttery flavor to the cobbler. It also contributes to the tenderness of the crumb in both the base and the topping.
- Vanilla Extract- Provides a subtle sweetness and aromatic depth to the cobbler. It enhances the overall flavor profile without overpowering the chocolate.
- Brown Sugar- With its molasses content, it creates a gooey layer in the cobbler. As it bakes, it forms a caramel-like sauce between the chocolatey base and crumbly topping.
How To Make Chocolate Cobbler
- Prepare the Chocolate Base . In a mixing bowl, combine the all-purpose flour, cocoa powder, sugar, baking powder, and a pinch of salt. Add milk, melted butter, and vanilla extract. Stir until a smooth batter forms.
- Create the Topping . In a separate bowl, mix sugar, quick oats, and cocoa powder. Sprinkle this mixture evenly over the chocolate batter.
- Add the Brown Sugar Layer . Sprinkle brown sugar over the cocoa-sugar topping. This layer will melt into a gooey, caramel-like sauce during baking.
- Pour Boiling Water . Gently pour boiling water over the entire concoction. This seemingly unusual step is the secret to creating a rich, saucy layer beneath the crumbly topping.
- Bake to Perfection . Place the dish in the preheated oven and bake until the cobbler is set, and the top forms a beautiful, crusted layer.
- Serve and Savor . Scoop out portions of warm cobbler, ensuring each serving has a bit of that gooey chocolate sauce. Pair it with a scoop of vanilla ice cream for an extra indulgence.
Tips And Tricks
Creating the perfect Chocolate Cobbler is a delightful journey, and here are some tips to ensure your dessert turns out just right:
- Cocoa Quality Matters . Choose a high-quality cocoa powder for an intense chocolate flavor.
- Serve Warm . This cobbler is best enjoyed warm. If reheating, a quick zap in the microwave or a few minutes in the oven will revive its gooey goodness.
- Experiment with Toppings . While a scoop of vanilla ice cream is a classic pairing, feel free to get creative with toppings. Whipped cream, chocolate shavings, or a drizzle of caramel can add an extra layer of indulgence.
Variations
Customize your Chocolate Cobbler experience with these creative variations:
- Nutty Crunch - Add chopped nuts like pecans or walnuts to the batter for a delightful crunch and nutty flavor.
- Mint Chocolate Twist - Infuse a hint of mint by adding peppermint extract to the batter for a refreshing twist on classic chocolate.
- Double Chocolate Delight - Fold in chocolate chips to both the base and the topping for an extra-rich, chocolatey experience.
What To Serve With Chocolate Cobbler
Enhance your Chocolate Cobbler experience by pairing it with the following accompaniments:
- Whipped Cream - A dollop of freshly whipped cream adds a light and airy texture.
- Vanilla Ice Cream - The classic pairing that takes this dessert to the next level. The cold and creamy ice cream contrasts beautifully with the warm, gooey cobbler.
- Fresh Berries - Serve with a side of fresh berries, like strawberries or raspberries, for a burst of fruity freshness.
How Long Does It Last?
While the temptation to devour the entire cobbler in one sitting is strong, leftovers can be stored. Here’s a general guideline for how long Chocolate Cobbler typically lasts under different storage conditions:
- Room Temperature - Best enjoyed fresh and warm, but if you have leftovers, store them at room temperature for up to 1-2 days in an airtight container.
- Refrigerator - For an extended shelf life, refrigerate in an airtight container for up to 4-5 days. A quick reheat in the oven or microwave will restore its delightful texture.
Can You Freeze It?
Yes, you can freeze Chocolate Cobbler for longer-term storage. Ensure it’s wrapped tightly in plastic wrap or aluminum foil and placed in an airtight container. Properly stored, it can maintain its quality for up to 2-3 months.
More Chocolate Treats
- Crockpot Hot Chocolate
- Keto Chocolate Chip Cookies
- Gluten Free Chocolate Cake
- Instant Pot Chocolate Cake
- Chocolate Pudding Pie
Chocolate Cobbler Recipe | Southern Chocolate Cobbler
Ingredients
- ▢ 1 cup All Purpose Flour
- ▢ 1/2 cup Cocoa Powder
- ▢ 1 cup Granulated Sugar
- ▢ 2 tsp Baking Powder
- ▢ 1/4 tsp Salt
- ▢ 1/2 cup Milk
- ▢ 1/4 Butter , Melted
- ▢ 1 tsp Vanilla Extract
For The Topping
- ▢ 1/2 cup Brown Sugar
- ▢ 1/2 cup Quick Oats
- ▢ 1/4 cup Cocoa Powder
- ▢ 1 1/2 cups Hot Water
Instructions
- Prepare the Chocolate Base . In a mixing bowl, combine the all-purpose flour, cocoa powder, sugar, baking powder, and a pinch of salt. Add milk, melted butter, and vanilla extract. Stir until a smooth batter forms.
- Create the Topping . In a separate bowl, mix sugar, quick oats, and cocoa powder. Sprinkle this mixture evenly over the chocolate batter.
- Add the Brown Sugar Layer . Sprinkle brown sugar over the cocoa-sugar topping. This layer will melt into a gooey, caramel-like sauce during baking.
- Pour Boiling Water . Gently pour boiling water over the entire concoction. This seemingly unusual step is the secret to creating a rich, saucy layer beneath the crumbly topping.
- Bake to Perfection . Place the dish in the preheated oven and bake until the cobbler is set, and the top forms a beautiful, crusted layer.
- Serve and Savor . Scoop out portions of warm cobbler, ensuring each serving has a bit of that gooey chocolate sauce. Pair it with a scoop of vanilla ice cream for an extra indulgence.
