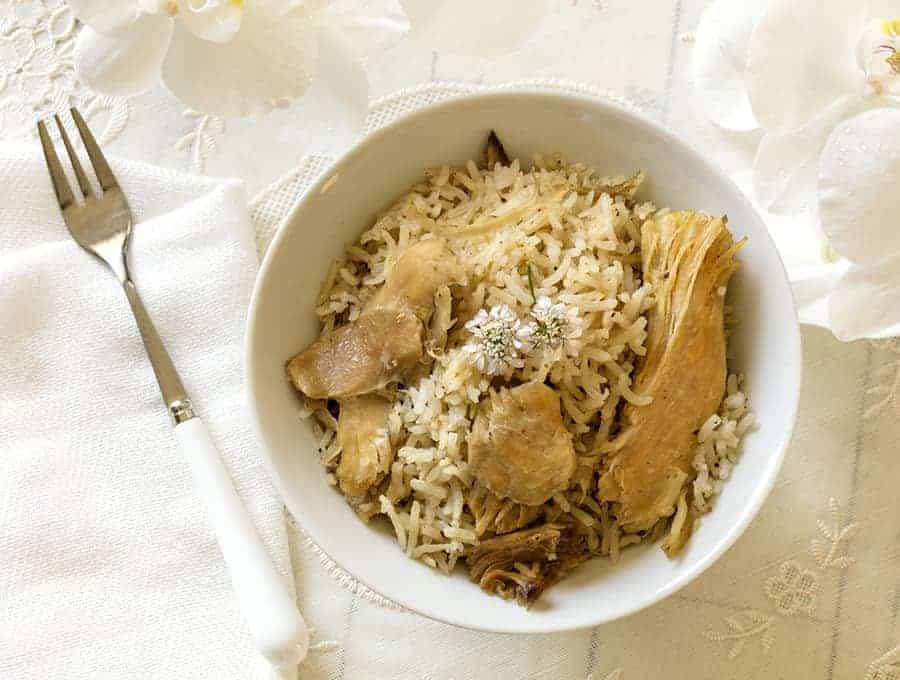
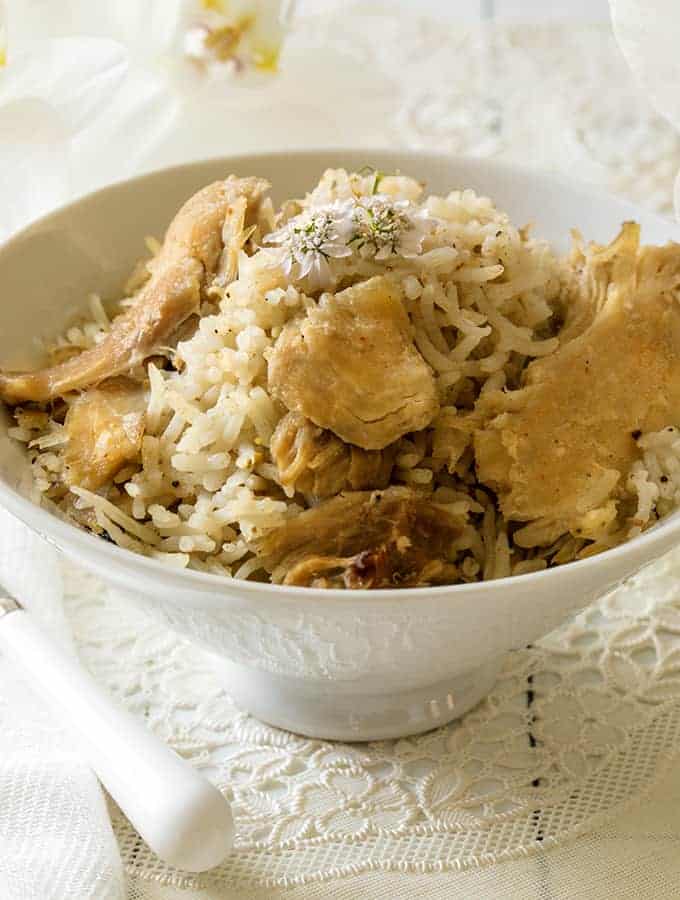
Dinners where you can cook everything in a single pot are one of my favorite things. This recipe for Chicken Yakhni Pulao is one of those recipes, and you’re going to love it. When you look at the pictures, this looks like just another chicken and rice dish, but it’s so much more flavorful than that.
What Is Chicken Yakhni Pulao
Kashmiri Yakhni Pulao is full of delicious spices like garlic, cinnamon, cardamom, and cloves and they all come together beautifully in the chicken. The rice is cooked separately in the chicken broth at the end, making it much more flavorful than plain white rice.
What Is The Difference Between Yakhni Pulao And Biryani?
Chicken Yakhni Pulaos and biryanis have a lot in common in that they are both a mix of meat and rice cooked together. But what makes a Yakhni different is that it is all about the rich, meaty broth that you create. It’s actually a very simple, comforting dish and all the flavor comes from the meat broth and the spices.
In contrast, biryanis often have a lot of other spices and aromatics such as onions, garlic, mint, and yogurt added, as with this Lamb Biryani Recipe .
Another way this chicken yakhni pulao recipe is different from a biryani is that the spices are left whole and are cooked in a cheesecloth pouch, and then discarded after cooking, unlike most recipes where you grind the spices and put them directly on the meat itself. This allows the meat to be infused with the flavors of the spices, and not just topped with them.
Thirdly, for a yakhni pulao , you have to cook it in two stages. These stages are:
- Make the broth
- Cook the rice in the broth
How To Make This Instant Pot Chicken And Rice Recipe
Like I mentioned above, there are two different steps to making this Yakhni Pulao. While it may sound like it is a complicated recipe, I assure you it is still quite simple. Here’s how you do it
Make the Yakhni
- Place onions, ginger, garlic, and whole spices into a cheesecloth bundle and secure tightly.
- Place chicken, water, salt, and the cheesecloth bundle in the inner liner of your Instant Pot .
- Cook at high pressure. Allow the pot to sit undisturbed and then release all remaining pressure.
- Remove the cheesecloth bundle and discard.
- Remove the chicken and break into large pieces.
- You should have 1.5 cups of stock in your Instant Pot (use a measuring cup to be sure).
- Leave 1.5 cups of stock in the pot for cooking the rice and reserve any remaining stock for a different recipe.
Make the rice
- To the stock in your inner liner , add the rinsed long grain basmati rice, garam masala , ghee , and salt. Push the rice down to ensure it is covered by the stock.
- Lay the large shredded chicken pieces on top of the rice.
- Cook under high pressure. Allow the pot to sit undisturbed and then release all remaining pressure.
- Mix lightly and serve.
- You can also make this with beef or lamb if you prefer. If you cut the meat into large, bite-size pieces, you won’t need to change cook times.
Which Is The Best Rice For Pulao?
While you don’t HAVE to use a specific type of rice for this Instant Pot Chicken and Rice recipe , some will produce better texture and absorb the flavor of the homemade broth more than others.
For this Yakhni Pulao recipe , I used Basmati rice . It is one of my favorite types of rice to cook in my Instant Pot because of how perfectly it turns out every time.
Want More Instant Pot Chicken And Rice Recipes?
- Creamy Chicken And Rice
- Instant Pot Barley and Chicken Soup
- Pressure Cooker Chicken Biryani
- Instant Pot Arroz Con Pollo
- Pressure Cooker Chicken Congee
Pressure cooking this Chicken Yakhni Pulao in your Instant Pot also helps it to be infused with the flavors from the spice pouch. This also saves time from grinding up spices, or from spices losing their flavor because they were ground too long ago. Make it and tell me what you think!
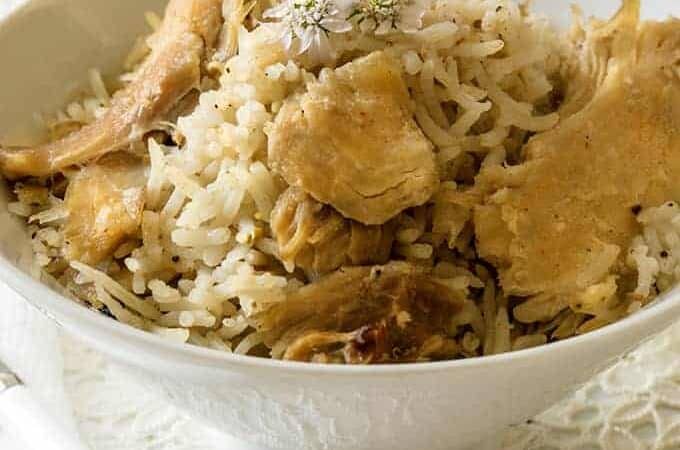
Kashmiri Yakhni Pulao |Instant Pot Rice and Chicken
Ingredients
For the Yakhni
- ▢ 1/2 cup ( 80 g ) Sliced Onions
- ▢ 6 ( 6 ) Garlic Cloves
- ▢ 3 ( 3 ) julienned ginger
- ▢ 2 ( 2 ) Cinnamon , each about 2 inches thick
- ▢ 4 ( 4 ) Cardamom Pods
- ▢ 6 ( 6 ) Whole Cloves
- ▢ 6 ( 6 ) Whole Black Peppercorns
- ▢ 1 pound ( 453.59 g ) Bone-in Skin-on Chicken Thighs
- ▢ 1.5 cups ( 375 ml ) Water
- ▢ 1 teaspoon ( 1 teaspoon ) Kosher Salt
For the Rice
- ▢ 1.5 cups ( 277.5 g ) Basmati Rice
- ▢ 2 teaspoons ( 2 teaspoons ) Garam Masala
- ▢ 1 tablespoon ( 1 tablespoon ) Ghee
- ▢ 1 teaspoon ( 1 teaspoon ) Kosher Salt
Instructions
Make the Yakhni
- Place onions, ginger, garlic and whole spices into a cheese cloth bundle and secure tightly.
- Place chicken, water, salt, and the cheesecloth bundle in the inner liner of your instant pot.
- Cook at high pressure for 10 minutes. Allow the pot to sit undisturbed for 10 minutes, and then release all remaining pressure.
- Remove the cheesecloth bundle and discard.
- Remove the chicken and break into large pieces.
- You should have 1.5 cups of stock in your instant pot (use a measuring cup to be sure).
- Leave 1.5 cups of stock in the pot for cooking the rice and reserve any remaining stock for a different recipe.
Make the rice
To the stock in your inner liner, add the rinsed long grain basmati rice, garam masala, ghee and salt. Push the rice down to ensure it is covered by the stock.
Lay the large shredded chicken pieces on top of the rice.
Cook at high pressure for 4 minutes. Allow the pot to sit undisturbed for 10 minutes, and then release all remaining pressure.
Mix lightly and serve.
You can also make this with beef or lamb if you prefer. If you cut the meat into large, bite-size pieces, you won’t need to change cook times.
Get support & connect with our community on Facebook!
Nutrition
Don’t forget to check out my otherBest-selling Instant Pot Cookbooks!
Indian Instant Pot , Keto Instant Pot, Instant Pot Fast and Easy , Healthy Instant Pot & Vegetarian Instant Pot .


If you already signed up, you should have received an email with a password to give you unlimited access to our FREE Printable Library. The password is case sensitive. Enter it below and get printing!
Password:

Kashmiri Yakhni Pulao |Instant Pot Rice and Chicken
Ingredients
For the Yakhni
- 1/2 cup Sliced Onions
- 6 Garlic Cloves
- 3 julienned ginger
- 2 Cinnamon each about 2 inches thick
- 4 Cardamom Pods
- 6 Whole Cloves
- 6 Whole Black Peppercorns
- 1 pound Bone-in Skin-on Chicken Thighs
- 1.5 cups Water
- 1 teaspoon Kosher Salt
For the Rice
- 1.5 cups Basmati Rice
- 2 teaspoons Garam Masala
- 1 tablespoon Ghee
- 1 teaspoon Kosher Salt
Instructions
Make the Yakhni
- Place onions, ginger, garlic and whole spices into a cheese cloth bundle and secure tightly.
- Place chicken, water, salt, and the cheesecloth bundle in the inner liner of your instant pot.
- Cook at high pressure for 10 minutes. Allow the pot to sit undisturbed for 10 minutes, and then release all remaining pressure.
- Remove the cheesecloth bundle and discard.
- Remove the chicken and break into large pieces.
- You should have 1.5 cups of stock in your instant pot (use a measuring cup to be sure).
- Leave 1.5 cups of stock in the pot for cooking the rice and reserve any remaining stock for a different recipe.
Make the rice
To the stock in your inner liner, add the rinsed long grain basmati rice, garam masala, ghee and salt. Push the rice down to ensure it is covered by the stock.
Lay the large shredded chicken pieces on top of the rice.
Cook at high pressure for 4 minutes. Allow the pot to sit undisturbed for 10 minutes, and then release all remaining pressure.
Mix lightly and serve.
You can also make this with beef or lamb if you prefer. If you cut the meat into large, bite-size pieces, you won’t need to change cook times.
Kashmiri Yakhni Pulao |Instant Pot Rice and Chicken https://twosleevers.com/chicken-yakhni-pilao-instant-pot-recipe/
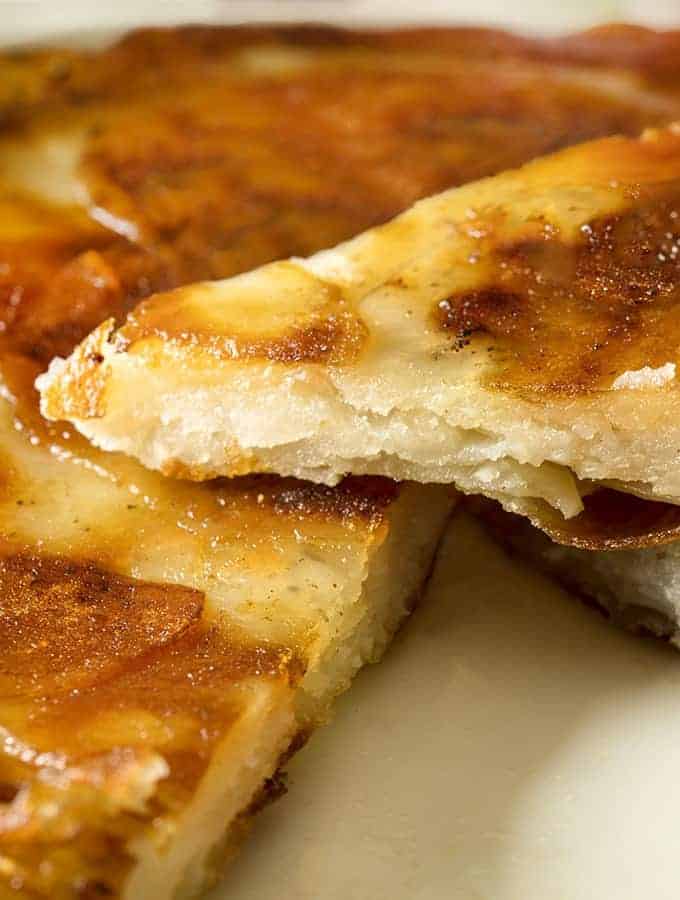
Ready to make something with potatoes in your air fryer other than Air Fried French Fries? This is an easy Potatoes Anna recipe that you can make in your air fryer. Four simple ingredients yield a tasty, elegant dish that is fit for company, but very simple to make.

What Makes Air Fryer Potatoes So Great?
- Easy. Just layer the potatoes and butter to fill the pan and pop them in your air fryer .
- Delicious. All of the flavor of your favorite fried potatoes without all of the extra oil.
- Vegetarian . A great vegetarian side dish to pair with your favorite meal.
- Gluten Free. An allergy-friendly dish your whole family will love.
Are Air Fried Potatoes Good For You?
Well, yes and no. They’re good for you in comparison to other types of potato recipes but they’re not what I would consider “health food.”
The great thing about cooking anything in the air fryer is that it requires less oil than deep frying and cooks at a fraction of the time it takes in your oven.
How To Make Air Fryer Potatoes
Do you think it’s too difficult to make Potatoes Anna or delicious air fryer potatoes? You’ll be pleasantly surprised at how simple they are to make with a few tips and tricks.
Here’s the trick. Use a good quality mandolin like this Swissmar Mandolin That’s simply the best way to get even slices that you can layer into a heat-safe pan that fits in your air fryer. I have tried several different Mandolins, by the way, since this one seemed a bit pricey to me.
What you’re going to do is to cut the potatoes evenly, and use lots and lots of butter. LOTS of butter.
This dish only has four ingredients–potatoes, butter, salt, and pepper. Don’t be skimping on the butter! Use it. Enjoy it. And watch it transform the humble potato into something that is elegant, creamy, and absolutely delicious.
Have some extra potatoes in the pantry and need some more recipes to use them in? Make these savory, cheesy Potatoes Au Grain right in your air fryer, leaving the oven open for the main course!
Tips and Tricks For Making Air Fryer Potatoes
This dish is often referred to as a galette, or a cake because what you want is for the various layers of potato to melt into each other. You also want a deeply browned and crunchy crust. So there are the tips you will need, in order to make the best air fryer potatoes you will ever have.
Do not rinse the potato slices. You need the starch between the layers for the potatoes to stick together.
Do not skimp on the butter. There are only four ingredients in this dish. You NEED that butter. Cut calories somewhere else. It’s definitely worth it to do this Potatoes Anna right and when you have a splurge.
Do not skip the step where I ask you to brown the pan with potatoes on the stovetop first. Listen. You know me. #ruthlessefficiency. If I tell you to follow an additional step, you can bet there’s a reason why. In this case, the reason is simply that you need a good, firm brown crust on the bottom potatoes. The beauty of Potatoes Anna is the combination of a slightly crispy crust, along with the creamy potatoes inside. You can’t get that crust with just the air fryer. Trust me. I tried it.
Take my advice and start with that center slice of potato as you begin layering. It really serves as an anchor point that will make the concentric circles in your Pomme Anna that much more even and symmetrical. You just don’t get the same symmetry when you start placing potatoes from the sides first.
Other than that, making Air Fryer Potatoes Anna is simplicity itself.
Want MoreAir Fryer Recipes?
- Air Fryer Zucchini
- Air Fryer Corn on the Cob
- French Toast
- Keto Shrimp Scampi
- Air Fryer Mushrooms
- Fish Nuggets
If you love this Air Fryer Potatoes recipe as much as I do, make sure you share it with your friends on Facebook and Pinterest so they can try them too.

Air Fryer Potatoes Anna
Equipment
- PHILLIPS AIR FRYER
- 6 inch round baking pan
Ingredients
- ▢ 1 large Potatoes , sliced 1/8 inch thin on a mandolin
- ▢ 4 tablespoons Butter
- ▢ 1 teaspoon Kosher Salt
- ▢ 1 teaspoon Ground Black Pepper
Instructions
Use a mandolin to slice the potatoes as thinly as you can.
Brush the bottom of a heatproof 7 x 2 inch pan with butter. Arrange one slice of potato in the middle. Now create concentric, overlapping circles of potato, making sure you go all the way to the edges of the pan since the potatoes will shrink as they cook.
Place this pan with its single layer of potatoes on the stove top and start heating it on medium. You are doing this to get the bottom layer well browned.
Continue to place layer upon layer of potatoes, continuing in concentric circles, brushing with lots of butter between layers. Press down on the layers so that the bottom will brown well.
Once you are done with the last layer, sprinkle any remaining salt and pepper and pour any remaining butter all over the potatoes.
Cover the pan with foil. Place the pan in the air fryer basket and set the air fryer to to 400°F for 30 minutes. Then remove the foil, and cook at 400°F for another 10 minutes.
Using a spatula, loosen the edges of the potatoes and upturn them on to a serving plate.
Do not rinse the potato slices. You need the starch between the layers for the potatoes to stick together.
Do not skimp on the butter. There are only four ingredients in this dish. You NEED that butter. Cut calories somewhere else.
Do not skip the step where I ask you to brown the pan with potatoes on the stovetop first. Listen. You know me. #ruthlessefficiency. If I tell you to follow an additional step, you can bet there’s a reason why. In this case, the reason is simply that you need a good, firm brown crust on the bottom potatoes. The beauty of Potatoes Anna is the combination of a slightly crispy crust, along with the creamy potatoes inside. You can’t get that crust with just the air fryer. Trust me. I tried it.
Take my advice and start with that center slice of potato as you begin layering. It really serves as an anchor point that will make the concentric circles in your Pomme Anna that much more even and symmetrical. You just don’t get the same symmetry when you start placing potatoes from the sides first.
