
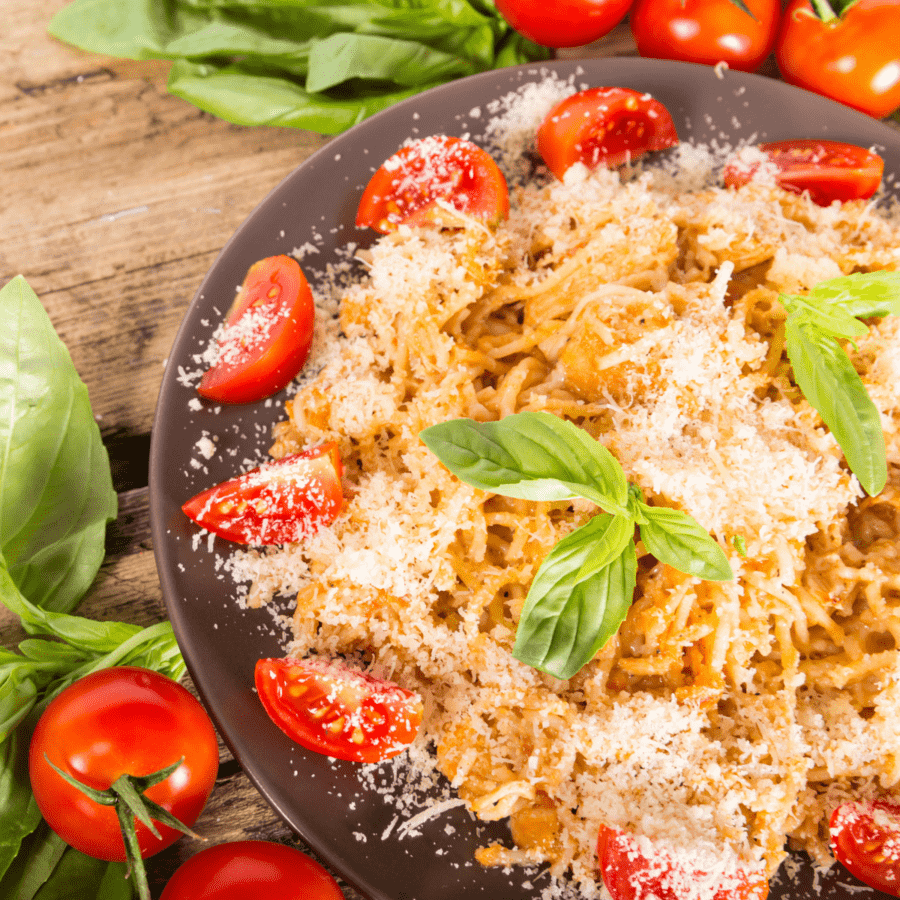
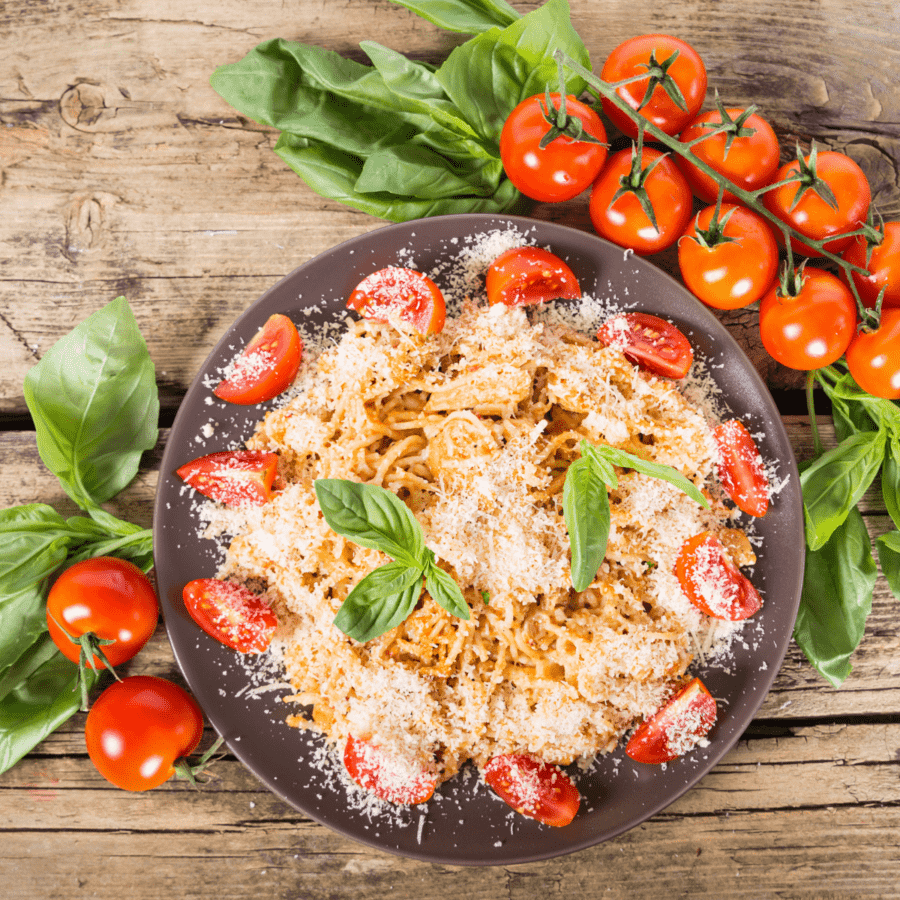
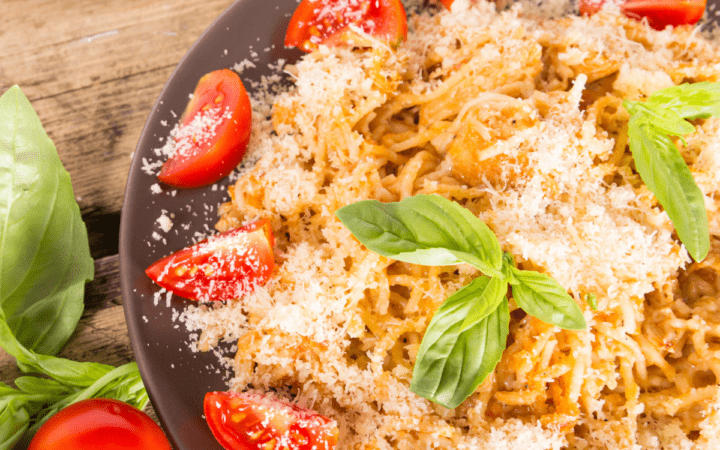
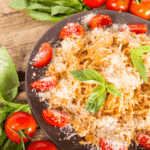
If you’re searching for a delicious and comforting meal that’s not only bursting with flavor but also incredibly easy to prepare, you’ve come to the right place. Our Chicken Spaghetti With Rotel recipe is a true game-changer, delivering a hearty and satisfying dish that’s perfect for family dinners, potlucks, or any time you want to indulge in a savory, one-pot feast.
Why This Will Have You Craving Pasta
- Flavorful and Easy . This Chicken Spaghetti is all about effortless cooking without sacrificing taste. It’s a breeze to make, and it’s perfect for those days when you crave a satisfying meal without the fuss of complex preparation.
- Rich and Hearty . You’ll fall in love with the rich, hearty flavors that meld in this dish. Creamy, cheesy, and with a hint of spice from Rotel tomatoes, it’s the ultimate comfort food.
- Versatile . Our Chicken Spaghetti is a versatile recipe that you can customize to your liking. You can adjust the level of spiciness, add extra veggies, or even experiment with different cheeses to suit your family’s tastes.
- Crowd-Pleaser . This dish is a crowd-pleaser. Whether it’s a potluck, a family gathering, or a weeknight dinner, you can count on everyone enjoying every bite.
- Leftovers are a Bonus . Make a big batch because the leftovers are equally delicious and great for lunch or dinner the next day.
What Is Chicken Spaghetti Made Of?
- Boneless Skinless Chicken Breasts - They are seasoned, cooked, and then sliced into bite-sized pieces to add a savory and meaty element to the pasta.
- Spaghetti- The pasta serves as the base for your dish, providing a filling and comforting component.
- Rotel Diced Tomatoes and Green Chilies - They provide a zesty and slightly tangy taste that enhances the overall flavor profile.
- Heavy Cream - Adds richness and creaminess to your sauce, making it luscious and velvety.
- Chicken broth - Contributes moisture and savory depth to your dish.
- Shredded Cheddar Cheese - Brings a cheesy and slightly tangy taste to your sauce.
- Diced Onions - Provide a savory and aromatic base for your sauce. They add a subtle sweetness and depth of flavor to the overall dish.
- Garlic- Minced garlic infuses the sauce with a rich and savory flavor.
- Chili Powder - It provides a mild level of spiciness and complements the other flavors in the sauce.
- Cumin - Adds earthy and slightly nutty notes to your dish.
- Salt and Pepper- They balance the flavors, enhance the taste of other ingredients, and ensure the dish is perfectly seasoned.
- Cooking Oil- Prevents sticking and ensures even cooking.
- Fresh Cilantro or Parsley- A garnish that adds a pop of color and freshness to your Chicken Spaghetti.
How To Make Chicken Spaghetti With Rotel
- Prepare the Chicken. Season the chicken breasts with salt, pepper, and a pinch of chili powder. In a large skillet, heat a bit of cooking oil over medium-high heat. Cook the chicken breasts until they’re nicely browned and cooked through (usually about 5-7 minutes per side, depending on the thickness). Remove them from the skillet and set them aside.
- Cook the Vegetables and Pasta. In the same skillet, add a bit more oil if needed. Sauté the diced onions and minced garlic until they’re tender and fragrant. While the aromatics are cooking, prepare the pasta according to the package instructions until it’s al dente. Drain and set it aside.
- Make the Sauce. In a large pot, combine the Rotel diced tomatoes and green chilies, heavy cream, chicken broth, cumin, and a pinch of chili powder. Cook over medium heat until the mixture is heated through, stirring occasionally.
- Combine Everything. Slice the cooked chicken into bite-sized pieces. Add the cooked pasta, sliced chicken, and sautéed onions and garlic to the pot with the sauce. Mix everything together until it’s well combined.
- Add Cheese. Stir in the shredded cheddar cheese until it’s fully melted and the sauce becomes creamy and cheesy. Season with salt and pepper to taste. Feel free to adjust the spices according to your preference.
- Serve and Garnish. Once everything is mixed and heated through, serve your Chicken Spaghetti With Rotel in bowls. If desired, garnish with parmesan cheese and chopped fresh cilantro or parsley to add a pop of color and freshness to the dish.
Enjoy your Chicken Spaghetti With Rotel as a delightful and flavorful meal that your family and friends will adore!
Tips And Tricks
Here are some tips and tricks for making delicious chicken spaghetti with Rotel:
- Don’t Overcook the Pasta . Cook the pasta until it’s al dente (firm to the bite) because it will continue to cook when you bake the dish. Overcooked pasta can become mushy.
- Balancing Spice . Adjust the amount of chili powder and cumin to suit your spice preference. You can always add more if you like it hotter or reduce it for a milder dish.
- Mix Well . Make sure to mix the cooked pasta, chicken, Rotel, heavy cream, chicken broth, and spices thoroughly. This ensures even distribution of flavors throughout the dish.
Variations
Chicken spaghetti with Rotel is a versatile dish, and there are several variations you can explore to suit your taste. Here are some ideas:
- Spice It Up . If you love heat, use “Hot” Rotel tomatoes and chilies instead of the mild version for a spicier kick.
- Protein Variations . Replace chicken with cooked ground beef or turkey for a different flavor profile. Use cooked and crumbled Italian sausage for added richness. Go vegetarian by omitting the meat and adding extra vegetables like bell peppers, mushrooms, or spinach.
- Cheese Choices . Experiment with different cheeses. Instead of cheddar, try Monterey Jack, pepper jack, or a blend of cheeses for a unique flavor. Add grated Parmesan or Romano cheese for extra depth of flavor.
What To Serve With It
Chicken spaghetti with Rotel is a flavorful and satisfying dish, but you can enhance your meal by serving it with complementary side dishes. Here are some suggestions:
- Garlic Bread - A classic choice that pairs well with almost any pasta dish. Toasted garlic bread or breadsticks are perfect for sopping up the delicious sauce.
- Salad - A crisp and refreshing salad can balance the richness of the dish. A simple garden salad with a light vinaigrette or a Caesar salad with homemade dressing can be excellent options.
- Steamed Vegetables - Steam some broccoli, asparagus, or green beans for a healthy side that adds color and nutrients to your plate.
How Long Does It Last?
Chicken spaghetti with Rotel, when properly stored in an airtight container in the refrigerator, can typically last for about 3-4 days.
Can You Freeze Chicken Spaghetti?
If you want to extend its shelf life, you can freeze chicken spaghetti. Properly frozen, it can last in the freezer for approximately 2-3 months without significant loss of quality. Be sure to store it in an airtight, freezer-safe container or sealable plastic freezer bags, removing any excess air to prevent freezer burn.
More Pasta Dishes
- Cajun Shrimp Pasta
- Haluski
- Mushroom Pasta with Mascarpone
- Instant Pot Eggplant Pasta
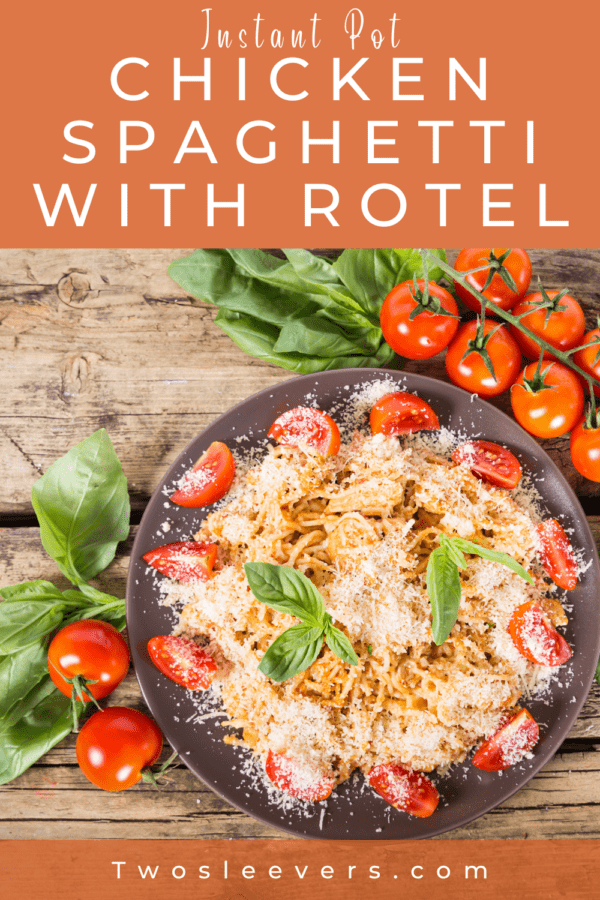
Chicken Spaghetti With Rotel | Instant Pot Rotel Pasta Recipe
Ingredients
- ▢ 8 oz Spaghetti Noodles
- ▢ 10 oz Rotel
- ▢ 1 cup Heavy Cream
- ▢ 1 cup Shredded Cheddar Cheese
- ▢ 1 cup Chicken Broth
- ▢ 1/2 cup Onion , diced
- ▢ 2 cloves Garlic , minced
- ▢ 1/2 tsp Chili Powder
- ▢ 1/2 tsp Cumin
- ▢ 1/2 tsp Salt
- ▢ 1/4 tsp Black Pepper
- ▢ 2 tbsp Olive Oil
- ▢ Parsley , for garnish
Instructions
- Prepare the Chicken. Season the chicken breasts with salt, pepper, and a pinch of chili powder. In a large skillet, heat a bit of cooking oil over medium-high heat. Cook the chicken breasts until they’re nicely browned and cooked through (usually about 5-7 minutes per side, depending on the thickness). Remove them from the skillet and set them aside.
- Cook the Vegetables and Pasta. In the same skillet, add a bit more oil if needed. Sauté the diced onions and minced garlic until they’re tender and fragrant. While the aromatics are cooking, prepare the pasta according to the package instructions until it’s al dente. Drain and set it aside.
- Make the Sauce. In a large pot, combine the Rotel diced tomatoes and green chilies, heavy cream, chicken broth, cumin, and a pinch of chili powder. Cook over medium heat until the mixture is heated through, stirring occasionally.
- Combine Everything. Slice the cooked chicken into bite-sized pieces. Add the cooked pasta, sliced chicken, and sautéed onions and garlic to the pot with the sauce. Mix everything together until it’s well combined.
- Add Cheese. Stir in the shredded cheddar cheese until it’s fully melted and the sauce becomes creamy and cheesy. Season with salt and pepper to taste. Feel free to adjust the spices according to your preference.
- Serve and Garnish. Once everything is mixed and heated through, serve your Chicken Spaghetti With Rotel in bowls. If desired, garnish with parmesan cheese and chopped fresh cilantro or parsley to add a pop of color and freshness to the dish.
Get support & connect with our community on Facebook!
Don’t forget to check out my otherBest-selling Instant Pot Cookbooks!
Indian Instant Pot , Keto Instant Pot, Instant Pot Fast and Easy , Healthy Instant Pot & Vegetarian Instant Pot .


If you already signed up, you should have received an email with a password to give you unlimited access to our FREE Printable Library. The password is case sensitive. Enter it below and get printing!
Password:
Chicken Spaghetti With Rotel | Instant Pot Rotel Pasta Recipe
Ingredients
- 8 oz Spaghetti Noodles
- 10 oz Rotel
- 1 cup Heavy Cream
- 1 cup Shredded Cheddar Cheese
- 1 cup Chicken Broth
- 1/2 cup Onion diced
- 2 cloves Garlic minced
- 1/2 tsp Chili Powder
- 1/2 tsp Cumin
- 1/2 tsp Salt
- 1/4 tsp Black Pepper
- 2 tbsp Olive Oil
- Parsley for garnish
Instructions
- Prepare the Chicken. Season the chicken breasts with salt, pepper, and a pinch of chili powder. In a large skillet, heat a bit of cooking oil over medium-high heat. Cook the chicken breasts until they’re nicely browned and cooked through (usually about 5-7 minutes per side, depending on the thickness). Remove them from the skillet and set them aside.
- Cook the Vegetables and Pasta. In the same skillet, add a bit more oil if needed. Sauté the diced onions and minced garlic until they’re tender and fragrant. While the aromatics are cooking, prepare the pasta according to the package instructions until it’s al dente. Drain and set it aside.
- Make the Sauce. In a large pot, combine the Rotel diced tomatoes and green chilies, heavy cream, chicken broth, cumin, and a pinch of chili powder. Cook over medium heat until the mixture is heated through, stirring occasionally.
- Combine Everything. Slice the cooked chicken into bite-sized pieces. Add the cooked pasta, sliced chicken, and sautéed onions and garlic to the pot with the sauce. Mix everything together until it’s well combined.
- Add Cheese. Stir in the shredded cheddar cheese until it’s fully melted and the sauce becomes creamy and cheesy. Season with salt and pepper to taste. Feel free to adjust the spices according to your preference.
- Serve and Garnish. Once everything is mixed and heated through, serve your Chicken Spaghetti With Rotel in bowls. If desired, garnish with parmesan cheese and chopped fresh cilantro or parsley to add a pop of color and freshness to the dish.
Chicken Spaghetti With Rotel | Instant Pot Rotel Pasta Recipe https://twosleevers.com/chicken-spaghetti-with-rotel/

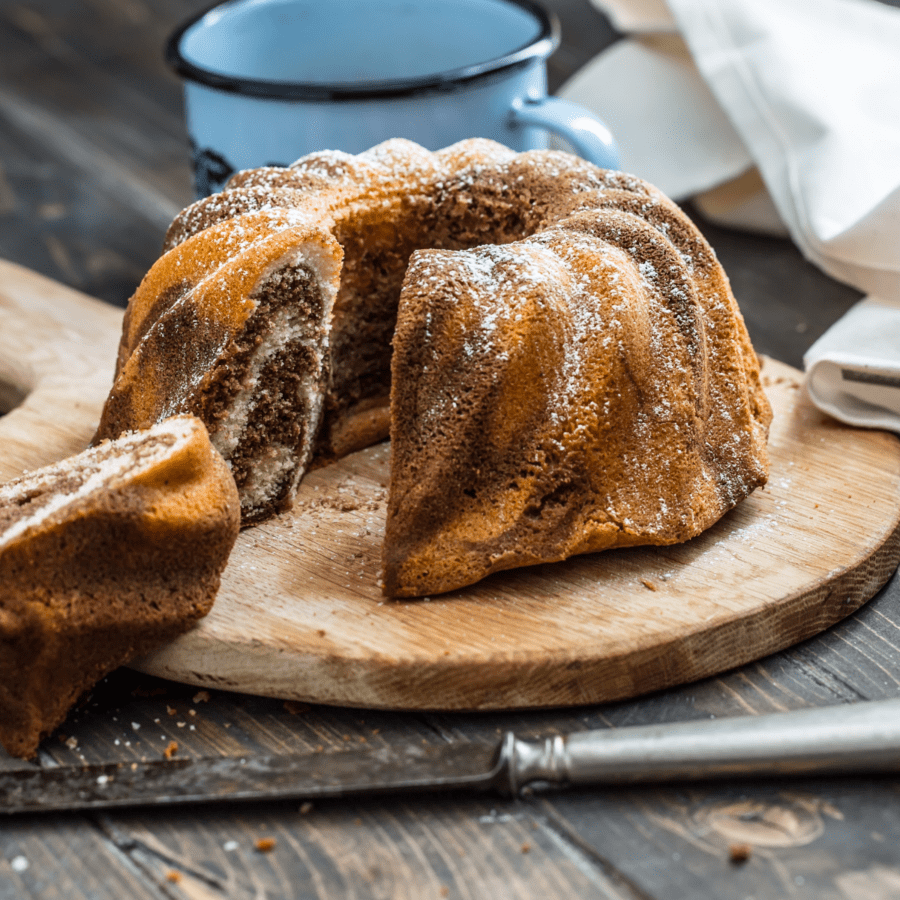
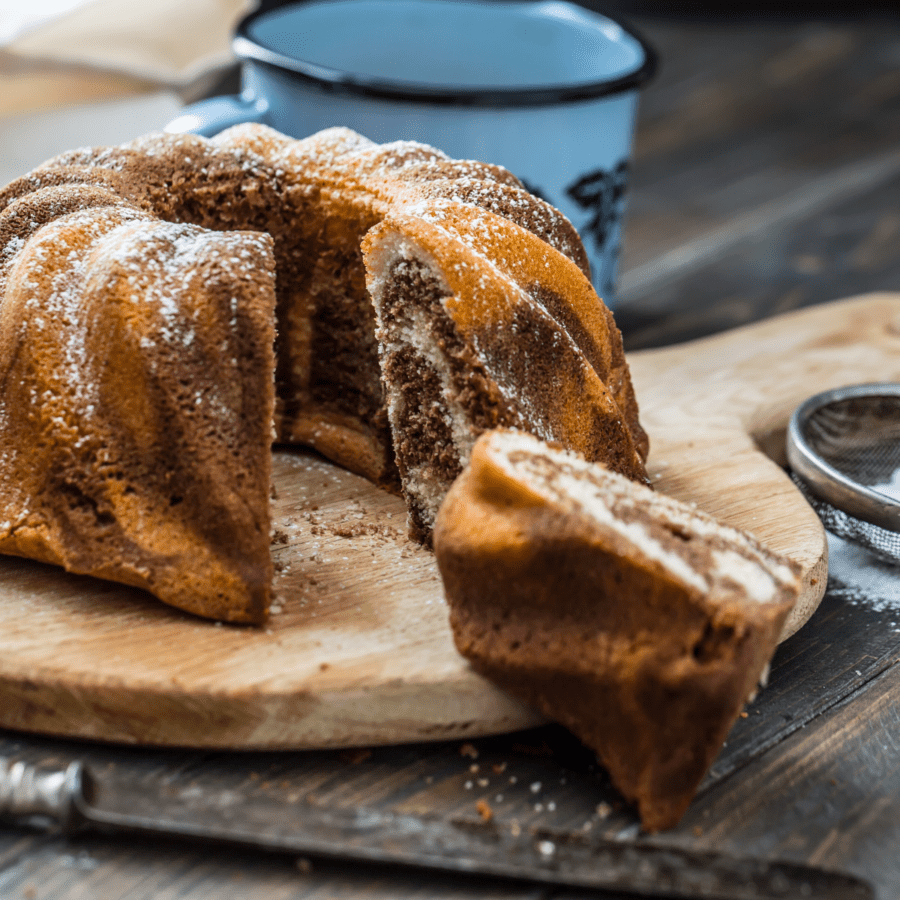
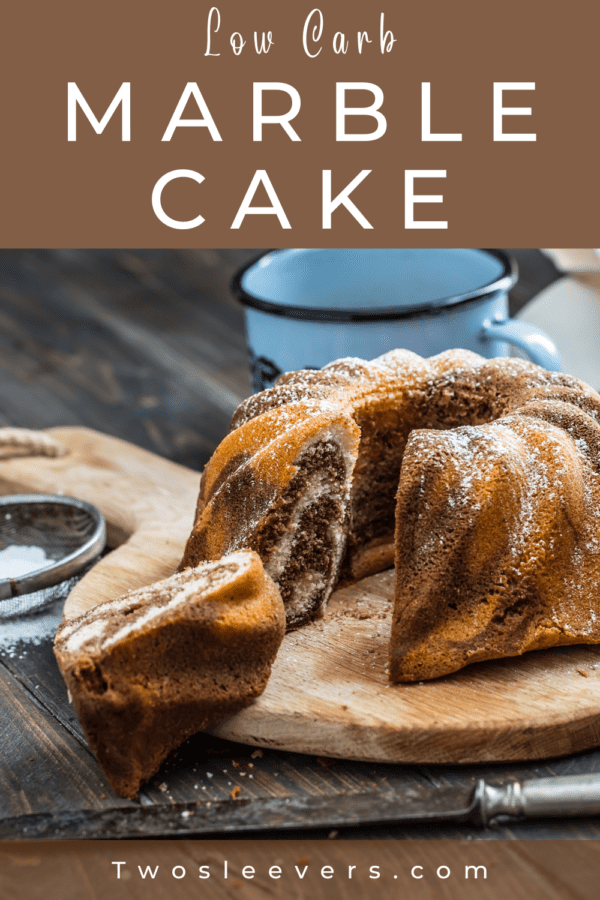
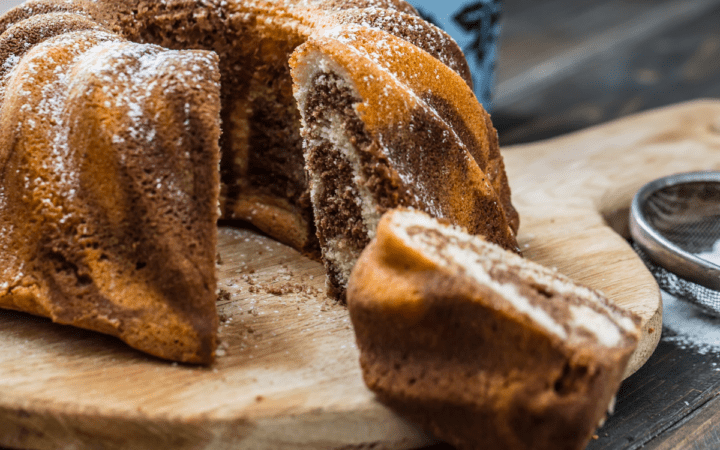
If you’re a fan of indulgent desserts without the guilt, get ready for a treat! Learn how to make a Low Carb Marble Cake that’s not only moist and decadent but also fits into your keto lifestyle. You’ll achieve the perfect balance between rich chocolate and vanilla flavors while keeping it low in carbs.
Why You’ll Love This Cake Recipe
- Fast. Ready in under an hour with simple ingredients that won’t derail your low-carb journey.
- Easy. Mix the batter, create the marble effect, and bake – it’s that simple!
- Low Carb. Minimal carbs per serving!
- Delicious. Enjoy the classic taste of marble cake without the carb overload.
With the convenience of this low carb recipe, you’ve created a dessert that satisfies your sweet tooth while keeping you on track with your dietary goals. Whether you’re hosting a gathering or just treating yourself to a guilt-free indulgence, this marble cake is sure to be a hit.
Why Is It Called Marble Cake?
Marble cake got its name because its appearance resembles that of polished marble, with the light and dark swirls of batter resembling the veins and patterns found in marble.
What Is The Best Way To Marble A Cake?
The marble effect is achieved by swirling light and dark batter together before baking, creating a marbled effect. Here’s how I like to do it to create a distinctly marbled look:
- Divide your batter into separate bowls, one for each color or flavor you will be using.
- Spoon the different colored or flavored batters into the cake pan, in large spoonfuls, randomly or in any pattern.
- Use a butter knife or a skewer to swirl the batter together, creating a marbled effect. Be careful not to over-mix, as this can make the marbling less distinct.
- Tap the pan on the counter a few times to release any air bubbles and to even out the batter.
Ingredients You’ll Need
- Almond Flour- A low-carb alternative to traditional flour, providing a moist texture to the cake.
- Coconut Flour- Adds structure and helps absorb moisture, ensuring a fluffy cake.
- Baking Powder
- Salt
- Unsalted Butter- Enhances the richness of the cake without the carbs found in sugar.
- Erythritol or Your Preferred Keto-Friendly Sweetener- Provides sweetness without the added sugars.
- Vanilla Extract
- Eggs
- Unsweetened Cocoa Powder- For the chocolate swirls. Heavy Cream- Adds moisture and creaminess to the batter.
How To Make Marble Cake
- Preheat the Oven. Preheat your oven to 350°F. Grease a bundt pan generously with butter or cooking spray.
- Prepare the Dry Ingredients . In a bowl, whisk together almond flour, coconut flour, baking powder, and salt. Set aside.
- Cream the Butter and Sweetener. In a large mixing bowl, cream together the softened unsalted butter and Erythritol (or your preferred keto-friendly sweetener) until light and fluffy.
- Add Eggs and Vanilla . Add the eggs one at a time, beating well after each addition. Stir in the vanilla extract.
- Incorporate the Dry Ingredients . Gradually add the dry ingredients to the wet ingredients, mixing well to combine.
- Add Heavy Cream . Pour in the heavy cream and continue to mix until the batter is smooth and well combined.
- Divide the Batter . Divide the batter into two equal portions in separate bowls.
- Chocolate Swirl Mixture . In one bowl, add unsweetened cocoa powder to create the chocolate swirl mixture. Mix until well combined.
- Create the Marble Effect . Spoon dollops of the vanilla and chocolate batters alternately into the prepared bundt pan. Use a knife or skewer to swirl the batters together, creating a marble effect.
- Bake to Perfection . Bake in the preheated oven for 40-45 minutes or until a toothpick inserted into the center comes out clean.
- Cooling . Allow the cake to cool in the pan for 10-15 minutes, then transfer it to a wire rack to cool completely.
- Serve . Once the cake has cooled, slice and serve. Optionally, dust the top with powdered Erythritol or a drizzle of sugar-free chocolate sauce.
Tips And Tricks
Making Low Carb Marble Cake is a delightful experience, and a few tips and tricks can ensure your cake turns out moist and delicious:
- Room Temperature Ingredients - Ensure that your butter and eggs are at room temperature. This helps create a smooth and evenly mixed batter.
- Swirling Technique - Use a knife or skewer to create the marble effect. Don’t overmix; a few swirls are enough to achieve a visually appealing pattern.
- Prevent Over-baking - Keep an eye on the cake towards the end of the baking time to prevent it from drying out. A toothpick inserted into the center should come out clean or with a few moist crumbs.
Variations
If you’re a fan of Low Carb Marble Cake and want to experiment with flavors, here are a few creative variations to try:
- Orange Chocolate Marble - Add orange zest or a splash of orange extract to the chocolate batter for a citrusy twist.
- Mocha Marble - Mix instant coffee or espresso powder into the chocolate batter to create a mocha-flavored marble cake.
- Nutty Marble - Fold chopped nuts, such as walnuts or pecans, into the batter before swirling for added crunch and flavor.
What To Serve With Marble Cake
Low Carb Marble Cake is a versatile dessert that can be enjoyed on its own or paired with various accompaniments. Here are some delicious options to consider:
- Whipped Cream - A dollop of freshly whipped cream adds a light and airy texture to each bite.
- Berries - Serve the cake with a handful of fresh berries, such as strawberries or raspberries, for a burst of freshness.
- Sugar-Free Chocolate Sauce - Drizzle a sugar-free chocolate sauce over individual slices for an extra decadent treat.
- Coffee or Tea - Enjoy a slice of marble cake with your favorite cup of coffee or tea for a delightful afternoon treat.
How Long Does It Last?
Marble cake, like most cakes, is best enjoyed fresh but it can last for a few days if stored properly.
You should store the cake in an airtight container no matter where you choose to store it after baking. At room temperature, you can expect it to last for up to 3 days. If you want the cake to last longer, you can store it in the refrigerator for up to 5 days. Be sure to wrap it well to keep it fresh.
Can You Freeze It?
Yes, you can freeze Low Carb Marble Cake for longer storage. Slice the cake into individual portions, wrap them in plastic wrap or foil, and place them in a freezer-safe container or bag.
Properly stored, the cake can be frozen for up to 2 to 3 months without a significant loss of quality. Thaw the slices in the refrigerator before reheating or serving.
More Craveable Cake Recipes
- Banana Pudding Cake
- Peach Cobbler Dump Cake
- Keto Cream Cheese Pound Cake
- Gluten Free Chocolate Cake
- Instant Pot Apple Cake
- Strawberry Angel Food Cake
Marble Cake | Bundt Swirl Cake Recipe
Ingredients
- ▢ 2 cups Almond Flour
- ▢ 1/2 cup Coconut Flour
- ▢ 1 tbsp Baking Powder
- ▢ 1/2 tsp Kosher Salt
- ▢ 1 cup Unsalted Butter , softened
- ▢ 1 1/2 cups Erythritol
- ▢ 1 tbsp Vanilla Extract
- ▢ 4 Eggs
- ▢ 1/4 cup Heavy Cream
- ▢ 1/4 cup Unsweetened Cocoa Powder
Instructions
- Preheat the Oven. Preheat your oven to 350°F. Grease a bundt pan generously with butter or cooking spray.
- Prepare the Dry Ingredients . In a bowl, whisk together almond flour, coconut flour, baking powder, and salt. Set aside.
- Cream the Butter and Sweetener. In a large mixing bowl, cream together the softened unsalted butter and Erythritol (or your preferred keto-friendly sweetener) until light and fluffy.
- Add Eggs and Vanilla . Add the eggs one at a time, beating well after each addition. Stir in the vanilla extract.
- Incorporate the Dry Ingredients . Gradually add the dry ingredients to the wet ingredients, mixing well to combine.
- Add Heavy Cream . Pour in the heavy cream and continue to mix until the batter is smooth and well combined.
- Divide the Batter . Divide the batter into two equal portions in separate bowls.
- Chocolate Swirl Mixture . In one bowl, add unsweetened cocoa powder to create the chocolate swirl mixture. Mix until well combined.
- Create the Marble Effect . Spoon dollops of the vanilla and chocolate batters alternately into the prepared bundt pan. Use a knife or skewer to swirl the batters together, creating a marble effect.
- Bake to Perfection . Bake in the preheated oven for 40-45 minutes or until a toothpick inserted into the center comes out clean.
- Cooling . Allow the cake to cool in the pan for 10-15 minutes, then transfer it to a wire rack to cool completely.
- Serve . Once the cake has cooled, slice and serve. Optionally, dust the top with powdered Erythritol or a drizzle of sugar-free chocolate sauce.
Get support & connect with our community on Facebook!
Don’t forget to check out my other Ketocookbooks.
Keto Instant Pot, Keto Fat Bombs, Sweets, & Treats , and Easy keto in 30 minutes.

