
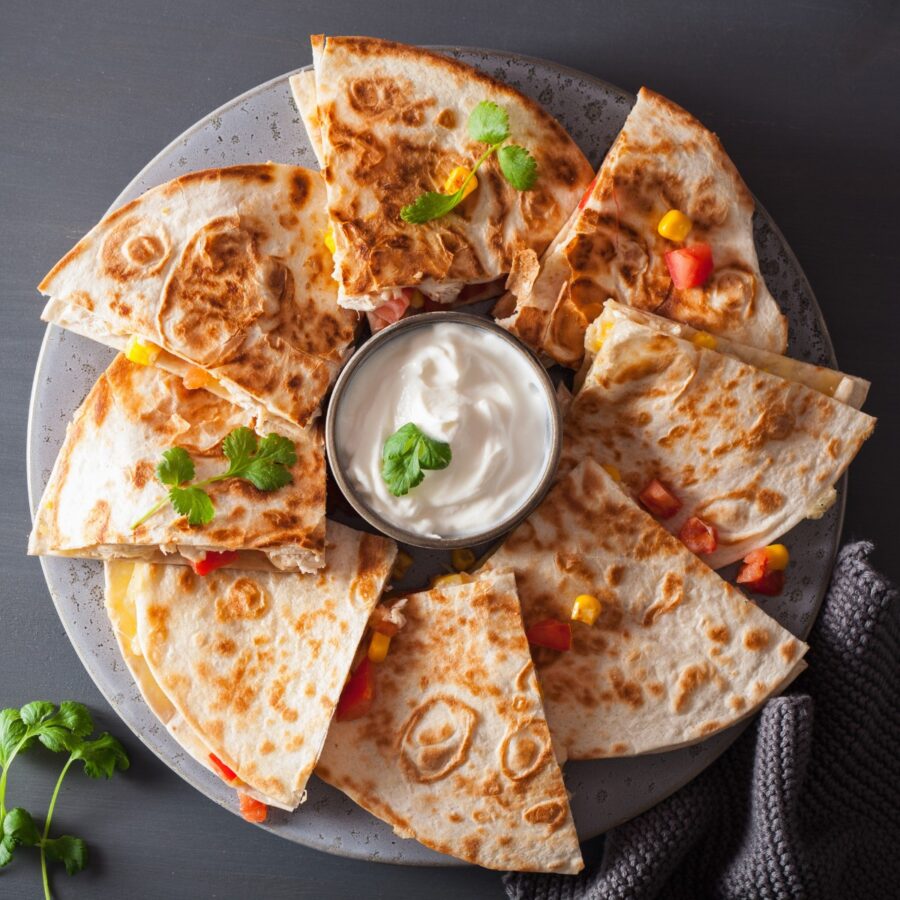
If you’re a fan of savory, melty cheese combined with perfectly seasoned chicken, you’re in for a treat! Learn how to make the best Chicken Quesadillas that are golden crispy on the outside, cheesy and flavorful on the inside. These quesadillas will quickly become a family favorite!
Why You’ll Love This Flavorful Bite
- Quick and Easy. Ready in under 20 minutes, making them ideal for busy weeknights or a quick lunch.
- Customizable. Adjust fillings to suit everyone’s tastes; add veggies, make it spicier, or keep it mild.
- Deliciously Satisfying. Packed with flavor from seasoned chicken, gooey cheese, and perfectly crisp tortillas. With just a few simple ingredients and minimal effort, you’ll have restaurant-quality quesadillas that everyone will love. Perfect for a game day snack, a cozy dinner, or a fun gathering with friends, these quesadillas are guaranteed to please!
What Do Chicken Quesadillas Taste Like?
Chicken Quesadillas are deliciously satisfying! They combine crispy tortillas, savory chicken, melted cheese, and any extra flavors you love.
The balance of crispy, cheesy, and slightly spicy elements creates a meal that’s crowd-pleasing and easy to make at home.
Why Aren’t My Chicken Quesadillas Crispy?
If your chicken quesadillas aren’t turning out crispy, here are some common reasons and tips to help you achieve that perfect golden crunch:
- Too Much Oil or Butter . While a bit of oil or butter can help create a crispy texture, too much will make the tortilla soggy. Use just a small amount, like a teaspoon per quesadilla, and spread it evenly across the pan.
- High Heat . Cooking over too high heat can cause the tortilla to brown too quickly without giving the cheese inside time to melt. Medium to medium-low heat allows the cheese to melt thoroughly while slowly crisping up the tortilla.
- Using Cold Fillings . Cold fillings, especially if they contain water-heavy ingredients like vegetables, can add moisture that prevents crispiness. Pre-cook ingredients or bring fillings closer to room temperature before assembling the quesadilla.
- Skipping the Pressing Step . Gently press down on the quesadilla with a spatula while it cooks to help it brown evenly and make better contact with the pan, creating a crisper texture.
By making these small adjustments, you’ll achieve perfectly crispy chicken quesadillas every time!
Ingredients You’ll Need
- Chicken Breast - Boneless and skinless; you can also use rotisserie chicken for convenience.
- Flour Tortillas - Soft and perfect for a crisp, golden exterior.
- Shredded Cheese - Cheddar or Monterey Jack works well for that gooey, melty texture.
- Olive Oil or Butter - For that golden, crisp finish.
- Seasonings - Salt, pepper, cumin, and chili powder for classic flavor.
- Optional Fillings - Add diced bell peppers, onions, corn or jalapeños for extra texture and flavor.
How To Make Chicken Quesadillas
- Season and Cook the Chicken. Start by seasoning the chicken breasts with salt, pepper, cumin, and chili powder. Heat olive oil in a skillet and cook for 7-9 minutes or until the chicken until golden and fully cooked to an internal temperature of 165F. Once done, shred or chop it into bite-sized pieces. Toss any veggies that may need cooked into the skillet with the chicken and cook for an additional 2-3 minutes until softened.
- Assemble the Quesadillas. Place a tortilla on a flat surface, sprinkle a layer of shredded cheese, followed by the cooked chicken, and any other fillings you prefer. Top with more cheese, then place another tortilla on top.
- Cook Until Crispy. Heat a skillet over medium heat and add a small amount of olive oil or butter. Place the quesadilla in the skillet, cooking for 2-3 minutes per side until the tortilla is golden brown and the cheese is fully melted.
- Slice and Serve. Once cooked, transfer to a cutting board and slice into wedges. Serve with salsa, guacamole, or sour cream.

Tips And Tricks
Making the perfect Chicken Quesadillas is easy, but these tips can help you achieve the best flavor and texture. Here are a few suggestions to make your quesadillas even better:
- Pre-Cook the Chicken. Cooking the chicken before assembling the quesadillas ensures that it’s fully cooked and adds an extra layer of flavor.
- Keep It Crisp. Use just a small amount of oil or butter for a golden, crispy exterior without making the quesadillas greasy.
- Low Heat for Melty Cheese. Cooking over medium to low heat allows the cheese to melt fully without burning the tortillas.
- Add Some Heat. For those who enjoy a kick, add some diced jalapeños or a dash of hot sauce to the filling.
Variations
If you love Chicken Quesadillas but want to try some creative variations, here are some delicious options to consider:
- Buffalo Chicken - Toss the cooked chicken in buffalo sauce and add some blue cheese crumbles for a spicy twist.
- BBQ Chicken - Mix barbecue sauce into the shredded chicken for a tangy, smoky flavor.
- Vegetarian - Replace chicken with sautéed mushrooms, bell peppers, and black beans for a meat-free option.
- Breakfast - Use scrambled eggs, cheese, and bacon or sausage for a delicious breakfast twist on the classic quesadilla.
What To Eat With Chicken Quesadillas
Chicken Quesadillas are a fantastic standalone dish, but they pair beautifully with a variety of sides and dips. Here are a few ideas to complete your meal:
- Salsa and Guacamole - Fresh, tangy salsa and creamy guacamole are perfect for dipping.
- Mexican Rice - Serve with a side of seasoned Mexican rice for a more filling meal.
- Black Beans - A side of black beans adds protein and a nice contrast in texture.
- Chips and Pico de Gallo - Add a crunchy, fresh element to your meal with a side of tortilla chips and pico de gallo.
How Long Do They Last?
Cooked Chicken Quesadillas can be stored in an airtight container in the refrigerator for up to 3 days. For best results, reheat in a skillet to restore the crispy texture.
Can You Freeze Them?
Yes, you can freeze Chicken Quesadillas! Assemble the quesadillas as directed, but don’t cook them. Instead, wrap each quesadilla tightly in plastic wrap and place them in a resealable freezer bag.
When you’re ready to eat your leftovers, cook from frozen in a skillet over low heat until fully heated through and crispy.
More Quick And Easy Meals
- Chorizo Tacos
- Chicken Penne Pasta
- Sticky Chicken Wings
- Slow Cooker Lasagna Soup
- Beef and Bean Enchiladas


Chicken Quesadillas | Homemade Chicken Quesadilla Recipe
Ingredients
- ▢ 1 Chicken Breast
- ▢ 1 flour tortilla
- ▢ 1/2 cup Monterey Jack Cheese , shredded
- ▢ 1/2 tsp Olive Oil
- ▢ Kosher Salt , to taste
- ▢ Ground Black Pepper , to taste
- ▢ 1/4 tsp Cumin
- ▢ 1/4 tsp Chili Powder
- ▢ 1/2 cup Bell Pepper , diced
- ▢ 1/4 cup Onion , diced
- ▢ 1/4 cup Corn
Instructions
- Season and Cook the Chicken. Start by seasoning the chicken breasts with salt, pepper, cumin, and chili powder. Heat olive oil in a skillet and cook for 7-9 minutes or until the chicken until golden and fully cooked to an internal temperature of 165F. Once done, shred or chop it into bite-sized pieces.
- Assemble the Quesadillas. Place a tortilla on a flat surface, sprinkle a layer of shredded cheese, followed by the cooked chicken, and any other fillings you prefer. Top with more cheese, then place another tortilla on top. Toss any veggies that may need cooked into the skillet with the chicken and cook for an additional 2-3 minutes until softened.
- Assemble the Quesadillas. Place a tortilla on a flat surface, sprinkle a layer of shredded cheese, followed by the cooked chicken, and any other fillings you prefer. Top with more cheese, then place another tortilla on top.
- Cook Until Crispy. Heat a skillet over medium heat and add a small amount of olive oil or butter. Place the quesadilla in the skillet, cooking for 2-3 minutes per side until the tortilla is golden brown and the cheese is fully melted.
- Slice and Serve. Once cooked, transfer to a cutting board and slice into wedges. Serve with salsa, guacamole, or sour cream.
Get support & connect with our community on Facebook!
Nutrition

If you already signed up, you should have received an email with a password to give you unlimited access to our FREE Printable Library. The password is case sensitive. Enter it below and get printing!
Password:

Chicken Quesadillas | Homemade Chicken Quesadilla Recipe
Ingredients
- 1 Chicken Breast
- 1 flour tortilla
- 1/2 cup Monterey Jack Cheese shredded
- 1/2 tsp Olive Oil
- Kosher Salt to taste
- Ground Black Pepper to taste
- 1/4 tsp Cumin
- 1/4 tsp Chili Powder
- 1/2 cup Bell Pepper diced
- 1/4 cup Onion diced
- 1/4 cup Corn
Instructions
- Season and Cook the Chicken. Start by seasoning the chicken breasts with salt, pepper, cumin, and chili powder. Heat olive oil in a skillet and cook for 7-9 minutes or until the chicken until golden and fully cooked to an internal temperature of 165F. Once done, shred or chop it into bite-sized pieces.
- Assemble the Quesadillas. Place a tortilla on a flat surface, sprinkle a layer of shredded cheese, followed by the cooked chicken, and any other fillings you prefer. Top with more cheese, then place another tortilla on top. Toss any veggies that may need cooked into the skillet with the chicken and cook for an additional 2-3 minutes until softened.
- Assemble the Quesadillas. Place a tortilla on a flat surface, sprinkle a layer of shredded cheese, followed by the cooked chicken, and any other fillings you prefer. Top with more cheese, then place another tortilla on top.
- Cook Until Crispy. Heat a skillet over medium heat and add a small amount of olive oil or butter. Place the quesadilla in the skillet, cooking for 2-3 minutes per side until the tortilla is golden brown and the cheese is fully melted.
- Slice and Serve. Once cooked, transfer to a cutting board and slice into wedges. Serve with salsa, guacamole, or sour cream.
Chicken Quesadillas | Homemade Chicken Quesadilla Recipe https://twosleevers.com/chicken-quesadillas/

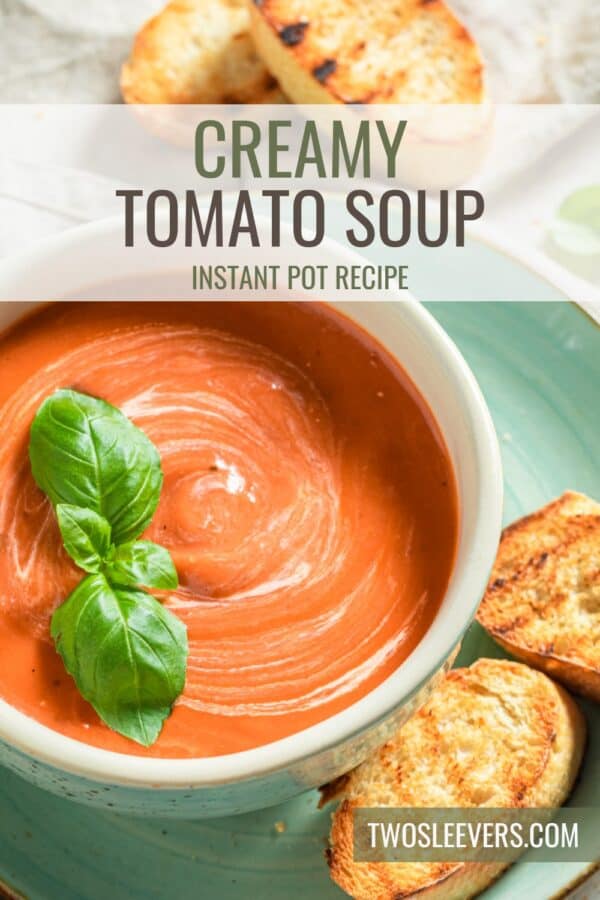
If you’re a fan of comforting, creamy soups with a rich tomato flavor, you’re in for a treat! Learn how to make this quick and delicious Instant Pot Creamy Tomato Soup. With minimal effort, you’ll get a soup that’s velvety smooth and packed with bold, tangy flavors.

Why You’ll Love This Spectacular Soup
- Fast. Ready in under 30 minutes, thanks to the efficiency of the Instant Pot.
- Simple. With just a few basic ingredients, you can create a restaurant-quality soup.
- Comforting. Creamy, rich, and full of fresh tomato flavor, perfect for cold days or cozy nights.
- Customizable. Add a variety of herbs or toppings to make it your own.
This creamy tomato soup will quickly become a family favorite. Whether you’re making it for a weeknight meal or serving it as an elegant starter for guests, it’s always a hit!
What Does Creamy Tomato Soup Taste Like?
Instant Pot Creamy Tomato Soup is a classic comfort food that tastes amazing with minimal effort. It’s thick, smooth, and full of that rich tomato flavor balanced with creaminess that is irresistible.
The pressure cooking method locks in all the flavors, allowing the tomatoes, garlic, and onions to blend into a harmonious dish that tastes like it’s been simmering for hours.
Is Creamy Tomato Soup Healthy?
Yes, creamy tomato soup can be a healthy option depending on how it’s prepared and the ingredients used. Here’s a breakdown of its health benefits and considerations:
- Rich in Nutrients: Tomatoes are the star ingredient and are packed with essential nutrients like vitamin C, vitamin A, potassium, and antioxidants, particularly lycopene, which may help reduce the risk of heart disease and certain cancers.
- Low in Calories: Tomato-based soups tend to be relatively low in calories, making them a great option for those looking to enjoy a filling meal without a high-calorie count.
- Hydrating: The water content in soups, particularly those made with a broth or vegetable base, helps with hydration and supports digestion.
- Rich in Fiber: If made with whole tomatoes, this soup can provide a decent amount of fiber, which is important for digestion and overall gut health.
creamy tomato soup can be a healthy option, especially when made with fresh, wholesome ingredients and by moderating the use of heavy cream or added sugars.
Ingredients You’ll Need
- Tomatoes - Use fresh Roma tomatoes for a classic, rich flavor. You can also use canned tomatoes if you’re short on time.
- Onion - Yellow onions add a hint of sweetness to balance the acidity of the tomatoes.
- Garlic - Fresh garlic gives the soup depth and complexity.
- Olive Oil - Helps sauté the vegetables and adds a layer of richness.
- Vegetable or Chicken Broth - Adds a savory base that enhances the flavor of the soup.
- Heavy Cream - This makes the soup rich and velvety.
- Salt & Pepper - Simple seasonings to bring out the flavors.
- Fresh Basil - For garnish, giving the soup a fresh and aromatic touch.
How To Make Creamy Tomato Soup
- Prepare the Ingredients. Start by chopping your tomatoes, onions, and garlic. If you’re using fresh tomatoes, quarter them, and remove the seeds if you prefer a smoother texture.
- Sauté the Vegetables. Turn your Instant Pot to the sauté function. Add olive oil, and once heated, add the onions and garlic. Cook until softened and fragrant, about 3-4 minutes.
- Add Tomatoes and Broth. Add the chopped tomatoes to the pot along with your vegetable or chicken broth. Stir to combine all ingredients.
- Pressure Cook. Secure the lid on the Instant Pot and set it to “Pressure Cook” on high for 10 minutes. Once finished, allow the pressure to release naturally for 10 minutes before performing a quick release.
- Blend Until Smooth. Using an immersion blender (or transferring the soup to a blender), blend the soup until it’s smooth and creamy. This step gives the soup its luxurious texture.
- Add Cream. Stir in the heavy cream to make the soup rich and velvety. Taste and adjust seasoning with salt and pepper if needed.
- Garnish and Serve. Ladle the soup into bowls and garnish with fresh basil. For an added treat, serve with a side of crusty bread or grilled cheese for dipping.

Tips And Tricks
Making Instant Pot Creamy Tomato Soup is a breeze, but a few extra tips can help elevate it to perfection:
- Use High-Quality Tomatoes. Fresh, ripe tomatoes make all the difference in flavor. If you’re using canned, opt for fire-roasted for added depth.
- Don’t Skip the Sauté. Sautéing the onions and garlic first builds a foundation of flavor for the soup.
- Blending the Soup. For the smoothest consistency, an immersion blender works best. But if you prefer a chunky texture, only blend part of the soup.
- Finish with Fresh Herbs. Adding fresh basil or thyme at the end gives the soup a bright, aromatic finish.
Variations
This creamy tomato soup recipe is versatile and can be customized to suit your taste preferences. Here are some variations to try:
- Spicy- Add red pepper flakes or a dash of cayenne to the soup for a spicy kick.
- Roasted - For added depth, roast your tomatoes in the oven before adding them to the Instant Pot. This brings out a rich, smoky flavor.
- Creamy Tomato Basil- Add fresh basil to the soup during the blending process for a deliciously herby twist.
- Cheesy- Stir in some grated Parmesan or cheddar cheese at the end for a cheesy, indulgent soup.
What To Eat With Creamy Tomato Soup
Creamy tomato soup pairs perfectly with a variety of side dishes. Here are some ideas to elevate your meal:
- Grilled Cheese Sandwich- The ultimate comfort food pairing!
- Croutons - Add a crunchy topping by sprinkling homemade or store-bought croutons over the soup.
- Garlic Bread - Dip slices of garlic bread into the soup for an extra burst of flavor.
- Salad - A fresh, green salad with a tangy vinaigrette balances the richness of the soup.
How Long Does It Last?
Instant Pot Creamy Tomato Soup can be stored in the refrigerator for up to 3 days in an airtight container. The flavors will continue to develop, making it even tastier the next day!
Can You Freeze It?
Yes, you can freeze creamy tomato soup! Allow the soup to cool completely before transferring it to freezer-safe containers or bags. Freeze for up to 3 months.
To reheat, thaw the soup in the refrigerator overnight and then warm it up on the stovetop or in the microwave.
More Easy Instant Pot Recipes
- Instant Pot Butter Chicken
- Creamy Garlic Chicken
- Korean Beef Bowl
- Keto Chili
- Pizza Soup

Creamy Tomato Soup Recipe | Instant Pot Creamy Tomato Soup
Ingredients
- ▢ 8 Roma Tomatoes , chopped
- ▢ 1 Yellow Onion , diced
- ▢ 3 cloves Garlic
- ▢ 1 tbsp Olive Oil
- ▢ 2 cups Vegetable Oil
- ▢ 1/2 cup Heavy Cream
- ▢ 1/2 tsp Kosher Salt
- ▢ 1/4 tsp Ground Black Pepper
- ▢ Fresh Basil , for garnish
Instructions
- Prepare the Ingredients. Start by chopping your tomatoes, onions, and garlic. If you’re using fresh tomatoes, quarter them, and remove the seeds if you prefer a smoother texture.
- Sauté the Vegetables. Turn your Instant Pot to the sauté function. Add olive oil, and once heated, add the onions and garlic. Cook until softened and fragrant, about 3-4 minutes.
- Add Tomatoes and Broth. Add the chopped tomatoes to the pot along with your vegetable or chicken broth. Stir to combine all ingredients.
- Pressure Cook. Secure the lid on the Instant Pot and set it to “Pressure Cook” on high for 10 minutes. Once finished, allow the pressure to release naturally for 10 minutes before performing a quick release.
- Blend Until Smooth. Using an immersion blender (or transferring the soup to a blender), blend the soup until it’s smooth and creamy. This step gives the soup its luxurious texture.
- Add Cream. Stir in the heavy cream to make the soup rich and velvety. Taste and adjust seasoning with salt and pepper if needed.
- Garnish and Serve. Ladle the soup into bowls and garnish with fresh basil. For an added treat, serve with a side of crusty bread or grilled cheese for dipping.
Get support & connect with our community on Facebook!
Nutrition
Don’t forget to check out my otherBest-selling Instant Pot Cookbooks!
Indian Instant Pot , Keto Instant Pot, Instant Pot Fast and Easy , Healthy Instant Pot & Vegetarian Instant Pot .

