These delicious Air Fryer Low Carb Chicken Meatballs are simple and will melt in your mouth! These keto coconut flour meatballs use coconut flour to hold the meatballs together while also adding a ton of flavor.

Why You’ll Love These Chicken Meatballs
I’ve been debating what to do with this ground chicken I had sitting around. The last time I made I very yummy chicken and rice recipe it used a hundred different pots so I was not going to try to recreate that.
I decided to try some Asian-style Low Carb Chicken Meatballs instead and I’m glad I did. Not only were they super easy, they’re also tasty, and low-carb, and the best meatball recipe I’ve tried in a long time.
Do These Taste Like Coconut?
The coconut makes it taste good, but I don’t think it’s essential.
I’m sure you could make these without the unsweetened coconut if you wanted, but the mixture was sticky so I wanted to add a little something to stiffen it.
But once I decided to use a scoop, then the consistency didn’t really matter.
If you aren’t trying to keep carbs low, you might want a little flour mixed in or even better, a little cornstarch which crisps nicely in the air fryer.
How Do You Know When Chicken Meatballs Are Done?
It’s stupid simple. Use a meat thermometer to test the internal temperature. Insert your thermometer to the thickest point in the meatball and they are cooked when they reach 165 degrees Fahrenheit.
Why Are My Meatballs Tough?
Meatballs can become tough if they don’t have enough moisture. Most meatballs use egg to help combat this issue and add moisture. My recipe doesn’t. Make sure you don’t skip the Soy Sauce, Hoisin Sauce, Sriracha Sauce, or Sesame Oil if you don’t want yours to end up tough.
Are Breadcrumbs Necessary In Meatballs?
Absolutely not! Especially if you’re wanting to make them low carb. This recipe uses unsweetened coconut to help bind these low carb meatballs together.
Is It Better To Bake Or Fry Meatballs?
Is neither an option? Only partly kidding. I’m kitchen gadget obsessed. So if I get a chance to use one of my gadgets to make a recipe faster and healthier, I’ll always choose that option. While you can use either method and the meatballs will turn out equally delicious, I chose to use my air fryer for this recipe.
Ingredients You’ll Need
- Ground Chicken - The base of the meatballs. It provides lean protein, a tender texture, and readily absorbs the flavors of the seasonings and sauces.
- Green Scallions - Add a mild onion flavor with freshness and a bit of crunch, helping balance the richness of the chicken.
- Cilantro - Brings brightness and herbaceous flavor, enhancing the overall freshness and adding a subtle citrus-like note.
- Hoisin Sauce - A sweet and savory sauce that gives depth, umami, and a touch of stickiness to the meatballs. It also helps keep them moist.
- Soy Sauce - Adds saltiness, umami, and a savory backbone that ties together the Asian-inspired flavors.
- Sriracha Sauce - Provides gentle heat, tang, and a garlicky kick, balancing the sweetness of hoisin.
- Sesame Oil - Adds a nutty, toasty aroma and depth, enhancing the Asian flavor profile. A little goes a long way.
- Unsweetened Shredded Coconut - Introduces subtle sweetness, nuttiness, and texture. It lightens the meat mixture while giving a unique twist.
- Kosher Salt - Enhances the natural flavors of the chicken and balances the sweetness and acidity from sauces.
- Ground Black Pepper - Adds mild heat and complexity, rounding out the seasoning.
How To Make Air Fryer Chicken Meatballs
- Preheat Air Fryer. Heat the air fryer to 350F.
- Make Meatballs. Mix all ingredients together gently. It makes a wet and sticky mixture.
- Air Fry. Cook at 350F for 10 minutes, flipping once, until they reach an internal temperature of 150-165F.
- Brown. Brown at 400 for 2-3 minutes.
- Serve and Enjoy. Serve your chicken meatballs with your favorite dipping sauce for a quick and easy low carb meal.
Tips And Tricks
Making homemade chicken meatballs in the air fryer is quick and easy, but a few smart tips will help you get the best texture, flavor, and golden-brown finish every time.
- Don’t Overmix the Meat . Stir the ingredients just until combined. Overmixing can make chicken meatballs dense instead of tender.
- Use a Cookie Scoop . A small cookie scoop or spoon keeps the meatballs uniform in size, ensuring even cooking.
- Keep Your Hands Wet . If shaping by hand, lightly wet your palms. This prevents sticking and helps form smooth, round meatballs.
- Check Internal Temperature . Use a meat thermometer and cook until the meatballs reach 165°F for food safety without drying them out.
Variations
One of the best parts about homemade chicken meatballs is how versatile they are. With just a few swaps, you can create entirely new flavors to keep things exciting.
- Turkey - Substitute ground turkey for chicken if that’s what you have on hand. It’s equally lean and works beautifully with the same flavor profile.
- Pork or Beef Blend - For juicier meatballs, mix ground chicken with ground pork or beef. This adds richness and makes the texture less lean.
- Extra Veggie Boost - Fold in finely grated zucchini, carrots, or mushrooms for added moisture and nutrients without changing the flavor much.
- Spicy Kick - Double the sriracha or add a pinch of red pepper flakes for a bolder, spicier bite.
- Sweet and Tangy - Swap the hoisin sauce for teriyaki or sweet chili sauce to give the meatballs a different Asian-inspired twist.
What To Enjoy With Them
These Asian-inspired chicken meatballs are delicious on their own, but pairing them with the right sides can turn them into a complete, satisfying meal.
- Jasmine or Basmati Rice - A classic pairing that soaks up all the savory flavors from the sauces and keeps the meal light and balanced.
- Fried Rice or Cauliflower Rice - For a heartier, low-carb option, serve the meatballs over veggie-packed fried rice or cauliflower rice.
- Noodles - Toss them with rice noodles, soba, or lo mein for a quick noodle bowl with lots of texture.
- Asian Slaw - A crunchy cabbage slaw with sesame dressing adds freshness and contrast to the tender meatballs.
How Long Do They Last?
Chicken meatballs, like most cooked poultry dishes, have a limited shelf life to ensure both freshness and food safety. Once cooked, chicken meatballs will last about 3 to 4 days in the refrigerator when stored in an airtight container.
Be sure to let them cool completely before refrigerating to prevent excess condensation, which can make them soggy.
Can You Freeze Them?
For longer storage, you can freeze chicken meatballs for up to 2 to 3 months. Place them on a baking sheet to freeze individually before transferring them to a freezer-safe bag or container to prevent sticking.
When you’re ready to enjoy them, reheat refrigerated meatballs in the microwave, oven, or air fryer until warmed through, or thaw frozen meatballs overnight in the fridge before reheating.
More Meatball Recipes
- Taco Meatballs - A great twist on Taco Tuesday with these gluten free meatballs .
- Kofta Kababs - Your answer to easy keto meals .
- Low Carb Wontons - Add this to your list of simple keto meals .
- Indian Seekh Kababs - Indian food made easy.
- African Merguez Sausage - Keto meatballs bursting with flavor.
- Cranberry Meatballs - A deliciously sweet appetizer.
- Keto Sausage Balls - They’re like meatballs, but for breakfast. What more could you ask for?

Chicken Meatballs | Air Fryer Chicken Meatball Recipe
Ingredients
- ▢ 1 pound ( 453.59 g ) Ground Chicken
- ▢ 2 ( 2 ) Chopped Green Scallions , finely chopped
- ▢ 1/2 cup ( 8 g ) Cilantro , chopped
- ▢ 1 tablespoon ( 1 tablespoon ) Hoisin Sauce
- ▢ 1 tablespoon ( 1 tablespoon ) Soy Sauce
- ▢ 1 teaspoon ( 1 teaspoon ) Sriracha Sauce
- ▢ 1 teaspoon ( 1 teaspoon ) Sesame Oil
- ▢ 1/4 cup ( 23.25 g ) Unsweetened Shredded Coconut
- ▢ Kosher Salt , to taste
- ▢ Ground Black Pepper , to taste
Instructions
- Heat oven to 350F.
- Mix all ingredients together gently. It makes a wet and sticky mixture.
- Line a cookie sheet with foil . Using a small scoop or a teaspoon, drop rounds of the mixture onto the foil-lined cookie sheet.
- Bake until they reach an internal temperature of 150-160F, about 15-20 minutes.
- Move sheet close to broiler and broil for a few minutes to brown the tops if you like.
Airfryer instructions
- These turned out really nice in an airfryer, the only problem is i could only fit 6-8 at a time and you’d have to do it in batches.
- Cook at 350F for 10 minutes, flipping once, until they reach an internal temperature of 150-165F.
- Brown at 400 for 2-3 minutes.
Get support & connect with our community on Facebook!
Nutrition
And don’t forget to check out my air fryer cookbooks! Every day easy air fryer , and Air Fryer Revolution .


If you already signed up, you should have received an email with a password to give you unlimited access to our FREE Printable Library. The password is case sensitive. Enter it below and get printing!
Password:

Chicken Meatballs | Air Fryer Chicken Meatball Recipe
Ingredients
- 1 pound Ground Chicken
- 2 Chopped Green Scallions finely chopped
- 1/2 cup Cilantro chopped
- 1 tablespoon Hoisin Sauce
- 1 tablespoon Soy Sauce
- 1 teaspoon Sriracha Sauce
- 1 teaspoon Sesame Oil
- 1/4 cup Unsweetened Shredded Coconut
- Kosher Salt to taste
- Ground Black Pepper to taste
Instructions
- Heat oven to 350F.
- Mix all ingredients together gently. It makes a wet and sticky mixture.
- Line a cookie sheet with foil . Using a small scoop or a teaspoon, drop rounds of the mixture onto the foil-lined cookie sheet.
- Bake until they reach an internal temperature of 150-160F, about 15-20 minutes.
- Move sheet close to broiler and broil for a few minutes to brown the tops if you like.
Airfryer instructions
- These turned out really nice in an airfryer, the only problem is i could only fit 6-8 at a time and you’d have to do it in batches.
- Cook at 350F for 10 minutes, flipping once, until they reach an internal temperature of 150-165F.
- Brown at 400 for 2-3 minutes.
Chicken Meatballs | Air Fryer Chicken Meatball Recipe https://twosleevers.com/chicken-coconut-meatballs/
Have you ever thought about making your own homemade Greek yogurt from scratch? If not, you definitely need to give it a try. This recipe is so simple, you’ll wonder why you’ve never made it this way before!
Why Make Yogurt At Home?
When you can buy yogurt at the store for very little money, why bother making your own homemade Greek yogurt ? Here are a few reasons why people like home-made yogurt .
- No additives . No need to add sugar, gum, gelatin, or other additives. Milk. Yogurt starter. Done.
- Choice of milk. Whole milk, 2% milk, skim milk, goat milk, sheeps milk, or even yogurt made with half and half–all of this is possible with Homemade Yogurt.
- Non-dairy milk yogurt. With a little know-how, you can make almond milk yogurt, soy milk yogurt, or coconut milk yogurt. If you want a dairy-free yogurt, making it at home is a fine way to do it.
- Mild or Tart. The longer you let it incubate, the more tart your yogurt. Usually, it sets in about 8 hours. If you let it keep incubating for 12 hours, you will have a very tart yogurt. So you have some control over the final product.
- Flavorings and sweetness of choice. Many people like plain yogurt. Some of us like cardamom yogurt , or Vietnamese sweet yogurt . Some want to use a keto sweetener . When making yogurt at home it’s easy to make any variation you prefer.
- Sense of accomplishment. Honestly, this alone is reason enough to do it. It’s easy. It’s fun. Your kids will love doing it with you.
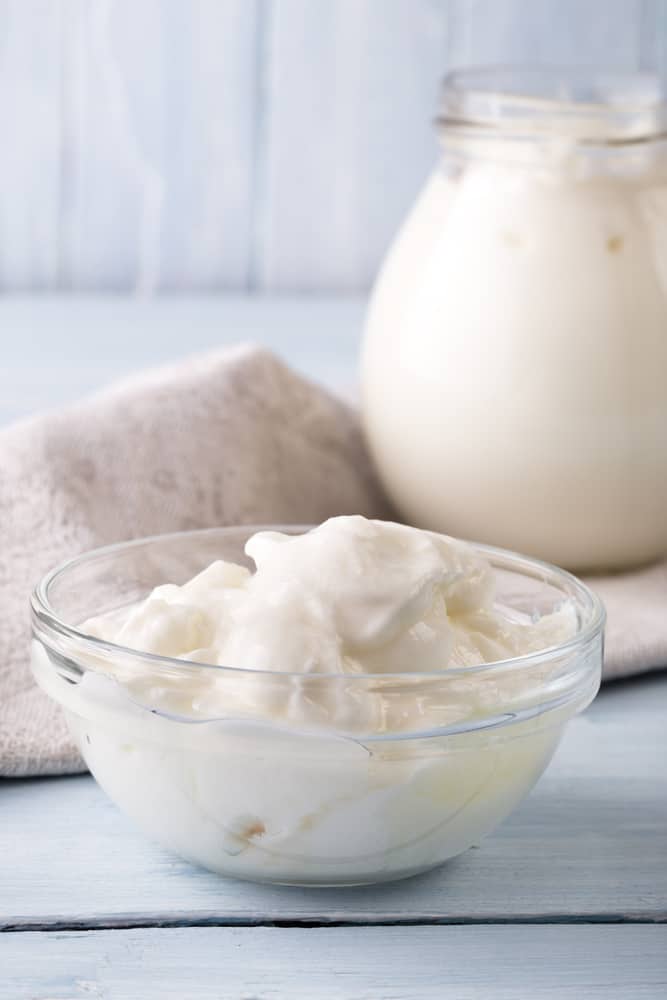
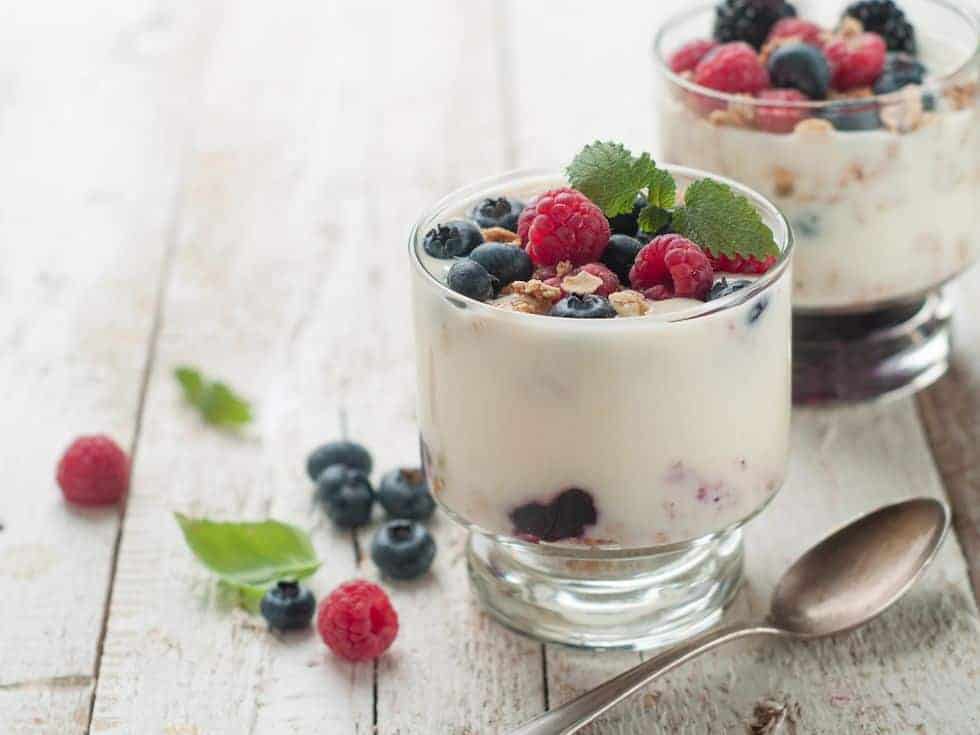
The creamy consistency of homemade Greek yogurt can be used in a variety of recipes, or you can simply add it to your morning smoothie or enjoy it by itself with some fruit, coconut and nuts garnished on top – the possibilities are truly endless!
Different Ways to Make Homemade Yogurt
Here are some of the common ways if which you can make homemade greek yogurt .
- Instant Pot yogurt.
- Slow Cooker yogurt .
- Making yogurt in the Oven
- Making yogurt on the Countertop.
What do all these methods have in common? The basic process is the same.
How to Make Yogurt
- Heat milk for 2 minutes in the microwave and test with your pinky finger. It should feel just ever so slightly warmer than your skin temperature but not burn you. If you’ve ever warmed up milk for a baby bottle, you know how this feels–you want it just a tad warmer than that.
- Don’t overheat. You’re aiming for about 105F-110F on the temperature. Do not use very hot milk to make the best Greek yogurt. Anything over 115F will kill all the starter bacteria and you will have milk, not yogurt when you are done. I know most Instant Pot recipes ask you to heat to 180F on the yogurt setting and then cool it down to 110F. This takes forever! Since I’m all about #ruthlessefficiency I start with UHT milk, which has previously been heated and I skip this step.
- Mix milk with a starter. I like to use 2-3 tablespoons of yogurt for every 8 cups of milk. Pour a little of the warm milk into your starter and mix until it’s well dissolved. (Buy a small 8 oz cup of plain greek yogurt and use this as your starter.) Pour this mixture into your warm milk and mix once again.
- Choose your method. Instant Pot Yogurt. You can use the yogurt setting on your Instant Pot and let the yogurt incubate for 8-12 hours. Slow Cooker Yogurt . You can put the milk into a warmed slow cooker. Turn the slow cooker on low for 30 minutes and then turn it off. Place the milk-yogurt mixture into the crockpot. Wrap it with a towel to retain the heat, and let it sit overnight. Oven 1 . Turn on the starter light in the oven. Place the milk-yogurt mixture in the oven, and let it sit overnight. Oven 2 . Turn oven to 250F. When it reaches that temperature, turn it off. Place the milk-yogurt mixture in the oven, and let it sit overnight. Countertop Yogurt . So you don’t actually need any appliances to make yogurt. I grew up making yogurt every might at home. We simply placed the milk yogurt mixture on the countertop, and we let it incubate overnight. If you live in a cold climate, it may take longer. But at 73F house, your yogurt will set with no help from any appliance.
- Chill . Place the yogurt in the fridge overnight. This helps the yogurt set properly without getting tart, and it gets thicker.
- Drain . Once the yogurt is set, you want to strain out the whey if you want homemade Greek Yogurt, or you can eat it as it is. You can use cheesecloth or a large coffee filter in a large stainless strainer, place the strainer over a bowl and let it drip in the fridge overnight. Alternatively, you can buy a Cuispro Donvier yogurt maker which is easier to clean up. For larger quantities of yogurt, a Eurocuisine Greek Yogurt Maker works better.
- Sweeten or flavor. I find it best to sweeten the yogurt after it is drained so you’re not draining your lovely honey down the drain. You can use honey, agave, or a keto-friendly sweetener. You could also consider adding sugar-free syrups .
And there you have it. Lovely, homemade Greek yogurt.
What is Cold Start Yogurt?
Cold Start Yogurt is when you start with room temperature milk and place it in the Instant Pot. You skip the whole first step of heating the milk, then cooling the milk, so it also referred to as the No-Boil Method.
Does it work? Absolutely it does. When I first shared my cold start method with Fairlife milk 3 years ago , I got a lot of push back on the safety of this method. Since Indians have been making it in this way for centuries, I wasn’t that worried 🙂
The video in this post shows you how to make cold start yogurt in your Instant Pot. Find the directions and video for how to make Instant Pot Hot Start Yogurt here.
Why heat the milk to 180F to make yogurt?
This is the perfect way to make your yogurt if you do not want to deal with boiling milk or straining
Many people believe that you get thicker yogurt from doing this. When you heat milk, the protein in milk denatures. This denatured protein intertwines with the casein from the yogurt, and creates a thicker yogurt.
Here’s what I have found. If you use UHT milk, you can skip the heating step, and still get very thick yogurt. If you use UHT Ultra-Filtered milk like Fairlife, you can get excellent yogurt.
Who knew yogurt could be so complex yet so easy and satisfying at the same time?
How to Make Non-Dairy Yogurt
You can use almond, coconut, cashew, hemp, and soy milk to make non-dairy yogurt.
You will need one of two things to make nondairy yogurt: either a thickener like agar agar or gelatin, and/or lactobacillus tablets.
In my cardamom yogurt recipe , I used gelatin to provide a little thickening.
- Thick Milk. Use the thickest version of the milk you can find. For example, for coconut yogurt use full-fat canned coconut milk, not the watery stuff in cartons.
- Ratios . For every 4 cups of nondairy milk, use 1 tablespoon of gelatin and 1 teaspoon probiotic powder.
- Long ferment cycle. Prepare to allow the yogurt to ferment for 12-18 hours.
- Vegan Starter Kits. Alternatively, you can purchase a vegan yogurt starter kit like this one.
Troubleshooting Homemade Yogurt
Can I be honest? People in the Instant Pot Community WAY overthink yogurt. It’s not complicated! But if you’ve never made it before, you may have a few questions. So here’s your troubleshooting guide with the most commonly asked questions about making yogurt
Your starter was no good or weak. 2. Your milk was too hot. 3. You need to let it ferment longer. You can always add more starter to your milk/yogurt mixture and allow it to ferment again.
It hasn’t yet set. 2. You need to let it chill in the refrigerator. ’ 3. The milk you used was thin. 4. You need to drain it using te methods described above.
You let the yogurt ferment too long. 2. The temperature around the yogurt was too warm, allowing the fermentation to proceed faster than anticipated. 3. Simply add some delicious sweeteners such as agave nectar, sugar or honey! 4. One way to stop yogurt from fermenting as quickly is to break up the curd. Using a spoon, stir up the yogurt. Usually, this stops it from fermenting as fast.
It is not. Ancient cultures have been making yogurt for centuries without access to refrigeration. It was in fact, a way to preserve milk without refrigeration. As long as it too tart, has no mold on it, it’s good to go.
It smells sour, and there’s a lot of extra liquid on top. Sometimes you see a visible, bubbling, and active fermenting. Throw it out.
Homemade yogurt usually lasts for -5 days with no issues. Since it’s not sealed in a plastic container, and since it doesn’t contain preservatives, it doesn’t last quite as long as commercial7 prepared yogurt.
Yup! Blend together 1 cup yogurt, 1 cup fresh berries or other fruit, a tablespoon or two of honey, and about 1/4 cup of milk. Make it a nice pouring consistency, and put into these refillable tubes.
Looking for delicious Yogurt recipes? Look no further!

- Indian Lassi
- Indian Yogurt Soup | Instant Pot Gluten-Free Indian Kadhi
- Borani Persian Yogurt Spinach Dip
- Instant Pot Indian Chicken Curry with Spinach & Yogurt
- Labneh Dip
- Cardamom Yogurt (Noosa style)
- Vietnamese Yogurt
- Mango Frozen Yogurt
- Saffron Scented Yogurt
Making homemade yogurt is fun, easy, delicious and way more nutritious than store-bought yogurt.
You can make homemade Greek yogurt plain or make it sweet, and it can be used in so many different ways. Give it a try the next time you are craving some yogurt - you surely will not be disappointed!

Homemade Greek Yogurt
Equipment
- Instant Pot
- SLOW COOKER CUISINART 3.5 QUART
- WHISK
Ingredients
- ▢ 2 cups ( 488 g ) Whole Milk
- ▢ 2 tablespoons ( 2 tablespoons ) Full-Fat Greek Yogurt , as a starter
Instructions
- Heat the milk for 2 minutes in the microwave and test with your pinky finger. It should feel just ever so slightly warmer than your skin temperature but not burn you. You’re aiming for about 110F on the temperature.
- Pour a little of this warm milk into your starter and mix until it’s well-dissolved.
- Pour this mixture into your warm milk and mix once again.
- Pour this into a mason jar, a ceramic crock, or some other container that is heat proof and will fit into your electric Instant Pot. I use pint size mason jars, but you can also make the yogurt directly in the inner liner.
- Once the yogurt is set, you want to strain out the whey. You can use cheesecloth or a large coffee filter in a large stainless strainer, place the strainer over a bowl and let it drip in the fridge overnight.
- Alternatively, you can buy a Cuispro Donvier yogurt maker which is easier to clean up. For larger quantities of yogurt, a Eurocuisine Greek Yogurt Maker works better.
Instant Pot Duo or Instant Pot Ultra
- Turn on the yogurt button, put your jars into it, set it for 8 hours, place a glass lid on the pot , and let it rest for 8 hours. If you’re using your Instant Pot lid, leave it at venting, not sealing to make the yogurt.
Oven with pilot light
- Just set your pots in there for 8 hours or until the yogurt is set. Once the yogurt is set (usually 8 hours), you want to strain out the whey. You can use cheesecloth or a large coffee filter in a large stainless strainer, place the strainer over a bowl and let it drip in the fridge overnight.
- Alternatively, you can buy a Cuispro Donvier yogurt maker which is easier to clean up. For larger quantities of yogurt, a Eurocuisine Greek Yogurt Maker works better.
Slow Cooker
- Turn your slow cooker on high as you start the yogurt making, and place jars in it, turn it off, and cover with towels or some other insulation so the pot stays warm.
- Once the yogurt is set (usually 8 hours), you want to strain out the whey. You can use cheesecloth or a large coffee filter in a large stainless strainer, place the strainer over a bowl and let it drip in the fridge overnight.
- Alternatively, you can buy a Cuispro Donvier yogurt maker which is easier to clean up. For larger quantities of yogurt, a Eurocuisine Greek Yogurt Maker works better.
Watch The Video
Get support & connect with our community on Facebook!
Nutrition
Don’t forget to check out my otherBest-selling Instant Pot Cookbooks!
Indian Instant Pot , Keto Instant Pot, Instant Pot Fast and Easy , Healthy Instant Pot & Vegetarian Instant Pot .

