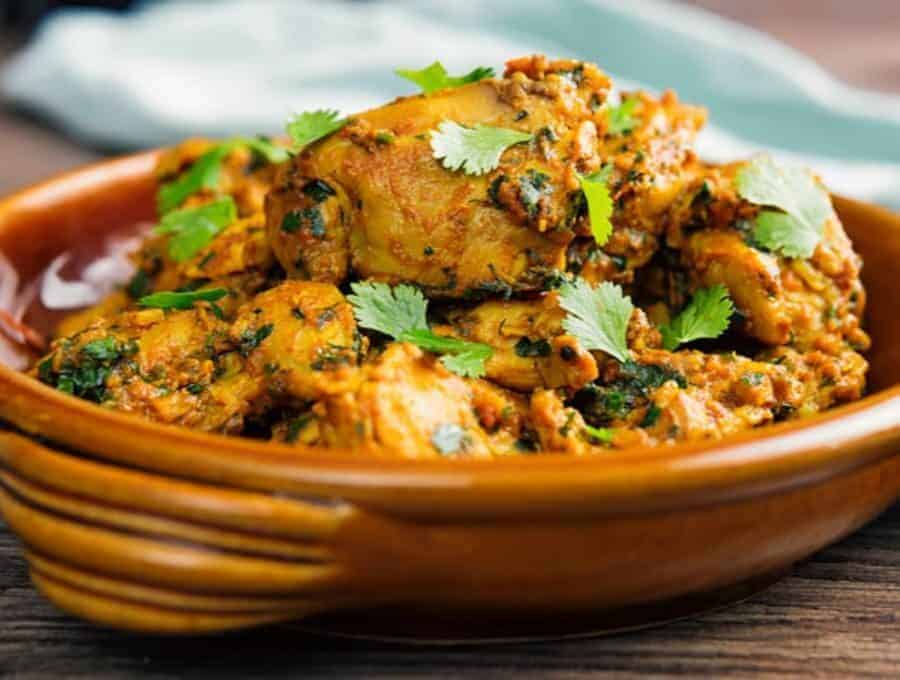
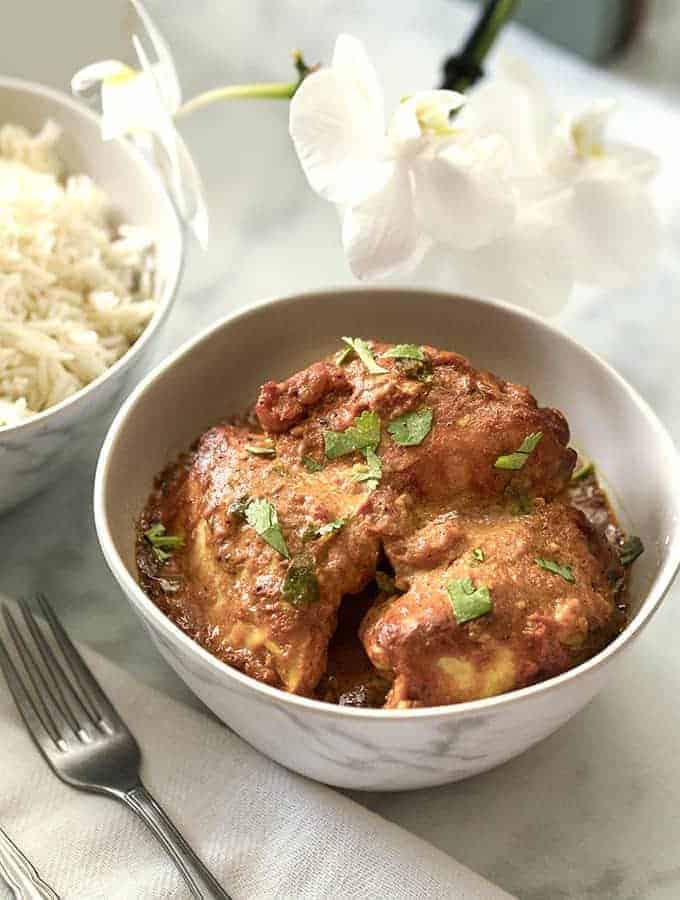
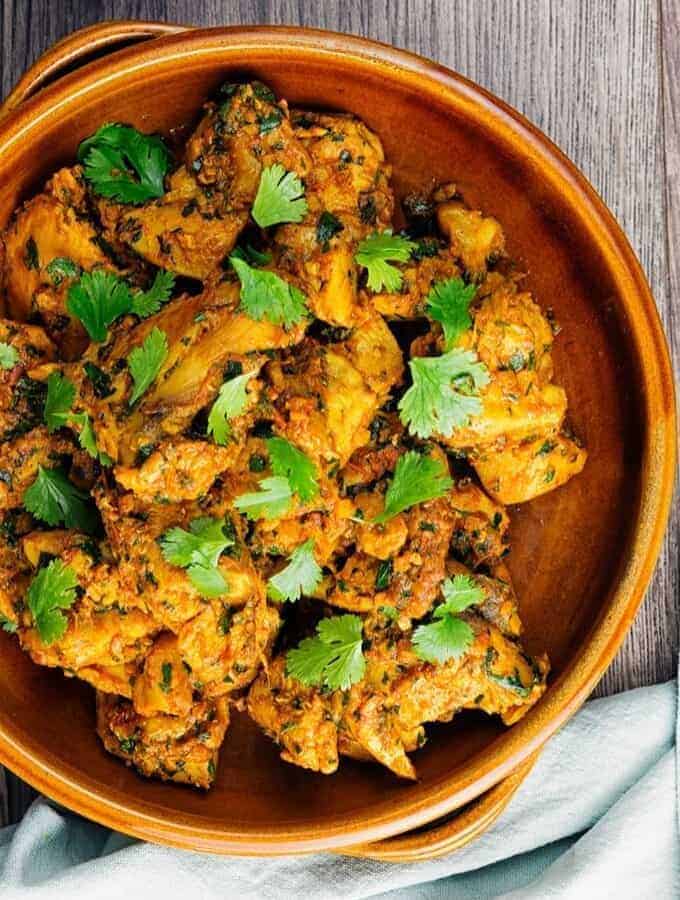
In less than 30 minutes, reproduce an authentic restaurant quality Punjabi Chicken Karahi recipe at home. This low carb Keto chicken recipe is a breeze to make. Make it on the stovetop in a wide pan or wok.
Why You Shouldn’t Pass On This Chicken Karahi Recipe
- Easy. A simple one pot meal ready in 30 minutes .
- Low Carb . Only 2 net carbs per serving.
- Delicious. Absolutely packed with tons of delicious flavor.
- Authentic. A traditional Indian dry curry recipe .
People love Chicken Karahi because it’s an easy, aromatic, and deeply satisfying dish that brings the authentic flavors of South Asia to your table in less than an hour.
What Is A Dry Curry?
For most Indians, a curry is anything that was cooked using water . Imagine our confusion when people tell us they don’t like curry. You don’t like anything that’s been cooked with water?
So we are perfectly capable of making a dry okra dish–and calling it a curry.
A dry chicken curry is called sookhi murgi :
Sookhi = dry and Murgi = chicken.
Of course, if I titled this recipe Keto Low Carb Sookhi Murghi , how many of you would have been searching for it?
Exactly. And I hate for you to miss out on this deliciousness.
Basically, this Chicken Karahi is a great keto chicken recipe that takes almost no time to make, and for those of us who are tired of eating chicken, this doesn’t really taste like chicken all that much thanks to all the other yummy ingredients.
Watch The Video
Ingredients You’ll Need
- 2 tablespoons Oil - Provides the base for sautéing aromatics and spices, helping develop rich flavor while preventing sticking. Traditionally, ghee or neutral oil like canola or avocado oil works best for high-heat cooking.
- 2 tablespoons Ginger - This generous amount of fresh ginger adds a bold, zesty heat and signature karahi aroma. It forms one of the essential “trinity” ingredients (ginger, garlic, and tomatoes) that define the dish’s authentic flavor.
- 1 tablespoon Jalapeño Peppers - Brings in fresh, bright heat that complements the earthy spices. Jalapeños provide a mild but flavorful kick.
- 1.5 pounds Boneless Skinless Chicken Thighs - Chicken thighs stay juicy and tender during high-heat cooking, absorbing the spices and sauce beautifully. Cutting them into smaller pieces ensures faster, even cooking.
- 1 cup Tomatoes -Forms the saucy, tangy base of the karahi. As they cook down, the tomatoes thicken naturally, creating a flavorful coating for the chicken without the need for added cream or water.
- 2 teaspoons Turmeric - Adds a warm, earthy undertone and deep golden color. It also enhances the overall depth of flavor and offers a subtle bitterness that balances the tomato’s acidity.
- 1 teaspoon Garam Masala - A blend of warming spices like cardamom, cinnamon, and cloves that bring complexity and depth to the curry. It gives Chicken Karahi its signature aromatic profile.
- ½–1 teaspoon Cayenne Pepper- Provides adjustable heat to the dish. A little adds warmth, while more can turn it into a fiery, restaurant-style karahi. The spice level is easy to tailor based on preference.
How To Make Chicken Karahi
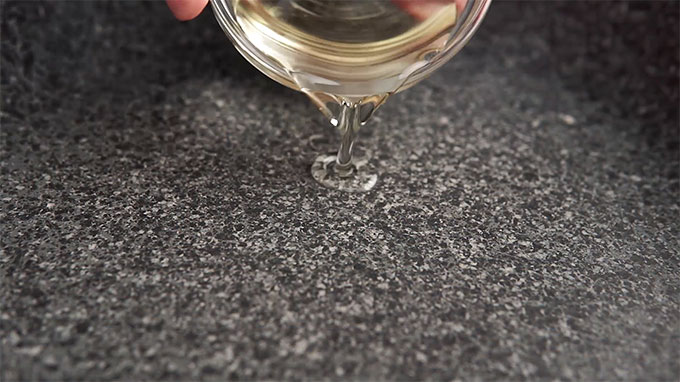
- On the stovetop, heat a nonstick 10-inch pan and when it’s hot, add in the oil. You want a wide saucepan.
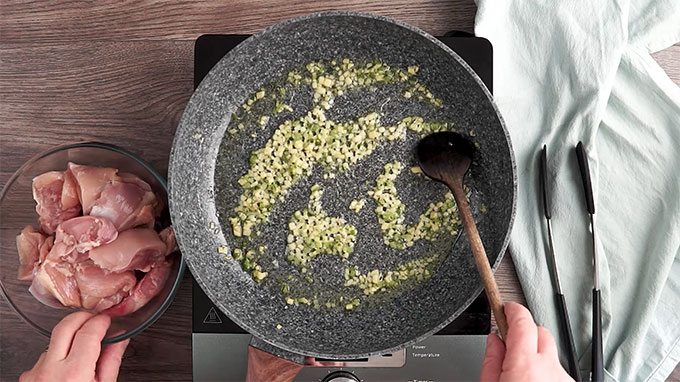
- To the hot oil, add the ginger and jalapeños.
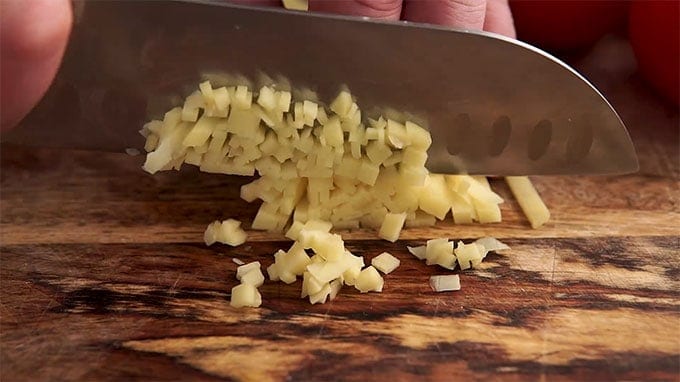
- Note that I cut the ginger quite small. I made coins, then I made matchsticks, then I cut the dice. You want to do this so you don’t get a huge chunk of ginger in any one bite.
- Add the chicken and let the chicken sear on one side and then flip over.
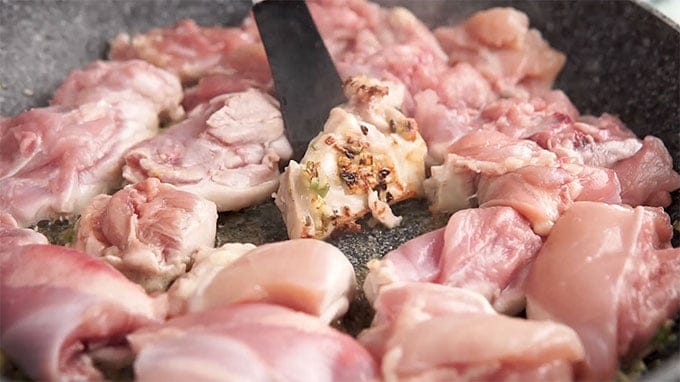
- Add in tomatoes and stir well.
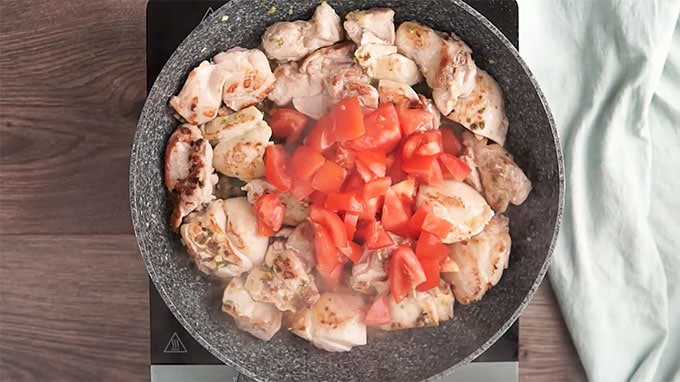
- Add all the spices and stir.
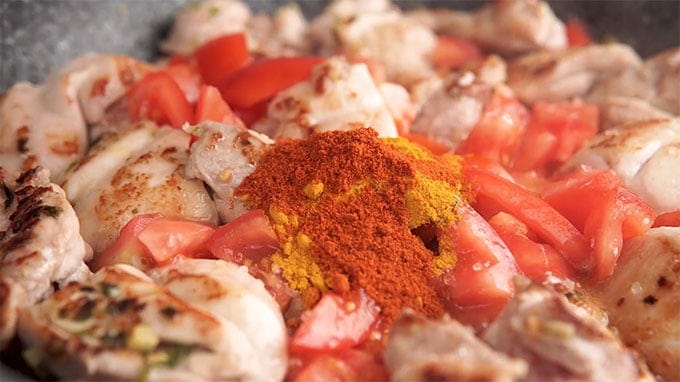
- Now, you’re going to cook this lovely, fragrant mixture until it is all well cooked. Do NOT add water. Do NOT cover.
Stir once in a while. This is the point you’ll be happy you listened to me and used a nonstick pan .
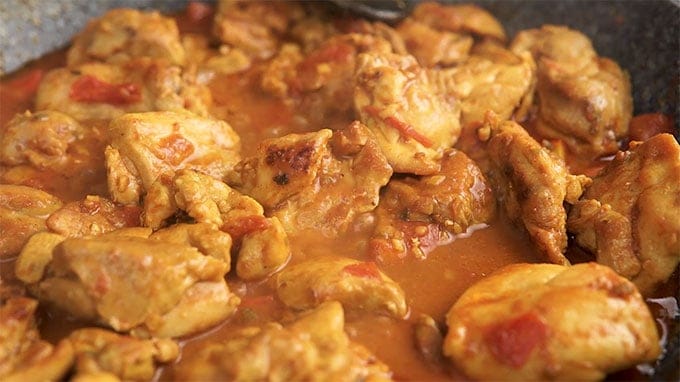
As the chicken and tomatoes cook, you’re going to see the water evaporating, the tomatoes caramelizing and mushing up–and most importantly, the oil separating. Some of this oil is what you added, some of it is what’s being rendered out of any fat that was on the chicken.
By the time the water has mostly or completely evaporated, your chicken will be done. Verify this with a meat thermometer so it is at 165F.
Add all the finishing ingredients and enjoy.
Tips And Tricks
Chicken Karahi is all about bold flavors, quick cooking, and the perfect balance of spice and tang. To get that authentic restaurant-style taste at home, follow these tried-and-true tips:
- Don’t add water. No matter how tempted you become, do NOT add water and do NOT cover the dish while it’s cooking! This is a dry curry and should be treated as such.
- Dice ginger small. Note that I cut the ginger quite small. I made coins, then I made matchsticks, then I cut the dice. You want to do this so you don’t get a huge chunk of ginger in any one bite.
- Try it meat-free. You can make a vegetarian version of this with either Paneer or boiled chickpeas.
- Skip the gadgets. It will be difficult to make this dish in the Instant Pot, as I know several of you will ask. That is to say, you can’t cook it under pressure and get a dry dish. But there’s nothing keeping you from cooking this on Sauté in your Instant Pot Pressure cooker.
Variations
Chicken Karahi is endlessly versatile, and with a few simple tweaks, you can customize it to suit your taste preferences, dietary needs, or available ingredients. Here are some delicious ways to change it up:
- Creamy Chicken Karahi - Stir in ¼ cup of heavy cream or full-fat coconut milk at the end for a milder, richer curry with a velvety texture that balances the spice beautifully.
- Butter Chicken Karahi - Add a tablespoon of butter toward the end of cooking to give the sauce a glossy finish and a subtle buttery flavor.
- Green Karahi (Hari Chicken Karahi) - Blend fresh cilantro, mint, and green chilies into a paste and add it to the curry for a bright, herbaceous twist with vibrant green color.
What To Eat With Chicken Karahi
Chicken Karahi’s bold, spicy, and aromatic flavors pair beautifully with a variety of sides that help balance the heat and soak up the rich tomato-ginger sauce. Whether you prefer traditional accompaniments or lighter options, here are some delicious ideas:
- Naan - The most classic pairing. Soft, fluffy naan is perfect for scooping up every bit of the flavorful sauce.
- Roti or Chapati - Whole wheat flatbreads that make a wholesome and hearty companion to the spicy curry.
- Basmati Rice - A simple side that absorbs the karahi gravy perfectly, letting the flavors shine.
- Raita - A cooling yogurt-based condiment with mint that helps balance the spice.
How Long Does It Last?
Chicken Karahi lasts for about 3 to 4 days when stored properly in an airtight container in the refrigerator. The flavors continue to develop as it sits, often tasting even better the next day.
To reheat, warm it gently on the stovetop over low heat or in the microwave, adding a splash of water if the sauce has thickened.
Can You Freeze It?
For longer storage, you can freeze it for up to 3 months, just let it cool completely before freezing.
When you’re ready to enjoy it, thaw it overnight in the fridge and reheat your chicken until piping hot for the best flavor and texture.
Try These Other Great Indian Recipes
- Make restaurant-quality Instant Pot Butter Chicken from “The Butter Chicken Lady” (that’s me) in under 30 minutes! Join the thousands who have made this very popular recipe !
- Make an authentic Chicken Vindaloo in your Instant Pot or Pressure Cooker in less than an hour! Check out this authentic Chicken Vindaloo Recipe made from scratch with no spice pastes.
- This Indian Kheema Recipe is an easy family-friendly keto dish that’s gluten-free, keto, paleo and done in under 30 minutes!
I absolutely implore you to make this Chicken Karahi recipe , even if you’ve said you don’t like curry in the past, as this recipe just might change your mind! Make sure to share it with your friends on Facebook and Pinterest so they can try it as well!
Chicken Karahi Recipe | Easy Homemade Karahi Chicken
Equipment
- Instant Pot Gem or Greenpan Nonstick Skillet
- Measuring Cups
- CUTTING BOARD
- Good set of Kitchen Knives
- Coffee grinder to make the garam masala
Ingredients
- ▢ 2 tablespoons ( 2 tablespoons ) Oil
- ▢ 2 tablespoons ( 2 tablespoons ) Ginger , (diced ) No really, 2 WHOLE Tablespoons of it #trusturvashi
- ▢ 1 tablespoon ( 1 tablespoon ) Jalapeño Peppers , or serrano pepper, minced
- ▢ 1.5 pounds ( 680.39 g ) boneless skinless chicken thighs , cut into 4 pieces each
- ▢ 1 cup ( 149 g ) tomatoes , chopped
- ▢ 2 teaspoons ( 2 teaspoons ) Turmeric
- ▢ 1 teaspoon ( 1 teaspoon ) Garam Masala
- ▢ 1/2-1 teaspoon ( 0.5 teaspoon ) Cayenne Pepper , okay, I used 2 teaspoons and love it but don’t start there
For Finishing
- ▢ 1/4 cup ( 4 g ) Cilantro , chopped
- ▢ 2 tablespoons ( 2 tablespoons ) Lemon Juice
- ▢ 1 teaspoon ( 1 teaspoon ) Garam Masala
Instructions
- Heat your Instant Pot Gem on sear/Sauté to 400F or on the stovetop, heat a nonstick 10-inch pan and when it’s hot, add in the oil. You want a wide saucepan.
- To the hot oil, add the ginger and jalapeños.
- Note that I cut the ginger quite small. I made coins, then I made matchsticks, then I cut the dice. You want to do this so you don’t get a huge chunk of ginger in any one bite.
- Add the chicken and let the chicken sear on one side and then flip over.
- Add in tomatoes and stir well.
- Add all the spices and stir.
- Now, you’re going to cook this lovely, fragrant mixture until it is all well cooked. Do NOT add water. Do NOT cover.
- Stir once in a while. This is the point you’ll be happy you listened to me and used a nonstick pan or the Gem.
- As the chicken and tomatoes cook, you’re going to see the water evaporating, the tomatoes caramelizing and mushing up–and most importantly, the oil separating.
- Some of this oil is what you added, some of it is what’s being rendered out of any fat that was on the chicken.
- By the time the water has mostly or completely evaporated, your chicken will be done. Verify this with a meat thermometer so it is at 165F.
- Add all the finishing ingredients and have at it!
Watch The Video
- You can make a vegetarian version of this with either Paneer, or with boiled chickpeas
- It will be difficult to make this dish in the Instant Pot as I know several of you will ask. That is to say, you can’t cook it under pressure and get a dry dish. BUT. There’s nothing keeping you from cooking this on Sauté in your Instant Pot Pressure cooker.
Get support & connect with our community on Facebook!
Nutrition
Don’t forget to check out my other Ketocookbooks.
Keto Instant Pot, Keto Fat Bombs, Sweets, & Treats , and Easy keto in 30 minutes.

In less than 30 minutes, reproduce an authentic restaurant quality Punjabi Chicken Karahi recipe at home. This low carb Keto chicken recipe is a breeze to make. Make it on the stovetop in a wide pan or wok.
Why You Shouldn’t Pass On This Chicken Karahi Recipe
- Easy. A simple one pot meal ready in 30 minutes .
- Low Carb . Only 2 net carbs per serving.
- Delicious. Absolutely packed with tons of delicious flavor.
- Authentic. A traditional Indian dry curry recipe .
People love Chicken Karahi because it’s an easy, aromatic, and deeply satisfying dish that brings the authentic flavors of South Asia to your table in less than an hour.
What Is A Dry Curry?
For most Indians, a curry is anything that was cooked using water . Imagine our confusion when people tell us they don’t like curry. You don’t like anything that’s been cooked with water?
So we are perfectly capable of making a dry okra dish–and calling it a curry.
A dry chicken curry is called sookhi murgi :
Sookhi = dry and Murgi = chicken.
Of course, if I titled this recipe Keto Low Carb Sookhi Murghi , how many of you would have been searching for it?
Exactly. And I hate for you to miss out on this deliciousness.
Basically, this Chicken Karahi is a great keto chicken recipe that takes almost no time to make, and for those of us who are tired of eating chicken, this doesn’t really taste like chicken all that much thanks to all the other yummy ingredients.
Watch The Video
Ingredients You’ll Need
- 2 tablespoons Oil - Provides the base for sautéing aromatics and spices, helping develop rich flavor while preventing sticking. Traditionally, ghee or neutral oil like canola or avocado oil works best for high-heat cooking.
- 2 tablespoons Ginger - This generous amount of fresh ginger adds a bold, zesty heat and signature karahi aroma. It forms one of the essential “trinity” ingredients (ginger, garlic, and tomatoes) that define the dish’s authentic flavor.
- 1 tablespoon Jalapeño Peppers - Brings in fresh, bright heat that complements the earthy spices. Jalapeños provide a mild but flavorful kick.
- 1.5 pounds Boneless Skinless Chicken Thighs - Chicken thighs stay juicy and tender during high-heat cooking, absorbing the spices and sauce beautifully. Cutting them into smaller pieces ensures faster, even cooking.
- 1 cup Tomatoes -Forms the saucy, tangy base of the karahi. As they cook down, the tomatoes thicken naturally, creating a flavorful coating for the chicken without the need for added cream or water.
- 2 teaspoons Turmeric - Adds a warm, earthy undertone and deep golden color. It also enhances the overall depth of flavor and offers a subtle bitterness that balances the tomato’s acidity.
- 1 teaspoon Garam Masala - A blend of warming spices like cardamom, cinnamon, and cloves that bring complexity and depth to the curry. It gives Chicken Karahi its signature aromatic profile.
- ½–1 teaspoon Cayenne Pepper- Provides adjustable heat to the dish. A little adds warmth, while more can turn it into a fiery, restaurant-style karahi. The spice level is easy to tailor based on preference.
How To Make Chicken Karahi
- On the stovetop, heat a nonstick 10-inch pan and when it’s hot, add in the oil. You want a wide saucepan.
- To the hot oil, add the ginger and jalapeños.
- Note that I cut the ginger quite small. I made coins, then I made matchsticks, then I cut the dice. You want to do this so you don’t get a huge chunk of ginger in any one bite.
- Add the chicken and let the chicken sear on one side and then flip over.
- Add in tomatoes and stir well.
- Add all the spices and stir.
- Now, you’re going to cook this lovely, fragrant mixture until it is all well cooked. Do NOT add water. Do NOT cover.
Stir once in a while. This is the point you’ll be happy you listened to me and used a nonstick pan .
As the chicken and tomatoes cook, you’re going to see the water evaporating, the tomatoes caramelizing and mushing up–and most importantly, the oil separating. Some of this oil is what you added, some of it is what’s being rendered out of any fat that was on the chicken.
By the time the water has mostly or completely evaporated, your chicken will be done. Verify this with a meat thermometer so it is at 165F.
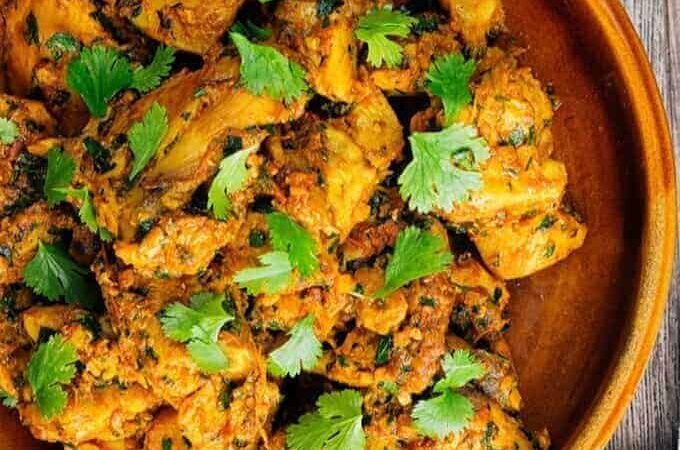
Add all the finishing ingredients and enjoy.
Tips And Tricks
Chicken Karahi is all about bold flavors, quick cooking, and the perfect balance of spice and tang. To get that authentic restaurant-style taste at home, follow these tried-and-true tips:
- Don’t add water. No matter how tempted you become, do NOT add water and do NOT cover the dish while it’s cooking! This is a dry curry and should be treated as such.
- Dice ginger small. Note that I cut the ginger quite small. I made coins, then I made matchsticks, then I cut the dice. You want to do this so you don’t get a huge chunk of ginger in any one bite.
- Try it meat-free. You can make a vegetarian version of this with either Paneer or boiled chickpeas.
- Skip the gadgets. It will be difficult to make this dish in the Instant Pot, as I know several of you will ask. That is to say, you can’t cook it under pressure and get a dry dish. But there’s nothing keeping you from cooking this on Sauté in your Instant Pot Pressure cooker.
Variations
Chicken Karahi is endlessly versatile, and with a few simple tweaks, you can customize it to suit your taste preferences, dietary needs, or available ingredients. Here are some delicious ways to change it up:
- Creamy Chicken Karahi - Stir in ¼ cup of heavy cream or full-fat coconut milk at the end for a milder, richer curry with a velvety texture that balances the spice beautifully.
- Butter Chicken Karahi - Add a tablespoon of butter toward the end of cooking to give the sauce a glossy finish and a subtle buttery flavor.
- Green Karahi (Hari Chicken Karahi) - Blend fresh cilantro, mint, and green chilies into a paste and add it to the curry for a bright, herbaceous twist with vibrant green color.
What To Eat With Chicken Karahi
Chicken Karahi’s bold, spicy, and aromatic flavors pair beautifully with a variety of sides that help balance the heat and soak up the rich tomato-ginger sauce. Whether you prefer traditional accompaniments or lighter options, here are some delicious ideas:
- Naan - The most classic pairing. Soft, fluffy naan is perfect for scooping up every bit of the flavorful sauce.
- Roti or Chapati - Whole wheat flatbreads that make a wholesome and hearty companion to the spicy curry.
- Basmati Rice - A simple side that absorbs the karahi gravy perfectly, letting the flavors shine.
- Raita - A cooling yogurt-based condiment with mint that helps balance the spice.
How Long Does It Last?
Chicken Karahi lasts for about 3 to 4 days when stored properly in an airtight container in the refrigerator. The flavors continue to develop as it sits, often tasting even better the next day.
To reheat, warm it gently on the stovetop over low heat or in the microwave, adding a splash of water if the sauce has thickened.
Can You Freeze It?
For longer storage, you can freeze it for up to 3 months, just let it cool completely before freezing.
When you’re ready to enjoy it, thaw it overnight in the fridge and reheat your chicken until piping hot for the best flavor and texture.
Try These Other Great Indian Recipes
- Make restaurant-quality Instant Pot Butter Chicken from “The Butter Chicken Lady” (that’s me) in under 30 minutes! Join the thousands who have made this very popular recipe !
- Make an authentic Chicken Vindaloo in your Instant Pot or Pressure Cooker in less than an hour! Check out this authentic Chicken Vindaloo Recipe made from scratch with no spice pastes.
- This Indian Kheema Recipe is an easy family-friendly keto dish that’s gluten-free, keto, paleo and done in under 30 minutes!
I absolutely implore you to make this Chicken Karahi recipe , even if you’ve said you don’t like curry in the past, as this recipe just might change your mind! Make sure to share it with your friends on Facebook and Pinterest so they can try it as well!
Chicken Karahi Recipe | Easy Homemade Karahi Chicken
Equipment
- Instant Pot Gem or Greenpan Nonstick Skillet
- Measuring Cups
- CUTTING BOARD
- Good set of Kitchen Knives
- Coffee grinder to make the garam masala
Ingredients
- ▢ 2 tablespoons ( 2 tablespoons ) Oil
- ▢ 2 tablespoons ( 2 tablespoons ) Ginger , (diced ) No really, 2 WHOLE Tablespoons of it #trusturvashi
- ▢ 1 tablespoon ( 1 tablespoon ) Jalapeño Peppers , or serrano pepper, minced
- ▢ 1.5 pounds ( 680.39 g ) boneless skinless chicken thighs , cut into 4 pieces each
- ▢ 1 cup ( 149 g ) tomatoes , chopped
- ▢ 2 teaspoons ( 2 teaspoons ) Turmeric
- ▢ 1 teaspoon ( 1 teaspoon ) Garam Masala
- ▢ 1/2-1 teaspoon ( 0.5 teaspoon ) Cayenne Pepper , okay, I used 2 teaspoons and love it but don’t start there
For Finishing
- ▢ 1/4 cup ( 4 g ) Cilantro , chopped
- ▢ 2 tablespoons ( 2 tablespoons ) Lemon Juice
- ▢ 1 teaspoon ( 1 teaspoon ) Garam Masala
Instructions
- Heat your Instant Pot Gem on sear/Sauté to 400F or on the stovetop, heat a nonstick 10-inch pan and when it’s hot, add in the oil. You want a wide saucepan.
- To the hot oil, add the ginger and jalapeños.
- Note that I cut the ginger quite small. I made coins, then I made matchsticks, then I cut the dice. You want to do this so you don’t get a huge chunk of ginger in any one bite.
- Add the chicken and let the chicken sear on one side and then flip over.
- Add in tomatoes and stir well.
- Add all the spices and stir.
- Now, you’re going to cook this lovely, fragrant mixture until it is all well cooked. Do NOT add water. Do NOT cover.
- Stir once in a while. This is the point you’ll be happy you listened to me and used a nonstick pan or the Gem.
- As the chicken and tomatoes cook, you’re going to see the water evaporating, the tomatoes caramelizing and mushing up–and most importantly, the oil separating.
- Some of this oil is what you added, some of it is what’s being rendered out of any fat that was on the chicken.
- By the time the water has mostly or completely evaporated, your chicken will be done. Verify this with a meat thermometer so it is at 165F.
- Add all the finishing ingredients and have at it!
Watch The Video
- You can make a vegetarian version of this with either Paneer, or with boiled chickpeas
- It will be difficult to make this dish in the Instant Pot as I know several of you will ask. That is to say, you can’t cook it under pressure and get a dry dish. BUT. There’s nothing keeping you from cooking this on Sauté in your Instant Pot Pressure cooker.
Get support & connect with our community on Facebook!
Nutrition
Don’t forget to check out my other Ketocookbooks.
Keto Instant Pot, Keto Fat Bombs, Sweets, & Treats , and Easy keto in 30 minutes.

If you already signed up, you should have received an email with a password to give you unlimited access to our FREE Printable Library. The password is case sensitive. Enter it below and get printing!
Password:

Chicken Karahi Recipe | Easy Homemade Karahi Chicken
Ingredients
- 2 tablespoons Oil
- 2 tablespoons Ginger (diced ) No really, 2 WHOLE Tablespoons of it #trusturvashi
- 1 tablespoon Jalapeño Peppers or serrano pepper, minced
- 1.5 pounds boneless skinless chicken thighs cut into 4 pieces each
- 1 cup tomatoes chopped
- 2 teaspoons Turmeric
- 1 teaspoon Garam Masala
- 1/2-1 teaspoon Cayenne Pepper okay, I used 2 teaspoons and love it but don’t start there
For Finishing
- 1/4 cup Cilantro chopped
- 2 tablespoons Lemon Juice
- 1 teaspoon Garam Masala
Instructions
Heat your Instant Pot Gem on sear/Sauté to 400F or on the stovetop, heat a nonstick 10-inch pan and when it’s hot, add in the oil. You want a wide saucepan.
To the hot oil, add the ginger and jalapeños.
Note that I cut the ginger quite small. I made coins, then I made matchsticks, then I cut the dice. You want to do this so you don’t get a huge chunk of ginger in any one bite.
Add the chicken and let the chicken sear on one side and then flip over.
Add in tomatoes and stir well.
Add all the spices and stir.
Now, you’re going to cook this lovely, fragrant mixture until it is all well cooked. Do NOT add water. Do NOT cover.
Stir once in a while. This is the point you’ll be happy you listened to me and used a nonstick pan or the Gem.
As the chicken and tomatoes cook, you’re going to see the water evaporating, the tomatoes caramelizing and mushing up–and most importantly, the oil separating.
Some of this oil is what you added, some of it is what’s being rendered out of any fat that was on the chicken.
By the time the water has mostly or completely evaporated, your chicken will be done. Verify this with a meat thermometer so it is at 165F.
Add all the finishing ingredients and have at it!
You can make a vegetarian version of this with either Paneer, or with boiled chickpeas
It will be difficult to make this dish in the Instant Pot as I know several of you will ask. That is to say, you can’t cook it under pressure and get a dry dish. BUT. There’s nothing keeping you from cooking this on Sauté in your Instant Pot Pressure cooker.
Chicken Karahi Recipe | Easy Homemade Karahi Chicken https://twosleevers.com/chicken-karahi/
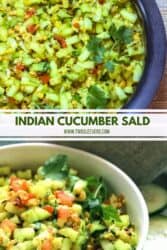
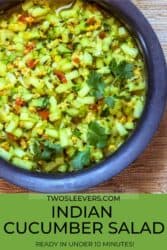
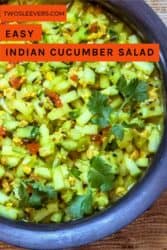
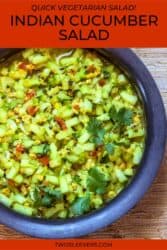
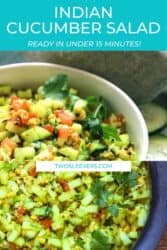
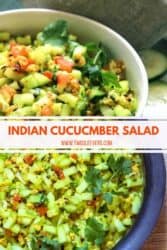
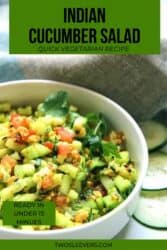
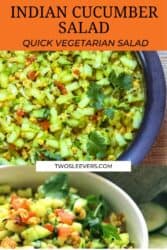
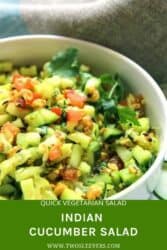
This Indian Cucumber Salad, or Indian Koshimbir, is perfect for summer and requires almost no cooking. A refreshing combination of cucumbers and peanuts with a few additional spices complete this perfect summer salad!
Why You’ll Love This Incredible Indian Dish
What Is Indian Cucumber Salad?
Now this Indian Cucumber Salad, or Kakadi chi Koshimbir, you won’t get outside of an Indian home–well, unless you make it, then you could have it in your home!
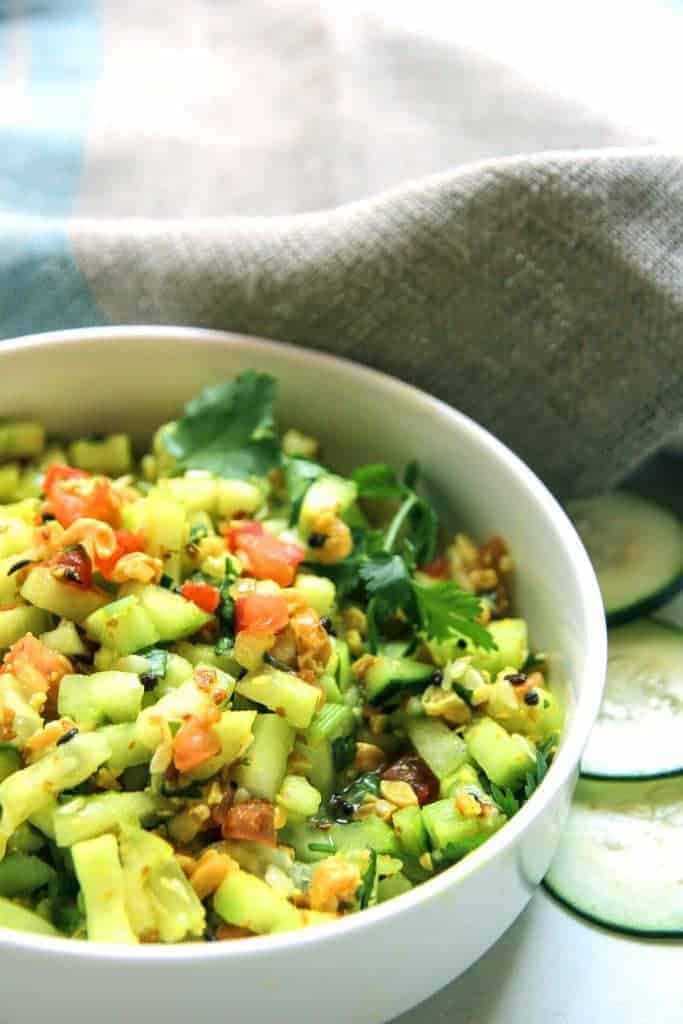
This Indian Cucumber Salad recipe has to be the best cucumber salad recipe (in my opinion). Cucumber, cilantro, peanuts, a few seasonings, and 10 minutes later you’re ready to chow down. This dish is typically Maharashtrian, and it is something that I very much look forward to at mealtimes.
This Indian Cucumber Salad is the perfect dish for hot summer days where you want something simple and fresh. It’s full of fresh, bright flavors that won’t weigh you down or leave you feeling icky. Not to mention it’s gluten free , vegetarian and vegan friendly!
Is It Healthy?
Is This Cucumber Salad Recipe Easy?
I think calling it easy is an understatement.
The only thing that gets cooked at all is the dressing with hot oil and mustard seeds (or cumin seeds). If you want to mix up a few things, you could try mixing it with some Matki Ussal as the two go really well together.
This dish makes a great appetizer , a side to a full meal or even a quick lunch when you need something in a hurry.
Ingredients You’ll Need
- 2 Cucumbers - The refreshing base of the salad, cucumbers add a crisp, hydrating crunch and mild flavor that soaks up the tangy dressing beautifully.
- 1/4 cup Cilantro - Adds a burst of freshness and herbal flavor, balancing the richness of the tempered spices and brightening the overall dish.
- 2 tablespoons Spanish Peanuts - Provide a delightful crunch and nutty contrast to the cool cucumbers, adding both texture and depth of flavor.
- 1 teaspoon Salt - Enhances all the flavors and helps draw out some moisture from the cucumbers, allowing them to absorb the seasoning better.
- 1/2 teaspoon Sugar or Other Sweetener Equivalent - Balances the acidity and spice, adding a subtle hint of sweetness to round out the flavors.
- 1 tablespoon Oil - Used as the base for tempering the spices, which releases their aromas and infuses the salad with authentic Indian flavor.
- 1/4 teaspoon Black Mustard Seeds (or sub Cumin Seeds) - Add earthy, slightly pungent flavor when popped in hot oil, giving the salad its signature Indian flair.
- 1/2 teaspoon Turmeric - Brings warm, earthy flavor and a vibrant golden color, enhancing both the taste and appearance of the salad.
- 1 Lemon - Provides bright acidity that ties everything together, cutting through the richness of the oil and adding a fresh, tangy finish.
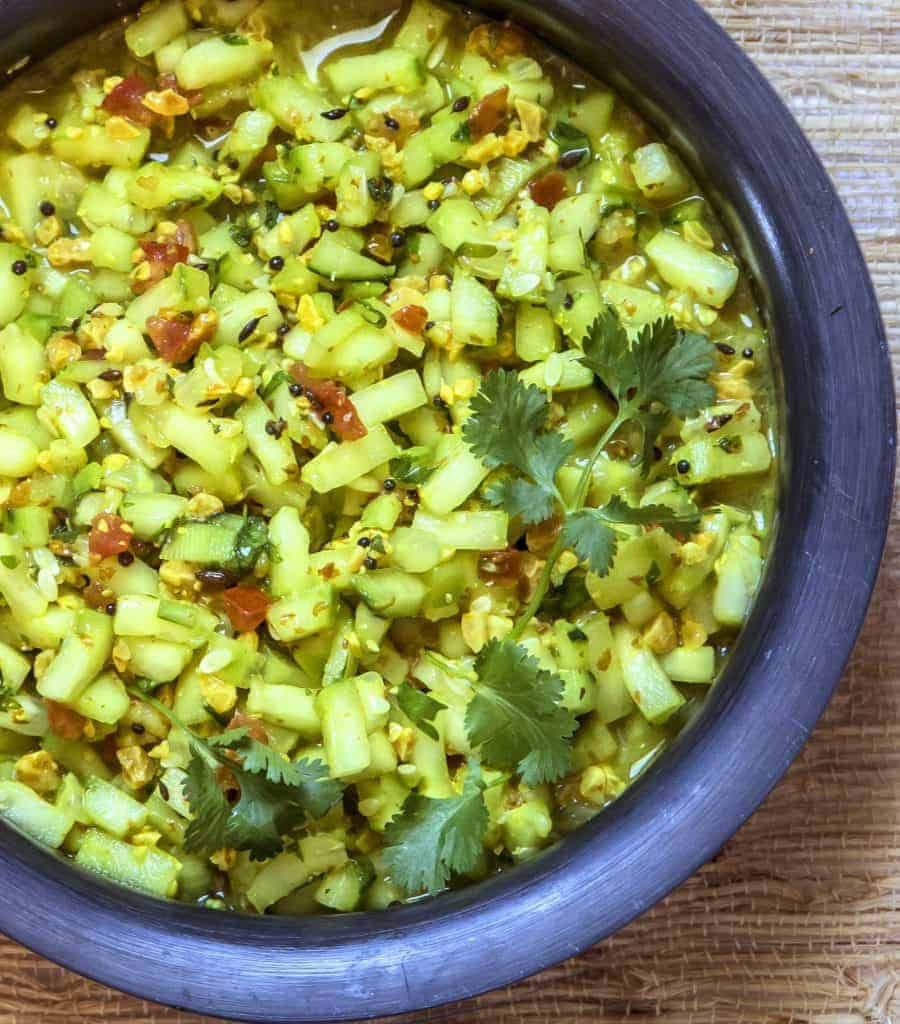
How to Make Indian Cucumber Salad
- Chop up the cucumbers, cilantro, and peanuts into a very fine dice. I use my trusty Kuhn Rikon pull chop which I love and it works on all of these equally well.
- Place into a bowl and season with salt and sugar.
- In the smallest little heat proof bowl you have, heat the oil until it is hot and shimmering.
- Place the mustard and/or cumin seeds and allow them to sputter like popcorn about 30 seconds.
- Add in the turmeric and stir quickly.
- Pour this hot, flavored oil over the cucumbers and mix well.
- Squeeze lemon juice and mix once again and serve.
Tips And Tricks
Making Indian Cucumber Salad is quick, refreshing, and full of vibrant flavor, but a few smart tips can take it from simple to spectacular. Here are some helpful tricks to ensure it turns out perfectly every time:
- Use fresh, firm cucumbers. Choose ones with crisp skin for the best texture and flavor. English or Persian cucumbers work especially well since they have fewer seeds.
- Chop ingredients evenly. Uniform cucumber and peanut pieces ensure balanced texture in every bite.
- Adjust sweetness and acidity. Taste before serving and tweak the lemon juice or sweetener to balance the flavors.
- Let it rest. This simple cucumber salad recipe tastes great the first day but it is ABSOLUTELY AMAZING the next day!
- Use kitchen gadgets. Use this slap chopper for smashing up the peanuts.
Variations
Indian Cucumber Salad is light, flavorful, and endlessly adaptable. You can easily customize it to suit your taste or what’s in your kitchen. Here are some tasty variations to try:
- Yogurt Cucumber Salad- Add a few tablespoons of plain yogurt for a creamy, cooling version that pairs perfectly with spicy curries.
- Spicy Version - Mix in finely chopped green chilies or a pinch of red chili powder for a bold, zesty kick.
- South Indian Twist - Add grated coconut and a few curry leaves to the tempered oil for a fragrant, coastal-style flavor.
- Omit the yogurt- You can sub 1/4 cup of lemon juice instead of yogurt if you prefer. This is good if you’re planning to use it for a picnic or leave it out with no refrigeration for hours.
- Swap out the peanuts - I like to use Red Spanish peanuts but if you can’t find those, just use regular roasted peanuts.
What To Eat With Indian Cucumber Salad
Indian Cucumber Salad is a cool, refreshing side dish that pairs beautifully with a variety of Indian and global meals. Here are some delicious ideas for what to eat with it:
- Grilled Meats - Serve alongside tandoori chicken , chicken tikka , or grilled lamb for a fresh contrast to smoky, spiced flavors.
- Curries- Complements rich dishes like butter chicken , paneer tikka masala, or dal makhani by adding a cooling balance.
- Rice Dishes - Pair with biryani , pulao , or lemon rice to add crunch and brightness to each bite.
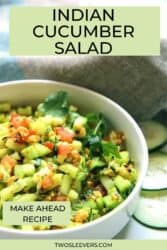
Can It Be Made Ahead?
Yes! I actually recommend making this ahead of time for the best flavor. If you can, this Indian Cucumber Salad is best made a day ahead of time and refrigerated so that the flavors have an opportunity to develop to their full potential.
More Cooling Cucumber Dishes
- This Sichuan Smashed Cucumber Salad borrows from a Xi’an sauce I once had. Cucumbers, garlic, and a secret chili ingredient was what I used to recreate this crisp, cool, tangy, spicy marvel!
- Tabouli Recipe with Hemp Hearts uses hemp hearts instead of bulgur for a delicious, vegetarian keto side dish. It’s also has cucumber, cherry tomatoes, green onions and some seasonings making this a delightfully low carb dish.
- This easy, refreshing Korean Cucumber Salad is a wonderful vegan, keto Korean easy cucumber salad recipe that’s ready to eat within 15 minutes. If you’re looking for a delicious, spicy pickle recipe, this is the one.
- Tzatziki - a fresh sauce that is a perfect topping for my Gyro meat .
- Stuffed Cucumber Bites - a delicious Keto summer salad recipe.

Indian Cucumber Salad Recipe | Easy Indian Salad
Equipment
- Pull Chopper
Ingredients
- ▢ 2 ( 2 ) cucumbers , peeled
- ▢ 1/4 cup ( 4 g ) Cilantro , chopped
- ▢ 2 tablespoons ( 2 tablespoons ) Spanish peanuts , chopped
- ▢ 1 teaspoon ( 1 teaspoon ) Kosher Salt
- ▢ 1/2 teaspoon ( 0.5 teaspoon ) Sugar Or Other Sweetener Equivalent , Optional
- ▢ 1 tablespoon ( 1 tablespoon ) Oil
- ▢ 1/4 teaspoon ( 0.25 teaspoon ) Black Mustard Seeds , or sub cumin seeds
- ▢ 1/2 teaspoon ( 0.5 teaspoon ) Turmeric
- ▢ 1 ( 1 ) Lemon , juiced
Instructions
Chop up the cucumbers, cilantro, and peanuts into a very fine dice. I use my trusty Kuhn Rikon pull chop which I love and it works on all of these equally well.
Place into a bowl and season with salt and sugar.
In the smallest little heat proof bowl you have, heat the oil until it is hot and shimmering.
Place the mustard and/or cumin seeds and allow them to sputter like popcorn about 30 seconds.
Add in the turmeric and stir quickly.
Pour this hot, flavored oil over the cucumbers and mix well.
Squeeze lemon juice and mix once again and serve.
This salad tastes great the first day but it is ABSOLUTELY AMAZING the next day!
You can sub 1/4 cup of lemon juice instead of yogurt if you prefer. This is good if you’re planning to use it for a picnic or leave it out with no refrigeration for hours.
Use this slap chopper for smashing up the peanuts.
I like to use Red Spanish peanuts but if you can’t find those, just use regular roasted peanuts.
If you’re not sure how to do the hot oil technique watch this video to see how I did it for the cabbage slaw.
