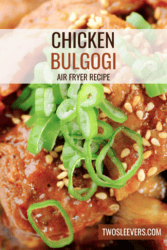
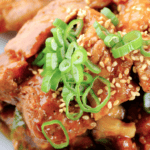
Spice up your dinner routine with this delicious Air Fryer Chicken Bulgogi! This recipe transforms simple ingredients into a mouth-watering dish with just the right balance of sweet and savory flavors. Dive into the ultimate combination of ease and taste with this foolproof method.
Why You’ll Love This Amazing Air Fryer Recipe
- Quick. Ready in just 30 minutes from start to finish.
- Effortless. Minimal preparation for a no-fuss cooking experience.
- Incredibly Tasty. The savory and slightly sweet bulgogi marinade infuses the chicken with rich, deep flavors.
With the convenience of the air fryer, you’ll achieve perfectly cooked, juicy chicken without the need for excessive oil, making it a healthier option that doesn’t sacrifice taste.
What Does Bulgogi Taste Like?
Bulgogi is a delightful combination of flavors that make it a unique and popular dish in Korean cuisine.
The interplay of sweet, savory, and spicy elements, along with the aromatic and nutty notes, makes bulgogi an irresistibly delicious experience.
What Is Chicken Bulgogi Made Of?
- Chicken Thighs - The main protein of the dish. Chicken thighs are preferred for their juiciness and rich flavor. They remain tender and moist during cooking, making them ideal for bulgogi.
- Soy Sauce - Acts as the base of the marinade, providing a salty, umami-rich flavor.
- Brown Sugar - Adds sweetness to balance the saltiness of the soy sauce and the heat from the gochujang.
- Sesame Oil - Adds a nutty, aromatic flavor to the marinade.
- Garlic - Provides a pungent, savory flavor that enhances the marinade.
- Ginger - Adds a zesty, slightly spicy flavor that complements the garlic and balances the sweetness of the brown sugar. Ginger also helps to tenderize the chicken.
- Gochujang - Provides heat and a deep, complex flavor to the marinade. Gochujang is a staple in Korean cuisine, known for its spicy, sweet, and savory taste. It adds a distinctive kick to the bulgogi.
- Rice Vinegar - Adds a subtle tanginess that balances the richness of the soy sauce and sesame oil.
- Green Onions - Add a fresh, slightly sharp flavor and a bit of crunch, enhancing the texture and taste of the finished dish.
- Sesame Seeds - Used as a garnish to add a subtle nutty flavor and a slight crunch.
Each ingredient in Air Fryer Chicken Bulgogi contributes to creating a well-balanced, flavorful, and authentic Korean dish. The combination of sweet, savory, spicy, and tangy elements makes this recipe truly special.
How To Make Chicken Bulgogi
- Prepare the Marinade. In a bowl, combine soy sauce, brown sugar, sesame oil, minced garlic, grated ginger, gochujang, and rice vinegar. Mix well until the sugar is dissolved.
- Marinate the Chicken. Cut the chicken thighs into bite-sized pieces. Add the chicken to the marinade, ensuring each piece is well-coated. Cover and refrigerate for at least 20 minutes.
- Preheat the Air Fryer. Preheat your air fryer to 375°F.
- Air Fry the Chicken. Place the marinated chicken pieces in the air fryer basket in a single layer. Cook for 10 minutes, then shake the basket or flip the chicken pieces. Cook for an additional 8-10 minutes, or until the chicken is cooked through and slightly caramelized.
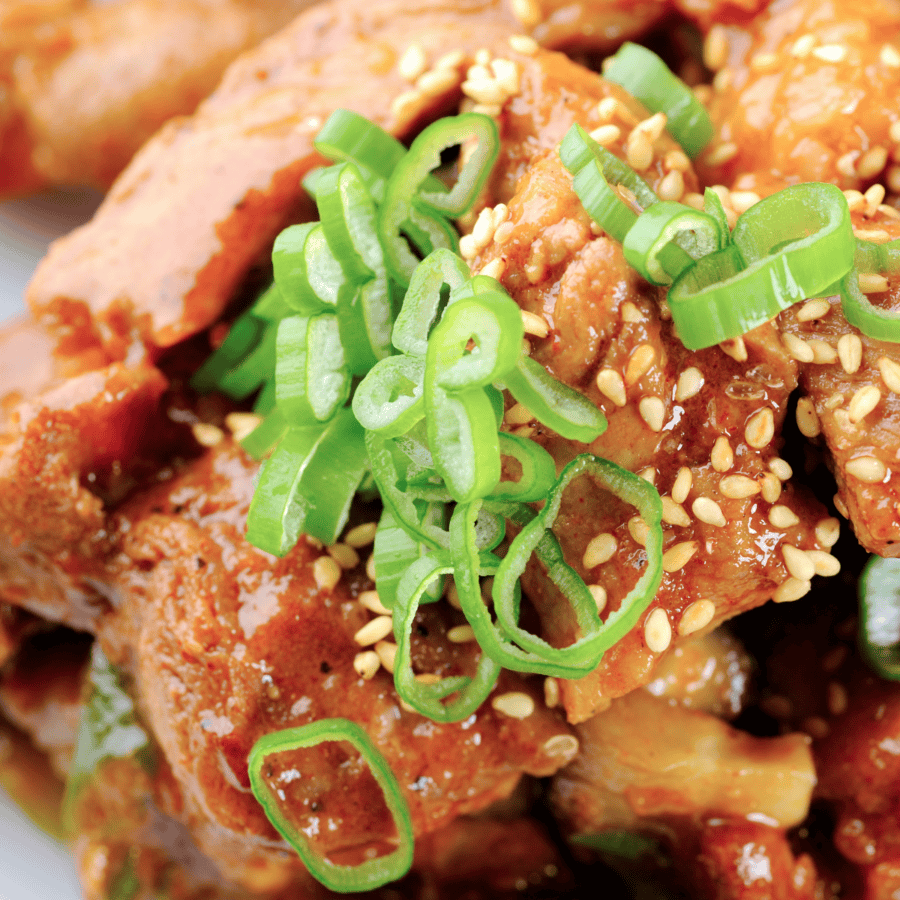
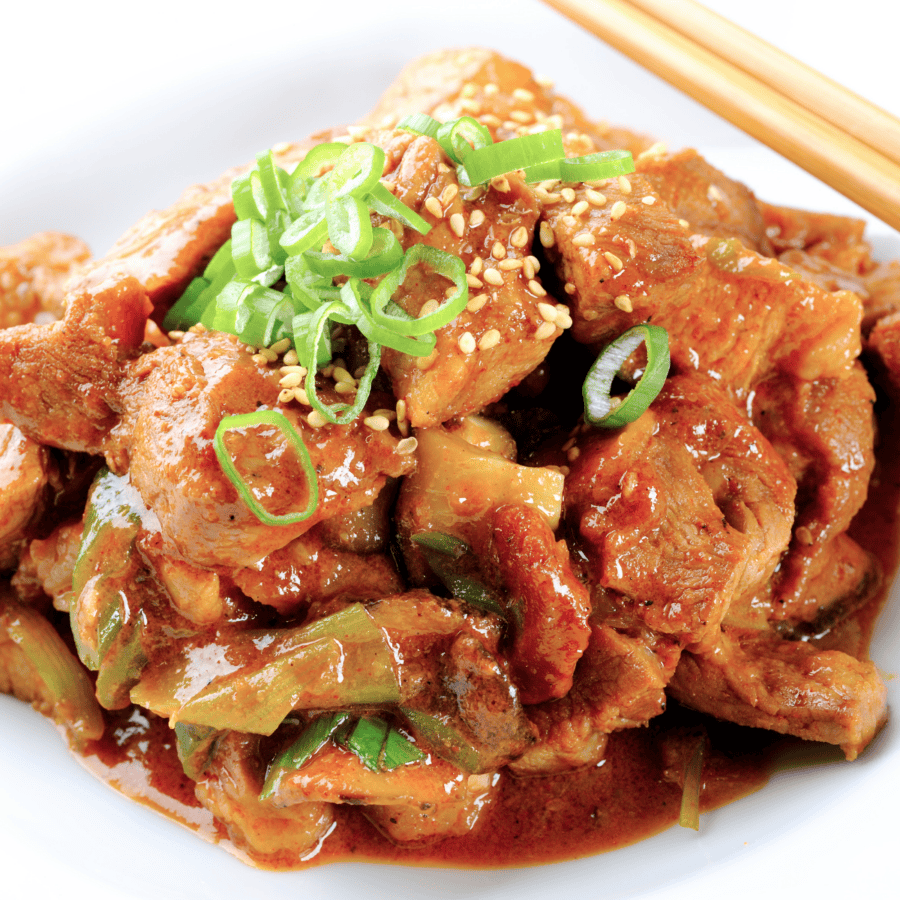
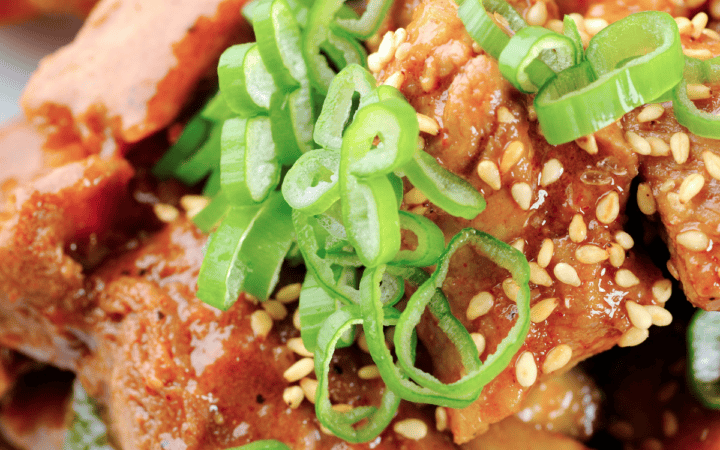
- Serve. Transfer the cooked chicken bulgogi to a serving platter. Garnish with sliced green onions and sesame seeds. Serve hot with steamed rice or lettuce wraps.
Tips And Tricks
Making delicious Air Fryer Chicken Bulgogi involves more than just the right ingredients; it’s about technique and a few kitchen tricks to ensure it turns out flavorful and satisfying. Here’s a comprehensive guide to perfecting it:
- Use Fresh Ingredients. Fresh garlic, ginger, and green onions make a significant difference in flavor.
- Marinate Well. Allow the chicken to marinate for at least 20 minutes, but for best results, marinate for a few hours or overnight.
- Don’t Overcrowd the Air Fryer. Cook the chicken in batches if necessary to ensure even cooking and proper caramelization.
Variations
Air Fryer Chicken Bulgogi is a versatile dish that can be adapted to suit a variety of tastes and dietary needs. Here are some creative variations on the classic:
- Spicy- Add more gochujang or some red pepper flakes for an extra kick of heat.
- Teriyaki- Add a splash of teriyaki sauce to the marinade for a slightly different flavor profile.
- Herb-Infused- Add fresh herbs like cilantro or basil for a unique twist.
What To Eat With Chicken Buglgoi
Air Fryer Chicken Bulgogi pairs wonderfully with various sides and accompaniments. Here are some great options to serve with this air fryer chicken recipe :
- Steamed Rice - A classic pairing that helps balance the bold flavors of the bulgogi.
- Lettuce Wraps- Fresh and crisp, they provide a refreshing contrast to the savory chicken.
- Kimchi - Adds a tangy and spicy element that complements the chicken perfectly.
- Vegetable Stir-Fry - A healthy and colorful side dish that goes well with bulgogi.
How Long Does It Last?
Store any leftovers in an airtight container in the refrigerator for up to 3 days. Reheat in the air fryer or microwave before serving.
Can You Freeze It?
Yes! Freeze the cooked and cooled chicken bulgogi in an airtight container or freezer bag for up to 3 months. Thaw in the refrigerator overnight and reheat in the air fryer or microwave.
More Awesome Air Fryer Recipes
- Air Fryer Chicken Tenders
- Cheesy Potatoes
- Keto Pizza Casserole
- Chile Rellenos
- Air Fryer Churros
- Chicken Meatballs
- Low Carb Chicken Shawarma

Chicken Bulgogi Recipe | Air Fryer Chicken Bulgogi
Ingredients
- ▢ 1 pound Boneless Skinless Chicken Thighs
- ▢ 3 tbsp Soy Sauce
- ▢ 2 tbsp Brown Sugar
- ▢ 1 tbsp Sesame Oil
- ▢ 3 cloves Garlic , minced
- ▢ 1 tsp Ginger , grated
- ▢ 2 tbsp Gochujang
- ▢ 2 tbsp Rice Vinegar
- ▢ 2 Green Onions , diced, for garnish
- ▢ 1 tbsp Sesame Seeds , for garnish
Instructions
- Prepare the Marinade. In a bowl, combine soy sauce, brown sugar, sesame oil, minced garlic, grated ginger, gochujang, and rice vinegar. Mix well until the sugar is dissolved.
- Marinate the Chicken. Cut the chicken thighs into bite-sized pieces. Add the chicken to the marinade, ensuring each piece is well-coated. Cover and refrigerate for at least 20 minutes.
- Preheat the Air Fryer. Preheat your air fryer to 375°F.
- Air Fry the Chicken. Place the marinated chicken pieces in the air fryer basket in a single layer. Cook for 10 minutes, then shake the basket or flip the chicken pieces. Cook for an additional 8-10 minutes, or until the chicken is cooked through and slightly caramelized.
- Serve. Transfer the cooked chicken bulgogi to a serving platter. Garnish with sliced green onions and sesame seeds. Serve hot with steamed rice or lettuce wraps.
Get support & connect with our community on Facebook!
Nutrition
And don’t forget to check out my air fryer cookbooks! Every day easy air fryer , and Air Fryer Revolution .


If you already signed up, you should have received an email with a password to give you unlimited access to our FREE Printable Library. The password is case sensitive. Enter it below and get printing!
Password:
Chicken Bulgogi Recipe | Air Fryer Chicken Bulgogi
Ingredients
- 1 pound Boneless Skinless Chicken Thighs
- 3 tbsp Soy Sauce
- 2 tbsp Brown Sugar
- 1 tbsp Sesame Oil
- 3 cloves Garlic minced
- 1 tsp Ginger grated
- 2 tbsp Gochujang
- 2 tbsp Rice Vinegar
- 2 Green Onions diced, for garnish
- 1 tbsp Sesame Seeds for garnish
Instructions
- Prepare the Marinade. In a bowl, combine soy sauce, brown sugar, sesame oil, minced garlic, grated ginger, gochujang, and rice vinegar. Mix well until the sugar is dissolved.
- Marinate the Chicken. Cut the chicken thighs into bite-sized pieces. Add the chicken to the marinade, ensuring each piece is well-coated. Cover and refrigerate for at least 20 minutes.
- Preheat the Air Fryer. Preheat your air fryer to 375°F.
- Air Fry the Chicken. Place the marinated chicken pieces in the air fryer basket in a single layer. Cook for 10 minutes, then shake the basket or flip the chicken pieces. Cook for an additional 8-10 minutes, or until the chicken is cooked through and slightly caramelized.
- Serve. Transfer the cooked chicken bulgogi to a serving platter. Garnish with sliced green onions and sesame seeds. Serve hot with steamed rice or lettuce wraps.
Chicken Bulgogi Recipe | Air Fryer Chicken Bulgogi https://twosleevers.com/chicken-bulgogi-recipe/

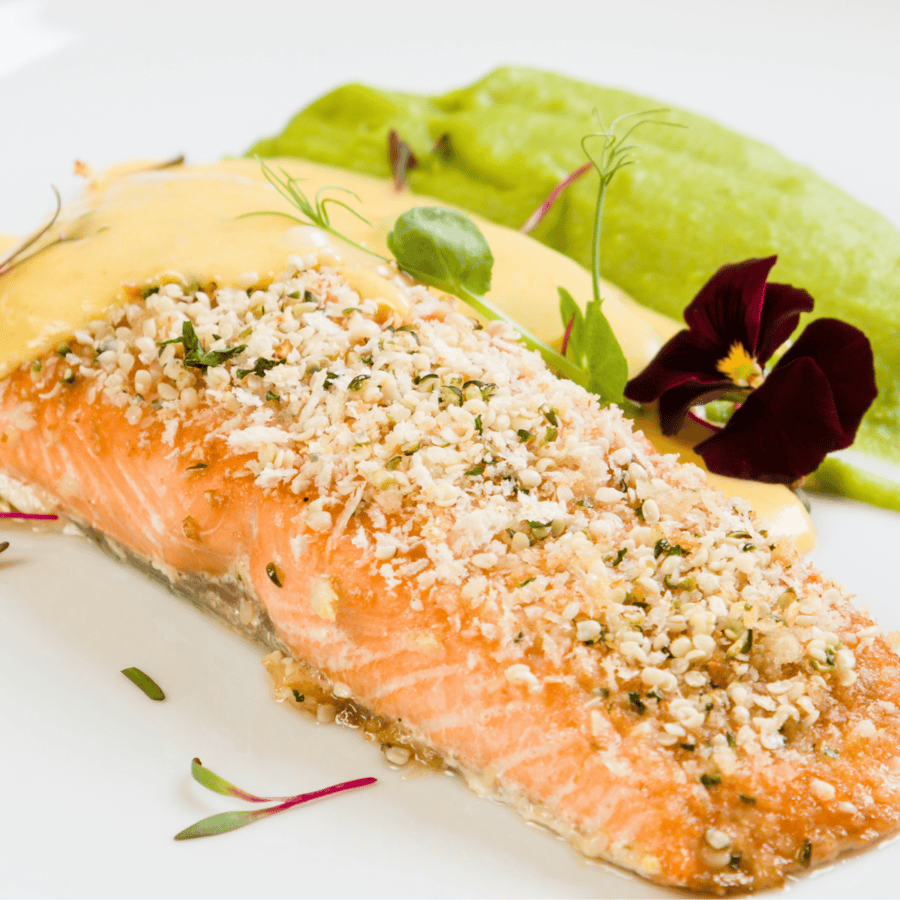
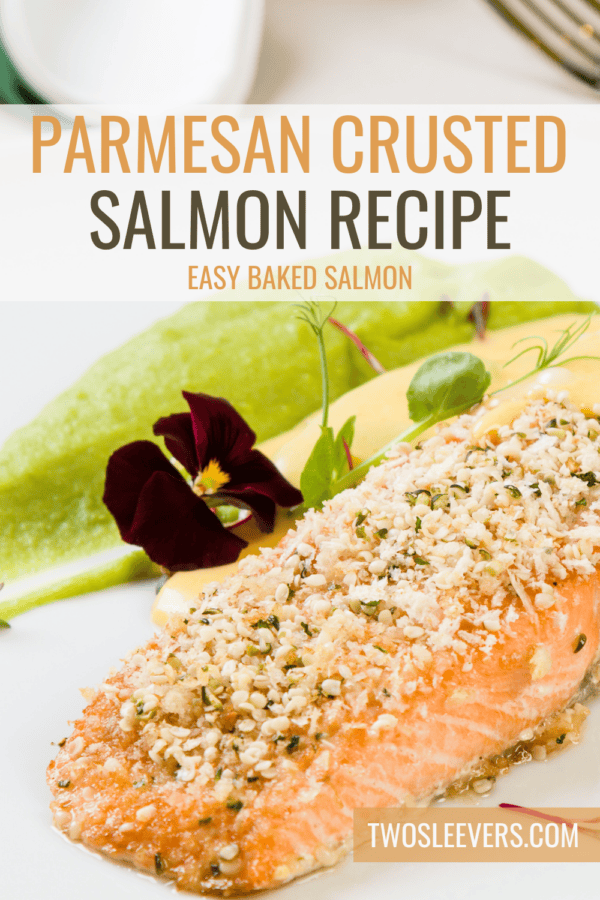
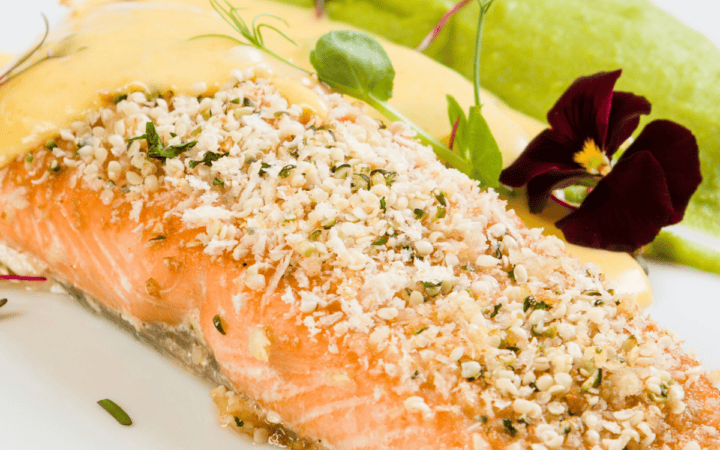
Elevate your dinner with this delicious Parmesan Crusted Salmon! This recipe transforms simple ingredients into a mouth-watering dish with just the right amount of crispiness and savory flavor. Dive into the ultimate combination of ease and taste with this foolproof method.
Why You’ll Love This Tasty Fish
- Quick. A main course that is ready in just 25 minutes from start to finish.
- Effortless. Minimal preparation for a no-fuss seafood experience.
- Incredibly Tasty. The Parmesan crust combined with the tender juiciness of the salmon is a match made in heaven.
With the magic of a simple crust, you’ll achieve that desirable crispy coating without the need for complex techniques, making it a healthier option that doesn’t sacrifice taste.
What Does Parmesan Crusted Salmon Taste Like?
Parmesan Crusted Salmon is a harmonious blend of savory, crunchy, and fresh flavors, with a texture that combines tender fish and a crispy, flavorful crust. It’s a satisfying dish that delights the palate and provides a gourmet experience with minimal effort.
Is It Healthy?
Baked Parmesan Crusted Salmon can be a healthy and nutritious dish that provides a good balance of protein, healthy fats, vitamins, and minerals. By using fresh, high-quality ingredients and baking the salmon, you can enjoy a delicious meal that supports your overall health and well-being.
Ingredients You’ll Need
- Salmon Fillets - Salmon fillets serve as the main protein in this dish. They provide a rich, tender, and flavorful base that pairs perfectly with the crispy Parmesan crust.
- Parmesan Cheese- The primary component of the crust. It melts and crisps up during baking, creating a savory, crunchy topping that enhances the overall flavor of the salmon.
- Panko Breadcrumbs- Add extra crunch to the Parmesan crust. Their light, airy texture helps achieve a crispy coating without being too heavy.
- Garlic Powder- Adds a subtle, savory depth to the crust mixture. It infuses the topping with a rich garlic flavor, enhancing the overall taste of the dish without overpowering the other ingredients.
- Paprika- Adds a mild, smoky flavor and a vibrant color to the crust.
- Salt- Used to enhance the natural flavors of the salmon and the crust.
- Black Pepper- Adds a slight heat and sharpness to the crust mixture.
- Olive Oil- Helps bind the crust mixture together, making it easier to apply to the salmon fillets.
- Lemon Zest- Adds a fresh, citrusy note to the crust, brightening up the flavors and providing a contrast to the richness of the cheese and salmon.
- Fresh Parsley- Used as an optional garnish to add a pop of color and a hint of freshness to the dish.
By using these ingredients together, you’ll create a delicious and perfectly balanced Parmesan Crusted Salmon with a crispy, flavorful topping that pairs wonderfully with the tender, rich salmon fillets.
How To Make Parmesan Crusted Salmon
- Prepare the Crust Mixture. In a small bowl, combine the grated Parmesan cheese, panko breadcrumbs, garlic powder, paprika, salt, black pepper, olive oil, and lemon zest. Mix until well combined.
- Prep the Salmon. Preheat your oven to 400°F. Line a baking sheet with parchment paper or lightly grease it. Place the salmon fillets on the baking sheet, skin-side down if the skin is on.
- Apply the Crust. Press the Parmesan mixture onto the top of each salmon fillet, ensuring an even layer. Gently press down to help the crust adhere to the salmon.
- Bake the Salmon. Bake in the preheated oven for 12-15 minutes, or until the salmon is cooked through and the crust is golden brown. The internal temperature of the salmon should reach 145°F.
- Serve. Transfer the salmon to a serving platter and garnish with fresh parsley if desired. Serve with lemon wedges for squeezing over the top.

Tips And Tricks
Making delicious Parmesan Crusted Salmon involves more than just the right ingredients; it’s about technique and a few kitchen tricks to ensure it turns out flavorful and satisfying. Here’s a comprehensive guide to perfecting it:
- Use Fresh Salmon. Fresh salmon fillets are preferable for the best flavor and texture. If using frozen, make sure to thaw completely and pat dry to remove excess moisture.
- Ensure Even Crust. Press the crust mixture firmly onto the salmon to ensure it adheres well and forms a crispy layer during baking.
- Avoid Overcooking. Keep an eye on the salmon to prevent overcooking, which can make it dry. Use a meat thermometer to check for doneness.
Variations
Parmesan Crusted Salmon is a versatile dish that can be adapted to suit a variety of tastes and dietary needs. Here are some creative variations on the classic:
- Herb-Crusted- Add fresh or dried herbs like dill, thyme, or basil to the crust mixture for extra flavor.
- Spicy Parmesan- Mix some cayenne pepper or red pepper flakes into the crust mixture for a spicy kick.
- Nut-Crusted- Substitute some of the panko breadcrumbs with finely chopped nuts like almonds or walnuts for a nutty flavor and extra crunch.
What To Serve With Parmesan Crusted Salmon
Parmesan Crusted Salmon pairs wonderfully with various sides and accompaniments. Here are some great options:
- Roasted Vegetables - A mix of roasted vegetables like asparagus, broccoli, or carrots complements the rich flavor of the salmon.
- Mashed Potatoes - Creamy mashed potatoes provide a comforting side that balances the crispy texture of the salmon.
- Salad - A fresh green salad with a light vinaigrette adds a refreshing contrast to the savory salmon.
How Long Does It Last?
Store any leftovers in an airtight container in the refrigerator for up to 3 days. Reheat in the oven at 350°F until warmed through.
Can You Freeze It?
Yes! Freeze the cooked and cooled salmon fillets on a baking sheet, then transfer them to a freezer bag. Reheat directly from frozen in the oven at 350°F until heated through.
More Of Our Best Salmon Recipes
- Instant Pot Salmon
- Honey Glazed Salmon
- Miso Salmon
- Salmon Quinoa Bowl
- Salmon Croquettes
- Dijon Salmon
Parmesan Crusted Salmon | Easy Baked Salmon Recipe
Ingredients
- ▢ 4 Salmon Filets
- ▢ 1/2 cup Parmesan Cheese , grated
- ▢ 1/2 cup Panko Breadcrumbs
- ▢ 1 tsp Garlic Powder
- ▢ 1 tsp Paprika
- ▢ 1/2 tsp Kosher Salt
- ▢ 1/2 tsp Black Pepper
- ▢ 2 tbsp Olive Oil
- ▢ 1 tbsp Lemon Zest
- ▢ Parsley , chopped, for garnish
Instructions
- Prepare the Crust Mixture. In a small bowl, combine the grated Parmesan cheese, panko breadcrumbs, garlic powder, paprika, salt, black pepper, olive oil, and lemon zest. Mix until well combined.
- Prep the Salmon. Preheat your oven to 400°F. Line a baking sheet with parchment paper or lightly grease it. Place the salmon fillets on the baking sheet, skin-side down if the skin is on.
- Apply the Crust. Press the Parmesan mixture onto the top of each salmon fillet, ensuring an even layer. Gently press down to help the crust adhere to the salmon.
- Bake the Salmon. Bake in the preheated oven for 12-15 minutes, or until the salmon is cooked through and the crust is golden brown. The internal temperature of the salmon should reach 145°F.
- Serve. Transfer the salmon to a serving platter and garnish with fresh parsley if desired. Serve with lemon wedges for squeezing over the top.
