
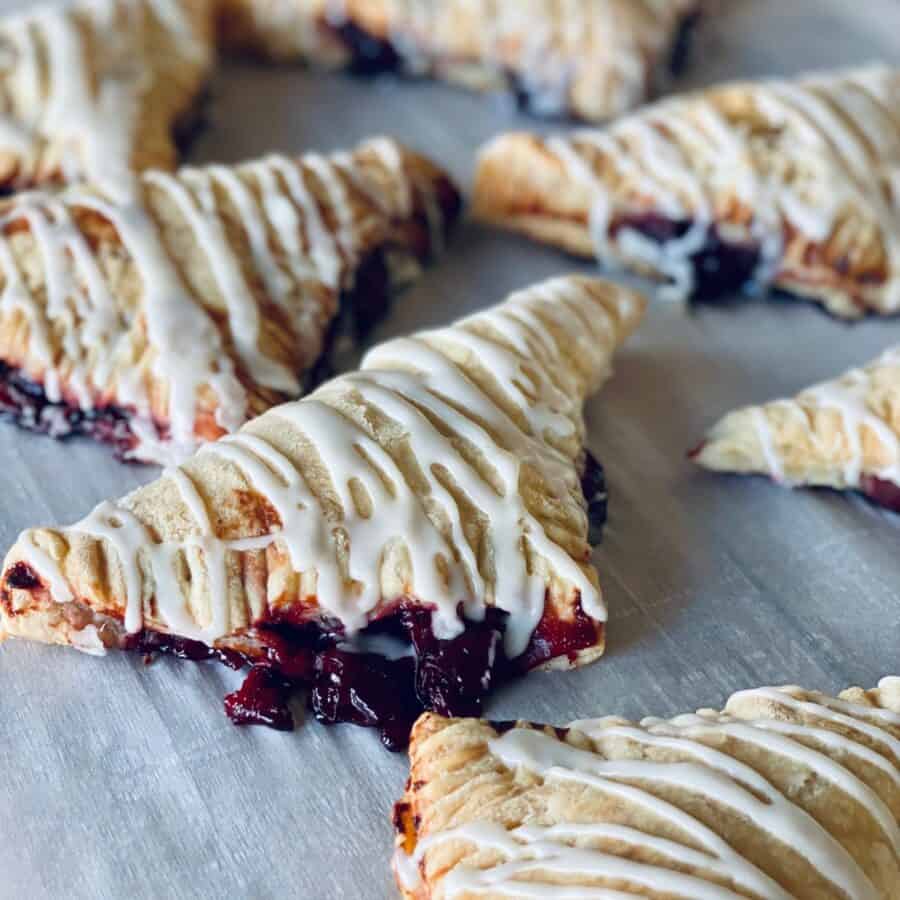
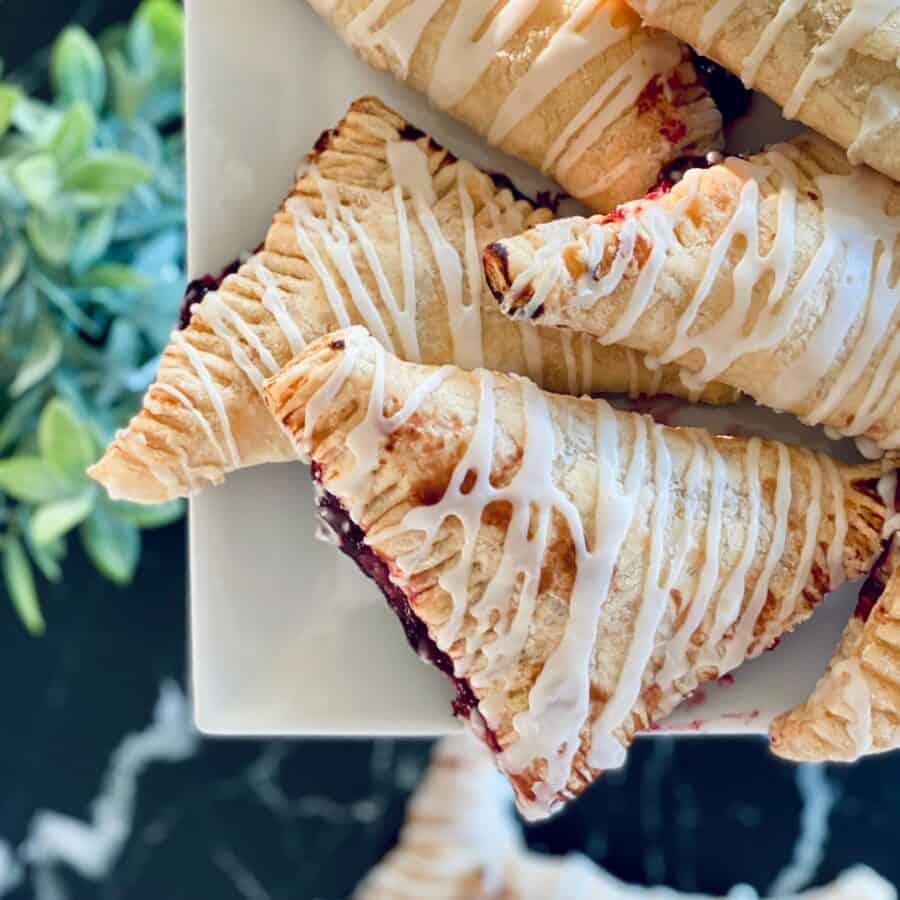
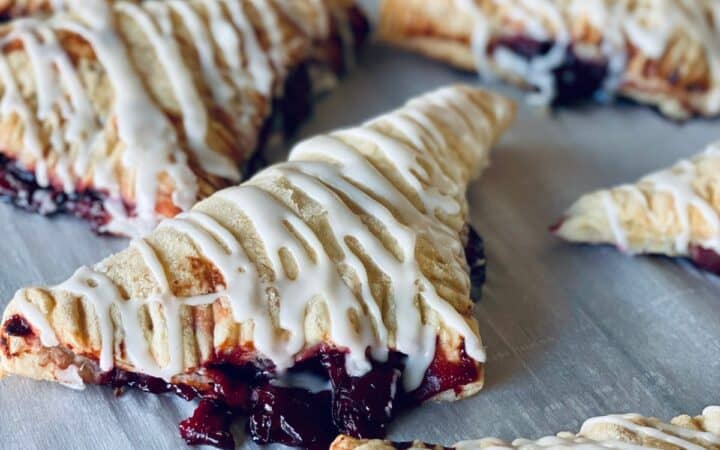
If you love flaky, buttery pastry filled with sweet and tart cherry goodness, these Cherry Turnovers are a must-try. Made with store-bought or homemade puff pastry, these turnovers are baked until golden brown and finished with a light glaze for the perfect handheld dessert.
Why You’ll Love This Sweet Treat
- Quick and Easy . Ready in under 30 minutes with simple ingredients.
- Flaky and Buttery . The puff pastry creates the perfect crisp layers.
- Sweet and Tart Cherry Filling . Balanced flavors that pair beautifully with the pastry.
- Great for Any Occasion . Perfect for breakfast, brunch, or dessert.
- Customizable . Try different fillings like blueberry, apple, or Nutella.
They’re quick to make, incredibly delicious, and perfect for breakfast, brunch, or a sweet treat with coffee.
What Do Cherry Turnovers Taste Like?
Cherry turnovers taste like a classic bakery treat. They’re flaky, fruity, lightly sweet, and absolutely delicious.
Whether enjoyed warm from the oven or at room temperature, they are a perfect balance of crisp and soft, sweet and tart, buttery and fresh!
Why Are They Called Turnovers?
Cherry turnovers, and turnovers in general, get their name from the way they are made. The term “turnover” refers to the process of folding the dough over the filling, sealing it, and baking it until golden brown.
Ingredients You’ll Need
- Puff Pastry - Puff pastry creates the crispy, buttery layers that make turnovers irresistible. It bakes up golden brown and flaky, providing the perfect contrast to the soft cherry filling. Using store-bought puff pastry makes the recipe quick and easy, while homemade pastry allows for more customization.
- Cherry Pie Filling - This is the star ingredient, adding a balance of sweetness and tartness to each bite. The thick, fruit-filled consistency ensures the filling doesn’t run out during baking. You can use homemade or store-bought cherry pie filling, depending on preference.
- Granulated Sugar - A light sprinkle of sugar on top of the pastry before baking adds a crisp, slightly caramelized finish. It enhances the natural sweetness and makes the turnovers extra delicious.
- Egg Wash (1 Egg + 1 Tablespoon Water) - Egg wash creates a beautiful golden color when baked. It gives the pastry a shiny, bakery-style finish and helps seal the edges of the turnovers. A mix of egg and water keeps the texture light and crisp.
- Vanilla Glaze (Optional) - A drizzle of powdered sugar, vanilla extract, and milk adds a light sweetness to complement the tart cherry filling.
Each of these ingredients works together to create the perfect Cherry Turnovers. They’re flaky, sweet, golden, and filled with fruity goodness!
How To Make Cherry Turnovers
- Prepare the Puff Pastry . Preheat the oven to 400°F and line a baking sheet with parchment paper. Roll out the puff pastry on a lightly floured surface. Cut into 4 to 6 equal squares, depending on your desired size.
- Fill and Fold . Spoon 1-2 tablespoons of cherry pie filling onto the center of each pastry square. Fold diagonally to form a triangle and press the edges with a fork to seal. Transfer to the prepared baking sheet.
- Egg Wash and Bake . Brush the tops with egg wash for a golden brown crust. Sprinkle with granulated sugar for extra crispiness. Bake for 15-18 minutes, or until golden brown and puffed.
- Add the Vanilla Glaze (Optional) . In a small bowl, whisk together ½ cup powdered sugar, ½ teaspoon vanilla extract, and 1-2 tablespoons milk. Drizzle over warm turnovers and let them set before serving.
Tips And Tricks
Cherry turnovers are flaky, fruity, and delicious, but a few simple tricks can make them even better. Follow these pro tips to ensure they turn out golden, crisp, and full of flavor every time:
- Use Cold Puff Pastry . Keep the dough cold for the best flakiness.
- Don’t Overfill . Too much cherry filling can cause the turnovers to leak.
- Seal the Edges Well . Press with a fork or pinch to prevent the filling from oozing out.
- Let Them Cool Slightly . The filling is very hot right out of the oven.
Variations
Cherry turnovers are flaky, fruity, and versatile, making them the perfect treat for customization. Whether you want to add chocolate, nuts, or a different filling, these variations will take your turnovers to the next level:
- Chocolate - Add a few chocolate chips inside for a rich twist.
- Cream Cheese - Spread a thin layer of sweetened cream cheese before adding the cherries.
- Almond - Sprinkle with sliced almonds before baking and drizzle with almond glaze.
- Sugar-Free - Use homemade sugar-free cherry filling with fresh or frozen cherries.
What To Enjoy With Cherry Turnovers
Cherry turnovers are flaky, sweet, and bursting with fruit, making them a delicious treat for breakfast, brunch, or dessert. Pair them with the right beverages, toppings, or side dishes to make them even more enjoyable:
- Hot Coffee or Espresso - A rich, bold contrast to the sweet cherry flavor.
- Tea or Chai Latte - The perfect cozy pairing for a light treat.
- Whipped Cream or Ice Cream - For an extra indulgent dessert.
- Fresh Berries - Blueberries or raspberries make a refreshing side.
How Long Do They Last?
Cherry turnovers are best enjoyed fresh on the day they are baked, but they can be stored in an airtight container at room temperature for up to 2 days. For longer storage, refrigerate for up to 4 days and reheat in the oven for crispiness
Can You Freeze Them?
Yes, you can absolutely freeze cherry turnovers, which makes them a convenient option for make-ahead breakfasts or desserts. You can freeze them either before or after baking.
If you choose to freeze them unbaked, simply assemble the turnovers as directed, then place them on a baking sheet and freeze until solid.
Once frozen, transfer them to an airtight container or freezer bag, separating layers with parchment paper to prevent sticking. When you’re ready to bake, there’s no need to thaw, just add a few extra minutes to the baking time and brush with egg wash for a golden finish.
Alternatively, you can freeze baked cherry turnovers after they’ve cooled completely. Wrap them tightly in plastic wrap or foil, then place them in a freezer-safe container. To enjoy later, reheat them in a 350°F oven for about 10–15 minutes until warmed through and crisp.
More Cherry-Filled Recipes
- Cherry Clafoutis
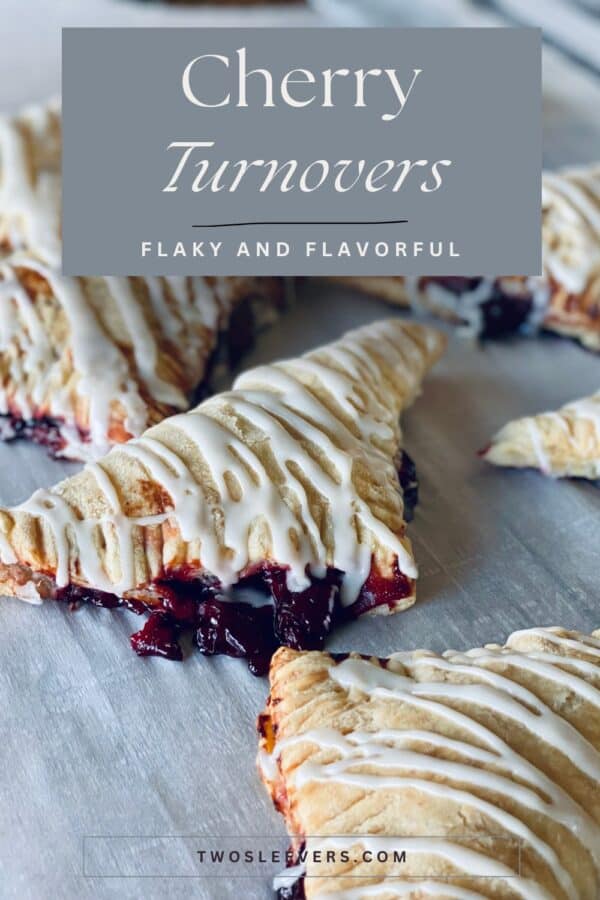
Cherry Turnovers | Easy Cherry Turnovers With Puff Pastry
Ingredients
For The Turnovers
- ▢ 1 sheet Puff Pastry
- ▢ 1 cup Cherry Pie Filling
- ▢ 2 tbsp Granulated Sugar
- ▢ 1 Egg
- ▢ 1 tbsp Water
For The Glaze
- ▢ 1/2 cup Powdered Sugar
- ▢ 1/2 tsp Vanilla Extract
- ▢ 11/2 tsp Milk
Instructions
- Prepare the Puff Pastry . Preheat the oven to 400°F and line a baking sheet with parchment paper. Roll out the puff pastry on a lightly floured surface. Cut into 4 to 6 equal squares, depending on your desired size.
- Fill and Fold . Spoon 1-2 tablespoons of cherry pie filling onto the center of each pastry square. Fold diagonally to form a triangle and press the edges with a fork to seal. Transfer to the prepared baking sheet.
- Egg Wash and Bake . Brush the tops with egg wash for a golden brown crust. Sprinkle with granulated sugar for extra crispiness. Bake for 15-18 minutes, or until golden brown and puffed.
- Add the Vanilla Glaze (Optional) . In a small bowl, whisk together ½ cup powdered sugar, ½ teaspoon vanilla extract, and 1-2 tablespoons milk. Drizzle over warm turnovers and let them set before serving.
Get support & connect with our community on Facebook!

If you already signed up, you should have received an email with a password to give you unlimited access to our FREE Printable Library. The password is case sensitive. Enter it below and get printing!
Password:

Cherry Turnovers | Easy Cherry Turnovers With Puff Pastry
Ingredients
For The Turnovers
- 1 sheet Puff Pastry
- 1 cup Cherry Pie Filling
- 2 tbsp Granulated Sugar
- 1 Egg
- 1 tbsp Water
For The Glaze
- 1/2 cup Powdered Sugar
- 1/2 tsp Vanilla Extract
- 11/2 tsp Milk
Instructions
- Prepare the Puff Pastry . Preheat the oven to 400°F and line a baking sheet with parchment paper. Roll out the puff pastry on a lightly floured surface. Cut into 4 to 6 equal squares, depending on your desired size.
- Fill and Fold . Spoon 1-2 tablespoons of cherry pie filling onto the center of each pastry square. Fold diagonally to form a triangle and press the edges with a fork to seal. Transfer to the prepared baking sheet.
- Egg Wash and Bake . Brush the tops with egg wash for a golden brown crust. Sprinkle with granulated sugar for extra crispiness. Bake for 15-18 minutes, or until golden brown and puffed.
- Add the Vanilla Glaze (Optional) . In a small bowl, whisk together ½ cup powdered sugar, ½ teaspoon vanilla extract, and 1-2 tablespoons milk. Drizzle over warm turnovers and let them set before serving.
Cherry Turnovers | Easy Cherry Turnovers With Puff Pastry https://twosleevers.com/cherry-turnovers/

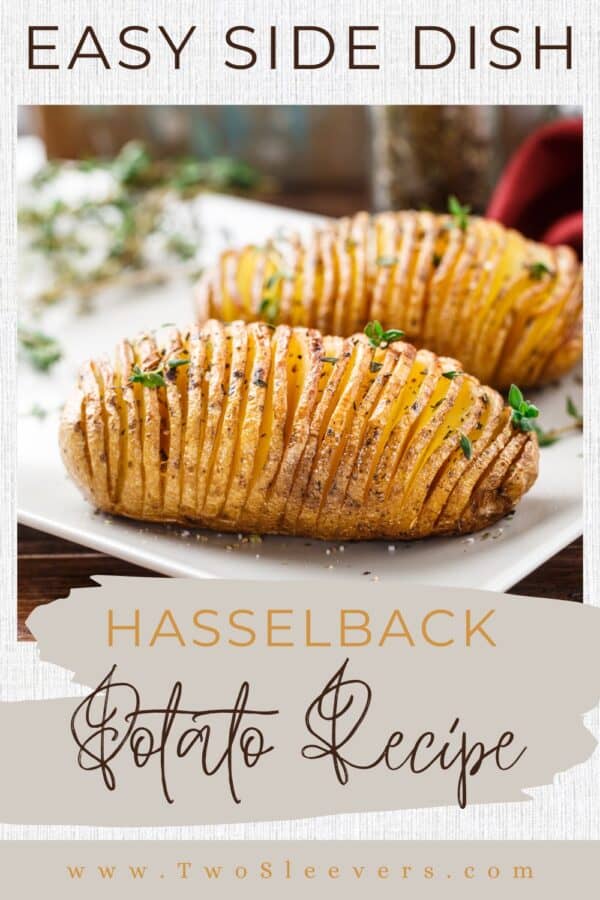
If you’re a fan of crispy-on-the-outside, tender-on-the-inside roasted potatoes, then this Hasselback Potatoes recipe is about to become your new favorite side dish! Learn how to make these stunning sliced potatoes that fan out beautifully in the oven, creating the perfect blend of flavor, texture, and presentation.

Why You’ll Love This Perfect Potato Recipe
- Impressive Yet Easy. Looks fancy, but it’s totally doable, even for beginners.
- Crispy and Tender. Thinly sliced for maximum crispiness on the edges with a soft, buttery interior.
- Customizable. Add cheese, herbs, garlic, or bacon for endless variations.
- Naturally Gluten-Free. A crowd-pleasing side that fits most diets.
Whether you’re hosting a holiday meal or just want to elevate your weeknight dinner, these Hasselback Potatoes are guaranteed to impress.
Why Are They Called Hasselback Potatoes?
Hasselback potatoes are named after the Hasselbacken restaurant in Stockholm, Sweden, where the dish was first created in the 1950s.
A trainee chef named Leif Elisson developed the recipe while training at the culinary school associated with the restaurant.
What Do They Taste Like?
Hasselback potatoes taste like the perfect combination of crispy roasted potatoes and tender baked potatoes, all in one bite. The thin slices fan out slightly as they bake, allowing the edges to become golden, crispy, and slightly caramelized, while the insides stay buttery soft and creamy.
When brushed with olive oil or melted butter, they take on a rich, savory flavor that’s elevated by aromatic garlic, fresh herbs like rosemary or thyme, and seasonings such as salt and pepper. Optional toppings like Parmesan cheese, cheddar, bacon bits, or sour cream add layers of indulgence, making each bite even more flavorful.
Ingredients You’ll Need
- Russet or Yukon Gold Potatoes - These are the foundation of the dish. Russets offer a crispy, golden exterior and fluffy interior. They’re ideal for maximum texture contrast. Yukon Golds have a naturally buttery flavor and a creamy texture that holds up well when sliced and roasted. Choose medium-sized, evenly shaped potatoes for uniform cooking and presentation.
- Olive Oil or Melted Butter - Brushed between the potato slices and over the tops, this fat helps the edges crisp up in the oven while adding a rich, savory finish. Butter adds deeper flavor, while olive oil contributes a light fruitiness and a slightly healthier profile.
- Garlic - Whether minced or thinly sliced, garlic tucks between the slices and infuses the entire potato with warm, savory aroma and depth. As it roasts, it caramelizes slightly, enhancing its sweetness and flavor complexity.
- Salt & Black Pepper - These pantry staples are crucial for seasoning every layer. Salt draws out moisture to encourage crisping, while black pepper adds subtle heat and complexity.
- Fresh Herbs - Sprinkled on at the end or during the final minutes of roasting, herbs like thyme, rosemary, or parsley lend a pop of color and fresh, earthy flavor that complements the rich roasted potato.
- Optional Add-ins - Ingredients like Parmesan cheese, cheddar, bacon bits, or a dollop of sour cream take your Hasselback Potatoes to the next level. They add layers of umami, creaminess, smokiness, and indulgence. They’re perfect for customizing based on your favorite flavor combos.
How To Make Hasselback Potatoes
- Prep the Potatoes . Preheat your oven to 425°F. Scrub the potatoes clean and dry thoroughly. Place each potato between two wooden spoons or chopsticks. This stops the knife from slicing all the way through. Using a sharp knife, make thin, even cuts (about 1/8-inch apart) across the potato, stopping just before the bottom.
- Brush with Oil or Butter . In a small bowl, mix olive oil (or melted butter) with garlic, salt, and pepper. Carefully brush the mixture over the potatoes and into the slices. This step ensures each layer gets seasoned and crisped.
- Bake the Potatoes . Place the potatoes on a parchment-lined baking sheet. Bake uncovered for 45–60 minutes, depending on the size of your potatoes. Halfway through, baste the potatoes again with more oil or butter to deepen the flavor and enhance crispiness.
- Add Toppings . In the last 10 minutes of baking, sprinkle on shredded cheese, crumbled bacon, or additional herbs if desired. Let the cheese melt and bubble over the edges for added indulgence.
- Garnish and Serve . Remove from the oven and top with fresh herbs, more melted butter, or a dollop of sour cream. Serve hot and enjoy the beautiful accordion-like layers of flavor and texture.

Tips And Tricks
Hasselback potatoes are as versatile as they are stunning, making them a perfect side dish for a wide variety of main courses. Their crispy edges and tender interiors pair beautifully with everything from hearty meats to lighter fare. Here are some delicious ideas on what to eat with them:
- Grilled or Roasted Meats - Serve them alongside steak, roast chicken , pork tenderloin , or lamb chops for a classic, satisfying dinner.
- Seafood - Pair with baked salmon, seared scallops , or shrimp skewers for a lighter, elegant option.
- Vegetarian Mains - Complement with sautéed mushrooms, stuffed bell peppers , or a hearty lentil loaf.
- Salads - Balance their richness with a crisp green salad, Caesar salad , or arugula with lemon vinaigrette.
- Sauces & Dips - Offer sour cream, garlic aioli, pesto, or chimichurri on the side for added flavor.
Variations
Looking to switch things up? Here are some delicious variations to take your Hasselback Potatoes to the next level:
- Cheesy - Add sliced cheddar or mozzarella between the layers during the last 10 minutes of baking.
- Garlic Parmesan - Sprinkle grated Parmesan over the top just before serving for a nutty, salty finish.
- Herb Butter - Mix your butter with thyme, rosemary, and sage for a rustic, earthy flavor.
- Bacon Loaded - Stuff cooked bacon bits into the slits, then top with sour cream and chives for a baked potato upgrade.
What To Eat With Hasselback Potatoes
Hasselback potatoes are a show-stopping side that pair well with a variety of main dishes, making them a versatile addition to any meal. Here are some delicious options to serve alongside them:
- Grilled Steak or Chicken - Their crispy edges and fluffy centers complement the bold, savory flavors of grilled meats.
- Baked or Grilled Fish - Light, flaky fish like salmon, cod, or trout balances the richness of the potatoes.
- Roast Pork or Lamb - These tender, flavorful meats match beautifully with the crispy texture and earthy notes of Hasselback potatoes.
How Long Do They Last?
Hasselback Potatoes are best enjoyed fresh, right out of the oven when they’re at peak crispiness. However, leftovers can be stored in an airtight container in the refrigerator for up to 3 days.
To reheat, bake in a 375°F oven for 10–15 minutes to re-crisp the edges. Microwaving works, but it softens the potato and may lose some of that signature crunch.
Can You Freeze Them?
While you technically can freeze cooked Hasselback Potatoes, it’s not ideal. The texture often changes after thawing, losing crispness and becoming mealy.
If you must freeze, wrap the completely cooled potatoes individually in foil and place them in a freezer-safe bag. To reheat, bake from frozen at 375°F until heated through and crisped again. This takes about 25–30 minutes.
More Simple Side Dishes
- Cheesy Potatoes
- Greek Rice
- Cucumber Kimchi
- Pea Salad
- Crockpot Baked Beans
- Loaded Potato Skins
- Jacket Potatoes

Hasselback Potatoes | Easy Oven Baked Hasselback Potatoes
Ingredients
- ▢ 4 Russet Potatoes
- ▢ 2 tbsp Olive Oil
- ▢ 3 cloves Garlic , minced
- ▢ 1/2 tsp Kosher Salt
- ▢ 1/4 tsp Ground Black Pepper
- ▢ Parlsey , for garnish
Instructions
- Prep the Potatoes . Preheat your oven to 425°F. Scrub the potatoes clean and dry thoroughly. Place each potato between two wooden spoons or chopsticks. This stops the knife from slicing all the way through. Using a sharp knife, make thin, even cuts (about 1/8-inch apart) across the potato, stopping just before the bottom.
- Brush with Oil or Butter . In a small bowl, mix olive oil (or melted butter) with garlic, salt, and pepper. Carefully brush the mixture over the potatoes and into the slices. This step ensures each layer gets seasoned and crisped.
- Bake the Potatoes . Place the potatoes on a parchment-lined baking sheet. Bake uncovered for 45–60 minutes, depending on the size of your potatoes. Halfway through, baste the potatoes again with more oil or butter to deepen the flavor and enhance crispiness.
- Add Toppings . In the last 10 minutes of baking, sprinkle on shredded cheese, crumbled bacon, or additional herbs if desired. Let the cheese melt and bubble over the edges for added indulgence.
- Garnish and Serve . Remove from the oven and top with fresh herbs, more melted butter, or a dollop of sour cream. Serve hot and enjoy the beautiful accordion-like layers of flavor and texture.
