
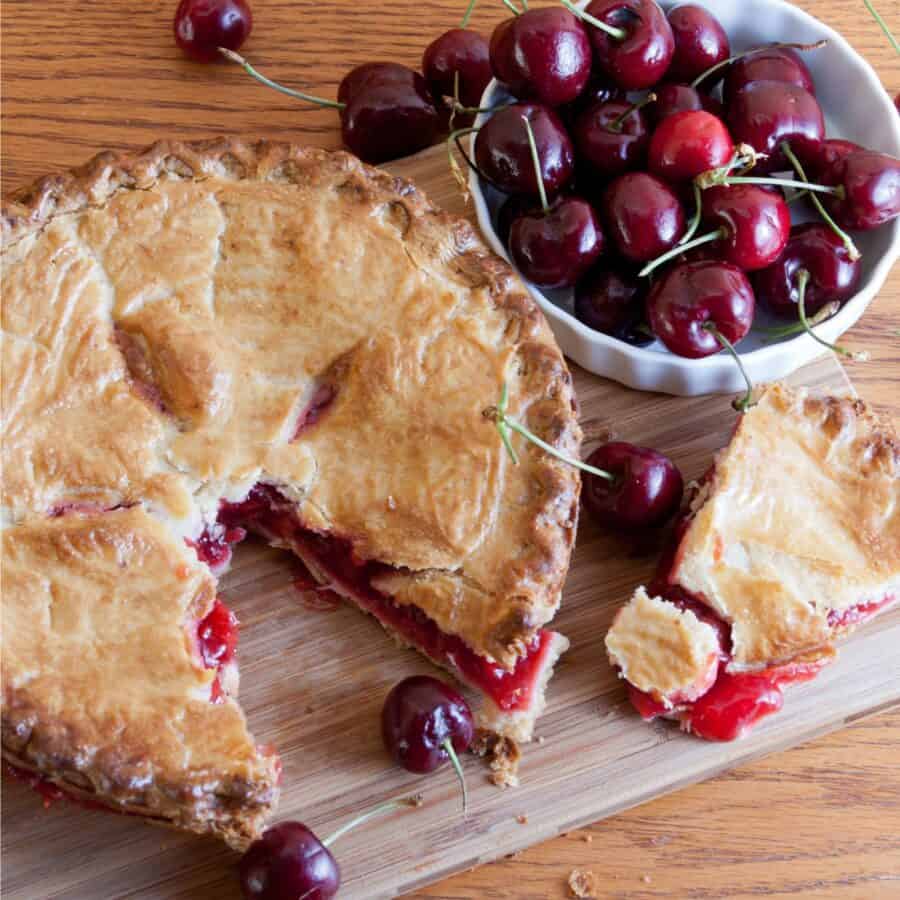
If you’re craving the ultimate homemade cherry pie, look no further. This easy Cherry Pie recipe delivers a flaky, buttery crust filled with juicy, sweet‐tart cherries and a perfectly glossy finish.
Why You’ll Love This Perfect Pie
- Timeless. Nothing says summer like a down-home cherry pie made with juicy, tart cherries.
- Easy. With a few simple steps (no fussy lattice work required) you’ll have a gorgeous pie in under an hour.
- Versatile. Swap in fresh, frozen, or canned cherries based on seasonality and pantry stock.
- Crowd-Pleaser. Sweet, tangy cherries bubbling under a golden crust are guaranteed to disappear fast.
Whether you’re celebrating the Fourth of July, hosting a backyard barbecue, or simply craving a slice of nostalgia, this cherry pie delivers old-fashioned comfort with every bite.
What Does Cherry Pie Taste Like?
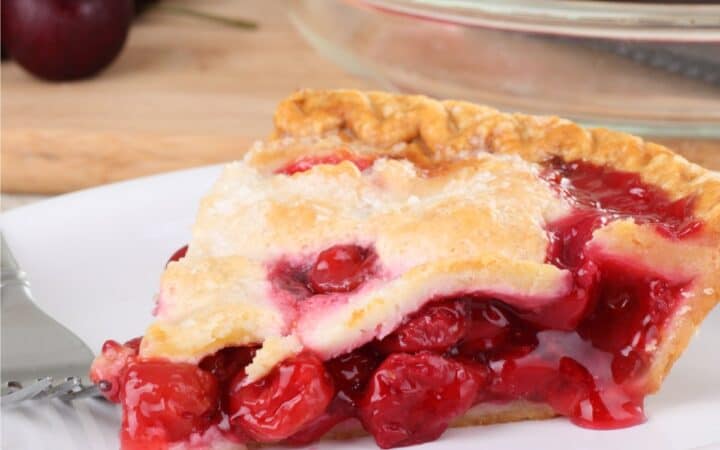
A well-made cherry pie strikes the perfect balance of sweet and tart, with a flaky crust that frames the jammy filling. Fresh or frozen cherries work beautifully, and when you taste the first forkful, you’ll understand why cherry pie is a classic dessert for every occasion.
How Do You Keep The Bottom Crust From A Cherry Pie From Getting Soggy?
If you’re having trouble with a soggy bottom crust, here are three different things you can try to keep it nice and firm:
- Blind bake the crust. Roll it out, chill it, then par‐dock the dough, line it with parchment, fill with pie weights, and bake briefly to seal the starches before adding the filling.
- Next, you can create a moisture barrier by brushing the par‐baked shell with a thin coat of beaten egg white or melted chocolate, which sets into a waterproof layer when returned to the oven for a minute or two.
- Finally, make sure you thicken your cherry filling properly. Toss the fruit with enough cornstarch (or a touch of instant tapioca) and drain any excess juice before filling the shell.
For an extra guarantee of a well cooked crust, bake the pie on the lowest oven rack so that the bottom crust receives direct heat to finish crisping even as the fruit bubbles above.
Ingredients You’ll Need
For the Pie Crust
- All-purpose flour - Provides the structure and tender crumb that holds your pie together.
- Salt - Enhances the flavor of the dough and balances the sweetness.
- Sugar - Adds a hint of sweetness to round out the savory notes of the crust.
- Cold unsalted butter - Creates pockets of fat that melt during baking, yielding a flaky, layered crust.
- Ice water - Hydrates the flour just enough to bind the dough without warming the butter, ensuring maximum flakiness.
For The Cherry Pie Filling
- Fresh or frozen pitted cherries - The centerpiece of the pie: their natural sweetness and gentle tartness give the filling its characteristic flavor.
- Granulated sugar - Sweetens the cherries and helps draw out their juices.
- Cornstarch - Thickens those released juices into a glossy, jam-like consistency that won’t run.
- Lemon juice - Brightens the filling’s sweetness and balances the fruit’s natural tartness.
- Ground cinnamon - Imparts warm, aromatic depth for a subtly spiced profile.
- Salt - Rounds out the sweetness and enhances the cherries’ flavor.
To Finish
- Egg - Brushed atop the crust for a shiny, golden finish.
- Coarse sugar - Sprinkled on the egg-wash for a sparkly crunch and extra sweetness.
How To Make A Cherry Pie
- Prepare the Crust. In a large bowl, whisk flour, salt, and sugar. Cut in cold butter with a pastry cutter or two forks until mixture resembles coarse crumbs. Drizzle in ice water, 1 tbsp at a time, tossing until dough holds together. Divide into two discs, wrap in plastic, and chill 30 minutes.
- Make the Cherry Filling. In a saucepan over medium heat, combine cherries, sugar, cornstarch, lemon juice, cinnamon, and salt. Cook, stirring often, until mixture thickens and berries release their juices, about 5 minutes. Remove from heat and let cool slightly.
- Assemble the Pie. Preheat oven to 400°F. Roll out one dough disc on a floured surface into a 12″ circle and transfer to a 9″ pie plate. Pour in cherry filling. Roll out the second disc and lay it over the filling. Trim the excess crust, crimp edges to seal, and cut vents in the top. Brush with beaten egg and sprinkle coarse sugar.
- Bake. Bake 20 minutes at 400°F, then reduce to 350°F and bake an additional 25–30 minutes until crust is golden and filling bubbles. Let rest for at least 2 hours before slicing to allow filling to set.

Tips And Tricks
If you want a cherry pie that’s as beautiful as it is delicious, a few simple tips will help you achieve a perfectly flaky crust, jammy filling, and picture-perfect finish.
- Use cold ingredients . Keep butter and water ice-cold for a flaky crust.
- Don’t skip resting time . Let both the dough and the baked pie rest; this prevents shrinking and runny filling.
- Patch holes . Guard against bubbling over by placing a pie plate on the rack below.
- Adjust the sweetness . Taste your cherries first. Add more or less sugar to suit tart or sweet varieties.
Variations
Whether you’re craving extra texture, boozy warmth, or a twist on the classic, these variations will take your cherry pie to the next level:
- Lattice Top - Weave strips of dough over the filling for a classic look.
- Almond Scented - Add ½ tsp almond extract to the filling for a nutty nuance.
- Mixed Berry - Substitute half the cherries with blueberries or raspberries for color and complexity.
- Mini Hand Pies - Cut rounds of dough, fill, fold, and seal the edges for portable treats.
What To Enjoy With Cherry Pie
Cherry pie’s sweet‐tart brightness pairs beautifully with a variety of creamy, cooling, or spiced accompaniments to round out every bite:
- Vanilla Ice Cream - A classic contrast of cold creaminess melting into warm, jammy cherries.
- Whipped Cream - Lightly sweetened or boozy (a splash of bourbon!) for an airy finish.
- Sharp Cheddar Cheese - A thin slice of aged cheddar on the side brings savory balance and a delightful flavor pop.
- Espresso or Strong Coffee - The bittersweet depth of coffee cuts through the pie’s richness.
How Long Does It Last?
Properly stored, homemade cherry pie can be kept covered at room temperature for up to 2 days.
For longer storage, cover and refrigerate for up to 5 days, though the crust may lose some of its crispness. To make it taste straight out of the oven, warm slices in a 350°F oven for 5–10 minutes.
Can You Freeze It?
Yes! Freeze whole (well-wrapped) or individual slices in freezer-safe containers for up to 3 months.
Thaw your leftovers overnight in the fridge, then reheat in a 350°F oven for 10–15 minutes until warmed through and bubbly.
More Fruit-Filled Recipes
- Cheesecake Fruit Salad
- Peach Muffins
- Blueberry Cinnamon Rolls
- Fruit Hand Pies
- Strawberry Pretzel Salad
- Fruit Salad With Cool Whip

Cherry Pie Recipe | Traditional Cherry Pie
Ingredients
For The Crust
- ▢ 2 1/2 cups All Purpose Flour
- ▢ 1 tsp Kosher Salt
- ▢ 1 tsp Granulated Sugar
- ▢ 1 cup Unsalted Butter , cold and cubed
- ▢ 6 tbsp Cold Water
Cherry Pie Filling
- ▢ 4 cups Cherries , pitted
- ▢ 1/2 cup Granulated Sugar
- ▢ 2 tbsp Cornstarch
- ▢ 1 tbsp Lemon Juice
- ▢ 1/4 tsp Ground Cinnamon
- ▢ 1/8 tsp Kosher Salt
To Finish
- ▢ 1 Eggs
- ▢ 1 tbsp Coarse Sugar
Instructions
- Prepare the Crust. In a large bowl, whisk flour, salt, and sugar. Cut in cold butter with a pastry cutter or two forks until mixture resembles coarse crumbs. Drizzle in ice water, 1 tbsp at a time, tossing until dough holds together. Divide into two discs, wrap in plastic, and chill 30 minutes.
- Make the Cherry Filling. In a saucepan over medium heat, combine cherries, sugar, cornstarch, lemon juice, cinnamon, and salt. Cook, stirring often, until mixture thickens and berries release their juices, about 5 minutes. Remove from heat and let cool slightly.
- Assemble the Pie. Preheat oven to 400°F. Roll out one dough disc on a floured surface into a 12″ circle and transfer to a 9″ pie plate. Pour in cherry filling. Roll out the second disc and lay it over the filling. Trim the excess crust, crimp edges to seal, and cut vents in the top. Brush with beaten egg and sprinkle coarse sugar.
- Bake. Bake 20 minutes at 400°F, then reduce to 350°F and bake an additional 25–30 minutes until crust is golden and filling bubbles. Let rest for at least 2 hours before slicing to allow filling to set.
Get support & connect with our community on Facebook!
Nutrition

If you already signed up, you should have received an email with a password to give you unlimited access to our FREE Printable Library. The password is case sensitive. Enter it below and get printing!
Password:

Cherry Pie Recipe | Traditional Cherry Pie
Ingredients
For The Crust
- 2 1/2 cups All Purpose Flour
- 1 tsp Kosher Salt
- 1 tsp Granulated Sugar
- 1 cup Unsalted Butter cold and cubed
- 6 tbsp Cold Water
Cherry Pie Filling
- 4 cups Cherries pitted
- 1/2 cup Granulated Sugar
- 2 tbsp Cornstarch
- 1 tbsp Lemon Juice
- 1/4 tsp Ground Cinnamon
- 1/8 tsp Kosher Salt
To Finish
- 1 Eggs
- 1 tbsp Coarse Sugar
Instructions
- Prepare the Crust. In a large bowl, whisk flour, salt, and sugar. Cut in cold butter with a pastry cutter or two forks until mixture resembles coarse crumbs. Drizzle in ice water, 1 tbsp at a time, tossing until dough holds together. Divide into two discs, wrap in plastic, and chill 30 minutes.
- Make the Cherry Filling. In a saucepan over medium heat, combine cherries, sugar, cornstarch, lemon juice, cinnamon, and salt. Cook, stirring often, until mixture thickens and berries release their juices, about 5 minutes. Remove from heat and let cool slightly.
- Assemble the Pie. Preheat oven to 400°F. Roll out one dough disc on a floured surface into a 12″ circle and transfer to a 9″ pie plate. Pour in cherry filling. Roll out the second disc and lay it over the filling. Trim the excess crust, crimp edges to seal, and cut vents in the top. Brush with beaten egg and sprinkle coarse sugar.
- Bake. Bake 20 minutes at 400°F, then reduce to 350°F and bake an additional 25–30 minutes until crust is golden and filling bubbles. Let rest for at least 2 hours before slicing to allow filling to set.
Cherry Pie Recipe | Traditional Cherry Pie https://twosleevers.com/cherry-pie-recipe/

If you’re craving the ultimate comfort food that’s easy to make and packed with bold flavors, you’re in for a treat. Learn how to make the perfect Blackstone Philly Cheesesteak!

Why You’ll Love This Brilliant Blackstone Recipe
- Quick and Satisfying. This recipe takes under 30 minutes from start to finish, perfect for busy weeknights or casual gatherings.
- Easy to Customize. Swap out toppings, cheeses, or even the type of bread to suit your taste.
- Bold and Savory. Loaded with juicy steak, caramelized onions, and gooey cheese, every bite is a flavor explosion.
- Outdoor Griddle Magic. Cooking on the Blackstone griddle ensures a smoky, crispy finish that elevates this classic dish.
With sizzling steak, caramelized onions, melted cheese, and soft hoagie rolls, this recipe delivers restaurant-quality results in the comfort of your home.
What Is A Blackstone Philly Cheesecake?
The Blackstone Philly Cheesesteak is a twist on the iconic Philadelphia sandwich, made even better by cooking it on a Blackstone griddle.
This outdoor cooking method gives the sandwich its signature sear and smoky flavor while keeping the steak juicy and tender. It’s the perfect way to enjoy this timeless sandwich outdoors.
What Is The Best Cut Of Meat For Philly Cheesesteak?
For the ultimate Philly cheesesteak experience, ribeye remains the top choice. Other less expensive cuts can still offer delicious alternatives based on your preferences and budget!
Ingredients You’ll Need
- Ribeye Steak - Thinly sliced for maximum tenderness and flavor. You can also use sirloin or flank steak.
- Onions - Yellow onions are ideal for their sweetness, but white or red onions work too.
- Bell Peppers (Optional) - Add some color and crunch with green, red, or yellow bell peppers.
- Cheese - Provolone or American cheese are traditional, but feel free to use Cheez Whiz for an authentic Philly twist.
- Hoagie Rolls - Soft rolls are key to holding all the juicy fillings.
- Butter or Oil - For sautéing the veggies and toasting the rolls.
- Salt and Pepper - For simple but effective seasoning.
How To Make A Blackstone Philly Cheesesteak
- Prepare the Steak. Thinly slice the ribeye steak while it’s slightly frozen for easier cutting. Season the slices with salt and pepper.
- Preheat the Blackstone Griddle. Heat your Blackstone griddle to medium-high heat. Add a drizzle of oil and let it heat up.
- Cook the Onions and Peppers. Add the sliced onions and bell peppers to the griddle. Sauté until softened and caramelized, about 5-7 minutes. Push them to one side.
- Sear the Steak. Add the seasoned steak slices to the griddle. Cook for 2-3 minutes on each side, breaking it apart with a spatula as it cooks. Combine the cooked steak with the veggies.
- Add the Cheese. Place slices of cheese over the steak and veggies. Cover with a griddle dome or large lid for 1-2 minutes to melt the cheese.
- Toast the Hoagie Rolls. Butter the inside of the hoagie rolls and place them on the griddle. Toast until golden and crispy.
- Assemble. Scoop the cheesy steak and veggie mixture onto the toasted hoagie rolls. Serve immediately and enjoy!

Tips And Tricks
Creating a delicious Blackstone Philly Cheesesteak is all about mastering the details for the perfect sandwich. Follow these tips and tricks to make it amazing every time:
- Freeze the Steak First. Partially freezing the steak makes it easier to slice thinly, ensuring even cooking.
- Don’t Overcrowd the Griddle. Leave enough space for proper searing and caramelization.
- Use a Dome for Melting Cheese. This simple tool helps the cheese melt evenly and quickly.
- Toast the Bread. A toasted hoagie roll adds texture and prevents it from getting soggy.
Variations
While the classic Philly cheesesteak is always a crowd-pleaser, there are plenty of ways to customize and elevate the dish to suit different tastes and preferences. Here are some fun and flavorful variations to try:
- Chicken Philly- Substitute chicken breast or thighs for the steak for a lighter option.
- Spicy Kick - Add jalapeños or a dash of hot sauce for extra heat.
- Garlic Butter Roll - Brush your hoagie rolls with garlic butter before toasting for added flavor.
- Veggie Delight - Skip the meat and load up on sautéed mushrooms, onions, and bell peppers for a vegetarian version.
What To Eat With A Blackstone Philly Cheesesteak
This hearty sandwich pairs perfectly with a variety of sides:
- French Fries - Crispy, golden fries are a classic pairing.
- Coleslaw - A tangy slaw balances the richness of the cheesesteak.
- Potato Chips - Keep it simple with a side of salty chips.
- Pickles - Add some crunch and acidity with dill pickles or pickled peppers.
How Long Does It Last?
Store the cooked steak, veggies, and cheese mixture in an airtight container for 3-4 days. Keep the bread separate to prevent it from getting soggy.
Reheat the sandwich filling on a griddle, stovetop, or microwave before serving.
Can You Freeze It?
Freeze the steak and veggie filling in a freezer-safe container or resealable bag for up to 2 months.
Thaw the steak and veggies overnight in the refrigerator before reheating and assembling your sandwich with fresh bread.
More Spectacular Sandwiches
- Chicken Parmesan Sandwich
- Breakfast Sliders
- Club Sandwich
- Italian Beef Sandwich
- Cuban Sandwich


Blackstone Philly Cheesesteak Recipe | Easy Philly Cheesesteaks
Ingredients
- ▢ 1 1/2 pounds Ribeye Steak , sliced thin
- ▢ 1 Yellow Onion , sliced
- ▢ 2 Bell Peppers , sliced
- ▢ 4 Hoagie Rolls
- ▢ 8 slices Provolone Cheese
- ▢ 3 tbsp Olive Oil
- ▢ 1/2 tsp Kosher Salt
- ▢ 1/4 tsp Ground Black Pepper
Instructions
- Prepare the Steak. Thinly slice the ribeye steak while it’s slightly frozen for easier cutting. Season the slices with salt and pepper.
- Preheat the Blackstone Griddle. Heat your Blackstone griddle to medium-high heat. Add a drizzle of oil and let it heat up.
- Cook the Onions and Peppers. Add the sliced onions and bell peppers to the griddle. Sauté until softened and caramelized, about 5-7 minutes. Push them to one side.
- Sear the Steak. Add the seasoned steak slices to the griddle. Cook for 2-3 minutes on each side, breaking it apart with a spatula as it cooks. Combine the cooked steak with the veggies.
- Add the Cheese. Place slices of cheese over the steak and veggies. Cover with a griddle dome or large lid for 1-2 minutes to melt the cheese.
- Toast the Hoagie Rolls. Butter the inside of the hoagie rolls and place them on the griddle. Toast until golden and crispy.
- Assemble. Scoop the cheesy steak and veggie mixture onto the toasted hoagie rolls. Serve immediately and enjoy!
