
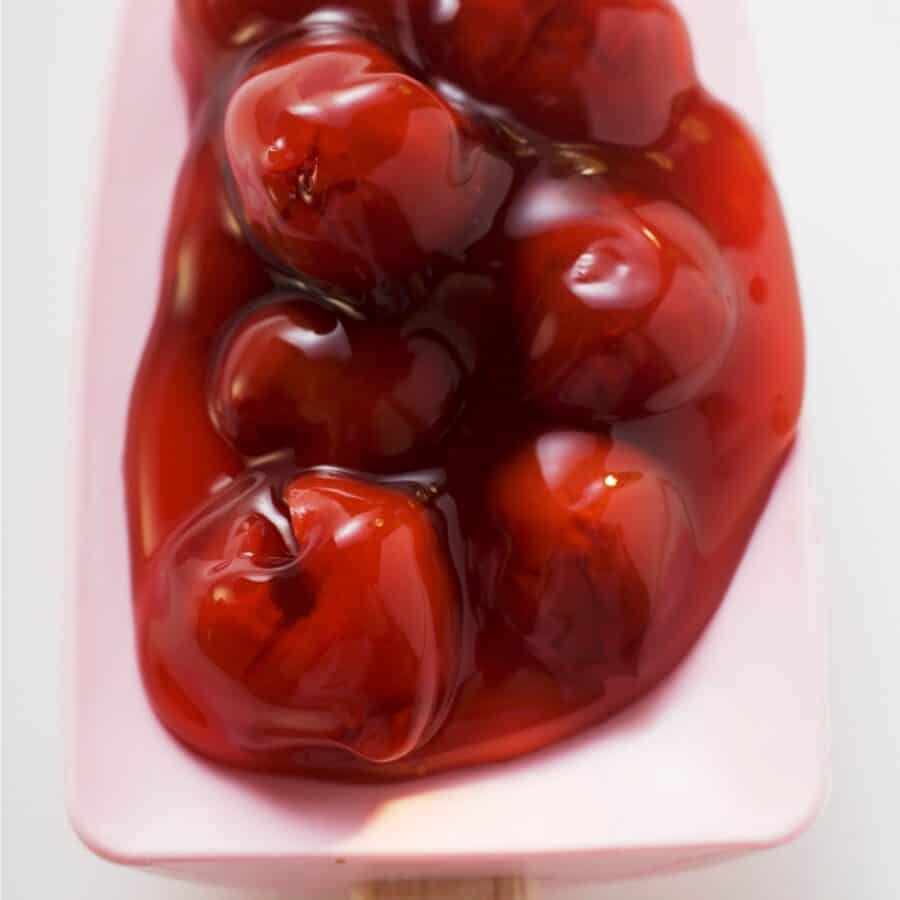
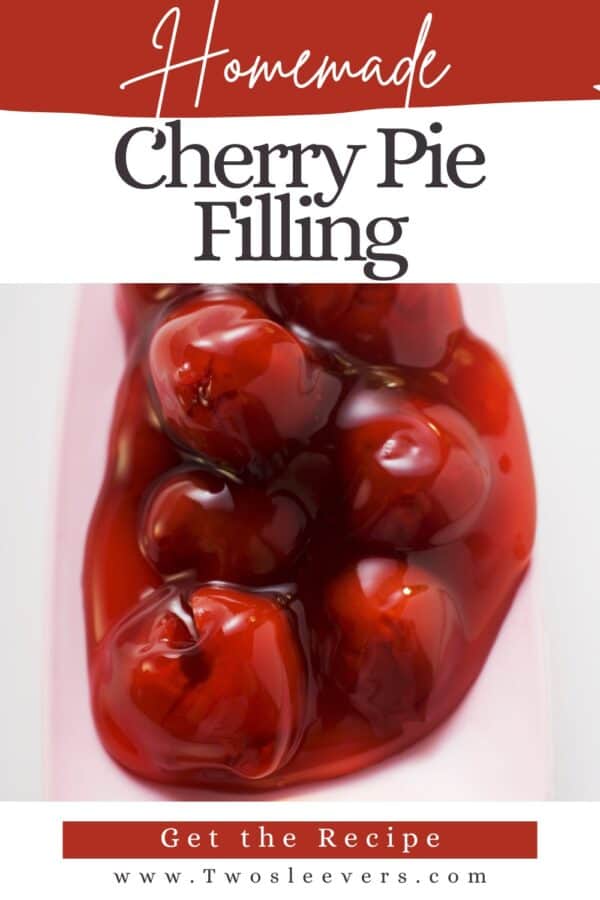
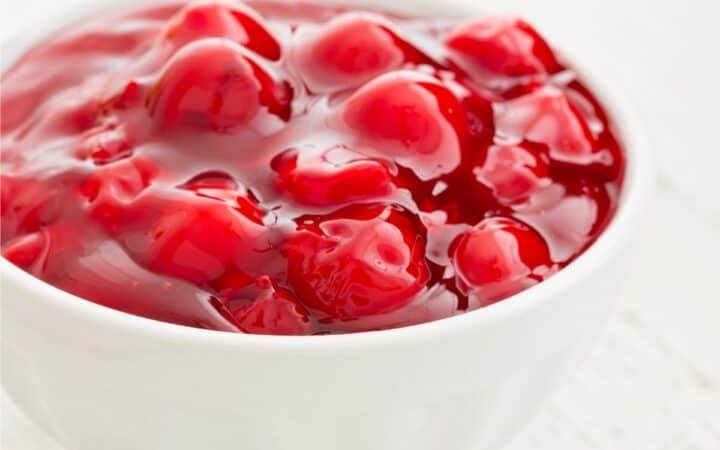
If you’ve ever bitten into a slice of cherry pie and wondered what makes that filling so perfectly sweet-tart and glossy, you’re in the right place. This homemade Cherry Pie Filling comes together in one pot with pantry-friendly ingredients and yields a jammy, pourable filling that’s infinitely better than anything you’ll find in a can.

Why You’ll Love This Fantastic Fruit Recipe
- Fresh Flavor. Ripe or frozen cherries burst with natural sweetness and a hint of tartness.
- Simple Ingredients. Just cherries, sugar, cornstarch, lemon, and warming spices.
- No Canning Required. Ready to use hot or cooled, no special equipment needed.
- Versatile. Perfect for pies, tarts, turnovers, ice cream topping, or spooned over yogurt.
What Does Cherry Pie Filling Taste Like?
Cherry pie filling offers a delightful balance of sweet and tart flavors. As you bite into a spoonful, you first notice the bright, juicy burst of cherry, its natural sweetness enhanced by sugar yet kept lively by a gentle tang.
The texture is luxuriously smooth and syrupy, with just enough body from the thickened juices to coat the palate. Optional hints of almond or cinnamon can add a subtle warmth or nutty note, rounding out the fruitiness with cozy complexity.
Overall, cherry pie filling tastes like sunshine in a spoon. It’s richly sweet, refreshingly tart, and deeply satisfying.
Is It As Good As Store-Bought?
Homemade cherry pie filling often outshines its store-bought counterpart in both flavor and texture.
When you make it yourself, you control the sweetness level, choose the ripest cherries, and can infuse fresh lemon juice or warm spices (like cinnamon or almond extract) exactly to your taste, resulting in a bright, vibrant filling with real fruit pieces.
Ingredients You’ll Need
- Pitted Cherries- The heart of the filling. Fresh or thawed frozen cherries provide the sweet-tart fruit base and release natural juices as they cook.
- Granulated Sugar- Sweetens the cherries and helps draw out their juices, creating a syrupy base.
- Cornstarch - Suspends and thickens the cherry juices into a glossy, spoonable sauce without cloudiness.
- Fresh Lemon Juice - Cuts the sweetness with bright acidity, balances the overall flavor, and prevents the filling from tasting flat.
- Almond Extract - Lends a delicate, nutty fragrance that enhances the cherries’ natural almond-like undertones.
- Pinch of Salt - Amplifies all the fruit flavors and rounds out the sweetness, making the filling taste more vibrant.
- Ground Cinnamon- Adds a hint of warm, spicy depth that pairs beautifully with cherry’s sweetness.
How To Make Cherry Pie Filling
- Combine cherries and sugar. In a medium saucepan over medium heat, stir together cherries and sugar. Let sit for 5 minutes so the cherries release some juice.
- Thicken the sauce. Whisk cornstarch with 2 Tbsp cold water until smooth. Stir into the cherry mixture.
- Simmer gently. Cook, stirring constantly, until the filling thickens and just begins to bubble, about 3–4 minutes.
- Finish with flavor. Remove from heat and stir in lemon juice, almond extract (if using), a pinch of salt, and cinnamon. Let cool slightly before using.
Tips And Tricks
Here are a few handy tips and tricks to ensure your cherry pie filling turns out perfectly glossy, thick, and bursting with flavor:
- Prevent grainy sauce. Dissolve the cornstarch completely in cold water before adding.
- Control sweetness. Taste your cherries first, then reduce sugar by a tablespoon if they’re very sweet.
- Skim foam. If foam gathers on top while simmering, skim it off for a crystal-clear filling.
- Cool before filling. Let the sauce cool 10–15 minutes to avoid a soggy pie crust.
Variations
If you love classic cherry pie filling, try these simple twists to keep things exciting and tailor it to your taste:
- Mixed Berry Filling. Swap half the cherries for blueberries or raspberries for a berry medley.
- Spiced Cherry. Stir in a pinch of ground ginger or cardamom for a festive twist.
- Wine-Infused. Deglaze the pan with 2 Tbsp red wine instead of water when dissolving the cornstarch.
What To Use Cherry Pie Filling For
Here are some delicious ways to put that vibrant, jammy goodness of homemade cherry pie filling to work:
- Classic Cherry Pie - Spoon into a flaky double-crust pie shell for the timeless dessert.
- Cherry Galette - Spread filling on rolled-out pastry, fold the edges over, and bake for a rustic freeform tart.
- Cheesecake Topping - Dollop warm filling over slices of vanilla or no-bake cheesecake for a bright, fruity finish.
- Ice Cream Sundaes - Warm and drizzle over vanilla ice cream , then top with whipped cream and chopped nuts.
- Yogurt Parfaits - Layer cherry filling with Greek yogurt and granola for an easy breakfast or snack.
How Long Does It Last?
Store leftover cherry pie filling in an airtight container in the refrigerator for up to 5 days. The thickener will continue to set as it chills, so give it a good stir before reheating or using.
Can You Freeze It?
Yes, you can freeze this homemade pie filling in a freezer-safe container for up to 3 months.
When you’re ready to use it, thaw it overnight in the refrigerator and gently rewarm on the stove, adding a splash of water if it becomes too thick.
More Ways To Use Cherries
- Instant Pot Cherry Clafoutis
- Cherry Poke Cake
- Cherry Limeade
- Mini Cheesecakes
- Cherry Fluff
Cherry Pie Filling Recipe | Homemade Cherry Pie Filling
Ingredients
- ▢ 4 cups Cherries , pitted
- ▢ 1/2 cup Granulated Sugar
- ▢ 2 tbsp Cornstarch
- ▢ 1 tbsp Lemon Juice
- ▢ 1/4 tsp Almond Extract
- ▢ 1/8 tsp Kosher Salt
- ▢ 1/4 tsp Ground Cinnamon , optional
- ▢ 2 tbsp Cold Water
Instructions
- Combine cherries and sugar. In a medium saucepan over medium heat, stir together cherries and sugar. Let sit for 5 minutes so the cherries release some juice.
- Thicken the sauce. Whisk cornstarch with 2 Tbsp cold water until smooth. Stir into the cherry mixture.
- Simmer gently. Cook, stirring constantly, until the filling thickens and just begins to bubble, about 3–4 minutes.
- Finish with flavor. Remove from heat and stir in lemon juice, almond extract (if using), a pinch of salt, and cinnamon. Let cool slightly before using.
Get support & connect with our community on Facebook!
Nutrition

If you already signed up, you should have received an email with a password to give you unlimited access to our FREE Printable Library. The password is case sensitive. Enter it below and get printing!
Password:

Cherry Pie Filling Recipe | Homemade Cherry Pie Filling
Ingredients
- 4 cups Cherries pitted
- 1/2 cup Granulated Sugar
- 2 tbsp Cornstarch
- 1 tbsp Lemon Juice
- 1/4 tsp Almond Extract
- 1/8 tsp Kosher Salt
- 1/4 tsp Ground Cinnamon optional
- 2 tbsp Cold Water
Instructions
- Combine cherries and sugar. In a medium saucepan over medium heat, stir together cherries and sugar. Let sit for 5 minutes so the cherries release some juice.
- Thicken the sauce. Whisk cornstarch with 2 Tbsp cold water until smooth. Stir into the cherry mixture.
- Simmer gently. Cook, stirring constantly, until the filling thickens and just begins to bubble, about 3–4 minutes.
- Finish with flavor. Remove from heat and stir in lemon juice, almond extract (if using), a pinch of salt, and cinnamon. Let cool slightly before using.
Cherry Pie Filling Recipe | Homemade Cherry Pie Filling https://twosleevers.com/cherry-pie-filling-recipe/

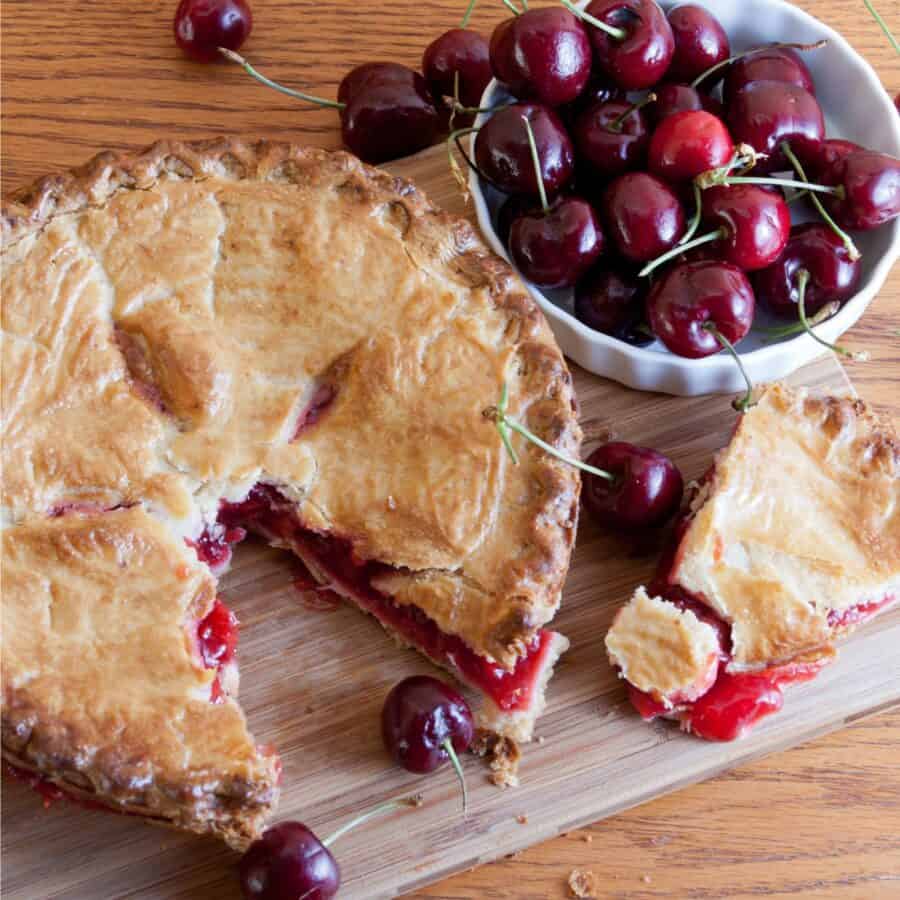
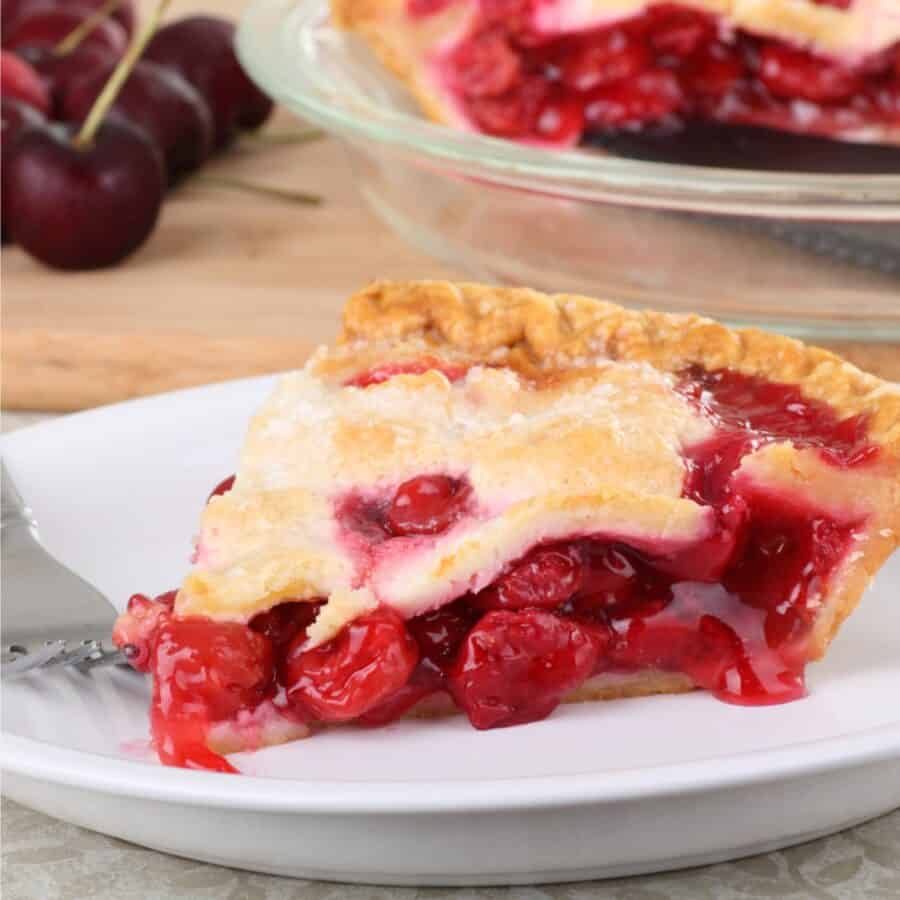
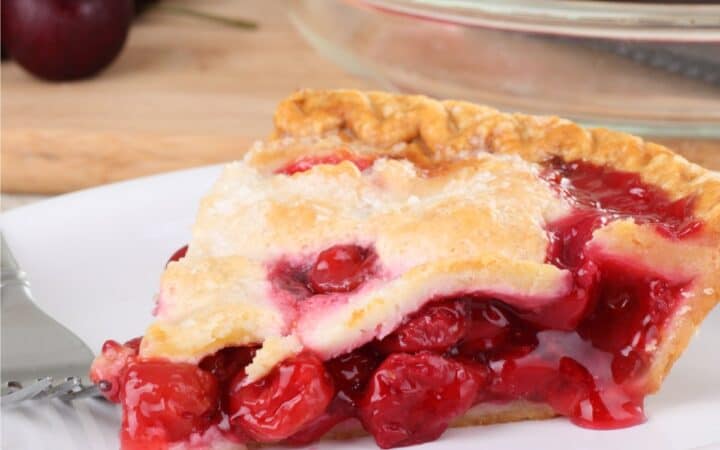
If you’re craving the ultimate homemade cherry pie, look no further. This easy Cherry Pie recipe delivers a flaky, buttery crust filled with juicy, sweet‐tart cherries and a perfectly glossy finish.
Why You’ll Love This Perfect Pie
- Timeless. Nothing says summer like a down-home cherry pie made with juicy, tart cherries.
- Easy. With a few simple steps (no fussy lattice work required) you’ll have a gorgeous pie in under an hour.
- Versatile. Swap in fresh, frozen, or canned cherries based on seasonality and pantry stock.
- Crowd-Pleaser. Sweet, tangy cherries bubbling under a golden crust are guaranteed to disappear fast.
Whether you’re celebrating the Fourth of July, hosting a backyard barbecue, or simply craving a slice of nostalgia, this cherry pie delivers old-fashioned comfort with every bite.
What Does Cherry Pie Taste Like?
A well-made cherry pie strikes the perfect balance of sweet and tart, with a flaky crust that frames the jammy filling. Fresh or frozen cherries work beautifully, and when you taste the first forkful, you’ll understand why cherry pie is a classic dessert for every occasion.
How Do You Keep The Bottom Crust From A Cherry Pie From Getting Soggy?
If you’re having trouble with a soggy bottom crust, here are three different things you can try to keep it nice and firm:
- Blind bake the crust. Roll it out, chill it, then par‐dock the dough, line it with parchment, fill with pie weights, and bake briefly to seal the starches before adding the filling.
- Next, you can create a moisture barrier by brushing the par‐baked shell with a thin coat of beaten egg white or melted chocolate, which sets into a waterproof layer when returned to the oven for a minute or two.
- Finally, make sure you thicken your cherry filling properly. Toss the fruit with enough cornstarch (or a touch of instant tapioca) and drain any excess juice before filling the shell.
For an extra guarantee of a well cooked crust, bake the pie on the lowest oven rack so that the bottom crust receives direct heat to finish crisping even as the fruit bubbles above.
Ingredients You’ll Need
For the Pie Crust
- All-purpose flour - Provides the structure and tender crumb that holds your pie together.
- Salt - Enhances the flavor of the dough and balances the sweetness.
- Sugar - Adds a hint of sweetness to round out the savory notes of the crust.
- Cold unsalted butter - Creates pockets of fat that melt during baking, yielding a flaky, layered crust.
- Ice water - Hydrates the flour just enough to bind the dough without warming the butter, ensuring maximum flakiness.
For The Cherry Pie Filling
- Fresh or frozen pitted cherries - The centerpiece of the pie: their natural sweetness and gentle tartness give the filling its characteristic flavor.
- Granulated sugar - Sweetens the cherries and helps draw out their juices.
- Cornstarch - Thickens those released juices into a glossy, jam-like consistency that won’t run.
- Lemon juice - Brightens the filling’s sweetness and balances the fruit’s natural tartness.
- Ground cinnamon - Imparts warm, aromatic depth for a subtly spiced profile.
- Salt - Rounds out the sweetness and enhances the cherries’ flavor.
To Finish
- Egg - Brushed atop the crust for a shiny, golden finish.
- Coarse sugar - Sprinkled on the egg-wash for a sparkly crunch and extra sweetness.
How To Make A Cherry Pie
- Prepare the Crust. In a large bowl, whisk flour, salt, and sugar. Cut in cold butter with a pastry cutter or two forks until mixture resembles coarse crumbs. Drizzle in ice water, 1 tbsp at a time, tossing until dough holds together. Divide into two discs, wrap in plastic, and chill 30 minutes.
- Make the Cherry Filling. In a saucepan over medium heat, combine cherries, sugar, cornstarch, lemon juice, cinnamon, and salt. Cook, stirring often, until mixture thickens and berries release their juices, about 5 minutes. Remove from heat and let cool slightly.
- Assemble the Pie. Preheat oven to 400°F. Roll out one dough disc on a floured surface into a 12″ circle and transfer to a 9″ pie plate. Pour in cherry filling. Roll out the second disc and lay it over the filling. Trim the excess crust, crimp edges to seal, and cut vents in the top. Brush with beaten egg and sprinkle coarse sugar.
- Bake. Bake 20 minutes at 400°F, then reduce to 350°F and bake an additional 25–30 minutes until crust is golden and filling bubbles. Let rest for at least 2 hours before slicing to allow filling to set.
Tips And Tricks
If you want a cherry pie that’s as beautiful as it is delicious, a few simple tips will help you achieve a perfectly flaky crust, jammy filling, and picture-perfect finish.
- Use cold ingredients . Keep butter and water ice-cold for a flaky crust.
- Don’t skip resting time . Let both the dough and the baked pie rest; this prevents shrinking and runny filling.
- Patch holes . Guard against bubbling over by placing a pie plate on the rack below.
- Adjust the sweetness . Taste your cherries first. Add more or less sugar to suit tart or sweet varieties.
Variations
Whether you’re craving extra texture, boozy warmth, or a twist on the classic, these variations will take your cherry pie to the next level:
- Lattice Top - Weave strips of dough over the filling for a classic look.
- Almond Scented - Add ½ tsp almond extract to the filling for a nutty nuance.
- Mixed Berry - Substitute half the cherries with blueberries or raspberries for color and complexity.
- Mini Hand Pies - Cut rounds of dough, fill, fold, and seal the edges for portable treats.
What To Enjoy With Cherry Pie
Cherry pie’s sweet‐tart brightness pairs beautifully with a variety of creamy, cooling, or spiced accompaniments to round out every bite:
- Vanilla Ice Cream - A classic contrast of cold creaminess melting into warm, jammy cherries.
- Whipped Cream - Lightly sweetened or boozy (a splash of bourbon!) for an airy finish.
- Sharp Cheddar Cheese - A thin slice of aged cheddar on the side brings savory balance and a delightful flavor pop.
- Espresso or Strong Coffee - The bittersweet depth of coffee cuts through the pie’s richness.
How Long Does It Last?
Properly stored, homemade cherry pie can be kept covered at room temperature for up to 2 days.
For longer storage, cover and refrigerate for up to 5 days, though the crust may lose some of its crispness. To make it taste straight out of the oven, warm slices in a 350°F oven for 5–10 minutes.
Can You Freeze It?
Yes! Freeze whole (well-wrapped) or individual slices in freezer-safe containers for up to 3 months.
Thaw your leftovers overnight in the fridge, then reheat in a 350°F oven for 10–15 minutes until warmed through and bubbly.
More Fruit-Filled Recipes
- Cheesecake Fruit Salad
- Peach Muffins
- Blueberry Cinnamon Rolls
- Fruit Hand Pies
- Strawberry Pretzel Salad
- Fruit Salad With Cool Whip

Cherry Pie Recipe | Traditional Cherry Pie
Ingredients
For The Crust
- ▢ 2 1/2 cups All Purpose Flour
- ▢ 1 tsp Kosher Salt
- ▢ 1 tsp Granulated Sugar
- ▢ 1 cup Unsalted Butter , cold and cubed
- ▢ 6 tbsp Cold Water
Cherry Pie Filling
- ▢ 4 cups Cherries , pitted
- ▢ 1/2 cup Granulated Sugar
- ▢ 2 tbsp Cornstarch
- ▢ 1 tbsp Lemon Juice
- ▢ 1/4 tsp Ground Cinnamon
- ▢ 1/8 tsp Kosher Salt
To Finish
- ▢ 1 Eggs
- ▢ 1 tbsp Coarse Sugar
Instructions
- Prepare the Crust. In a large bowl, whisk flour, salt, and sugar. Cut in cold butter with a pastry cutter or two forks until mixture resembles coarse crumbs. Drizzle in ice water, 1 tbsp at a time, tossing until dough holds together. Divide into two discs, wrap in plastic, and chill 30 minutes.
- Make the Cherry Filling. In a saucepan over medium heat, combine cherries, sugar, cornstarch, lemon juice, cinnamon, and salt. Cook, stirring often, until mixture thickens and berries release their juices, about 5 minutes. Remove from heat and let cool slightly.
- Assemble the Pie. Preheat oven to 400°F. Roll out one dough disc on a floured surface into a 12″ circle and transfer to a 9″ pie plate. Pour in cherry filling. Roll out the second disc and lay it over the filling. Trim the excess crust, crimp edges to seal, and cut vents in the top. Brush with beaten egg and sprinkle coarse sugar.
- Bake. Bake 20 minutes at 400°F, then reduce to 350°F and bake an additional 25–30 minutes until crust is golden and filling bubbles. Let rest for at least 2 hours before slicing to allow filling to set.
