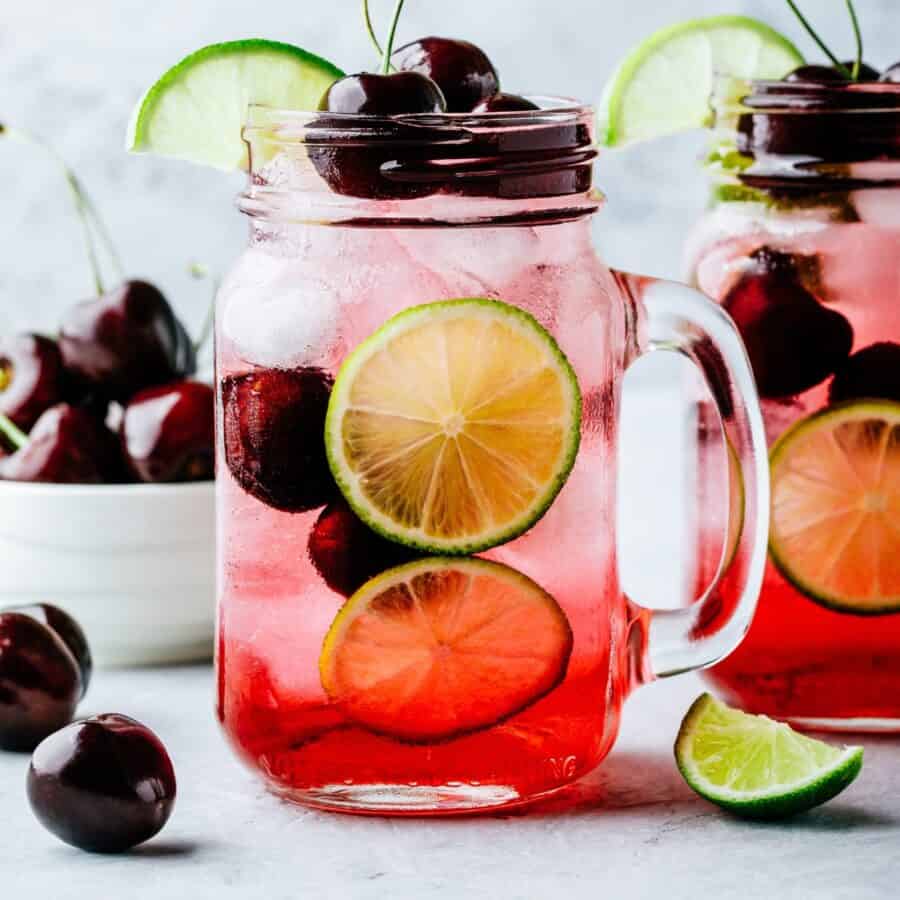
If you’re a fan of the delightful combination of sweet cherries and tangy lime, you’re in for a treat! Learn how to make the easiest Homemade Cherry Limeade. This refreshing drink achieves that perfect balance between sweet and tart, offering an invigorating flavor that’s hard to resist.
Why You’ll Love This Delicious Drink
- Quick & Easy . Ready in under 10 minutes with simple ingredients.
- Refreshing . Perfect for hot summer days or any time you need a refreshing drink.
- Customizable . Adjust the sweetness and tartness to your liking.
- Natural Ingredients . Made with fresh cherries and limes, no artificial flavors.
With the convenience of this recipe, you’ve achieved a café-quality beverage that will leave your friends and family asking for more. Whether you’re hosting a summer barbecue or simply treating yourself to a delicious drink, this cherry limeade is guaranteed to be a hit.
What Does A Cherry Limeade Taste Like?
Cherry Limeade is absolutely delicious and popular among beverage enthusiasts. This drink offers a delightful combination of sweet cherries and tart lime, creating a refreshing and satisfying experience.
The vibrant color and invigorating flavors make it a favorite choice for parties, picnics, and casual gatherings.
Is A Cherry Limeade Healthy?
Cherry Limeade can be a healthy drink, especially if you control the sugar content and enjoy it as part of a balanced diet.
The amount of sugar added to the limeade is the main factor that can affect its healthiness. A significant amount of granulated sugar can increase the calorie content and potentially negate some of the health benefits of the fresh fruit.
Ingredients You’ll Need
- Fresh Cherries - Provides natural sweetness and a vibrant color.
- Limes - Adds a tangy and refreshing flavor.
- Granulated Sugar - Sweetens the limeade to your liking.
- Water - Dilutes the concentrate for the perfect consistency. Ice : Keeps the limeade chilled and refreshing.
How To Make A Cherry Limeade
- Prepare the Ingredients . Pit the fresh cherries. You can use a cherry pitter or slice them in half and remove the pits manually. Roll the limes on the countertop to soften them, then cut them in half and juice them. Set aside some lime slices for garnish if desired.
- Combine Cherries and Sugar . In a saucepan, combine the pitted cherries and granulated sugar. Add a cup of water.
- Simmer Cook over medium heat until the cherries break down and the mixture becomes syrupy, about 10 minutes. Stir occasionally.
- Strain . Once done, strain the syrup through a fine-mesh sieve to remove the cherry solids. Let it cool.
- Combine Lime Juice and Water . In a large pitcher, combine the freshly squeezed lime juice with 3 cups of water. Adjust the water amount based on your taste preference.
- Add Cherry Syrup . Pour in the cooled cherry syrup. Stir well to combine.
- Serve . Fill glasses with ice cubes. Pour the cherry limeade over the ice. Garnish with lime slices and mint leaves if desired.

Tips And Tricks
Making Homemade Cherry Limeade is a fun and easy endeavor, and a few tips can help you achieve the best possible results:
- Adjust Sweetness . Taste the limeade before serving and adjust the sweetness by adding more sugar if necessary.
- Chill Well . For the best flavor, chill the limeade for at least an hour before serving.
- Use Fresh Ingredients . Fresh cherries and limes provide the best flavor and color.
Variations
If you love Cherry Limeade and want to try some creative variations, here are a few delicious ideas to explore:
- Sparkling - Add a splash of sparkling water or club soda for a fizzy twist.
- Alcoholic - For an adult version, add a shot of vodka or rum to each glass.
- Berry Limeade - Mix in fresh berries like raspberries or blueberries for a fruity variation.
What To Enjoy With A Cherry Limeade
Cherry Limeade is a versatile drink that pairs well with a variety of snacks and dishes. Here are some delicious options to consider serving alongside it:
- Grilled Chicken - The tangy limeade complements the smoky flavors of grilled chicken.
- Salads - Serve with a fresh garden salad for a light and refreshing meal.
- Sandwiches - Perfect alongside deli sandwiches or wraps.
- Desserts - Pairs wonderfully with light desserts like fruit tarts or lemon bars.
How Long Does It Last?
Homemade Cherry Limeade can be stored in the refrigerator for up to 3 days. The flavors might intensify over time, making it even more delicious.
Can You Freeze It?
Yes, you can freeze Cherry Limeade. Pour the limeade into ice cube trays and freeze. Once frozen, transfer the cubes to a resealable freezer bag. Use the cubes to chill and flavor other beverages or to make slushy drinks.
More Delightful Drink Recipes
- Pink Drink
- Instant Pot Iced Tea
- Mango Lassi
- Iced Caramel Macchiato
- Pressure Cooker Horchata
- Homemade Irish Cream
- Protein Smoothie
- Non-Alcholic Margarita


Cherry Limeade Recipe | Refreshing Summer Drink
Ingredients
- ▢ 2 cups Cherries , pitted
- ▢ 4 Limes , juiced
- ▢ 3/4 cup Granulated Sugar
- ▢ 4 cups Water
- ▢ Ice , for serving
Instructions
- Prepare the Ingredients . Pit the fresh cherries. You can use a cherry pitter or slice them in half and remove the pits manually. Roll the limes on the countertop to soften them, then cut them in half and juice them. Set aside some lime slices for garnish if desired.
- Combine Cherries and Sugar . In a saucepan, combine the pitted cherries and granulated sugar. Add a cup of water.
- Simmer Cook over medium heat until the cherries break down and the mixture becomes syrupy, about 10 minutes. Stir occasionally.
- Strain . Once done, strain the syrup through a fine-mesh sieve to remove the cherry solids. Let it cool.
- Combine Lime Juice and Water . In a large pitcher, combine the freshly squeezed lime juice with 3 cups of water. Adjust the water amount based on your taste preference.
- Add Cherry Syrup . Pour in the cooled cherry syrup. Stir well to combine.
- Serve . Fill glasses with ice cubes. Pour the cherry limeade over the ice. Garnish with lime slices and mint leaves if desired.
Get support & connect with our community on Facebook!
Nutrition

If you already signed up, you should have received an email with a password to give you unlimited access to our FREE Printable Library. The password is case sensitive. Enter it below and get printing!
Password:

Cherry Limeade Recipe | Refreshing Summer Drink
Ingredients
- 2 cups Cherries pitted
- 4 Limes juiced
- 3/4 cup Granulated Sugar
- 4 cups Water
- Ice for serving
Instructions
- Prepare the Ingredients . Pit the fresh cherries. You can use a cherry pitter or slice them in half and remove the pits manually. Roll the limes on the countertop to soften them, then cut them in half and juice them. Set aside some lime slices for garnish if desired.
- Combine Cherries and Sugar . In a saucepan, combine the pitted cherries and granulated sugar. Add a cup of water.
- Simmer Cook over medium heat until the cherries break down and the mixture becomes syrupy, about 10 minutes. Stir occasionally.
- Strain . Once done, strain the syrup through a fine-mesh sieve to remove the cherry solids. Let it cool.
- Combine Lime Juice and Water . In a large pitcher, combine the freshly squeezed lime juice with 3 cups of water. Adjust the water amount based on your taste preference.
- Add Cherry Syrup . Pour in the cooled cherry syrup. Stir well to combine.
- Serve . Fill glasses with ice cubes. Pour the cherry limeade over the ice. Garnish with lime slices and mint leaves if desired.
Cherry Limeade Recipe | Refreshing Summer Drink https://twosleevers.com/cherry-limeade-recipe/

If you’re a fan of the savory and sweet combination of teriyaki sauce and tender chicken, you’re in for a treat! Learn how to make the easiest Baked Chicken Teriyaki. You’ll achieve that perfect balance between a succulent interior and a deliciously glazed exterior while indulging in irresistible flavors.

Why You’ll Love This Flavorful Feast
- Fast. Ready in under 45 minutes with simple ingredients.
- Easy. Prep the chicken, whip up a quick teriyaki sauce, and bake to perfection.
- Healthy. High in protein and can be served with veggies for a balanced meal.
- Delicious. Packed with flavor that will make your taste buds dance.
With the convenience of baking, you’ve achieved a restaurant-quality dish that will leave your friends and family craving more. Whether you’re hosting a dinner party or simply treating yourself to a delicious meal, this baked chicken teriyaki is guaranteed to be a hit.
What Does Baked Chicken Teriyaki Taste Like?
Baked Chicken Teriyaki is absolutely delicious and a favorite among teriyaki enthusiasts. This dish offers a delectable combination of sweet and savory flavors that appeals to a wide range of palates.
The richness of the teriyaki sauce, combined with the tender, juicy chicken, creates a mouthwatering and satisfying eating experience.
Is It Better To Bake Chicken Covered Or Uncovered?
Whether to bake chicken covered or uncovered depends on the dish you are preparing and the desired outcome. Covering the chicken helps retain moisture and infuse flavors, while baking uncovered results in crispy skin and a more intense flavor.
For this recipe, you’ll want to let the chicken baked uncovered.
Ingredients You’ll Need
- Chicken- I prefer chicken thighs for their juiciness, but you can use breasts if you prefer.
- Soy Sauce- Adds a savory base to the teriyaki sauce.
- Brown Sugar - Balances the soy sauce with sweetness.
- Garlic - Use freshly minced garlic for the best flavor.
- Ginger - Freshly grated ginger adds a warm, spicy note.
- Honey - Adds a natural sweetness and a lovely glaze.
- Rice Vinegar - Adds a tangy contrast to the sweetness.
- Cornstarch - Helps thicken the sauce.
- Sesame Seeds - Optional, for garnish.
- Green Onions - Optional, for garnish.
How To Make Baked Chicken Teriyaki
- Prepare the Chicken. Start by preheating your oven to 400°F. Pat the chicken dry with paper towels. Dry chicken will result in a better texture. Place the chicken in a baking dish.
- Make the Teriyaki Sauce. In a small saucepan, combine soy sauce, brown sugar, minced garlic, grated ginger, honey, and rice vinegar. Bring to a boil over medium heat. In a small bowl, mix cornstarch with water to create a slurry. Add the slurry to the saucepan and stir until the sauce thickens.
- Bake to Perfection. Pour half of the teriyaki sauce over the chicken in the baking dish. Bake in the preheated oven for 25-30 minutes, basting with the remaining sauce halfway through the cooking time. The chicken should be golden brown and cooked through.
- Garnish and Serve. Once the chicken is cooked, transfer it to a serving platter. Sprinkle sesame seeds and chopped green onions over the top for a burst of color and added freshness.

Tips And Tricks
Making Baked Chicken Teriyaki is a delightful endeavor, and a few tips and tricks can help you achieve the best possible results. Here are some pointers to ensure your chicken turns out juicy, flavorful, and utterly irresistible:
- Use Fresh Ingredients . Fresh garlic and ginger will make a big difference in the flavor of your teriyaki sauce.
- Baste the Chicken . Basting the chicken with the sauce halfway through baking ensures it stays moist and flavorful.
- Let it Rest . Allow the chicken to rest for a few minutes before serving. This helps the juices redistribute throughout the meat.
Variations
If you’re a fan of Baked Chicken Teriyaki and want to try some creative variations, here are a few delicious ideas to explore:
- Spicy- Add a kick of heat by mixing in some crushed red pepper flakes or sriracha to the teriyaki sauce.
- Pineapple- Add chunks of pineapple to the baking dish for a tropical twist.
- Vegetable- Add some chopped vegetables like bell peppers, broccoli, and snap peas to the baking dish for a complete meal.
What To Eat With Baked Chicken Teriyaki
Baked Chicken Teriyaki is a versatile dish that pairs well with a variety of sides. Here are some delicious options to consider serving alongside it:
- Rice - A classic pairing that absorbs the delicious teriyaki sauce.
- Vegetables - Adds a healthy and colorful component to your meal.
- Noodles - Try serving the chicken over a bed of noodles for a hearty option.
- Salad - A fresh green salad can provide a nice contrast to the rich flavors of the teriyaki.
How Long Does It Last?
Cooked Baked Chicken Teriyaki can be stored in the refrigerator in an airtight container for up to 3 to 4 days. The flavors may intensify over time, so for the best bite, they are best enjoyed as soon as possible.
Can You Freeze It?
Properly frozen Baked Chicken Teriyaki can last in the freezer for up to 2 to 3 months without significant loss of quality. However, for the best taste and texture, try to enjoy it within a few weeks of freezing.
More Craveworthy Chicken Recipes
- Instant Pot Butter Chicken
- Creamy Chicken Salad
- Chicken Korma
- Buffalo Chicken Tenders
- Firecracker Chicken
- Tequila Lime Chicken
- Chicken Yakhni Pilau
- Gochujang Chicken
- Katsu Curry
- Grilled Teriyaki Chicken


Baked Chicken Teriyaki Recipe | Oven Baked Teriyaki Chicken
Ingredients
- ▢ 4 Chicken Breasts
- ▢ 1/2 cup Soy Sauce
- ▢ 1/4 cup Brown Sugar
- ▢ 3 cloves Garlic , minced
- ▢ 1 tbsp Ginger , freshly grated
- ▢ 2 tbsp Honey
- ▢ 2 tbsp Rice Vinegar
- ▢ 1 tbsp Cornstarch
- ▢ 1 tbsp Water
- ▢ 1 tbsp Sesame Seeds
- ▢ 2 Green Onions , diced
Instructions
- Prepare the Chicken. Start by preheating your oven to 400°F. Pat the chicken dry with paper towels. Dry chicken will result in a better texture. Place the chicken in a baking dish.
- Make the Teriyaki Sauce. In a small saucepan, combine soy sauce, brown sugar, minced garlic, grated ginger, honey, and rice vinegar. Bring to a boil over medium heat. In a small bowl, mix cornstarch with water to create a slurry. Add the slurry to the saucepan and stir until the sauce thickens.
- Bake to Perfection. Pour half of the teriyaki sauce over the chicken in the baking dish. Bake in the preheated oven for 25-30 minutes, basting with the remaining sauce halfway through the cooking time. The chicken should be golden brown and cooked through.
- Garnish and Serve. Once the chicken is cooked, transfer it to a serving platter. Sprinkle sesame seeds and chopped green onions over the top for a burst of color and added freshness.
