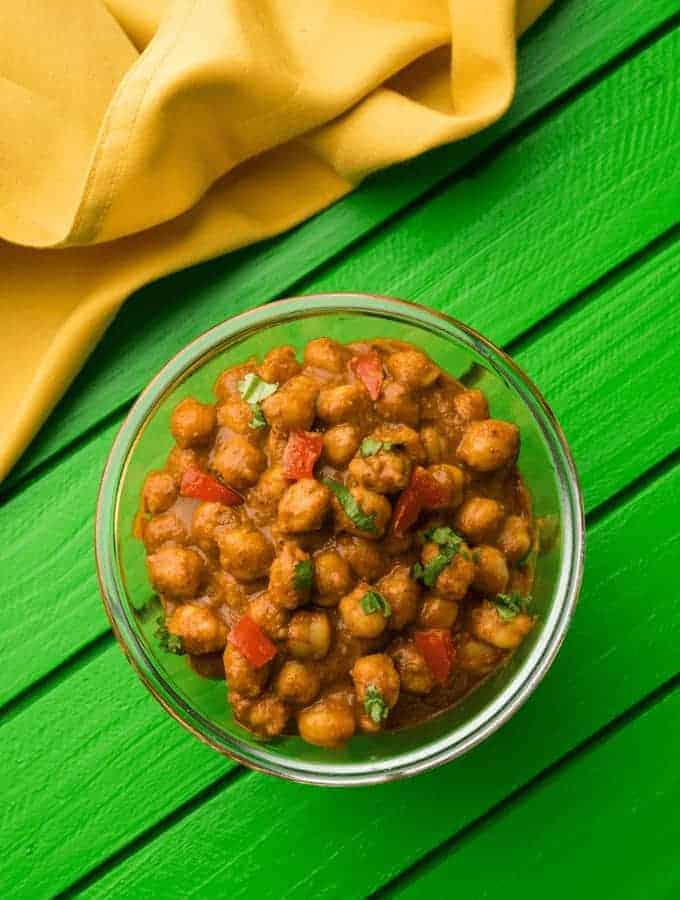
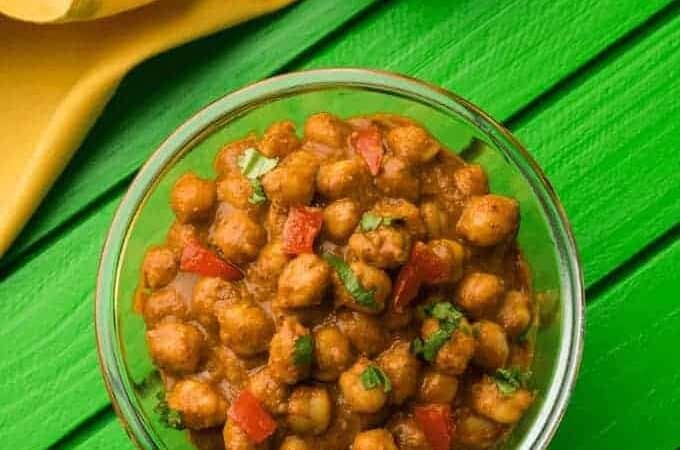
Instant Pot Chana Masala is a way to get all of the rich, aromatic flavors you know and love in a traditional Chana Masala recipe in a fraction of the time.

Why You’re Going To Love This Chana Masala Recipe
- Fast. Ok, so this isn’t one of the quickest recipes I’ve ever created, but compared to how long it could take without the help of an Instant Pot , it’s very fast.
- Easy. Use prepared Onion Masala to reduce the number of steps it takes to create a delicious Chana Masala.
- Authentic. This will make you feel like you’re eating a delicious home-cooked meal in India.
- Vegetarian. This vegetarian recipe is absolutely packed with protein thanks to chickpeas, so it’s a great meal option.
I call them homestyle because…well, they ARE homestyle which means they’re not overly spiced, and they don’t have that deep red color that restaurant chana do.
These taste like what my mom used to make, and she was Punjabi. She was also a very good cook, so that is good enough for me to try to replicate.
What Is Chana Masala?
Chana Masala is a wonderful, savory, vegetarian Indian dish made with chickpeas, and a classic sauce, or “gravy”, made with onions, tomatoes, ginger, garlic, and a bunch of spices.
Ingredients You’ll Need
- Dried Chickpeas
- Bay Leaves
- Onion masala
- Ghee
- Chana masala spice mix - You can omit this if you don’t have it, although it really does add an authentic taste.
- Kosher Salt
- Amchoor - Use this if you have it, but if you don’t you can also use the juice of a whole lemon, squeezed.
How To Make Chana Masala
The list of steps below may seem daunting at first glance, but I promise they are all extremely easy to follow and will save you an enormous amount of time compared to preparing traditional homemade Chana Masala.
Quick Soak and Cook the Chana
- I find it easier to quick soak the chana in hot water for an hour but if you’re using an Instant Pot you can skip this step. In that case, you will need to add cooking time to compensate.
- Drain the water the chana is soaked in and put the chana in your Instant Pot along with 3 cups of water.
- Add the bay leaves and cook at high pressure for 15 minutes if you want it firm, or 20 minutes if you want a slightly creamy curry (I went with 20 minutes).
- Allow it to release pressure naturally.
- Open it up and drain the water, but save the water for now.
- Use a potato masher or something heavy and roughly mash about half the chana. You’re doing this to thicken the final sauce. Use the chana mash to thicken.
- Set this aside.
Finishing the Chana
- Heat your pot or skillet and when it’s hot, add the ghee and then add the Onion Masala you made earlier.
- Sauté until this is heated through, and then add 2 teaspoons of chana masala and 1 teaspoon of salt. Mix well.
- Add in your semi-mashed chana and some of the cooking water and heat through.
- Add lemon juice and taste to see if you need any more, or any additional salt.
Tips And Tricks
- Don’t use cornstarch. Seriously, there’s no need to. Simply mash half of the chickpeas to create a thick, delicious consistency.
- It’s ok if you don’t have all of the ingredients. I know that it can be difficult to find some of the ingredients in this dish in some areas, so I tried to provide substitutions or omissions for specialty ingredients where I could.
- Prep extra onion masala. You’re going to love this recipe and want to eat it again soon, I guarantee it. Unfortunately, chickpeas aren’t that resilient when stored after preparation. So, keep the onion masala in your fridge so you can quickly whip up another batch of chana masala in a flash.
What To Serve With It
Chana Masala is far from a low carb meal, so you may want to offset the heaviness of the dish with a cucumber salad or beet salad .
On the other hand, if you’re serving this as a comfort meal and want to keep the sides authentic, it can be served with rice , naan, or chapati.
Even better? Serve a small portion of everything and enjoy the variety of flavors and textures for an incredible dining experience.
How Long Does It Last?
Chana Masala is best enjoyed within a few days of preparing it, especially if you prefer your chickpeas to have a bit more bite to them. Once the chickpeas sit in the curry inside the refrigerator, they become mushy and the texture quickly deteriorates.
Want More Indian Instant Pot Recipes?
- Instant Pot Butter Chicken
- Chicken Korman
- Chicken Vindaloo
- I nstant Pot Chicken Biryani
- Lamb Rogan Josh
Instant Pot Chana Masala | Indian Chickpeas
Ingredients
Cooking the Chickpeas
- ▢ 1 cup Dried Chickpeas
- ▢ 2-3 Bay Leaves
- ▢ hot water , to cover the chick peas while they soak
- ▢ 3 cups Water , to cook in Instant Pot
Finishing with Masala
- ▢ 1/3 cup onion masala
- ▢ 1 tablespoon Ghee
- ▢ 2 teaspoons Chana masala spice mix , (omit if you don’t have although it really does add an authentic taste to it)
- ▢ 1 teaspoon Kosher Salt
- ▢ 1/2 teaspoons Amchoor , if you have it or one lemon squeezed for juice
Instructions
Quick Soak and Cook the Chana
- I find it easier to quick soak the chana in hot water for an hour but if you’re using a Instant Pot you can skip this step. In that case, you will need to add cooking time to compensate.
- Drain the water the chana are soaked in and put the chana in your Instant Pot along with 3 cups of water.
- Add the bay leaves and cook at high pressure for 15 minutes if you want it firm, or 20 minutes if you want a slightly creamy curry ( I went with 20 minutes).
- Allow it to release pressure naturally.
- Open it up and drain the water, but save it for now.
- Use a potato masher or something heavy and roughly mash about half the chana. You’re doing this to thicken the final sauce. Please do not add corn starch to thicken! Use the chana mash to thicken.
- Set this aside.
Finishing the Chana
- Heat your pot or skillet and when it’s hot, add the ghee and then add the Onion Masala you made earlier.
- Sauté until this is heated through, and then add 2 teaspoons of chana masala and 1 teaspoon of salt. Mix well.
- Add in your semi-mashed chana and some of the cooking water and heat through.
- Add lemon juice and taste to see if you need any more, or any additional salt.
- Garnish with cilantro and serve with rice or Naan or Chapatis.
Get support & connect with our community on Facebook!
Nutrition
Don’t forget to check out my otherBest-selling Instant Pot Cookbooks!
Indian Instant Pot , Keto Instant Pot, Instant Pot Fast and Easy , Healthy Instant Pot & Vegetarian Instant Pot .

Instant Pot Chana Masala is a way to get all of the rich, aromatic flavors you know and love in a traditional Chana Masala recipe in a fraction of the time.
Why You’re Going To Love This Chana Masala Recipe
- Fast. Ok, so this isn’t one of the quickest recipes I’ve ever created, but compared to how long it could take without the help of an Instant Pot , it’s very fast.
- Easy. Use prepared Onion Masala to reduce the number of steps it takes to create a delicious Chana Masala.
- Authentic. This will make you feel like you’re eating a delicious home-cooked meal in India.
- Vegetarian. This vegetarian recipe is absolutely packed with protein thanks to chickpeas, so it’s a great meal option.
I call them homestyle because…well, they ARE homestyle which means they’re not overly spiced, and they don’t have that deep red color that restaurant chana do.
These taste like what my mom used to make, and she was Punjabi. She was also a very good cook, so that is good enough for me to try to replicate.
What Is Chana Masala?
Chana Masala is a wonderful, savory, vegetarian Indian dish made with chickpeas, and a classic sauce, or “gravy”, made with onions, tomatoes, ginger, garlic, and a bunch of spices.
Ingredients You’ll Need
- Dried Chickpeas
- Bay Leaves
- Onion masala
- Ghee
- Chana masala spice mix - You can omit this if you don’t have it, although it really does add an authentic taste.
- Kosher Salt
- Amchoor - Use this if you have it, but if you don’t you can also use the juice of a whole lemon, squeezed.
How To Make Chana Masala
The list of steps below may seem daunting at first glance, but I promise they are all extremely easy to follow and will save you an enormous amount of time compared to preparing traditional homemade Chana Masala.
Quick Soak and Cook the Chana
- I find it easier to quick soak the chana in hot water for an hour but if you’re using an Instant Pot you can skip this step. In that case, you will need to add cooking time to compensate.
- Drain the water the chana is soaked in and put the chana in your Instant Pot along with 3 cups of water.
- Add the bay leaves and cook at high pressure for 15 minutes if you want it firm, or 20 minutes if you want a slightly creamy curry (I went with 20 minutes).
- Allow it to release pressure naturally.
- Open it up and drain the water, but save the water for now.
- Use a potato masher or something heavy and roughly mash about half the chana. You’re doing this to thicken the final sauce. Use the chana mash to thicken.
- Set this aside.
Finishing the Chana
- Heat your pot or skillet and when it’s hot, add the ghee and then add the Onion Masala you made earlier.
- Sauté until this is heated through, and then add 2 teaspoons of chana masala and 1 teaspoon of salt. Mix well.
- Add in your semi-mashed chana and some of the cooking water and heat through.
- Add lemon juice and taste to see if you need any more, or any additional salt.
Tips And Tricks
- Don’t use cornstarch. Seriously, there’s no need to. Simply mash half of the chickpeas to create a thick, delicious consistency.
- It’s ok if you don’t have all of the ingredients. I know that it can be difficult to find some of the ingredients in this dish in some areas, so I tried to provide substitutions or omissions for specialty ingredients where I could.
- Prep extra onion masala. You’re going to love this recipe and want to eat it again soon, I guarantee it. Unfortunately, chickpeas aren’t that resilient when stored after preparation. So, keep the onion masala in your fridge so you can quickly whip up another batch of chana masala in a flash.
What To Serve With It
Chana Masala is far from a low carb meal, so you may want to offset the heaviness of the dish with a cucumber salad or beet salad .
On the other hand, if you’re serving this as a comfort meal and want to keep the sides authentic, it can be served with rice , naan, or chapati.
Even better? Serve a small portion of everything and enjoy the variety of flavors and textures for an incredible dining experience.
How Long Does It Last?
Chana Masala is best enjoyed within a few days of preparing it, especially if you prefer your chickpeas to have a bit more bite to them. Once the chickpeas sit in the curry inside the refrigerator, they become mushy and the texture quickly deteriorates.
Want More Indian Instant Pot Recipes?
- Instant Pot Butter Chicken
- Chicken Korman
- Chicken Vindaloo
- I nstant Pot Chicken Biryani
- Lamb Rogan Josh
Instant Pot Chana Masala | Indian Chickpeas
Ingredients
Cooking the Chickpeas
- ▢ 1 cup Dried Chickpeas
- ▢ 2-3 Bay Leaves
- ▢ hot water , to cover the chick peas while they soak
- ▢ 3 cups Water , to cook in Instant Pot
Finishing with Masala
- ▢ 1/3 cup onion masala
- ▢ 1 tablespoon Ghee
- ▢ 2 teaspoons Chana masala spice mix , (omit if you don’t have although it really does add an authentic taste to it)
- ▢ 1 teaspoon Kosher Salt
- ▢ 1/2 teaspoons Amchoor , if you have it or one lemon squeezed for juice
Instructions
Quick Soak and Cook the Chana
- I find it easier to quick soak the chana in hot water for an hour but if you’re using a Instant Pot you can skip this step. In that case, you will need to add cooking time to compensate.
- Drain the water the chana are soaked in and put the chana in your Instant Pot along with 3 cups of water.
- Add the bay leaves and cook at high pressure for 15 minutes if you want it firm, or 20 minutes if you want a slightly creamy curry ( I went with 20 minutes).
- Allow it to release pressure naturally.
- Open it up and drain the water, but save it for now.
- Use a potato masher or something heavy and roughly mash about half the chana. You’re doing this to thicken the final sauce. Please do not add corn starch to thicken! Use the chana mash to thicken.
- Set this aside.
Finishing the Chana
- Heat your pot or skillet and when it’s hot, add the ghee and then add the Onion Masala you made earlier.
- Sauté until this is heated through, and then add 2 teaspoons of chana masala and 1 teaspoon of salt. Mix well.
- Add in your semi-mashed chana and some of the cooking water and heat through.
- Add lemon juice and taste to see if you need any more, or any additional salt.
- Garnish with cilantro and serve with rice or Naan or Chapatis.
Get support & connect with our community on Facebook!
Nutrition
Don’t forget to check out my otherBest-selling Instant Pot Cookbooks!
Indian Instant Pot , Keto Instant Pot, Instant Pot Fast and Easy , Healthy Instant Pot & Vegetarian Instant Pot .

If you already signed up, you should have received an email with a password to give you unlimited access to our FREE Printable Library. The password is case sensitive. Enter it below and get printing!
Password:

Instant Pot Chana Masala | Indian Chickpeas
Ingredients
Cooking the Chickpeas
- 1 cup Dried Chickpeas
- 2-3 Bay Leaves
- hot water to cover the chick peas while they soak
- 3 cups Water to cook in Instant Pot
Finishing with Masala
- 1/3 cup onion masala
- 1 tablespoon Ghee
- 2 teaspoons Chana masala spice mix (omit if you don’t have although it really does add an authentic taste to it)
- 1 teaspoon Kosher Salt
- 1/2 teaspoons Amchoor if you have it or one lemon squeezed for juice
Instructions
Quick Soak and Cook the Chana
- I find it easier to quick soak the chana in hot water for an hour but if you’re using a Instant Pot you can skip this step. In that case, you will need to add cooking time to compensate.
- Drain the water the chana are soaked in and put the chana in your Instant Pot along with 3 cups of water.
- Add the bay leaves and cook at high pressure for 15 minutes if you want it firm, or 20 minutes if you want a slightly creamy curry ( I went with 20 minutes).
- Allow it to release pressure naturally.
- Open it up and drain the water, but save it for now.
- Use a potato masher or something heavy and roughly mash about half the chana. You’re doing this to thicken the final sauce. Please do not add corn starch to thicken! Use the chana mash to thicken.
- Set this aside.
Finishing the Chana
- Heat your pot or skillet and when it’s hot, add the ghee and then add the Onion Masala you made earlier.
- Sauté until this is heated through, and then add 2 teaspoons of chana masala and 1 teaspoon of salt. Mix well.
- Add in your semi-mashed chana and some of the cooking water and heat through.
- Add lemon juice and taste to see if you need any more, or any additional salt.
- Garnish with cilantro and serve with rice or Naan or Chapatis.
Instant Pot Chana Masala | Indian Chickpeas https://twosleevers.com/pressure-cooker-homestyle-chana-masala/


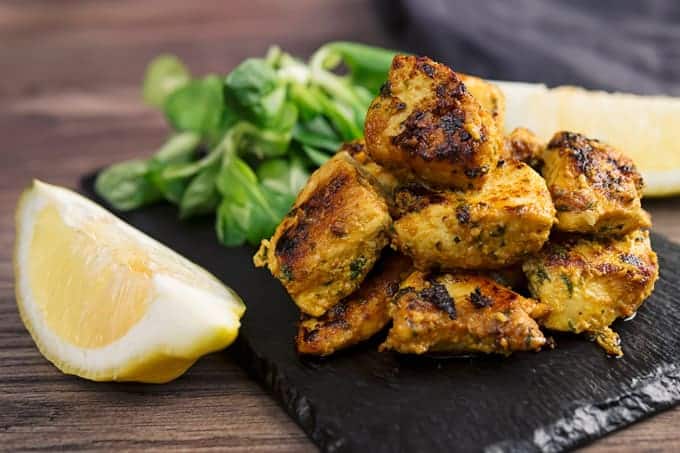
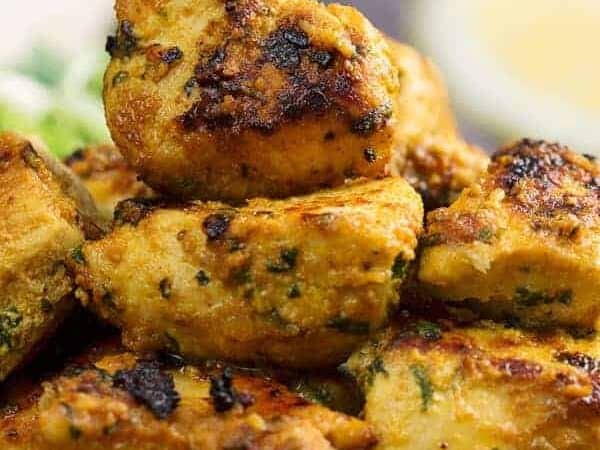
Indian Chicken Tikka Bites are a high-protein Indian chicken dish made with bite-sized chicken marinated in Greek yogurt, ginger-garlic, cilantro, and warm spices like garam masala, cumin, coriander, turmeric, paprika, and cayenne, then finished with ghee and lemon. It’s quick and weeknight-friendly and works well for low-carb/keto meal prep or an easy party appetizer when you want big flavor fast. Unlike traditional chicken tikka that needs skewers and a tandoor/grill, this version cooks right in a skillet or air fryer and uses a hot ghee sear to mimic that smoky, tandoori-style char with way less effort.
I make these when I just couldn’t be bothered to cook anything complicated, and as an added bonus, my picky eater loves this chicken kebab recipe .
What is Chicken Tikka?
Chicken Tika actually means a chicken nugget, if you will. That’s the closest I can come up with for a translation.
So..umm..Indian chicken nuggets? Sounds weird, tastes amazing!
What is the difference between Chicken Tikka and Chicken Tikka Masala?
I have a super simple, very authentic recipe for an Instant Pot Chicken Tikka Masala .
The main difference is that chicken tikka is a dry dish, sort of like a chicken kebab .
Chicken Tikka Masala on the other hand, is chicken in a tomato-based gravy or sauce. In that case, the chicken isn’t the star of the dish, as much as it is the gravy.
But for Chicken Tikka kebabs ? It’s ALL about that Chicken.
Traditionally, tikka is a tandoori dish and they’re baked in a clay oven. Since I do not just happen to have a clay oven that reaches 800F in my back yard (if you do, I want to be your best friend), I use a skillet or my air fryer to make these.
Ingredients You’ll Need
- 1 pound Chicken Thighs or Breast - The protein base of the dish. Chicken thighs stay juicy and tender, while chicken breast offers a leaner option.
- 1/2 cup Full-Fat Greek Yogurt - The acidity in the yogurt helps break down the chicken fibers, making the meat soft and flavorful while keeping it moist during air frying.
- 3–4 cloves Minced Garlic - Adds deep, aromatic flavor and a touch of pungency that enhances the savory spices in the marinade.
- 2 teaspoons Minced Ginger - Brings a warm, slightly spicy brightness that balances the richness of the yogurt and complements the garlic.
- 1/4 cup Cilantro - Provides a fresh, herbal note that lightens the bold spice mix and adds color to the marinade.
- 1 teaspoon Salt - Essential for enhancing all the flavors and helping the spices penetrate the chicken.
- 1 teaspoon Garam Masala - The key Indian spice blend that gives the tikka its distinctive aroma and warmth, combining cinnamon, cloves, cardamom, and other spices.
- 1/2 teaspoon Turmeric - Adds a golden color and subtle earthy flavor.
- 1/2 teaspoon Ground Cumin - Contributes nutty, warm undertones and depth to the overall flavor profile.
- 1/2 teaspoon Ground Coriander - Adds citrusy brightness and a hint of sweetness that lifts the heavier spices.
- 1/2 teaspoon Smoked Paprika - Gives a smoky depth and enhances the color, mimicking the traditional charred flavor of tandoor-cooked chicken.
- 1/4 teaspoon Cayenne Pepper - Provides gentle heat and a kick of spice, which can be adjusted to your preferred spice level.
- 2 tablespoons Ghee - Adds rich, buttery flavor and helps the chicken develop a golden, lightly crisp exterior in the air fryer.
- 1 Lemon - Brightens the dish with acidity, balancing the creamy yogurt and rich ghee.
How To Make Chicken Tikka Bites
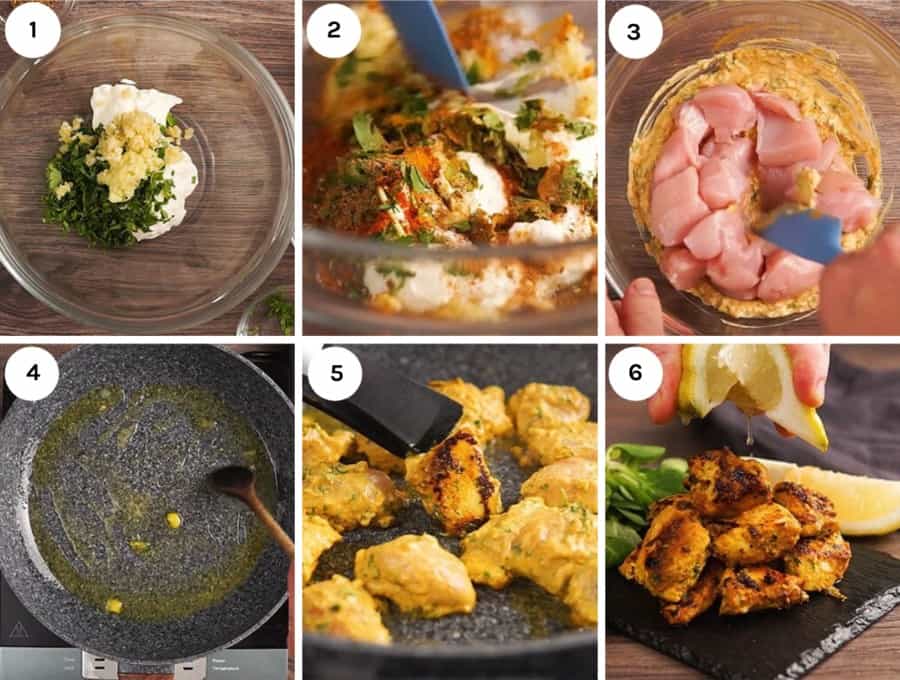
Step 1: Mix together the yogurt, ginger, garlic, and cilantro.
Step 2: Add in all the yummy spices like turmeric, cayenne, paprika, cumin, coriander, garam masala, and salt.
Step 3: Add the cut up chicken and allow the mixture to marinate for a while. You can use chicken breast or thighs for this recipe.
Step 4: Heat some ghee in a pan.
Step 5: Add the chicken to the hot pan and cook, allowing it to sear to mimic the smoky, tandoori-grilled taste you’d get in a clay oven.
Step 6: Finish up with a nice, tart squirt of lemon or lime juice for a burst of tang at the end.
Tips and Tricks
Making Air Fryer Chicken Tikka Bites is a quick and flavorful way to enjoy restaurant-quality Indian flavors at home. To ensure your chicken turns out tender, smoky, and bursting with spice in every bite, here are some tried-and-true tips and tricks:
- Marinate that chicken with yogurt for as long as you can, up to 24 hours. The lactic acid in dairy helps to break down the protein and tenderizes it just beautifully. This is especially needed if you’re using chicken breast. But honestly, sometimes I just marinate for 30 minutes and it turns out just fine.
- If you’re dairy-free or kosher, use lemon juice instead of the yogurt to provide the same tenderizing. You can also substitute oil instead of the ghee.
- Adjust the cayenne pepper to your family’s taste. Remember you can always add cayenne pepper afterward, and the presence of the ghee coating each piece helps the cayenne adhere to it well, so you can spice up your portion after you’ve dished out portions for the non-spice tolerators in your family.
- Use ghee if possible as it has a high smoke point, which makes these chicken bites sear like champs. Here’s an EASY recipe to make your own ghee .
- If you don’t want to make your own ghee, you could try this one.
- Double up on this recipe and use the leftover chicken in the butter chicken sauce you have leftover.
Variations
Here are some creative and delicious ways to switch up your Air Fryer Chicken Tikka Bites to suit different flavor preferences and dietary needs:
- Tikka Skewers - Thread the marinated chicken onto skewers before air frying for a fun, tandoori-style presentation. Perfect for parties or appetizers.
- Vegetable Tikka Bites - Use the same marinade for paneer, tofu, or hearty vegetables like cauliflower, bell peppers, or mushrooms. Air fry until lightly charred and tender.
- Coconut - Replace Greek yogurt with coconut yogurt and add a bit of lime zest for a tropical, dairy-free twist.
What To Eat With Indian Chicken Nuggets
Once you learn how to make Chicken Tikka , you will come up with a variety of uses for it.
- It actually tastes AMAZING when added the leftover Butter Chicken Sauce , but it would also taste great with some plain Basmati Pilau I also like to serve it with this simple Green Chutney .
- For a low-carb version, I usually just serve this with side vegetable as it’s plenty flavorful by itself. A traditional way to make a side salad would be sliced red onion, sliced cucumber and tomatoes, sprinkled with salt and lemon or lime juice.
- You could serve with naan if you weren’t concerned with carbs
- Serve as an appetizer with little fancy toothpicks
- The most keto-friendly and delicious way would be to cook these, and then blend them into the leftover Makhani sauce you saved from this recipe.
How Long Do They Last?
Air fryer chicken tikka bites can be stored in an airtight container in the refrigerator for up to 4 days. Make sure they cool completely before sealing to prevent excess moisture from softening the exterior.
When reheating, use the air fryer at 350°F for 3–4 minutes to restore their crisp edges and juicy texture, or warm them in a skillet over medium heat.
Can You Freeze Them?
For longer storage, you can freeze the cooked tikka bites for up to 2 months. To enjoy later, thaw them overnight in the fridge and reheat in the air fryer until hot and slightly charred again.
Air fryer chicken tikka bites can be spicy, but the heat is totally customizable. Most of the “spice” comes from how much cayenne/chili powder you add, while the rest of the flavor is warm and aromatic from garam masala, cumin, coriander, turmeric, and paprika. A Greek yogurt marinade also mellows the heat, so many chicken tikka bites taste more tangy and smoky than fiery. For mild tikka, reduce or skip cayenne and lean on paprika. For hotter tandoori-style chicken tikka, increase chili and finish with a squeeze of lemon and a cooling side like raita.
Yes, you can use chicken breast instead of thighs for air fryer chicken tikka bites, but because breast is leaner it can dry out faster. To keep chicken tikka breast juicy, cut it into evenly sized bite-size pieces, marinate in the Greek yogurt ginger-garlic paste mixture (even 30–60 minutes helps), and air fry just until it reaches 165°F. Thighs are more forgiving and stay juicier, but breast works great for a high-protein chicken tikka bites option as long as you don’t overcook and you keep everything in a single layer for even browning and tandoori-style char.
Your air fryer chicken tikka bites are usually dry because the pieces were overcooked (air fryers run hot and small cubes cook fast), the chicken was cut too small/uneven, or you used chicken breast instead of thighs without adjusting time. The fix is to cut uniform bite-size pieces, use the Greek yogurt marinade (it helps tenderize and protect the meat), cook in a single layer, and pull the chicken as soon as it hits 165°F. Then let it rest a couple of minutes, so the juices redistribute. If you want more foolproof juiciness, switch to chicken thighs, and for better “tandoori-style” char without drying, finish with a quick high-heat burst or a light ghee brush at the end rather than extending cook time.
To get tandoori-style char on air fryer chicken tikka bites, you want high heat + a drier surface. Pat excess Greek yogurt marinade off the chicken so it doesn’t steam, then air fry in a single layer at a hotter setting, flipping halfway for even browning. A light brush of ghee (or oil spray) near the end boosts caramelization and gives that classic tikka aroma, and adding a final 1–2 minute “blast” at the highest temp helps mimic tandoor heat without overcooking the center. If your air fryer has an optional crisp/broil-style mode, use it briefly at the end. The char comes from intense heat at the surface, not longer cook time.
More Indian-Inspired Favorites
- Instant Pot Butter Chicken
- Indian Rice Pudding
- Chicken Tikka Masala
- Indian Curry
- Mint Chutney

Low Carb Indian Chicken Tikka Bites
Equipment
- skillet
- Silicone Tongs
- PHILLIPS AIR FRYER
- Measuring Cups
- OVAL MEASURING SPOONS
Ingredients
- ▢ 1 pounds chicken thighs , or breast, boneless skinless, cut into bite size cubes
- ▢ 1/2 cup Full-Fat Greek Yogurt
- ▢ 3-4 cloves Minced Garlic , minced
- ▢ 2 teaspoons Minced Ginger , minced
- ▢ 1/4 cup Cilantro , chopped
- ▢ 1 teaspoon Kosher Salt
- ▢ 1 teaspoon Garam Masala
- ▢ 1/2 teaspoons Turmeric
- ▢ 1/2 teaspoons Ground Cumin
- ▢ 1/2 teaspoons Ground Coriander
- ▢ 1/2 teaspoons Smoked Paprika
- ▢ 1/4 teaspoons Cayenne Pepper
- ▢ 2 tablespoon Ghee
- ▢ 1 Lemon , juiced
Instructions
- Mix together chicken, yogurt, garlic, ginger, cilantro, salt, garam masala, cayenne, cumin, coriander, paprika, and let the chicken marinate for an hour or up to 24 hours. If you’re using chicken breast, give it at least an hour for the yogurt to marinate the chicken
- When you’re ready to cook this, heat a skillet, and when it’s hot, add two tablespoons of ghee. You want a skillet that’s large enough to let your chicken rest in a single layer across the pan, or be ready to cook it in batches. You want to quick cook this at high heat, frying in the ghee, not braise this.
- Carefully place the chicken in the skillet, and after 3-4 minutes, using tongs, turn the pieces to sear the other side. Once both sides are seared, you can reduce the heat a little to finish cooking the pieces, but all in all, you’re looking at about 10 mins at most in the skillet, especially if you cut into bite-sized pieces as instructed
- Spritz the lemon juice across all the chicken right before serving.
Air fryer instructions
- If you’re trying to avoid fat, you can cook this in an air-fryer at 400F for 12 minutes, turning half way through. They’re a little dryer than the skillet method but the meat is still tender due to the yogurt marinade.
- Spritz the lemon juice across all the chicken right before serving.
Watch The Video
- Marinate that chicken with yogurt for as long as you can, up to 24 hours. The lactic acid in dairy helps to break down the protein and tenderizes it just beautifully. This is especially needed if you’re using chicken breast. But honestly, sometimes I just marinate for 30 minutes and it turns out just fine.
- If you’re dairy-free or kosher, use lemon juice instead of the yogurt to provide the same tenderizing. You can also substitute oil instead of the ghee.
- Adjust the cayenne pepper to your family’s taste. Remember you can always add cayenne pepper afterward, and the presence of the ghee coating each piece helps the cayenne adhere to it well, so you can spice up your portion after you’ve dished out portions for the non-spice tolerators in your family.
- Use ghee if possible as it has a high smoke point, which makes these chicken bites sear like champs. Here’s an EASY recipe to make your own ghee and I’ll post the video here as well.
- If you don’t want to make your own ghee, you could try this one.
- Double up on this recipe and use the leftover chicken in the butter chicken sauce you have left over.
