If you’re a fan of the savory combination of melted cheese, rich tomato sauce, and a variety of tasty fillings all encased in a crispy, golden crust, you’re in for a treat! Learn how to make the easiest Calzone at home. You’ll achieve that perfect balance between a crispy exterior and flavorful interior while indulging in a delightful Italian classic .

Why You’ll Love This Hearty Recipe
- Fast . Ready in under 45 minutes with simple ingredients.
- Easy . Prepare the dough, add your favorite fillings, and bake until golden brown.
- Customizable . Fill with your favorite ingredients for a personalized touch.
- Delicious . Packed with flavors that are absolutely irresistible.
With this easy recipe, you’ve achieved a restaurant-quality dish that will leave your friends and family craving more. Whether you’re hosting a casual dinner or simply treating yourself to a delicious meal, these calzones are guaranteed to be a hit.
Is Calzone Dough Different Than Pizza Dough?
While the dough for calzones and pizza is fundamentally the same, the differences lie in the preparation, thickness, and baking process. Now that you know, you can enjoy making both with confidence!
How Do You Fold Dough Into A Calzone?
Gently lift the empty half of the dough and fold it over the filled side, aligning the edges. The dough should now resemble a half-moon shape.
Press the edges together to seal. To ensure a tight seal and prevent the calzone from opening during baking, crimp the edges with a fork or twist and fold the edges over each other (similar to crimping a pie crust).
Using a knife or dough cutter, make a couple of small slits on the top of the calzone. This allows steam to escape and prevents the calzone from becoming soggy.
Ingredients You’ll Need
- Pizza Dough You can use store-bought or homemade pizza dough for the calzone crust.
- Tomato Sauce - Use your favorite marinara or pizza sauce for the base.
- Mozzarella Cheese - Melts perfectly to give that classic cheesy goodness.
- Ricotta Cheese - Adds creaminess and richness to the filling.
- Pepperoni - For a traditional flavor, but you can use any meat or keep it vegetarian.
- Vegetables - Bell peppers, onions, and mushrooms add color and flavor.
- Olive Oil - To brush on top for a golden, crispy crust.
- Italian Seasoning - Adds a burst of flavor to the calzone.
How To Make This Calzone Recipe
- Preheat the Oven . Preheat your oven to 450°F.
- Prepare the Dough . Roll out the pizza dough on a floured surface into a large circle.
- Prepare the Filling . In a bowl, mix mozzarella, ricotta, pepperoni, and vegetables. Add a spoonful of tomato sauce and a sprinkle of Italian seasoning.
- Add the Filling . Place the filling mixture on one half of the dough circle, leaving a border around the edge.
- Fold and Seal . Fold the dough over the filling to create a half-moon shape. Press the edges to seal, and use a fork to crimp the edges for a decorative touch.
- Brush with Olive Oil . Brush the top of each calzone with olive oil for a golden finish.
- Bake . Place the calzones on a baking sheet lined with parchment paper and bake for 15-20 minutes or until golden brown and crispy.

Tips And Tricks
Making homemade calzones is a fun and delicious endeavor, and a few tips and tricks can help you achieve the best possible results. Here are some pointers to ensure your calzones turn out crispy, flavorful, and utterly irresistible:
- Use Chilled Dough . Cold dough is easier to handle and roll out.
- Don’t Overfill . Less is more when it comes to filling your calzones to avoid leaks.
- Vent the Calzones . Make small slits on top to allow steam to escape, preventing soggy dough.
- Experiment with Fillings . Try different cheeses, meats, and vegetables to create your perfect calzone.
Variations
If you’re a fan of calzones and want to try some creative variations, here are a few delicious ideas to explore:
- Spicy Sausage- Spicy Italian sausage, jalapeños, and pepper jack cheese. Follow the same steps, substituting the filling ingredients.
- Veggie Lovers - Spinach, artichoke hearts, sun-dried tomatoes, and feta cheese. Follow the same steps, substituting the filling ingredients.
- BBQ Chicken - Shredded BBQ chicken, red onions, and cheddar cheese. Follow the same steps, substituting the filling ingredients.
What To Eat With This Calzone Recipe
Calzones are a hearty and savory dish that pairs well with a variety of sides and accompaniments. Here are some delicious options to consider serving alongside them:
- Salad - A fresh green salad or Caesar salad complements the richness of the calzone.
- Garlic Bread - Perfect for dipping into extra tomato sauce.
- Roasted Vegetables - A healthy and flavorful side dish.
How Long Does It Last?
Cooked calzones can be stored in the refrigerator in an airtight container for up to 3 to 4 days. The flavors may intensify over time, so for the best bite, they are best enjoyed as soon as possible.
Can You Freeze It?
Yes, you can freeze calzones to extend their shelf life and enjoy them at a later time. Freezing is a great way to preserve the flavors and texture.
- Cool Completely . Let the calzones cool completely.
- Wrap Individually . Wrap each calzone in plastic wrap and then in aluminum foil.
- Freeze . Place the wrapped calzones in a freezer-safe bag or container and freeze for up to 2 to 3 months.
To reheat, bake the frozen calzones at 350°F for about 20 minutes or until heated through.
Best Pizza Recipes
- Keto Pizza Casserole
- Stromboli
- Sheet Pan Pizza
- Air Fryer Pizza
- Pizza Pinwheels


Calzone Recipe | Easy Homemade Calzone
Ingredients
- ▢ 1 Refrigerated Pizza Dough
- ▢ 1 cup Marinara Sauce
- ▢ 2 cups Mozzarella Cheese
- ▢ 1 cup Ricotta Cheese
- ▢ 1 cup Pepperoni
- ▢ 1/2 cup Onions , sliced
- ▢ 1/2 cup Bell Peppers
- ▢ 1/2 cup Mushrooms
- ▢ 1 tsp Italian Seasoning
- ▢ 2 tbsp Olive Oil
Instructions
- Preheat the Oven . Preheat your oven to 450°F.
- Prepare the Dough . Roll out the pizza dough on a floured surface into a large circle.
- Prepare the Filling . In a bowl, mix mozzarella, ricotta, pepperoni, and vegetables. Add a spoonful of tomato sauce and a sprinkle of Italian seasoning.
- Add the Filling . Place the filling mixture on one half of the dough circle, leaving a border around the edge.
- Fold and Seal . Fold the dough over the filling to create a half-moon shape. Press the edges to seal, and use a fork to crimp the edges for a decorative touch.
- Brush with Olive Oil . Brush the top of each calzone with olive oil for a golden finish.
- Bake . Place the calzones on a baking sheet lined with parchment paper and bake for 15-20 minutes or until golden brown and crispy.
Get support & connect with our community on Facebook!
Nutrition

If you already signed up, you should have received an email with a password to give you unlimited access to our FREE Printable Library. The password is case sensitive. Enter it below and get printing!
Password:

Calzone Recipe | Easy Homemade Calzone
Ingredients
- 1 Refrigerated Pizza Dough
- 1 cup Marinara Sauce
- 2 cups Mozzarella Cheese
- 1 cup Ricotta Cheese
- 1 cup Pepperoni
- 1/2 cup Onions sliced
- 1/2 cup Bell Peppers
- 1/2 cup Mushrooms
- 1 tsp Italian Seasoning
- 2 tbsp Olive Oil
Instructions
- Preheat the Oven . Preheat your oven to 450°F.
- Prepare the Dough . Roll out the pizza dough on a floured surface into a large circle.
- Prepare the Filling . In a bowl, mix mozzarella, ricotta, pepperoni, and vegetables. Add a spoonful of tomato sauce and a sprinkle of Italian seasoning.
- Add the Filling . Place the filling mixture on one half of the dough circle, leaving a border around the edge.
- Fold and Seal . Fold the dough over the filling to create a half-moon shape. Press the edges to seal, and use a fork to crimp the edges for a decorative touch.
- Brush with Olive Oil . Brush the top of each calzone with olive oil for a golden finish.
- Bake . Place the calzones on a baking sheet lined with parchment paper and bake for 15-20 minutes or until golden brown and crispy.
Calzone Recipe | Easy Homemade Calzone https://twosleevers.com/calzone-recipe/
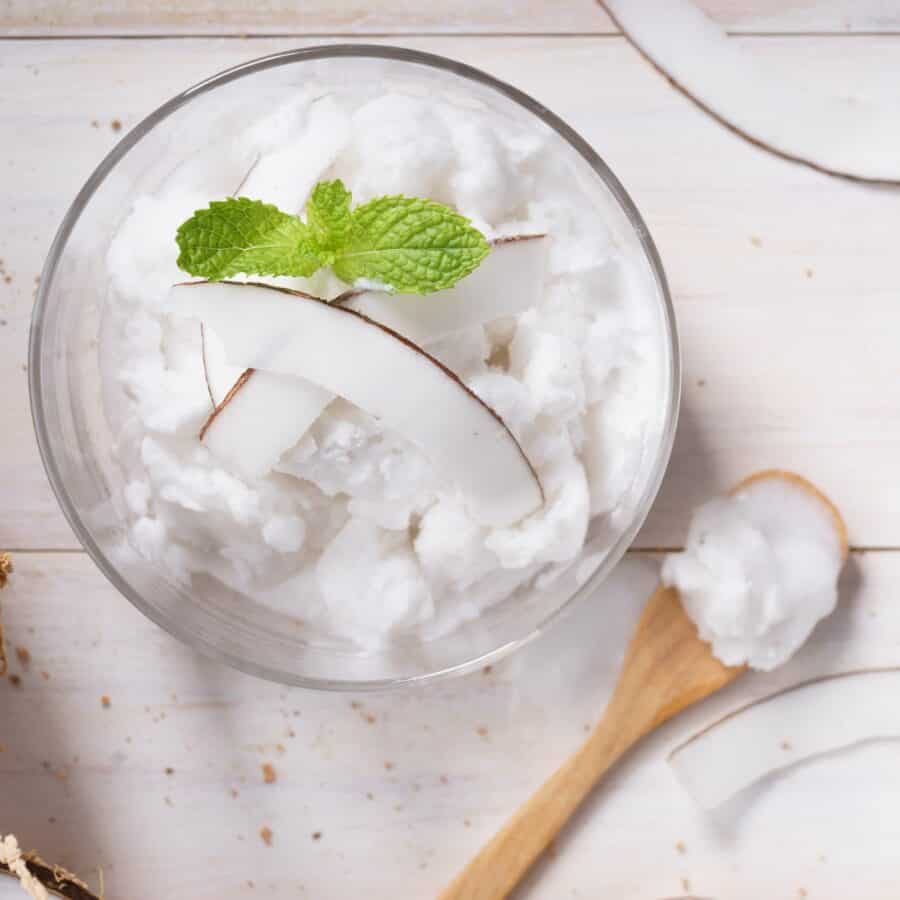
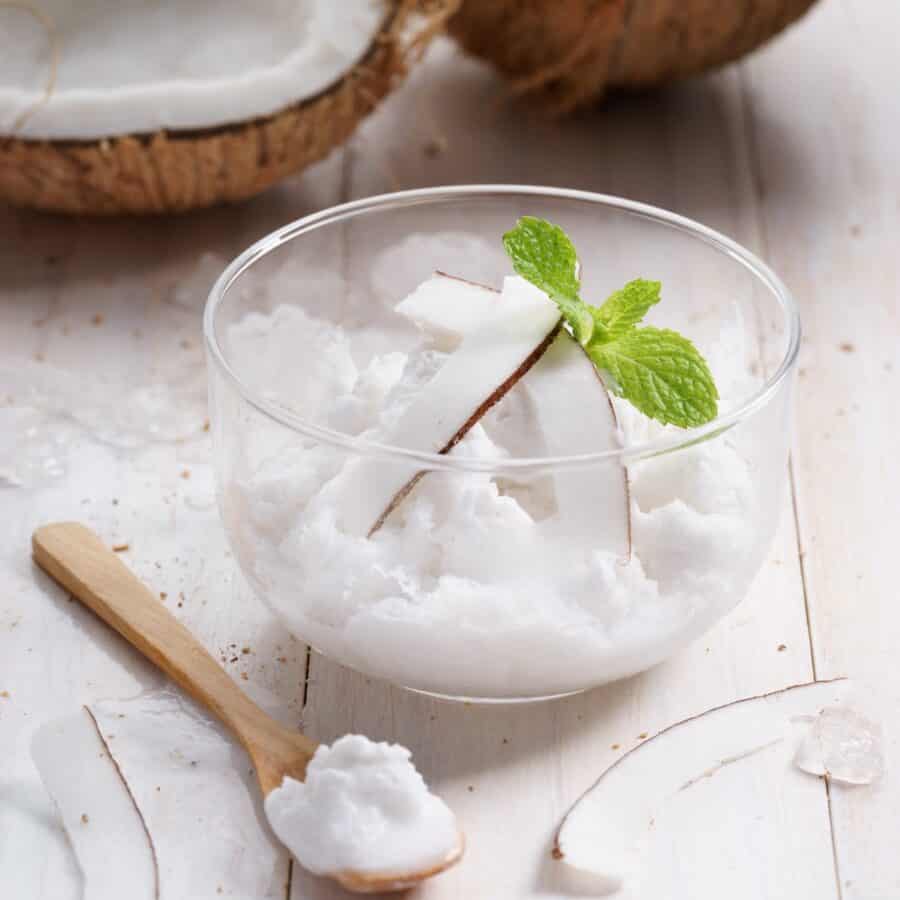
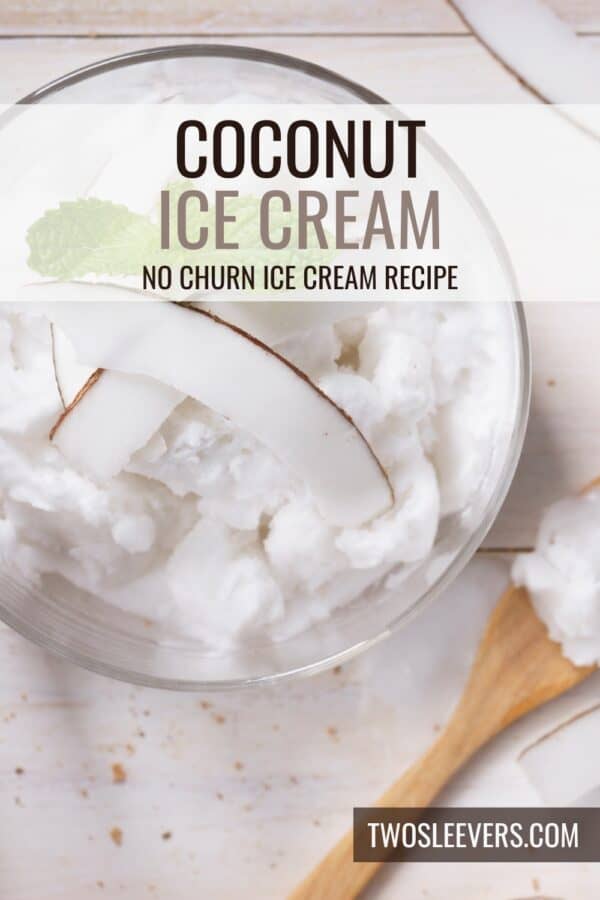
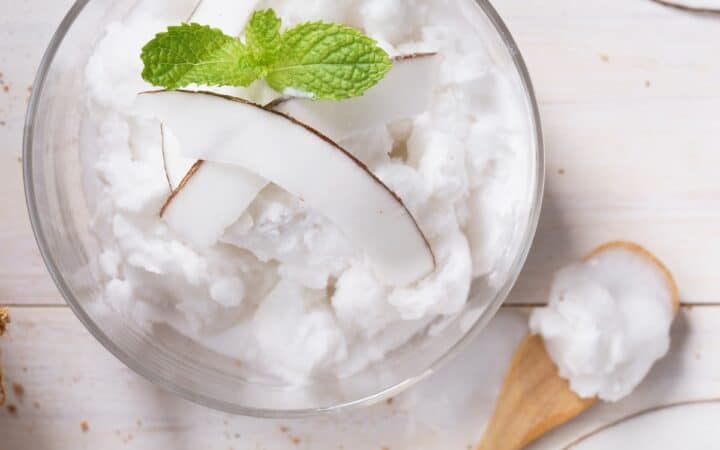
If you’re a fan of the creamy, tropical flavors of coconut, you’re in for a treat! Learn how to make the easiest No Churn Coconut Ice Cream. You’ll achieve that perfect balance between a creamy texture and rich coconut flavor while indulging in irresistible tropical vibes.
Why You’ll Love This Incredible Ice Cream
- Simple. Ready in under 10 minutes of prep time with no ice cream maker needed.
- Easy. Just mix, freeze, and enjoy the perfect frozen treat.
- Dairy-Free Option. Can be made dairy-free by using coconut milk and coconut cream.
- Delicious. Packed with a rich coconut flavor that is absolutely refreshing.
With the convenience of a no-churn method, you’ve achieved a homemade ice cream that will leave your friends and family craving more. Whether you’re hosting a summer party or simply treating yourself to a delightful dessert, this coconut ice cream is guaranteed to be a hit.
What Does Coconut Ice Cream Taste Like?
Coconut Ice Cream is absolutely delicious and a favorite among ice cream enthusiasts. It offers a delectable combination of creamy texture and rich coconut flavor that appeals to a wide range of palates.
The tropical richness of coconut creates a mouthwatering and satisfying eating experience.
Is Coconut Ice Cream Healthy?
Like any treat, coconut ice cream can be enjoyed as part of a balanced diet when consumed in moderation. Paying attention to portion sizes and choosing healthier ingredient options can make it a more nutritious dessert choice.
Ingredients You’ll Need
- Coconut Cream - Provides the creamy base.
- Sweetened Condensed Milk - Adds sweetness and helps with the creamy texture.
- Vanilla Extract - Enhances the coconut flavor.
- Shredded Coconut - Adds texture and extra coconut flavor.
How To Make Coconut Ice Cream
- Prepare the Coconut Cream Base. Start by chilling a mixing bowl and beaters in the freezer for about 15 minutes. This helps in whipping the coconut cream to a fluffy consistency. In the chilled bowl, beat the coconut cream until soft peaks form.
- Add the Sweetened Condensed Milk. Gently fold in the sweetened condensed milk and vanilla extract until well combined. Be careful not to deflate the whipped coconut cream.
- Mix in Shredded Coconut. Stir in the shredded coconut until evenly distributed throughout the mixture.
- Freeze the Mixture. Transfer the mixture to a loaf pan or any freezer-safe container. Smooth the top with a spatula. Cover with plastic wrap or a lid to prevent ice crystals from forming.
- Freeze Until Firm. Freeze for at least 4-6 hours or overnight until the ice cream is firm.
- Serve and Enjoy. Scoop it into bowls or cones. Garnish with extra shredded coconut or a drizzle of chocolate if desired.
Tips And Tricks
Making No Churn Coconut Ice Cream is a delightful endeavor, and a few tips and tricks can help you achieve the best possible results. Here are some pointers to ensure your ice cream turns out creamy, flavorful, and utterly irresistible:
- Chill the Ingredients. Ensure that the coconut cream and mixing bowl are well chilled before whipping.
- Use Full-Fat Coconut Cream. This gives the ice cream a rich and creamy texture.
- Fold Gently. Be gentle when folding in the sweetened condensed milk to keep the mixture light and airy.
Variations
If you’re a fan of Coconut Ice Cream and want to try some creative variations, here are a few delicious ideas to explore:
- Chocolate- Add a swirl of chocolate syrup or mix in chocolate chips for a chocolatey twist.
- Pineapple- Stir in crushed pineapple for a tropical flavor combo.
- Mango- Add chunks of fresh or frozen mango for a refreshing and fruity ice cream.
What To Enjoy With Coconut Ice Cream
Coconut Ice Cream is a flavorful and refreshing dessert that pairs well with a variety of toppings and accompaniments. Here are some delicious options to consider serving alongside it:
- Fresh Fruit - Serve with slices of fresh pineapple, mango, or berries.
- Toasted Coconut - Sprinkle toasted coconut flakes on top for extra crunch and flavor.
- Chocolate Sauce - Drizzle with chocolate sauce for a decadent treat.
How Long Does It Last?
Homemade coconut ice cream can be stored in the freezer in an airtight container for up to 2 weeks. For the best texture and flavor, it’s best enjoyed within the first week.
More Fantastic Frozen Treats
- Keto Ice Cream
- Strawberry Popsicles
- Mango Ice Cream
- Bulletproof Popsicles
- Cookies and Cream Ice Cream
- Peanut Butter Ice Cream
Coconut Ice Cream Recipe | No Churn Coconut Ice Cream
Ingredients
- ▢ 2 cups Coconut Cream
- ▢ 14 oz Sweetened Condensed Milk
- ▢ 1 tsp Vanilla Extract
- ▢ 1 cup Shredded Coconut
Instructions
- Prepare the Coconut Cream Base. Start by chilling a mixing bowl and beaters in the freezer for about 15 minutes. This helps in whipping the coconut cream to a fluffy consistency. In the chilled bowl, beat the coconut cream until soft peaks form.
- Add the Sweetened Condensed Milk. Gently fold in the sweetened condensed milk and vanilla extract until well combined. Be careful not to deflate the whipped coconut cream.
- Mix in Shredded Coconut. Stir in the shredded coconut until evenly distributed throughout the mixture.
- Freeze the Mixture. Transfer the mixture to a loaf pan or any freezer-safe container. Smooth the top with a spatula. Cover with plastic wrap or a lid to prevent ice crystals from forming.
- Freeze Until Firm. Freeze for at least 4-6 hours or overnight until the ice cream is firm.
- Serve and Enjoy. Scoop it into bowls or cones. Garnish with extra shredded coconut or a drizzle of chocolate if desired.
