
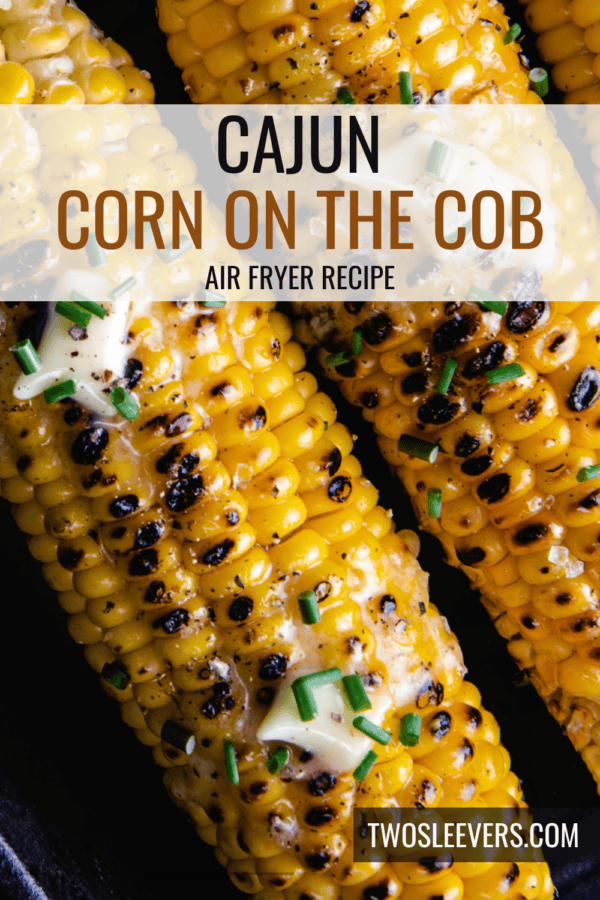
Add a kick to your side dishes with this easy and delicious Air Fryer Cajun Corn On The Cob recipe! This method transforms fresh corn into a mouth-watering dish with just the right amount of spice and a perfectly crispy exterior.
Why You’ll Love This Corn With A Kick
- Quick . Ready in just 15 minutes from start to finish.
- Effortless . Minimal preparation for a no-fuss cooking experience.
- Incredibly Tasty . The Cajun seasoning combined with the sweetness of the corn is a match made in heaven.
- Healthier Option . The air fryer gives you that desirable crisp without the need for deep frying, making it a lighter choice that doesn’t sacrifice taste.
Experience the ultimate combination of ease and flavor with this foolproof air fryer technique.
What Does Cajun Corn On The Cob Taste Like?
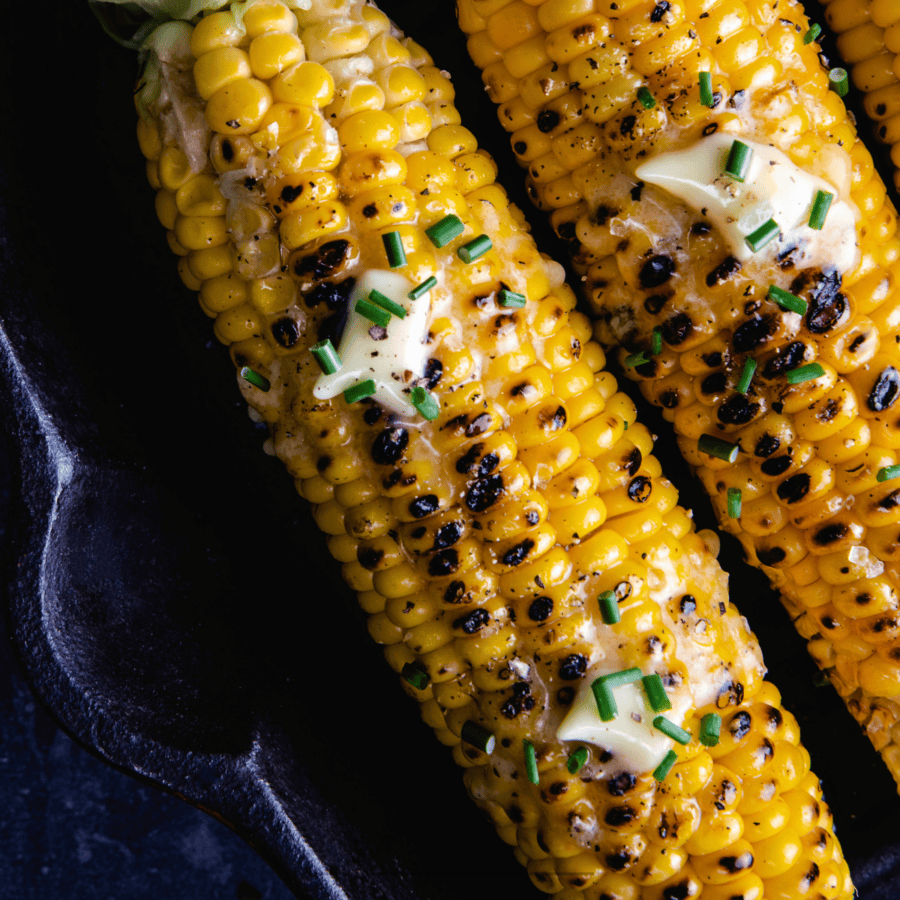
Cajun corn on the cob is a delightful blend of flavors and textures. The sweet, juicy kernels of fresh corn provide a perfect contrast to the spicy, savory Cajun seasoning. The seasoning mix imparts a robust, slightly smoky flavor with a kick of heat.
When cooked in the air fryer, the corn develops a slightly crispy exterior, enhancing the overall taste experience.
Ingredients You’ll Need
- Fresh Corn on the Cob - The main star of the dish.
- Olive Oil - Helps to crisp up the exterior and ensures the seasoning sticks to the corn.
- Cajun Seasoning - This provides the distinctive spicy, savory flavor.
- Salt - Enhances the natural sweetness of the corn.
- Black Pepper - Adds a slight heat and sharpness, complementing the Cajun spices.
- Butter - Adds richness and a creamy texture.
- Fresh Parsley - For a burst of color and freshness.
- Lemon Wedges - Adds a zesty brightness that balances the spice.
How To Make Cajun Corn On The Cob
- Shuck the Corn . Remove the husks and silk from the corn.
- Season the Corn . Drizzle each ear of corn with olive oil, then sprinkle generously with Cajun seasoning, salt, and black pepper. Rub the seasoning into the corn to ensure it’s evenly coated.
- Preheat the Air Fryer . Set your air fryer to 400°F.
- Arrange the Corn . Place the seasoned corn in a single layer in the air fryer basket. Do not overcrowd to ensure even cooking.
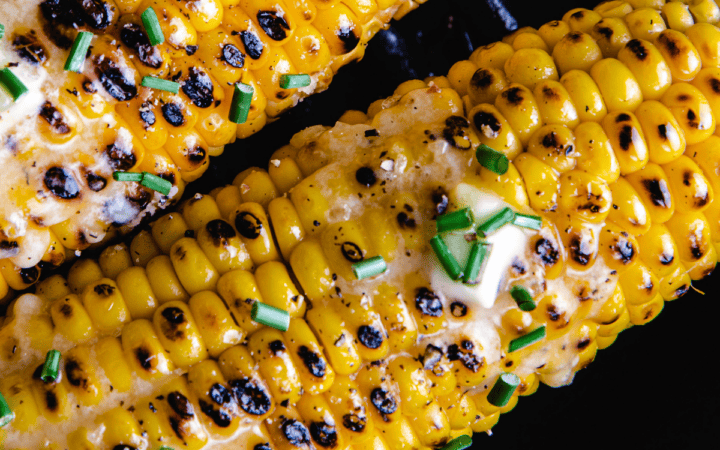
- Cook . Air fry the corn for 10-12 minutes, turning halfway through, until the corn is golden brown and slightly charred.
- Optional Garnishes . While the corn is still hot, you can brush it with butter, sprinkle with fresh parsley, and serve with lemon wedges.
- Enjoy . Serve your Cajun corn on the cob hot. It pairs perfectly with grilled meats, salads, or as a standalone snack.

Tips And Tricks
Making delicious Cajun corn on the cob involves more than just the right ingredients; it’s about technique and a few kitchen tricks to ensure they turn out flavorful and satisfying. Here’s how to perfect it:
- Select the Right Corn . Fresh corn on the cob is best for this recipe. Look for ears with bright green husks and plump kernels.
- Season Generously . Don’t be afraid to coat the corn thoroughly with seasoning for the best flavor.
- Don’t Overcrowd the Air Fryer . Cooking the corn in a single layer ensures even cooking and a crispy exterior.
Variations
Cajun corn on the cob is a versatile dish that can be adapted to suit a variety of tastes and dietary needs. Here are some creative variations on the classic:
- Parmesan- After air frying, sprinkle the corn with grated Parmesan cheese for a savory twist.
- Garlic Butter- Mix melted butter with minced garlic and brush over the corn before serving.
- Lemon Pepper- Replace the Cajun seasoning with lemon pepper seasoning for a zesty alternative.
What To Eat With Cajun Corn On The Cob
Cajun corn on the cob pairs wonderfully with various main dishes and sides. Here are some great options:
- Grilled Chicken or Steak - Adds a hearty protein to balance the meal.
- Salad - Provides a fresh, crunchy contrast to the spicy corn.
- Baked Potatoes - A classic side that complements the bold flavors.
How Long Does It Last?
Store any leftovers in an airtight container in the refrigerator for up to 3 days. Reheat in the air fryer for a few minutes to restore the crispy texture before serving.
Can You Freeze It?
Yes, you can! Freeze the cooked and cooled corn on a baking sheet, then transfer to a freezer bag. Reheat directly from frozen in the air fryer, making them a convenient meal prep option.
More Amazing Air Fryer Recipes
- Tandoori Chicken
- Honey Balsamic Chicken
- Cilantro Lime Shrimp
- Smashed Potatoes
- Air Fryer Tofu
Cajun Corn On The Cob Recipe | Cajun-Style Corn On The Cob
Ingredients
- ▢ 4 Ears Of Corn
- ▢ 2 tbsp Olive Oil
- ▢ 1 tbsp Cajun Seasoning
- ▢ 1/2 tsp Kosher Salt
- ▢ 1/4 tsp Black Pepper
- ▢ 2 tbsp Butter
- ▢ Parsley , Chopped, for garnish
- ▢ 4 Lemon Wedges
Instructions
- Shuck the Corn . Remove the husks and silk from the corn.
- Season the Corn . Drizzle each ear of corn with olive oil, then sprinkle generously with Cajun seasoning, salt, and black pepper. Rub the seasoning into the corn to ensure it’s evenly coated.
- Preheat the Air Fryer . Set your air fryer to 400°F.
- Arrange the Corn . Place the seasoned corn in a single layer in the air fryer basket. Do not overcrowd to ensure even cooking.
- Cook . Air fry the corn for 10-12 minutes, turning halfway through, until the corn is golden brown and slightly charred.
- Optional Garnishes . While the corn is still hot, you can brush it with butter, sprinkle with fresh parsley, and serve with lemon wedges.
- Enjoy . Serve your Cajun corn on the cob hot. It pairs perfectly with grilled meats, salads, or as a standalone snack.
Get support & connect with our community on Facebook!
Nutrition
And don’t forget to check out my air fryer cookbooks! Every day easy air fryer , and Air Fryer Revolution .


If you already signed up, you should have received an email with a password to give you unlimited access to our FREE Printable Library. The password is case sensitive. Enter it below and get printing!
Password:
Cajun Corn On The Cob Recipe | Cajun-Style Corn On The Cob
Ingredients
- 4 Ears Of Corn
- 2 tbsp Olive Oil
- 1 tbsp Cajun Seasoning
- 1/2 tsp Kosher Salt
- 1/4 tsp Black Pepper
- 2 tbsp Butter
- Parsley Chopped, for garnish
- 4 Lemon Wedges
Instructions
- Shuck the Corn . Remove the husks and silk from the corn.
- Season the Corn . Drizzle each ear of corn with olive oil, then sprinkle generously with Cajun seasoning, salt, and black pepper. Rub the seasoning into the corn to ensure it’s evenly coated.
- Preheat the Air Fryer . Set your air fryer to 400°F.
- Arrange the Corn . Place the seasoned corn in a single layer in the air fryer basket. Do not overcrowd to ensure even cooking.
- Cook . Air fry the corn for 10-12 minutes, turning halfway through, until the corn is golden brown and slightly charred.
- Optional Garnishes . While the corn is still hot, you can brush it with butter, sprinkle with fresh parsley, and serve with lemon wedges.
- Enjoy . Serve your Cajun corn on the cob hot. It pairs perfectly with grilled meats, salads, or as a standalone snack.
Cajun Corn On The Cob Recipe | Cajun-Style Corn On The Cob https://twosleevers.com/cajun-corn-on-the-cob-recipe/

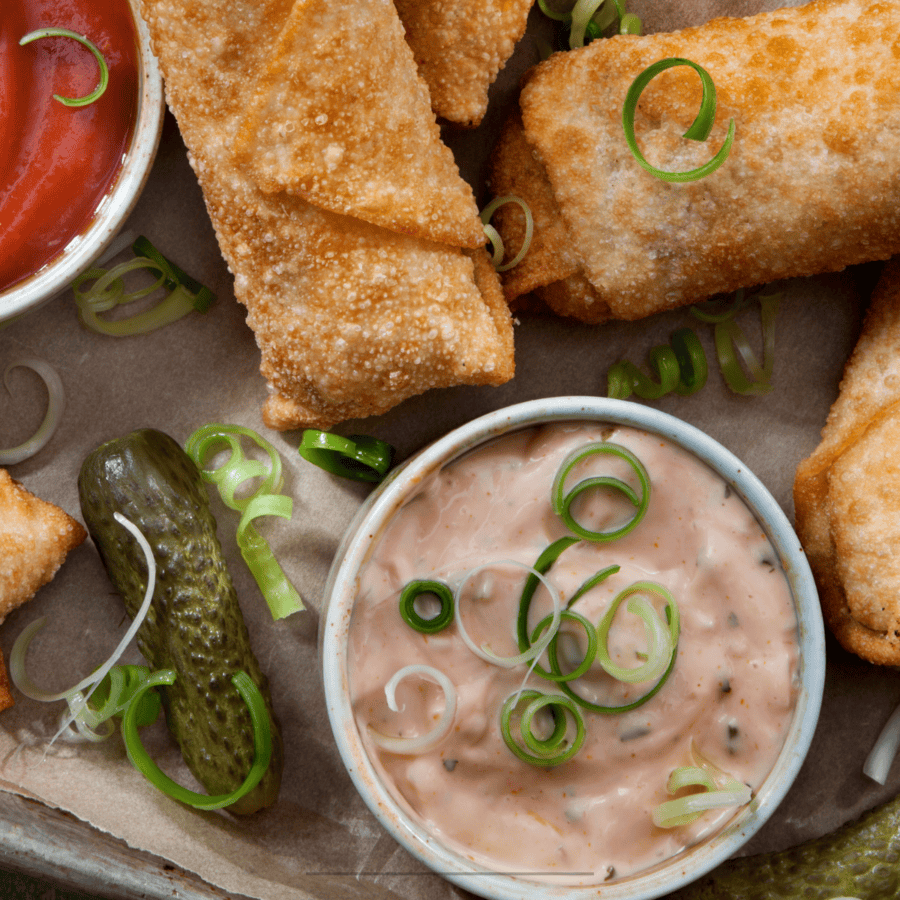
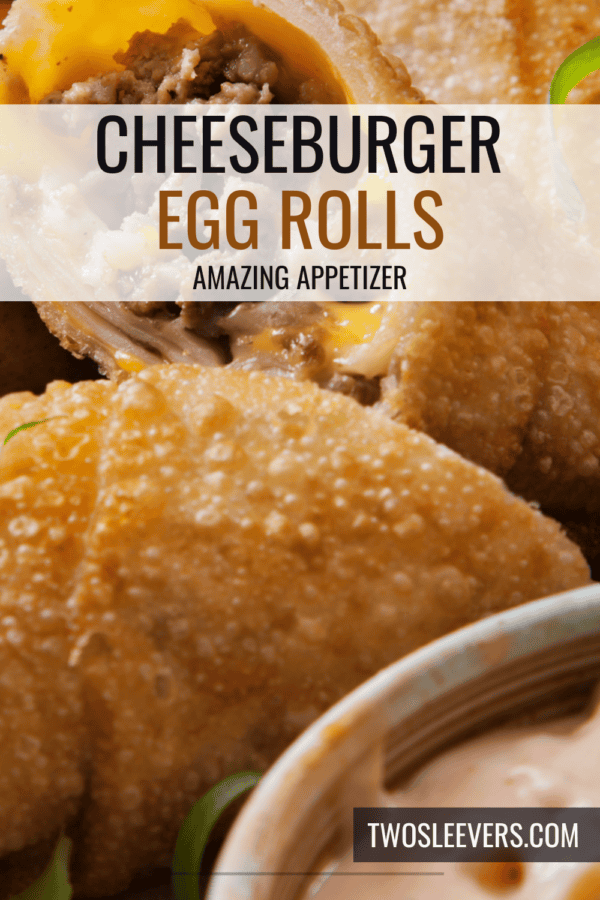
If you’re a fan of the classic cheeseburger but crave a delicious twist, get ready to fall in love with our Cheeseburger Egg Rolls recipe!
Why You’ll Love This Twist On A Classic
- Irresistible Flavor Fusion . Experience the best of both worlds as the savory goodness of a cheeseburger meets the crispy exterior of an egg roll, creating a tantalizing flavor explosion in every bite.
- Easy Preparation . With simple ingredients and easy-to-follow steps, you can whip up a batch of these cheeseburger egg rolls in no time, making them perfect for a quick weeknight dinner or a fun appetizer for parties and gatherings.
- Customizable . Make these cheeseburger egg rolls your own by adding your favorite burger toppings and condiments, such as pickles, onions, or even bacon, to suit your taste preferences.
- Kid-Friendly . Kids and adults alike will love the fun and delicious twist on a classic cheeseburger, making these egg rolls a family-friendly meal option that’s sure to be a hit with everyone at the table.
These delightful morsels combine the iconic flavors of a cheeseburger with the crispy goodness of egg rolls, resulting in a mouthwatering dish that will leave you craving more.
What Do Cheeseburger Egg Rolls Taste Like?
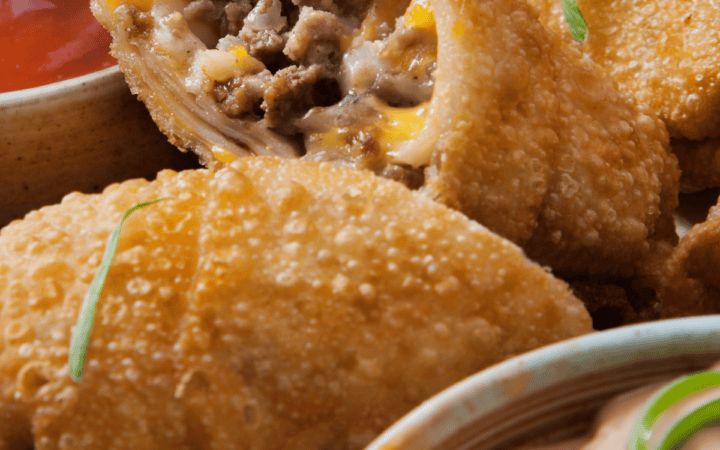
Cheeseburger egg rolls offer a delightful combination of flavors and textures. Picture the savory goodness of a classic cheeseburger—juicy ground beef seasoned to perfection, melted cheese, tangy pickles, and onions—all wrapped up in a crispy egg roll wrapper.
Ingredients You’ll Need
- Egg Roll Wrappers - These thin sheets of dough are the perfect vessel for encasing the cheesy, meaty goodness of the cheeseburger filling.
- Ground Beef - Choose lean ground beef for a healthier option, or opt for ground turkey or chicken for a lighter alternative.
- Cheese - Use your favorite cheese to add gooey, melty goodness to the filling. Cheddar, American, or pepper jack are all excellent choices.
- Onion - Sauteed onions add flavor and texture to the filling, complementing the savory beef and cheese.
- Pickles - Diced pickles lend a tangy crunch to the filling, reminiscent of classic cheeseburger toppings.
- Ketchup and Mustard - These iconic condiments add classic cheeseburger flavor to the filling, tying everything together with their sweet and tangy notes.
- Salt and Pepper - Season the filling to taste with salt and pepper, enhancing the flavors of the other ingredients.
How To Make Cheeseburger Egg Rolls
- Cook the Ground Beef . In a skillet over medium heat, cook the ground beef until browned and cooked through. Drain any excess fat and transfer the cooked beef to a large mixing bowl.
- Add the Ingredients . To the bowl with the cooked ground beef, add the diced onions, diced pickles, shredded cheese, ketchup, mustard, salt, and pepper. Mix until well combined, ensuring that all the ingredients are evenly distributed throughout the filling.
- Assemble the Egg Rolls . Lay an egg roll wrapper on a clean, flat surface. Spoon a generous portion of the cheeseburger filling onto the center of the wrapper. Fold the bottom corner of the wrapper over the filling, then fold in the sides, and roll tightly to enclose the filling. Seal the edge with a dab of water to ensure the egg roll stays closed during frying. Repeat with the remaining wrappers and filling.
- Fry the Egg Rolls . In a deep fryer or large skillet, heat oil to 350°F. Carefully add the egg rolls to the hot oil in batches, being careful not to overcrowd the pan. Fry for 3-4 minutes, or until golden brown and crispy on all sides. Remove the cooked egg rolls with a slotted spoon and drain on paper towels to remove excess oil.
- Serve and Enjoy . Serve the cheeseburger egg rolls hot with your favorite dipping sauces, such as ketchup, big mac sauce , or ranch dressing . Enjoy the crispy, cheesy goodness with friends and family!

Tips And Tricks
Here are some tips and tricks to help you make delicious cheeseburger egg rolls:
- Choose the Right Wrapper . Use egg roll wrappers that are specifically designed for frying. These wrappers are thicker and sturdier, which helps prevent them from becoming soggy during frying.
- Prevent Leakage . Make sure to seal the egg rolls tightly to prevent the filling from leaking out during frying. You can use a mixture of cornstarch and water as a glue to seal the edges of the wrappers.
- Proper Filling Distribution . Be mindful of the amount of filling you use in each egg roll. Overfilling can make it difficult to seal the wrappers and may cause them to burst during frying.
Variations
Here are some tasty variations for cheeseburger egg rolls to spice up your menu:
- Bacon Cheeseburger- Add crispy cooked bacon pieces to the filling mixture for an extra layer of flavor and texture. The smoky and savory bacon pairs perfectly with the beef and cheese.
- Mushroom Swiss- Incorporate sautéed mushrooms and Swiss cheese into the filling for a gourmet twist on the classic cheeseburger. The earthy flavor of the mushrooms complements the richness of the Swiss cheese.
- Jalapeño Popper- Add diced jalapeños and cream cheese to the filling mixture for a spicy and creamy kick. These egg rolls have a perfect balance of heat and cheesy goodness.
What To Eat With Cheeseburger Egg Rolls
Cheeseburger egg rolls are versatile and pair well with a variety of sides and accompaniments. Here are some delicious options to serve alongside them:
- Sweet Potato Fries - For a healthier twist, try serving sweet potato fries. Their natural sweetness contrasts nicely with the savory filling of the egg rolls.
- Coleslaw - Creamy coleslaw provides a refreshing and crunchy side that balances the richness of the egg rolls.
- Onion Rings - Crispy onion rings add another layer of texture and flavor to the meal, enhancing its overall enjoyment.
How Long Do They Last?
Cheeseburger egg rolls can typically last for about 3 to 4 days when stored properly in an airtight container in the refrigerator. However, for the best taste and texture, it’s recommended to consume them within 2 to 3 days.
Can You Freeze Them?
If you want to extend their shelf life, you can freeze cheeseburger egg rolls for up to 2 to 3 months.
Defrost them in the refrigerator overnight before reheating in the air fryer until warmed through.
More Cheeseburger Recipes
- Oven Baked Burgers
- Smash Burgers
- Beef Bulgogi Burgers
- Montreal Steak Burgers
- Lamb Burgers
- Hamburger Steak
- Italian Beef Sandwiches
- Ground Beef Lettuce Wraps
Cheeseburger Egg Rolls | Beef Egg Roll Recipe
Ingredients
- ▢ 8 Egg Roll Wrappers
- ▢ 1 pound Ground Beef
- ▢ 1 cup American Cheese , shredded
- ▢ 1 cup Onion , diced
- ▢ 1/4 cup Pickles , diced
- ▢ 2 tbsp Ketchup
- ▢ 1 tbsp Mustard
- ▢ 1/2 tsp Kosher Salt
- ▢ 1/4 tsp Black Pepper
- ▢ Vegetable Oil , for frying
Instructions
- Cook the Ground Beef . In a skillet over medium heat, cook the ground beef until browned and cooked through. Drain any excess fat and transfer the cooked beef to a large mixing bowl.
- Add the Ingredients . To the bowl with the cooked ground beef, add the diced onions, diced pickles, shredded cheese, ketchup, mustard, salt, and pepper. Mix until well combined, ensuring that all the ingredients are evenly distributed throughout the filling.
- Assemble the Egg Rolls . Lay an egg roll wrapper on a clean, flat surface. Spoon a generous portion of the cheeseburger filling onto the center of the wrapper. Fold the bottom corner of the wrapper over the filling, then fold in the sides, and roll tightly to enclose the filling. Seal the edge with a dab of water to ensure the egg roll stays closed during frying. Repeat with the remaining wrappers and filling.
- Fry the Egg Rolls . In a deep fryer or large skillet, heat oil to 350°F. Carefully add the egg rolls to the hot oil in batches, being careful not to overcrowd the pan. Fry for 3-4 minutes, or until golden brown and crispy on all sides. Remove the cooked egg rolls with a slotted spoon and drain on paper towels to remove excess oil.
- Serve and Enjoy . Serve the cheeseburger egg rolls hot with your favorite dipping sauces, such as ketchup, mustard, or ranch dressing. Enjoy the crispy, cheesy goodness with friends and family!
