
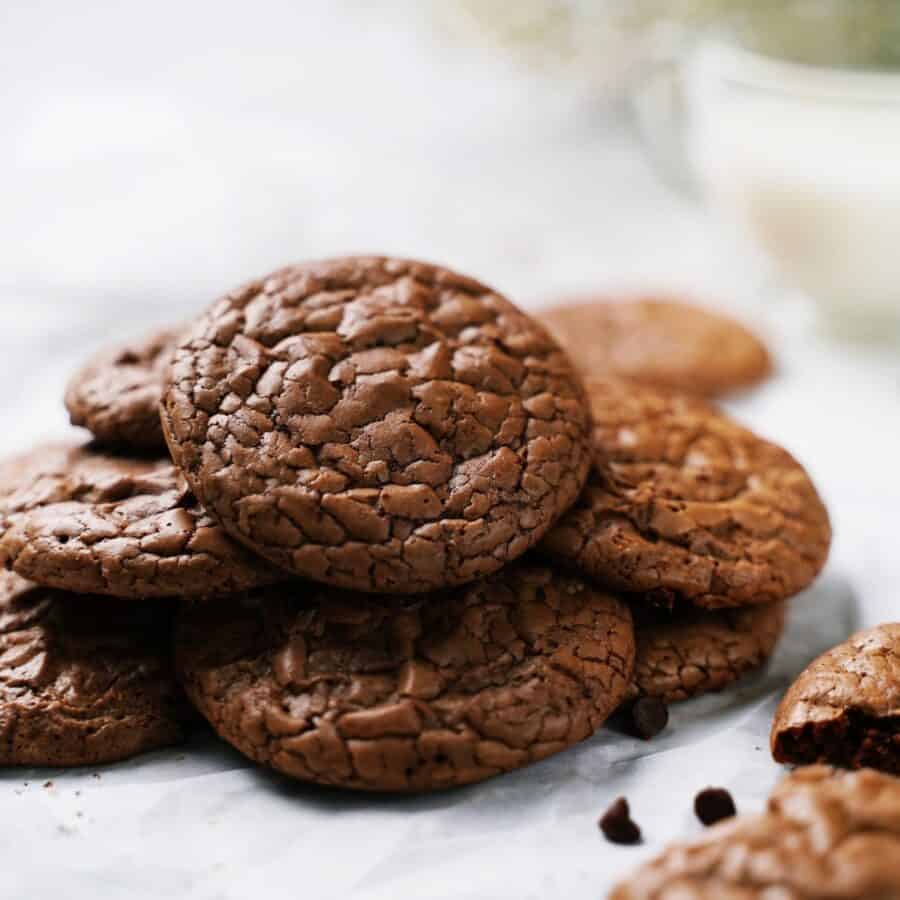
If you’re looking for a rich, fudgy treat with minimal effort, you’ll love these Brownie Mix Cookies! Made with a brownie mix base, these cookies are a quick way to enjoy the delicious taste of brownies in handheld, cookie form. With a few additional ingredients, you’ll transform a basic box of brownie mix into soft, chewy, and absolutely irresistible cookies.

Why You’ll Love These Comforting Cookies
- Quick and Easy . Just a few ingredients and you have delicious cookies ready in under 30 minutes.
- Chocolatey Goodness . All the decadence of a brownie, in a convenient cookie form.
- Minimal Ingredients . With a simple brownie mix as the base, you don’t need a long list of ingredients to make this delicious dessert recipe .
- Versatile . You can add chocolate chips, nuts, or even peanut butter for a custom treat!
Whether you’re whipping these up for a gathering or satisfying a chocolate craving, these brownie mix cookies are sure to please every sweet tooth.
What Do Brownie Mix Cookies Taste Like?
Brownie mix cookies have the perfect balance of a slightly crisp edge with a fudgy, chewy center. By using a brownie mix, you capture the intense chocolate flavor and richness of brownies, but with a slightly different texture that’s a delight to bite into.
What Is The Difference Between A Brownie And A Brownie Cookie?
The main difference between a brownie and a brownie cookie lies in their texture and shape:
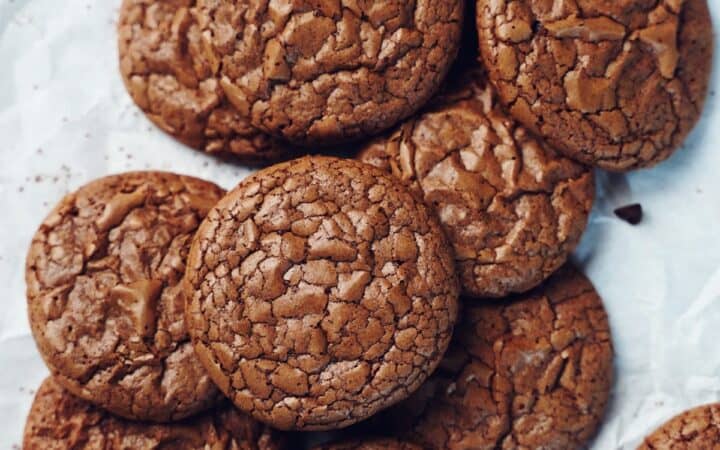
- Texture Brownies : Brownies are typically dense, fudgy, and have a soft, sometimes gooey center. They’re known for their rich, chewy consistency, with the perfect brownie having a crackly top. Brownie Cookies : Brownie cookies capture the same chocolate richness of a brownie but in a cookie form. They tend to have a slightly crisper edge with a chewy, brownie-like center. The texture is similar to the edges of a brownie with a bit of a bite.
- Shape and Structure Brownies : Baked in a pan and then cut into squares or rectangles. They are often thicker and have a dense, cakey or fudgy interior. Brownie Cookies : Baked individually on a cookie sheet like typical cookies. They’re flatter and smaller, with a more uniform, handheld shape.
So, if you love the flavor of brownies but want something handheld with a bit more texture variation, brownie cookies are a fantastic option!
Ingredients You’ll Need
- Brownie Mix - Any standard brownie mix works well. Look for a mix that is around 18-20 ounces.
- Eggs - Provides structure and moisture for a chewy texture.
- Oil - Canola or vegetable oil keeps the cookies soft and moist.
- Water - A small amount to bring the dough together.
- Chocolate Chips (optional)- For even more chocolatey goodness.
How To Make Brownie Mix Cookies
- Prepare the Dough. In a large mixing bowl, combine your brownie mix, eggs, oil, and water. Mix until well combined, and the dough is thick. Stir in chocolate chips if desired.
- Scoop the Dough. Preheat your oven to 350°F. Line a baking sheet with parchment paper. Using a spoon or cookie scoop, portion out dough balls and place them on the baking sheet, spacing them about 2 inches apart.
- Bake to Perfection. Bake the cookies for 9-11 minutes, until the edges are set but the centers are still soft. They’ll firm up as they cool, creating that perfect brownie-like consistency.
- Cool and Enjoy. Let the cookies cool on the baking sheet for a few minutes, then transfer to a wire rack to cool completely.
Tips And Tricks
Making brownie mix cookies is a breeze, but here are a few tips to help you get the best results:
- Don’t Overbake . These cookies can go from fudgy to dry quickly. Take them out when they’re still soft in the center, as they’ll continue to set while cooling.
- Chill the Dough . For thicker cookies, you can chill the dough for 15-20 minutes before baking.
- Use a Cookie Scoop . This helps keep all your cookies the same size, ensuring even baking.
- Add Mix-Ins . Try chocolate chunks, chopped nuts, or even peanut butter chips for a fun twist!
Variations
If you love Brownie Mix Cookies, try these fun variations to customize your cookies:
- Mint Chocolate - Add a few drops of peppermint extract and mix in chocolate mint chips for a refreshing twist.
- Peanut Butter Swirl - Drop small spoonfuls of peanut butter onto each cookie before baking, then swirl it into the dough for a delicious peanut butter chocolate combo.
- Salted Caramel - Sprinkle a pinch of sea salt on top of each cookie before baking and add caramel bits to the dough.
- S’mores - Fold in mini marshmallows and graham cracker pieces to get a s’mores-inspired flavor.
What To Enjoy With Brownie Mix Cookies
Brownie mix cookies are a perfect treat on their own, but here are some tasty ways to serve them:
- Glass of Milk - Classic and always delicious, milk brings out the rich chocolate flavor.
- Ice Cream Sandwich - Use these cookies as the base for ice cream sandwiches. Simply add a scoop of your favorite ice cream between two cookies.
- Dipping Sauces - Serve with chocolate, caramel, or peanut butter dipping sauces for extra indulgence.
- Hot Coffee - Pairing these cookies with coffee creates a delicious balance of flavors, especially for a cozy treat.
And if you can’t get enough of these delicious brownie flavors, give our Brownie Ice Cream , Peanut Butter Brownies , or Zucchini Brownies a try!
How Long Do They Last?
Once baked, brownie mix cookies can be stored in an airtight container at room temperature for up to 5 days. For a longer shelf life, store them in the refrigerator for up to a week, or freeze for up to 3 months.
Can You Freeze Them?
Yes, these cookies freeze well! Once cooled, place them in a single layer on a baking sheet and freeze until solid, then transfer them to a freezer-safe bag or container. This way, you can enjoy fresh brownie mix cookies whenever a craving hits!
More Of OurBest Cookie Recipes
- Peppermint Cookies
- Snowball Cookies
- Matcha Cookies
- Red Velvet Cookies
- Soft Sugar Cookies

Brownie Mix Cookies | Easy Brownie Mix Cookie Recipe
Ingredients
- ▢ 18 oz Brownie Mix
- ▢ 2 Eggs
- ▢ 1/4 cup Vegetable Oil
- ▢ 2 tbsp Water
- ▢ 1/2 cup Chocolate Chips
Instructions
- Prepare the Dough. In a large mixing bowl, combine your brownie mix, eggs, oil, and water. Mix until well combined, and the dough is thick. Stir in chocolate chips if desired.
- Scoop the Dough. Preheat your oven to 350°F. Line a baking sheet with parchment paper. Using a spoon or cookie scoop, portion out dough balls and place them on the baking sheet, spacing them about 2 inches apart.
- Bake to Perfection. Bake the cookies for 9-11 minutes, until the edges are set but the centers are still soft. They’ll firm up as they cool, creating that perfect brownie-like consistency.
- Cool and Enjoy. Let the cookies cool on the baking sheet for a few minutes, then transfer to a wire rack to cool completely.
Get support & connect with our community on Facebook!
Nutrition

If you already signed up, you should have received an email with a password to give you unlimited access to our FREE Printable Library. The password is case sensitive. Enter it below and get printing!
Password:
Brownie Mix Cookies | Easy Brownie Mix Cookie Recipe
Ingredients
- 18 oz Brownie Mix
- 2 Eggs
- 1/4 cup Vegetable Oil
- 2 tbsp Water
- 1/2 cup Chocolate Chips
Instructions
- Prepare the Dough. In a large mixing bowl, combine your brownie mix, eggs, oil, and water. Mix until well combined, and the dough is thick. Stir in chocolate chips if desired.
- Scoop the Dough. Preheat your oven to 350°F. Line a baking sheet with parchment paper. Using a spoon or cookie scoop, portion out dough balls and place them on the baking sheet, spacing them about 2 inches apart.
- Bake to Perfection. Bake the cookies for 9-11 minutes, until the edges are set but the centers are still soft. They’ll firm up as they cool, creating that perfect brownie-like consistency.
- Cool and Enjoy. Let the cookies cool on the baking sheet for a few minutes, then transfer to a wire rack to cool completely.
Brownie Mix Cookies | Easy Brownie Mix Cookie Recipe https://twosleevers.com/brownie-mix-cookies/

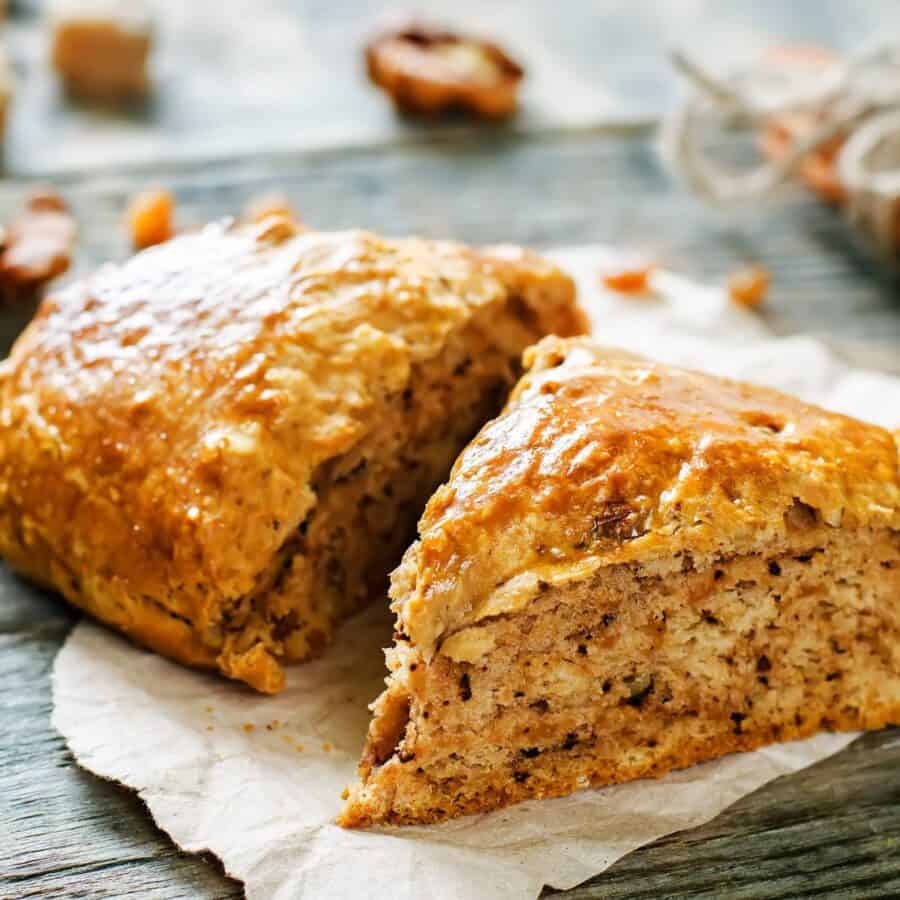
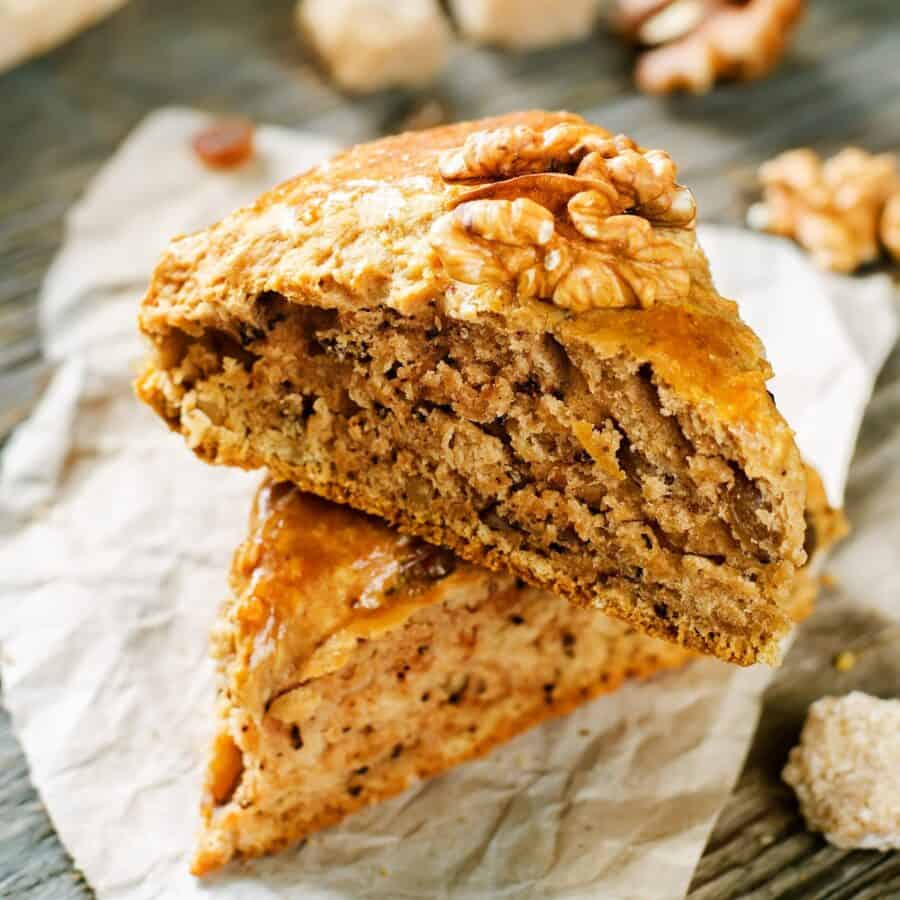
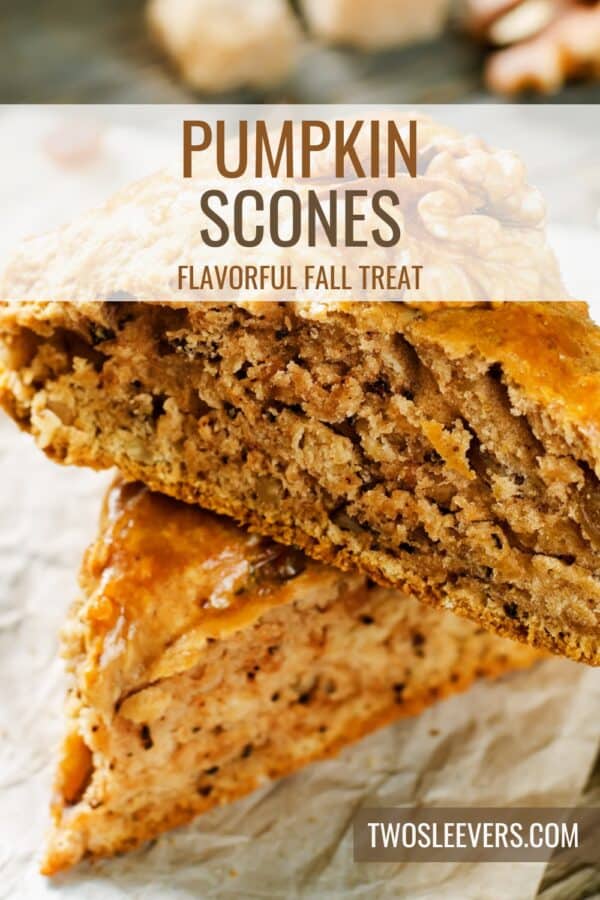
If you’re craving the cozy flavors of fall in a delicious baked treat, you have to try these Pumpkin Scones. They’re the perfect combination of warm spices and pumpkin goodness with a buttery, flaky texture. Learn how to make these scones that are perfect for a morning pick-me-up or a delightful afternoon snack.
Why You’ll Love This Brilliant Breakfast Idea
- Cozy Flavors. These scones are packed with the warm flavors of pumpkin, cinnamon, and nutmeg.
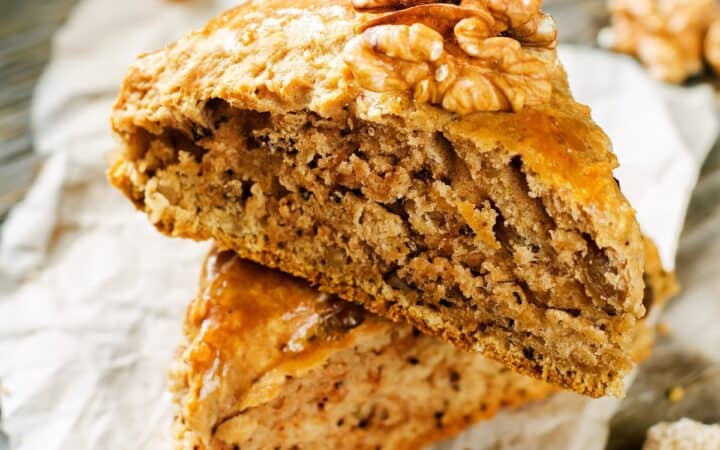
- Perfect Texture. Buttery, flaky, and moist with a slight crispness on the edges.
- Simple Ingredients. Uses pantry staples and real pumpkin puree.
- Make-Ahead Friendly. Prepare the dough in advance and bake fresh scones any time.
Whether you’re serving these at a brunch or enjoying them on a crisp autumn morning, these pumpkin scones will satisfy your fall cravings.
What Do Pumpkin Scones Taste Like?
Pumpkin scones are a fall favorite for a reason. The blend of warm spices and pumpkin puree gives them a rich, comforting flavor. The flaky, tender texture paired with a sweet glaze makes them irresistibly good.
What Is The Secret To A Good Scone?
The secret to a good scone lies in a few key techniques and ingredients that ensure a flaky, tender texture and a delicious flavor. Here’s what makes a scone truly perfect:
- Use Cold Ingredients . Cold, cubed butter is essential. When the cold butter melts in the oven, it creates pockets of steam that make the scones flaky. Grating frozen butter into the flour can also work wonders. Whether you’re using milk, cream, or buttermilk, keeping it cold prevents the butter from melting before baking.
- Don’t Overmix the Dough . Mix the ingredients just until they come together. Overmixing will develop the gluten in the flour, resulting in tough and dense scones. The dough should be slightly crumbly but hold together when pressed.
- Gentle Shaping . Be gentle when shaping the dough. Press it together lightly rather than kneading it, and try to handle it as little as possible to maintain a tender texture.
- Chill the Dough Before Baking . Once you’ve shaped the scones, chilling the dough in the fridge for 15-30 minutes helps firm up the butter and prevents the scones from spreading too much in the oven.
By following these tips, you can achieve scones that are perfectly tender, flaky, and full of flavor. Enjoy experimenting with different flavors and add-ins!
Ingredients You’ll Need
- All-Purpose Flour - The base for the scones, giving them structure.
- Granulated Sugar - Adds sweetness and helps achieve the perfect texture.
- Baking Powder - Helps the scones rise beautifully.
- Salt - Enhances the flavors of the spices and pumpkin.
- Cinnamon, Nutmeg, and Ginger - A blend of warm spices for that classic pumpkin flavor.
- Cold Unsalted Butter - Key to creating flaky layers.
- Pumpkin Puree - Make sure to use 100% pure pumpkin, not pumpkin pie filling.
- Walnuts (optional)- Optional, for texture and earthy flavor.
- Heavy Cream - Adds moisture and richness.
- Vanilla Extract - Enhances the overall flavor of the scones.
How To Make Pumpkin Scones
- Preheat Your Oven. Set it to 400°F and line a baking sheet with parchment paper.
- Mix Dry Ingredients. In a large bowl, whisk together flour, sugar, baking powder, salt, and spices.
- Cut in the Butter. Using a pastry cutter or your fingers, cut the cold butter into the flour mixture until it resembles coarse crumbs.
- Combine Wet Ingredients. In a separate bowl, whisk together pumpkin puree, heavy cream, and vanilla extract.
- Bring It All Together. Pour the wet ingredients into the dry ingredients and gently mix until just combined. Fold in walnuts if using. Do not overmix.
- Shape and Cut the Dough. Turn the dough onto a floured surface, shape it into a circle about 1 inch thick, and cut it into 8 wedges.
- Bake. Place the wedges on the prepared baking sheet and bake for 15-20 minutes or until golden brown.
Tips And Tricks
Making perfect Pumpkin Scones is all about the right techniques. Here are some tips to make sure your scones turn out delicious:
- Use Cold Butter. Cold butter is crucial for flaky scones. You can even freeze the butter and grate it into the flour for the best results.
- Don’t Overmix. Overworking the dough will make the scones tough. Mix just until everything comes together.
- Chill the Dough. If your kitchen is warm, chill the dough for 15-20 minutes before baking to help the scones hold their shape.
- Glaze While Warm. For a delicious glaze, mix powdered sugar with a bit of milk and drizzle it over the scones while they’re still slightly warm.
Variations
Want to get creative with your Pumpkin Scones? Here are some tasty variations to try:
- Maple Glaze - Swap the milk in the glaze for maple syrup for a fall-inspired twist.
- Cranberry-Pumpkin - Add dried cranberries to the dough for a pop of tartness.
- Nutty - Mix in chopped pecans or walnuts for a crunchy texture.
- Chocolate Chip- Fold in mini chocolate chips for a chocolatey treat.
What To Eat With Pumpkin Scones
Pumpkin scones are delicious on their own, but pairing them with the right accompaniments can make them even more delightful:
- Hot Beverages - Enjoy them with a cup of coffee, chai tea , or a pumpkin spice latte.
- Whipped Butter - Serve with a dollop of whipped honey butter for extra indulgence.
- Fruit Compote - A side of warm fruit compote complements the spiced flavors of the scones.
How Long Do They Last?
Pumpkin scones can be stored in an airtight container at room temperature for up to 2 days. For longer storage, refrigerate them for up to 5 days.
Reheat the leftover scones in the oven or microwave for that freshly-baked taste.
Can You Freeze Them?
Yes! To freeze, place the scones on a baking sheet and freeze until solid. Transfer them to a freezer-safe bag or container and freeze for up to 3 months.
When you’re ready to enjoy your leftovers, bake them directly from frozen, adding a few extra minutes to the baking time.
More Perfect Pumpkin Recipes
- Pumpkin Snickerdoodle Cookies
- Low Carb Pumpkin Mousse
- Pumpkin Cinnamon Rolls
- Pumpkin Butter
- Instant Pot Pumpkin Bread
Pumpkin Scones | Pumpkin Spice Scone Recipe
Ingredients
- ▢ 2 cups All Purpose Flour
- ▢ 1/3 cup Granulated Sugar
- ▢ 1 tbsp Baking Powder
- ▢ 1/2 tsp Kosher Salt
- ▢ 1 tsp Ground Cinnamon
- ▢ 1/2 tsp Ground Nutmeg
- ▢ 1/2 tsp Ground Ginger
- ▢ 1/2 cup Unsalted Butter , cold, cut into cubes
- ▢ 1/2 cup Pumpkin Puree
- ▢ 1/4 cup Heavy Cream
- ▢ 1 tsp Vanilla Extract
- ▢ 1/2 cup Chopped Walnuts , optional
Instructions
- Preheat Your Oven. Set it to 400°F and line a baking sheet with parchment paper.
- Mix Dry Ingredients. In a large bowl, whisk together flour, sugar, baking powder, salt, and spices.
- Cut in the Butter. Using a pastry cutter or your fingers, cut the cold butter into the flour mixture until it resembles coarse crumbs.
- Combine Wet Ingredients. In a separate bowl, whisk together pumpkin puree, heavy cream, and vanilla extract.
- Bring It All Together. Pour the wet ingredients into the dry ingredients and gently mix until just combined. Add in chopped walnuts if using. Do not overmix.
- Shape and Cut the Dough. Turn the dough onto a floured surface, shape it into a circle about 1 inch thick, and cut it into 8 wedges.
- Bake. Place the wedges on the prepared baking sheet and bake for 15-20 minutes or until golden brown.
