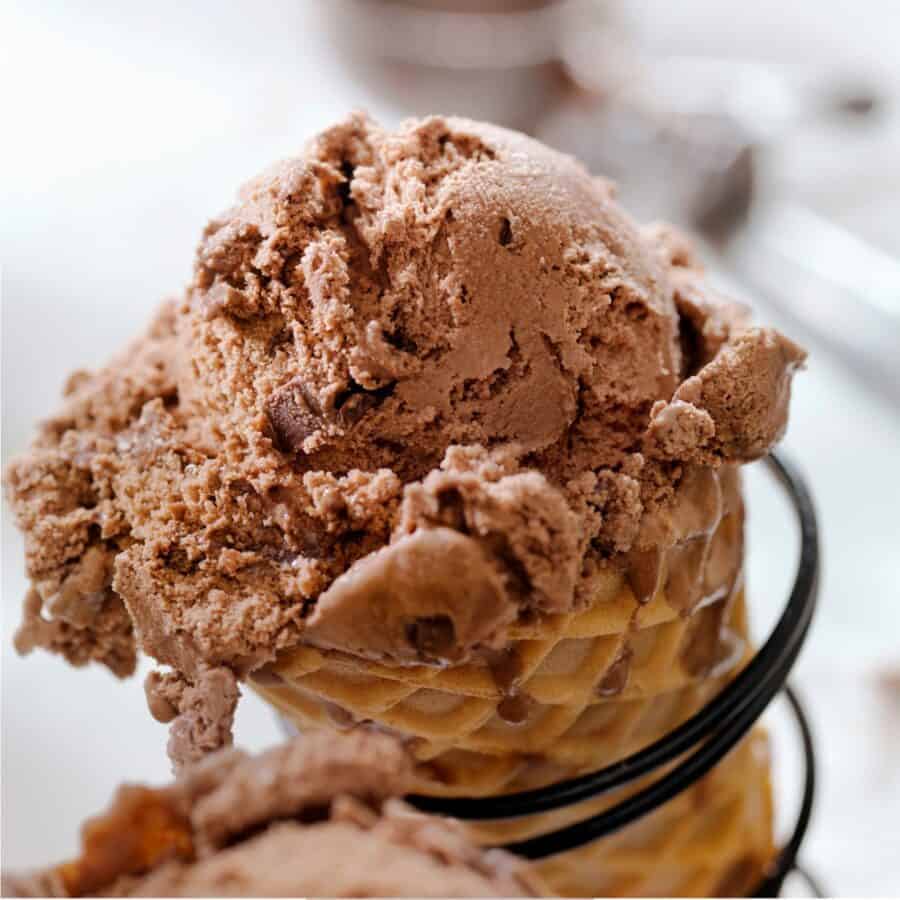
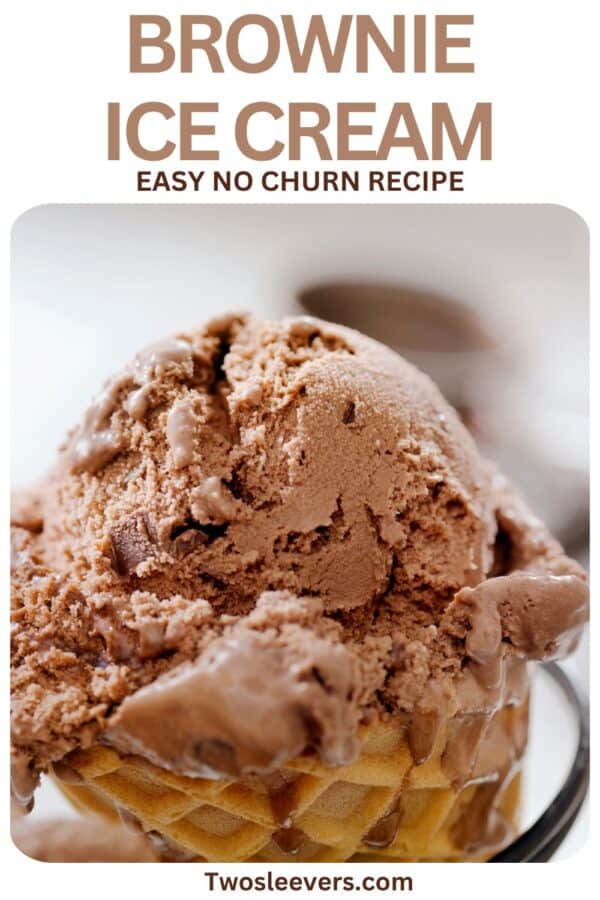
If you’re a chocolate lover craving a cool, creamy treat, get ready to indulge in the easiest No Churn Brownie Ice Cream you’ll ever make. This recipe blends rich chocolate brownie chunks into velvety smooth ice cream, delivering a decadent dessert that’s sure to satisfy your sweet tooth.
Why You’ll Love This Incredible Ice Cream
- Quick & Easy . Ready in just a few simple steps without the need for an ice cream maker.
- Decadent Flavor . Velvety smooth ice cream loaded with chocolatey goodness from brownie pieces.
- No Churn . Skip the special equipment. This recipe requires only a few basic kitchen tools.
- Irresistible . Perfect for hot summer days or anytime you crave a rich chocolate treat.
With this No Churn Brownie Ice Cream, you’re treating yourself to a homemade delight that rivals any premium ice cream parlor creation. Whether you’re hosting a gathering or simply indulging on a lazy afternoon, this dessert is guaranteed to impress.
What Does Brownie Ice Cream Taste Like?
No churn ice cream is loved for its simplicity and rich, creamy texture. By incorporating brownie chunks, this recipe elevates the classic chocolate ice cream experience, offering a delightful contrast of smoothness and fudgy bites.
Ingredients You’ll Need
- Heavy Cream - Provides the base for the creamy texture without churning.
- Sweetened Condensed Milk - Adds sweetness and helps create a smooth ice cream texture.
- Cocoa Powder - Intensifies the chocolate flavor in the ice cream base.
- Brownie Chunks - Use homemade or store-bought brownies, chopped into small pieces for decadent bites.
How To Make Brownie Ice Cream
- Whip the Cream . In a large bowl, whip the heavy cream until stiff peaks form.
- Mix in Condensed Milk . Gently fold in sweetened condensed milk and cocoa powder until well combined.
- Add Brownie Chunks . Fold in the brownie chunks, ensuring they are evenly distributed throughout the mixture.
- Freeze . Transfer the mixture into a loaf pan or container, smoothing the top with a spatula. Cover with plastic wrap or a lid and freeze for at least 6 hours or overnight until firm.
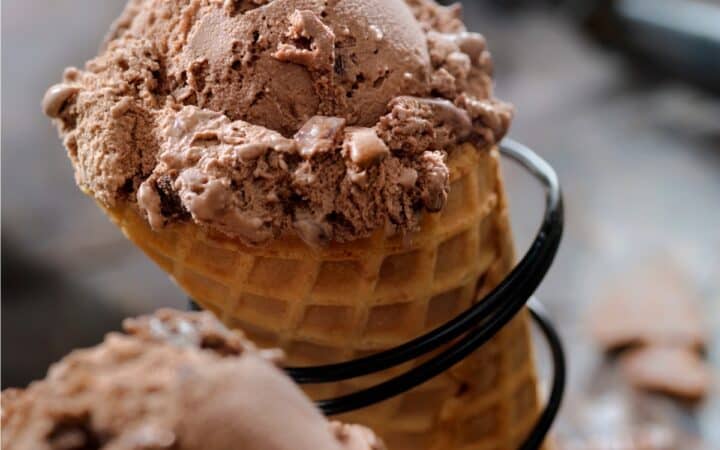
- Serve . Scoop into bowls or cones, garnish with extra brownie pieces if desired, and enjoy your homemade indulgence!

Tips And Tricks
Creating delicious No Churn Brownie Ice Cream involves a few tips and tricks to ensure a creamy texture and rich chocolate flavor. Here are some helpful tips for making it at home:
- Brownie Chunks - Use homemade or store-bought brownies for the mix-ins. Ensure they are cut into small, bite-sized pieces to distribute evenly throughout the ice cream.
- No Churn Method - The no churn method involves whipping cream until stiff peaks form, then folding in sweetened condensed milk and other flavors. Ensure the cream is well chilled before whipping for best results.
- Fold Gently - When combining the whipped cream and sweetened condensed milk mixture, fold gently to maintain the airiness of the whipped cream. This helps in achieving a light and creamy texture.
Variations
Here are some delicious variations and twists you can try to elevate your No Churn Brownie Ice Cream:
- Mint- Add mint extract or peppermint extract to the base for a refreshing twist. Fold in chopped mint chocolate or Andes mints along with brownie chunks.
- Salted Caramel- Swirl in homemade or store-bought salted caramel sauce into the ice cream base. Add a pinch of sea salt to enhance the flavors.
- Rocky Road- Fold in mini marshmallows, chopped nuts (such as almonds or walnuts), and chocolate chunks along with the brownie pieces.
What To Enjoy With Brownie Ice Cream
When serving No Churn Brownie Ice Cream, you can enhance its indulgent flavors and textures by pairing it with complementary treats and beverages. Here are some delightful options to enjoy alongside it:
- Hot Fudge Sauce - Drizzle warm hot fudge sauce over the ice cream for a decadent chocolatey touch.
- Fresh Berries - Serve a side of fresh strawberries, raspberries, or blueberries for a refreshing contrast to the rich chocolate flavors.
- Whipped Cream - Top each serving with a dollop of whipped cream for added creaminess and a light texture.
How Long Does It Last?
Store leftover No Churn Brownie Ice Cream in an airtight container in the freezer for up to 2 weeks. For the best texture, let it sit at room temperature for a few minutes before scooping.
More Of Our Best Brownie Recipes
- Edible Brownie Batter
- Brownie Mix Cookies
- Brownie In A Mug
- Lunch Lady Brownies
- S’mores Brownies
Brownie Ice Cream Recipe | Ice Cream With Brownie Chunks
Ingredients
- ▢ 2 cups Heavy Cream
- ▢ 14 ounces Sweetened Condensed Milk
- ▢ 1/4 cup Unsweetened Cocoa Powder
- ▢ 2 cups Brownie Chunks
Instructions
- Whip the Cream . In a large bowl, whip the heavy cream until stiff peaks form.
- Mix in Condensed Milk . Gently fold in sweetened condensed milk and cocoa powder until well combined.
- Add Brownie Chunks . Fold in the brownie chunks, ensuring they are evenly distributed throughout the mixture.
- Freeze . Transfer the mixture into a loaf pan or container, smoothing the top with a spatula. Cover with plastic wrap or a lid and freeze for at least 6 hours or overnight until firm.
- Serve . Scoop into bowls or cones, garnish with extra brownie pieces if desired, and enjoy your homemade indulgence!
Get support & connect with our community on Facebook!
Nutrition

If you already signed up, you should have received an email with a password to give you unlimited access to our FREE Printable Library. The password is case sensitive. Enter it below and get printing!
Password:

Brownie Ice Cream Recipe | Ice Cream With Brownie Chunks
Ingredients
- 2 cups Heavy Cream
- 14 ounces Sweetened Condensed Milk
- 1/4 cup Unsweetened Cocoa Powder
- 2 cups Brownie Chunks
Instructions
- Whip the Cream . In a large bowl, whip the heavy cream until stiff peaks form.
- Mix in Condensed Milk . Gently fold in sweetened condensed milk and cocoa powder until well combined.
- Add Brownie Chunks . Fold in the brownie chunks, ensuring they are evenly distributed throughout the mixture.
- Freeze . Transfer the mixture into a loaf pan or container, smoothing the top with a spatula. Cover with plastic wrap or a lid and freeze for at least 6 hours or overnight until firm.
- Serve . Scoop into bowls or cones, garnish with extra brownie pieces if desired, and enjoy your homemade indulgence!
Brownie Ice Cream Recipe | Ice Cream With Brownie Chunks https://twosleevers.com/brownie-ice-cream-recipe/
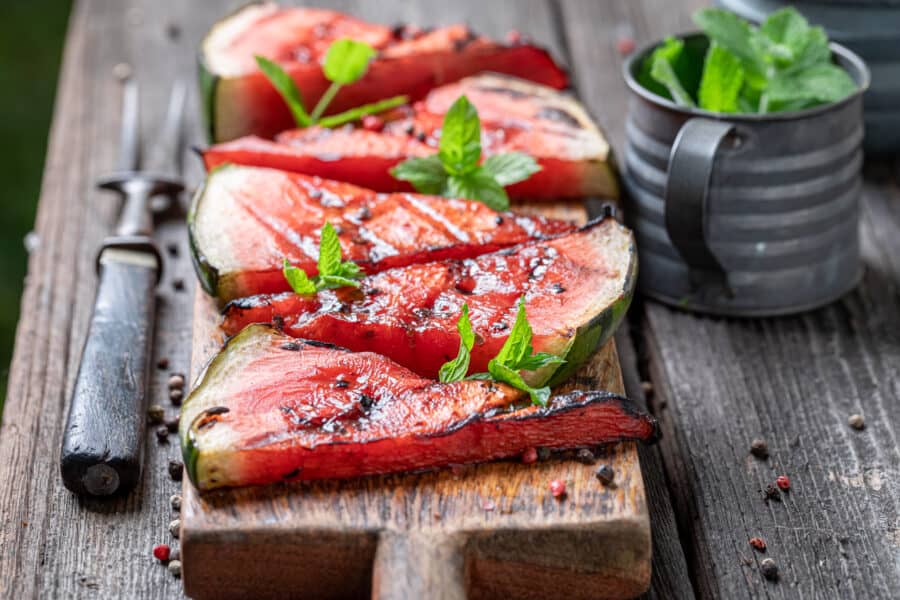
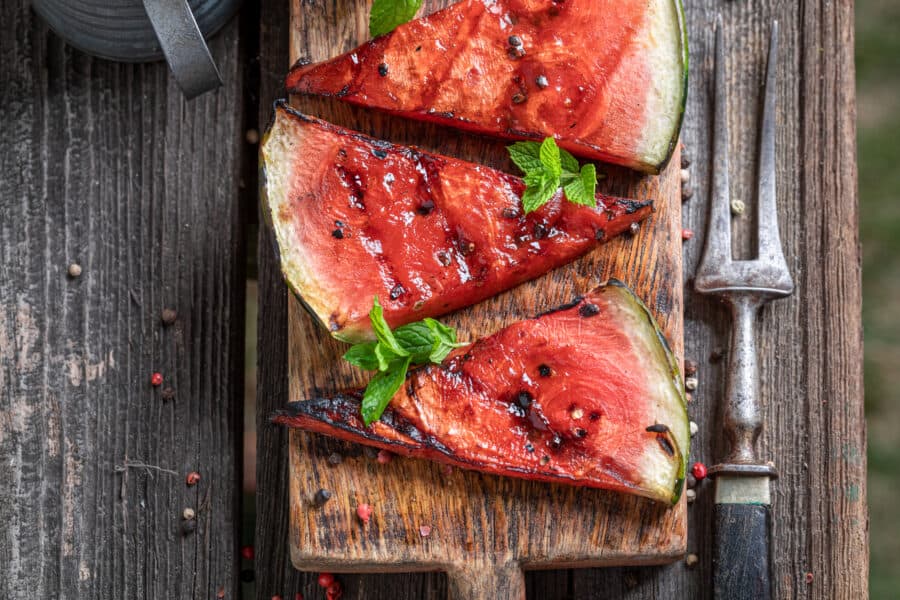
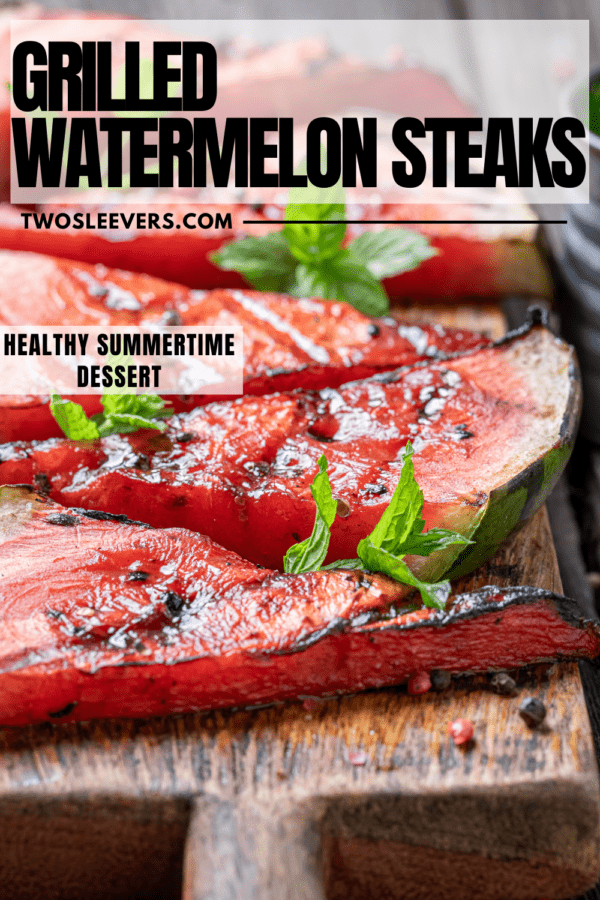
If you’ve never tried Grilled Watermelon Steak, you’re in for a refreshing surprise! This easy recipe turns simple watermelon slices into caramelized, smoky “steaks” that are perfect as a side, vegan entrée, or summer BBQ showstopper.
Why You’re Going To Love Grilling Watermelon
- Fast. Ready in under 20 minutes, perfect for last-minute grilling needs.
- Easy. Minimal prep with only basic pantry ingredients.
- Unique. A creative vegan-friendly dish that impresses guests.
- Delicious. Sweet, smoky, and caramelized with a juicy bite.
- Healthy. Hydrating, low-calorie, and full of vitamins.
Whether you’re grilling for a vegan crowd or looking for a fresh addition to your BBQ spread, these watermelon steaks deliver flavor and presentation.
What Do Watermelon Steaks Taste Like?
Grilled watermelon steaks are surprisingly delicious. Grilling intensifies the natural sweetness of the melon while adding savory, smoky depth.
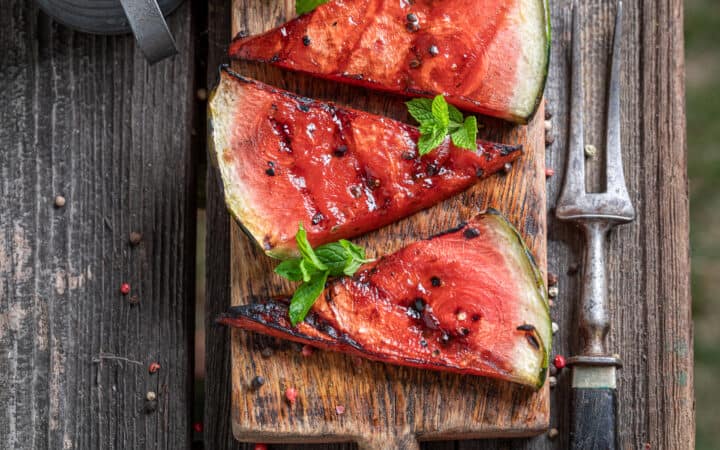
The exterior caramelizes slightly while the interior remains juicy and tender, giving it a steak-like texture that’s satisfying and refreshing.
Is It Healthy?
Yes, watermelon steaks are very healthy. However, adding sweet glazes or heavy toppings will increase calories and sugar, so keep it simple for maximum health benefits.
Ingredients You’ll Need
- Watermelon - Acts as the star of the dish. Using seedless, ripe watermelon ensures juicy, sweet steaks with no seeds to remove. Slicing into 1-inch thick steaks allows them to hold up well on the grill without falling apart.
- Olive Oil - Lightly brushed on each side of the watermelon steaks to prevent sticking to the grill grates and to promote caramelization, creating those beautiful grill marks and enhancing flavor.
- Salt - Enhances the natural sweetness of the watermelon by balancing its sugars and adding savory depth to each bite.
- Black Pepper - Provides subtle heat and a gentle spice that contrasts and complements the sweetness of the watermelon.
- Optional Additions - These ingredients customize and elevate your watermelon steaks: Lime Juice - Adds a tangy, bright citrus finish. Chili Powder - Brings mild smokiness and heat. Fresh Mint - Offers refreshing herbal notes. Balsamic Glaze - Drizzled for tangy-sweet depth and restaurant-quality presentation.
How To Make Grilled Watermelon
- Prepare the Watermelon. Cut the watermelon into 1-inch thick slices. Trim off the rind, creating steak-like rectangles or wedges.
- Season. Brush both sides lightly with olive oil. Sprinkle with salt and black pepper.
- Preheat the Grill. Heat your grill or grill pan over medium-high heat until hot.
- Grill the Watermelon. Place the watermelon steaks directly on the grill grates. Cook for 3-5 minutes per side, until grill marks appear and the edges begin to caramelize.
- Serve. Transfer to a platter and garnish with fresh mint, lime juice, or a drizzle of balsamic glaze if desired.
Tips And Tricks
Here are a few helpful pointers to make your grilled watermelon steaks perfect every time:
- Use a hot grill. A properly preheated grill will caramelize the surface quickly and prevent sticking.
- Use thick slices. Cut at least 1-inch thick steaks to hold up on the grill without falling apart.
- Don’t overcook. Grill just until grill marks appear; overcooking will make the watermelon too mushy.
- Experiment with seasonings. Try adding smoked paprika, chili powder, or a drizzle of honey for extra flavor layers.
Variations
If you love these grilled watermelon steaks and want to explore more flavors, try these ideas:
- Spicy Watermelon Steaks - Sprinkle with chili powder or cayenne before grilling for a kick of heat.
- Balsamic Glazed Watermelon - Drizzle with balsamic glaze after grilling for a tangy-sweet finish.
- Herb Infused -Top with fresh basil or mint for refreshing herbal brightness.
- Lime and Tajín - Squeeze fresh lime juice and dust with Tajín seasoning for a tangy Mexican twist.
What Do You Serve With Grilled Watermelon?
Grilled watermelon is a versatile, refreshing dish that pairs well with a variety of flavors. Here are some delicious ideas:
- Grilled Shrimp Skewers - The sweet watermelon complements savory seafood perfectly.
- Fresh Green Salads - Serve alongside arugula salad with feta for a balanced plate.
- Grilled Veggies - Pair with zucchini, bell peppers, or corn for a colorful vegan platter.
- Burgers - Serve as a refreshing side with your favorite burger or plant-based patty.
- Cheese Boards - Cut into smaller slices and add to a summer cheese or charcuterie board.
How Long Do They Steaks Last?
Watermelon steaks are best enjoyed immediately after grilling, as their texture and flavor are at their peak when freshly cooked and warm. However, if you have leftovers:
Store them in an airtight container for up to 2 days. Note that the watermelon will release more water as it sits, becoming softer and less firm over time.
They can be eaten cold as a refreshing salad addition, but reheating is not recommended as it will further soften the texture and reduce their grilled caramelization.
More Fantastic Fruit Recipes
- Strawberry Popsicles
- Mango Ice Cream
- Watermelon Feta Salad
- Cheesecake Fruit Salad
- Blueberry Cinnamon Rolls
- Grilled Pineapple
Watermelon Steak | Grilled Watermelon Vegan Steak Recipe
Ingredients
- ▢ 1 Watermelon , cut into slices
- ▢ 2 tbsp Olive Oil
- ▢ Kosher Salt , to taste
- ▢ Ground Black Pepper , to taste
- ▢ Balsamic Glaze , to garnish
Instructions
- Prepare the Watermelon. Cut the watermelon into 1-inch thick slices. Trim off the rind, creating steak-like rectangles or wedges.
- Season. Brush both sides lightly with olive oil. Sprinkle with salt and black pepper.
- Preheat the Grill. Heat your grill or grill pan over medium-high heat until hot.
- Grill the Watermelon. Place the watermelon steaks directly on the grill grates. Cook for 3-5 minutes per side, until grill marks appear and the edges begin to caramelize.
- Serve. Transfer to a platter and garnish with fresh mint, lime juice, or a drizzle of balsamic glaze if desired.
