
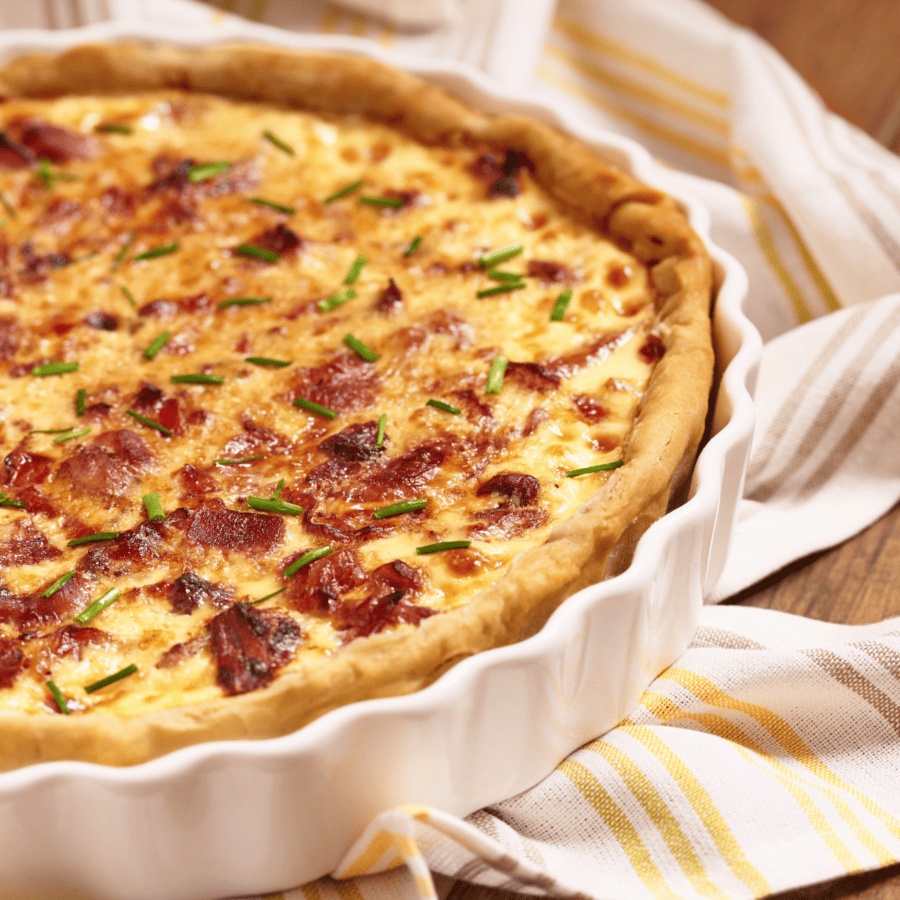
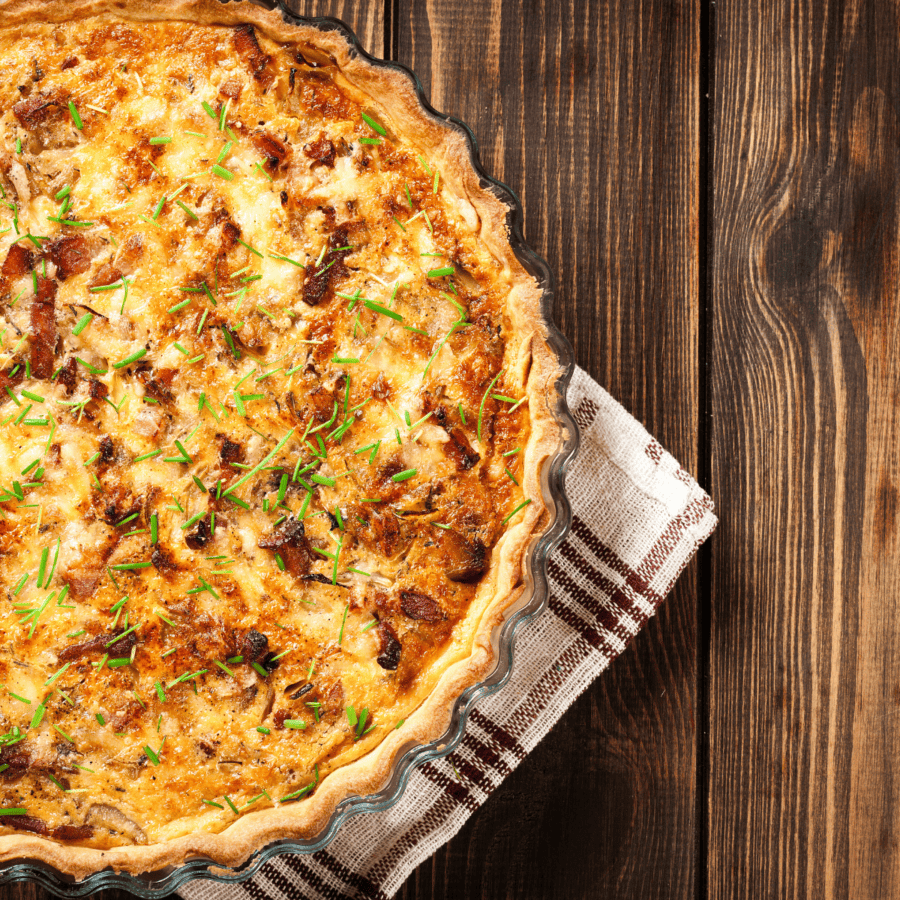
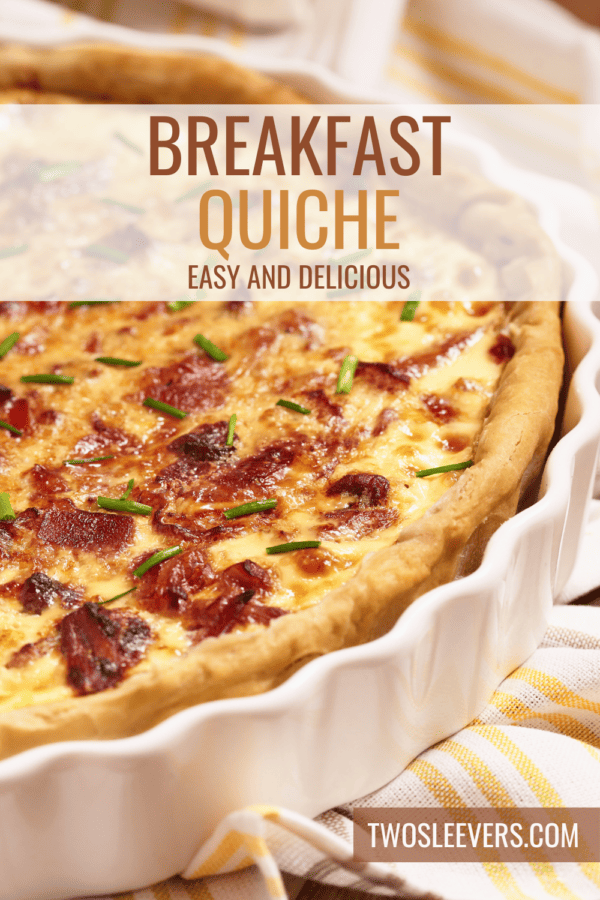
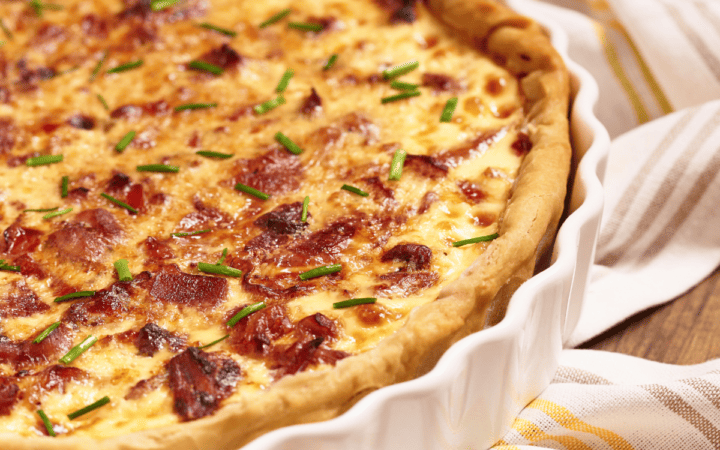
Start your day right with this mouth-watering Bacon Egg and Cheese Breakfast Quiche! It’s a hearty, flavorful, and easy-to-make dish that’s perfect for breakfast or brunch. Packed with crispy bacon, fluffy eggs, and melted cheese, this quiche is sure to be a hit with the whole family.
Why This Will Be Your New Go-To Breakfast
- Hearty and Satisfying . Filled with a delicious combination of bacon, eggs, and cheese.
- Versatile . Perfect for a weekend brunch, a special breakfast, or even as a dinner option.
- Easy to Prepare . Simple ingredients and straightforward steps make this quiche a breeze to whip up.
- Customizable . Easily adaptable with various add-ins like veggies, different cheeses, or meats.
Whether you’re hosting a brunch or looking for a delicious breakfast option, this Bacon Egg and Cheese Breakfast Quiche is sure to impress.
Does Pie Crust Need To Be Prebaked For Quiche?
It is often recommended to prebake (also known as “blind bake”) the pie crust when making quiche. This step is crucial for several reasons:
- Prevents a Soggy Crust . Prebaking the crust helps to seal it and prevent the wet egg mixture from making it soggy during baking.
- Ensures Even Cooking . The egg mixture cooks at a different rate than the crust. Prebaking ensures that the crust is fully cooked and not doughy or undercooked by the time the filling is set.
- Improves Texture . Prebaking results in a crisper, flakier crust, which contrasts nicely with the creamy quiche filling.
What Are The Three Main Differences Between A Frittata And A Quiche?
Frittatas and quiches are both popular egg-based dishes, but they have distinct differences in preparation, ingredients, and presentation. Here are the three main differences between a frittata and a quiche:
- Crust Quiche - A quiche is baked in a pie crust, which gives it a flaky, buttery base. The crust is an integral part of its structure and presentation. Frittata - A frittata does not have a crust. It’s essentially a crustless dish, similar to an omelet, and is started on the stove and often finished in the oven.
- Ingredients and Texture Quiche - The filling of a quiche typically includes eggs and cream or milk, which creates a custard-like consistency. It often has a higher ratio of dairy to eggs compared to a frittata, resulting in a creamier texture. Quiches can also be more versatile with fillings like cheese, meats, and vegetables. Frittata - Frittatas generally contain just eggs with a little bit of dairy, resulting in a denser and less custardy texture than quiches. They often feature a variety of mix-ins like vegetables, meats, and cheeses, but in lesser quantities than a quiche.
- Cooking Method Quiche - Quiches are baked in the oven. The crust is usually pre-baked (blind baked) before the egg mixture is added and then baked again until the filling is set. Frittata - Frittatas are started on the stovetop and then finished in the oven (especially for thicker ones) or entirely cooked on the stove. The ingredients are cooked first, then the egg mixture is poured over, and the frittata is cooked without stirring until it’s set.
What Is Breakfast Quiche Made Of?
- Pie Crust (Store-bought or Homemade) - This forms the base of the quiche. The crust provides a buttery, flaky foundation that holds the filling.
- Bacon - Bacon adds a savory depth and a crunchy texture to the quiche. Its rich, smoky flavor complements the eggs and cheese, and the crumbled pieces distribute this flavor throughout the dish.
- Eggs - The main component of the quiche filling. They create the custard-like base that quiche is known for. When baked, they set to a firm yet tender consistency, enveloping the other ingredients in a creamy texture.
- Shredded Cheese- Cheese adds richness, flavor, and a gooey texture to the quiche. Cheddar, known for its sharpness, enhances the overall taste, but a mix of different cheeses can add complexity and different flavor profiles.
- Heavy Cream- This is used to thin out the eggs and create a smooth, custard-like consistency. The fat in the cream contributes to the richness and creaminess of the quiche filling.
- Salt and Pepper - These are essential seasonings that enhance the natural flavors of the other ingredients.
Together, these ingredients combine to make a Bacon, Egg, and Cheese Breakfast Quiche that is not only flavorful and hearty but also visually appealing and versatile enough to be enjoyed at any meal.
How To Make Breakfast Quiche
- Preheat and Prep . First, preheat your oven. Prepare the pie crust in a quiche dish or pie plate.
- Cook the Bacon . Next, fry the bacon until crispy, then crumble or chop it.
- Combine Ingredients . In a bowl, whisk together eggs, milk or cream, cheese, salt, and pepper. Add the bacon and any optional veggies or additional ingredients.
- Assemble the Quiche . Then, pour the egg mixture into the pre-baked crust.
- Bake to Perfection . Bake in the oven until the quiche is set and the top is lightly golden.
- Serve and Enjoy . Finally, let it cool slightly before slicing. Serve warm and enjoy!
Tips and Tricks
Making a delicious and satisfying breakfast quiche involves several tips and tricks to ensure the best results. Here are some key suggestions to help you perfect it:
- Prebake the Crust - For a crispier crust that doesn’t get soggy, prebake (blind bake) your pie crust for about 10 minutes before adding the filling. This step is crucial, especially if you’re using a watery vegetable filling.
- Balance Your Fillings - Too many fillings can overwhelm the egg mixture and make the quiche too dense. Aim for a good balance between the eggs, cream, cheese, and other add-ins.
- Avoid Overcooking - Bake the quiche until just set but still slightly jiggly in the center. It will continue to cook and set as it cools.
- Rest Before Serving - Let the quiche rest for a few minutes after baking. This resting period allows the quiche to set, making it easier to slice.
Variations
Breakfast quiche is a versatile dish that can be adapted in numerous ways to suit different tastes and occasions. Here are some creative variations you can try:
- Vegetable Quiche - Add sautéed spinach, mushrooms, bell peppers, onions, or asparagus for a veggie-packed version. Make sure to cook the vegetables first to remove excess moisture.
- Meat Lover’s Quiche - Include cooked bacon, ham, sausage, or chorizo for a hearty, meaty quiche.
- Mediterranean Quiche - Include sun-dried tomatoes, olives, and feta cheese for a Mediterranean flair.
What To Serve With Breakfast Quiche
Breakfast quiche is a versatile dish that can be paired with a variety of sides to create a well-rounded and satisfying meal. Here are some great options to serve with it:
- Fresh Fruit or Fruit Salad - A light and refreshing choice that balances the richness of the quiche. Think seasonal fruits or a colorful fruit salad.
- Salad - A simple salad with a light vinaigrette dressing can add a crisp, fresh element to your meal. Consider adding some nuts or seeds for extra crunch.
- Roasted Vegetables - Vegetables like asparagus , tomatoes , bell peppers , or zucchini can add color and nutrition to your breakfast plate.
- Bread or Toast - A slice of rustic bread, toast, or a warm baguette with butter or preserves can complement the quiche well.
- Hash Browns- For a hearty addition, serve with crispy hash browns, potato wedges , or sweet potato fries .
How Long Does It Last?
A fully baked breakfast quiche can be stored in the refrigerator for up to 3-4 days. Make sure to let the quiche cool to room temperature before storing it. Place it in an airtight container or wrap it tightly in plastic wrap or aluminum foil to maintain its freshness and prevent it from absorbing other odors in the fridge.
Can You Freeze It?
Quiche can be frozen and enjoyed later if you have leftovers or want to make it ahead of time. Wrap the quiche tightly with plastic wrap and then with aluminum foil, or place it in a freezer-safe container. A breakfast quiche can last in the freezer for up to 3 months.
Thaw the frozen quiche it in the refrigerator overnight before reheating. To reheat, place the quiche in an oven preheated to around 350°F and heat it until it’s warmed through. This can take about 20-30 minutes.
More Breakfast Recipes
- Keto Pancakes
- Protein Waffles
- Keto Breakfast Casserole
- Low Carb Blueberry Muffins
- Savory Bread Pudding
- Tarte Flambee
- Egg Muffins
- Granola Bars
- Biscuits And Gravy
- Broccoli Quiche
So, if you love this Breakfast Quiche recipe as much as we do, make sure you share it with your friends on Facebook and Pinterest so they can try it too!
Breakfast Quiche Recipe | Bacon Egg And Cheese Quiche
Ingredients
- ▢ 1 Premade Pie Crust
- ▢ 8 slices Bacon
- ▢ 4 Eggs
- ▢ 1 cup Shredded Cheese
- ▢ 1 cup Heavy Cream
- ▢ 1/2 tsp Kosher Salt
- ▢ 1/4 tsp Black Pepper
Instructions
- Preheat and Prep . First, preheat your oven. Prepare the pie crust in a quiche dish or pie plate prebake at 375 for 10 minutes.
- Cook the Bacon . Next, fry the bacon until crispy, then crumble or chop it.
- Combine Ingredients . In a bowl, whisk together eggs, milk or cream, cheese, salt, and pepper. Add the bacon and any optional veggies or additional ingredients.
- Assemble the Quiche . Then, pour the egg mixture into the pre-baked crust.
- Bake to Perfection . Bake in the oven at 375F for 35-45 minutes or until the quiche is set and the top is lightly golden.
- Serve and Enjoy . Finally, let it cool slightly before slicing. Serve warm and enjoy!
Get support & connect with our community on Facebook!
Nutrition

If you already signed up, you should have received an email with a password to give you unlimited access to our FREE Printable Library. The password is case sensitive. Enter it below and get printing!
Password:

Breakfast Quiche Recipe | Bacon Egg And Cheese Quiche
Ingredients
- 1 Premade Pie Crust
- 8 slices Bacon
- 4 Eggs
- 1 cup Shredded Cheese
- 1 cup Heavy Cream
- 1/2 tsp Kosher Salt
- 1/4 tsp Black Pepper
Instructions
- Preheat and Prep . First, preheat your oven. Prepare the pie crust in a quiche dish or pie plate prebake at 375 for 10 minutes.
- Cook the Bacon . Next, fry the bacon until crispy, then crumble or chop it.
- Combine Ingredients . In a bowl, whisk together eggs, milk or cream, cheese, salt, and pepper. Add the bacon and any optional veggies or additional ingredients.
- Assemble the Quiche . Then, pour the egg mixture into the pre-baked crust.
- Bake to Perfection . Bake in the oven at 375F for 35-45 minutes or until the quiche is set and the top is lightly golden.
- Serve and Enjoy . Finally, let it cool slightly before slicing. Serve warm and enjoy!
Breakfast Quiche Recipe | Bacon Egg And Cheese Quiche https://twosleevers.com/breakfast-quiche/

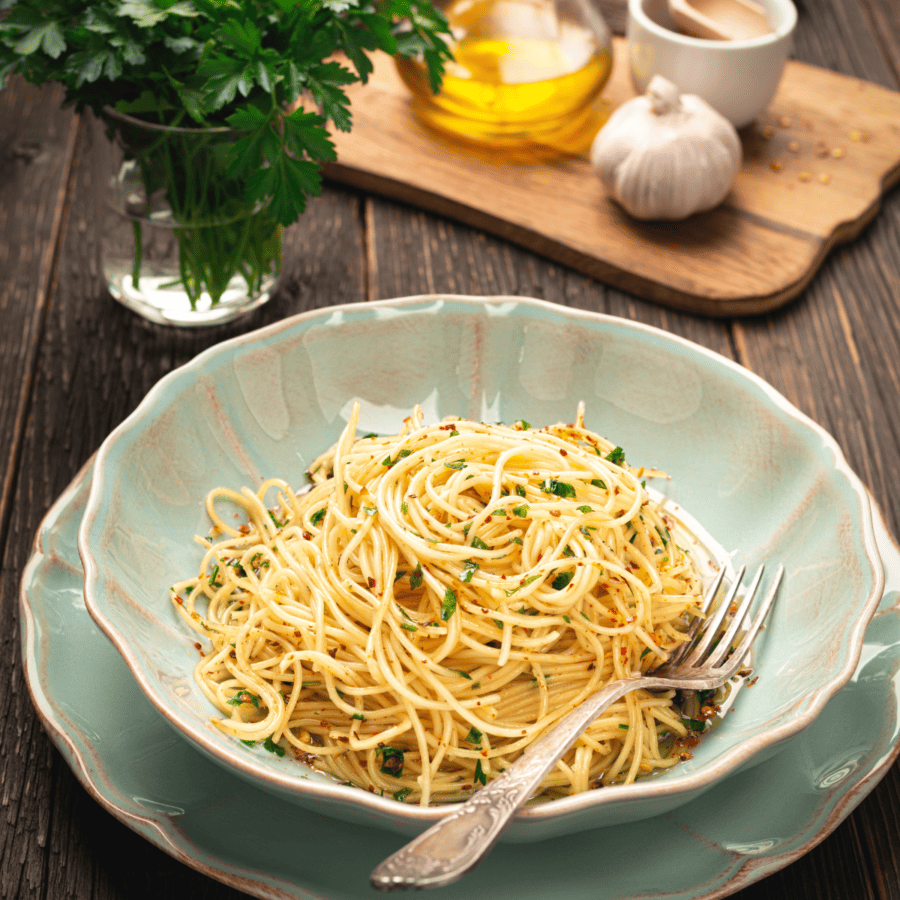
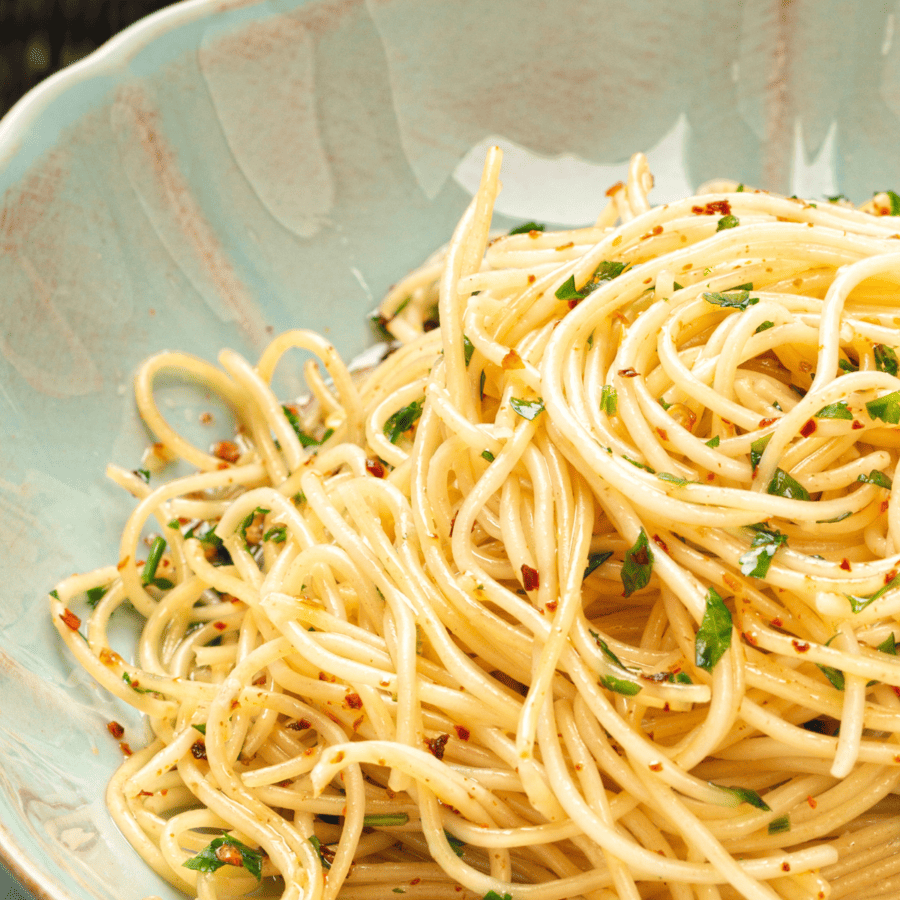
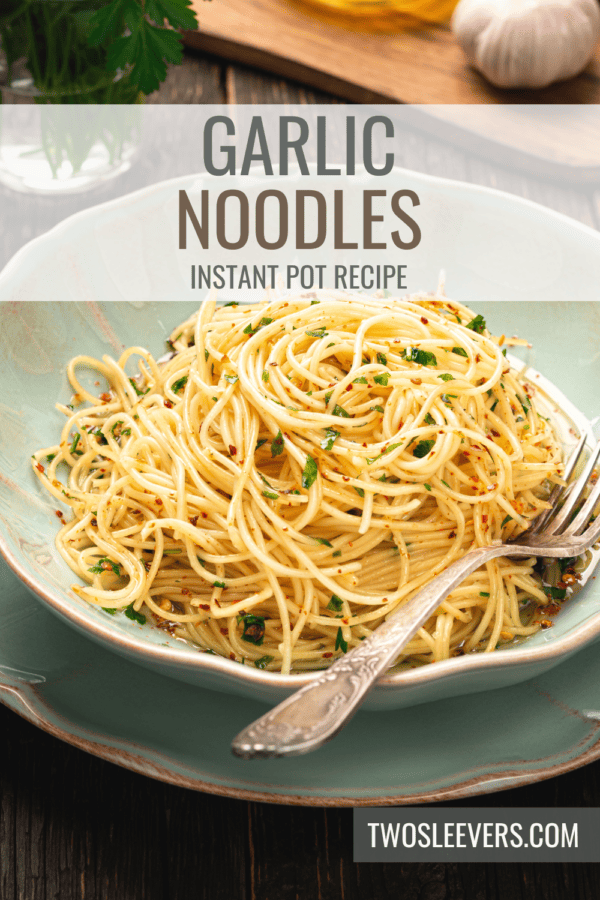
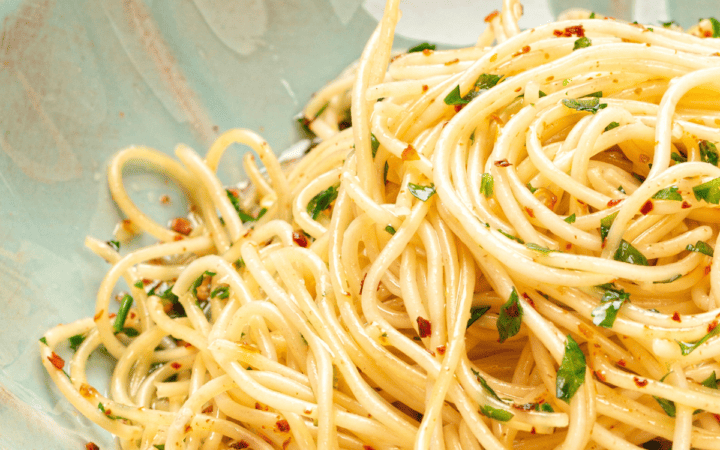
If you’re a pasta lover enchanted by the aromatic allure of garlic, get ready for a culinary journey that combines convenience and irresistible flavors. Learn how to make Instant Pot Garlic Noodles, where you’ll achieve a perfect al dente texture infused with the rich essence of garlic in mere minutes.
Why You’ll Love This Flavorful Pasta Dish
- Quick & Easy . Ready in a flash, these Instant Pot Garlic Noodles comes together effortlessly, making it an ideal solution for busy days.
- Flavorful. The harmonious blend of garlic and perfectly cooked pasta creates a dish that is not only quick but bursting with savory goodness.
- Versatile. Customize your pasta with your favorite herbs, spices, or protein additions for a personalized touch.
Embrace the simplicity of this recipe and indulge in a delightful bowl of garlicky goodness that will satisfy your pasta cravings.
Can You Add Raw Garlic To Pasta?
Yes, you can add raw garlic to pasta, and it can infuse the dish with a strong, fresh garlic flavor.
Keep in mind that the intensity of raw garlic can vary, so it’s essential to taste and adjust as needed. If you’re concerned about the pungency of raw garlic, you can also blanch or sauté it briefly in olive oil to mellow the flavor before adding it to the pasta. This method takes the edge off the raw garlic while still preserving its freshness.
Ingredients You’ll Need
- Pasta - Choose your favorite pasta variety—spaghetti, fettuccine, or penne all work well.
- Garlic - Fresh garlic cloves minced or sliced for that unmistakable aromatic flavor.
- Olive Oil - A quality olive oil adds richness and enhances the garlic infusion.
- Vegetable or Chicken Broth - Provides the liquid base for cooking the pasta and infusing it with flavor.
- Salt and Pepper - Essential seasonings to enhance the taste.
- Parmesan Cheese - Optional but highly recommended for a cheesy finish.
- Fresh Herbs - A sprinkle of chopped parsley or basil adds a burst of freshness.
How To Make Garlic Noodles
- Prepare the Ingredients. Add pasta, water, minced garlic, olive oil, salt, and pepper to the Instant Pot.
- Set and Seal. Close the Instant Pot lid, set the valve to sealing, and select the Manual/Pressure Cook function. Cook for the recommended time for your pasta type.
- Quick Release. Once done, perform a quick pressure release. Open the lid carefully.
- Toss and Garnish. Stir the pasta, ensuring it’s well-coated in the flavorful garlic and olive oil. Garnish with grated Parmesan cheese and fresh parsley.
- Serve and Enjoy. Spoon the Instant Pot Garlic Pasta into bowls, and savor the simplicity and deliciousness of this quick and easy dish.
Tips And Tricks
Making Instant Pot garlic noodles can be a quick and convenient way to prepare a flavorful dish. Here are some tips and tricks to help you achieve the best results:
- Sauté the Garlic . Begin by using the Instant Pot’s sauté function to cook minced garlic in olive oil or butter. Sautéing the garlic enhances its flavor and reduces its raw sharpness.
- Use Broth or Stock . Instead of plain water, consider using vegetable or chicken broth to cook the pasta. This adds an extra layer of flavor to the dish.
- Break Pasta in Half . Break long pasta strands in half to fit comfortably in the Instant Pot. This helps prevent sticking and ensures even cooking.
Variations
There are numerous variations you can try to add variety and flavor to your garlic pasta. Here are some creative ideas:
- Vegetarian Delight - Incorporate a variety of vegetables such as cherry tomatoes, spinach, mushrooms, bell peppers, and artichokes. Sauté them along with the garlic for a veggie-packed dish.
- Lemon Garlic Pasta - Add a burst of freshness by squeezing in some lemon juice or adding lemon zest. The citrusy flavor pairs wonderfully with garlic.
- Shrimp Scampi Pasta - Elevate your garlic pasta by adding sautéed shrimp. Cook the shrimp in garlic-infused butter for a delightful seafood twist.
- Chicken Alfredo Garlic Pasta - Introduce cooked chicken pieces to your garlic pasta and create a creamy Alfredo sauce using heavy cream and Parmesan cheese.
What To Serve With Garlic Noodles
Garlic noodles are a flavorful and versatile dish that pairs well with various accompaniments. Here are some ideas on what to serve with them:
- Grilled Chicken or Shrimp - Add protein to your meal by grilling chicken or shrimp with complementary seasonings. The charred flavors and tender texture will complement the garlic noodles.
- Vegetables - Sautéed or roasted vegetables are a great addition. Broccoli, bell peppers, snap peas, and asparagus work well. The vibrant colors and textures create a visually appealing and nutritious dish.
- Tofu or Tempeh - For a vegetarian or vegan option, pan-fry or bake tofu or tempeh until golden brown. Toss them with the garlic noodles for a protein-packed meal.
- Asian-Style Greens - Serve garlic noodles with Asian greens like bok choy, gai lan (Chinese broccoli), or yu choy. Sauté them lightly with garlic and soy sauce for a quick and tasty side.
How Long Do They Last?
Store any leftovers in an airtight container in the refrigerator for up to 3–4 days. Reheat gently in the microwave or on the stovetop, adding a splash of broth to maintain moisture.
Can You Freeze Them?
While pasta dishes can be frozen, the texture of the pasta may change slightly upon thawing. If freezing, allow the pasta to cool completely before transferring it to a freezer-safe container. To reheat, thaw overnight in the refrigerator and warm in the microwave or on the stovetop.
More Simple Pasta Recipes
- Baked Feta Pasta
- Haluski
- Pesto Pasta
- Instant Pot Eggplant Pasta
- Mushroom Pasta with Mascarpone
Garlic Noodles | Instant Pot Garlic Noodles Recipe
Ingredients
- ▢ 1 pound Spaghetti Noodles
- ▢ 6 cloves Garlic , Minced
- ▢ 3 tbsp Olive Oil
- ▢ 4 cups Vegetable Broth
- ▢ 1/2 cup Parmesan Cheese
- ▢ Basil , for garnish
- ▢ 1/2 tsp Salt
- ▢ 1/4 tsp Black Pepper
Instructions
- Prepare the Ingredients. Add pasta, water, minced garlic, olive oil, salt, and pepper to the Instant Pot.
- Set and Seal. Close the Instant Pot lid, set the valve to sealing, and select the Manual/Pressure Cook function. Cook for the recommended time for your pasta type. 4 Minutes for Spaghetti Noodles.
- Quick Release. Once done, perform a quick pressure release. Open the lid carefully.
- Toss and Garnish. Stir the pasta, ensuring it’s well-coated in the flavorful garlic and olive oil. Garnish with grated Parmesan cheese and fresh parsley.
- Serve and Enjoy. Spoon the Instant Pot Garlic Pasta into bowls, and savor the simplicity and deliciousness of this quick and easy dish.
Get support & connect with our community on Facebook!
Nutrition
Don’t forget to check out my otherBest-selling Instant Pot Cookbooks!
Indian Instant Pot , Keto Instant Pot, Instant Pot Fast and Easy , Healthy Instant Pot & Vegetarian Instant Pot .

