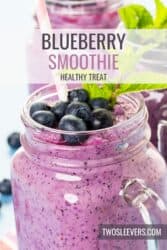
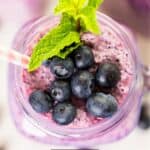
If you love a refreshing, naturally sweet, and nutritious drink, this Blueberry Smoothie is a must-try. Made with juicy blueberries, creamy yogurt, and a touch of honey, this smoothie is packed with antioxidants, protein, and natural energy to kick-start your day. With just a handful of ingredients and a blender, you can create a smooth, thick, and satisfying drink in minutes.
Why You’ll Love This Delicious Drink
- Quick and Easy. Ready in just 5 minutes with minimal prep.
- Nutritious and Filling. Packed with fiber, protein, and healthy fats to keep you energized.
- Naturally Sweetened. No need for refined sugars—blueberries and honey provide the perfect balance.
- Customizable. Easily adjust ingredients to fit your taste or dietary needs.
Whether you’re looking for a quick breakfast, a post-workout boost, or a healthy snack, this blueberry smoothie will keep you feeling full and refreshed.
What Does A Blueberry Smoothie Taste Like?
A blueberry smoothie tastes refreshingly sweet, slightly tangy, and creamy, with a smooth and luscious texture. The flavor is a perfect blend of:
- Juicy sweetness from blueberries – Blueberries provide a naturally sweet yet slightly tart taste, creating a vibrant berry-forward flavor.
- Creamy richness from Greek yogurt – The yogurt adds a velvety smooth texture with a mild tang that enhances the fruitiness.
- Subtle tropical notes from banana – Banana adds natural sweetness and a hint of tropical flavor while making the smoothie thicker.
- Light nuttiness from almond milk – Almond milk contributes a mild, nutty undertone that complements the fruity flavors without overpowering them.
- Delicate floral sweetness from honey – Honey rounds out the flavors with a touch of natural sweetness, balancing the tartness of the berries.
Overall, a blueberry smoothie is cool, refreshing, and perfectly sweet with a creamy finish, making it an ideal drink for breakfast, post-workout, or an energizing snack.
Is A Blueberry Smoothie Healthy?
Yes, blueberry smoothies are incredibly healthy ! They’re made with nutrient-dense ingredients that provide essential vitamins, minerals, and antioxidants.
- Blueberries - High in antioxidants that support brain health and reduce inflammation.
- Greek Yogurt - A great source of protein and probiotics that aid digestion and keep you full.
- Banana - Naturally sweetens the smoothie while adding potassium for heart health.
- Almond Milk - A dairy-free alternative that provides a creamy texture without extra calories.
- Honey - A natural sweetener with antibacterial properties.
This smoothie is a great low-calorie, nutrient-packed option that supports overall health while satisfying your cravings.
Ingredients You’ll Need
- Blueberries - These vibrant berries are packed with antioxidants, which help protect cells from damage, support brain health, and reduce inflammation. They also add a natural sweetness and a rich, fruity flavor to the smoothie.
- Greek Yogurt - A key ingredient for creaminess and protein, Greek yogurt makes the smoothie thick and satisfying. It contains probiotics, which aid digestion and promote gut health, while also keeping you fuller for longer.
- Banana - Naturally sweet and packed with potassium, banana balances the tartness of the blueberries while supporting heart health and muscle function. It also contributes to the smoothie’s smooth and creamy texture.
- Almond Milk - A dairy-free alternative that provides a light, creamy texture without adding excessive calories or fat. It’s perfect for those who are lactose-intolerant or looking for a plant-based option.
- Honey - A natural sweetener that enhances the flavor of the smoothie without relying on refined sugar. It also has antibacterial properties and can provide a quick energy boost.
Together, these ingredients create a low-calorie, nutrient-packed smoothie that is not only delicious but also supports overall health and wellness while keeping cravings in check.
How To Make A Blueberry Smoothie
- Blend the Ingredients . In a high-speed blender, combine blueberries, banana, Greek yogurt, almond milk, honey, and ice cubes.
- Blend Until Smooth. Blend on high for 30–60 seconds, or until the mixture is completely smooth and creamy. If the smoothie is too thick, add a little more almond milk. If it’s too thin, add extra frozen blueberries or ice cubes.
- Taste and Adjust. Taste the smoothie and adjust sweetness if needed by adding more honey. Blend again for a few seconds to incorporate.
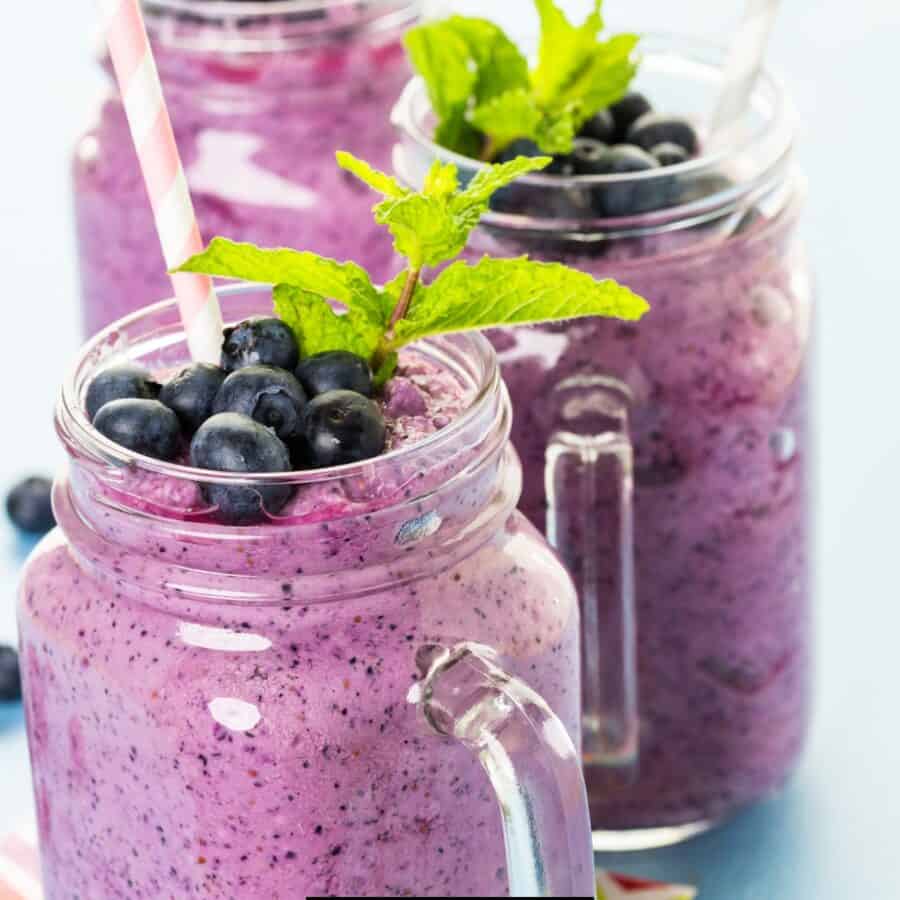
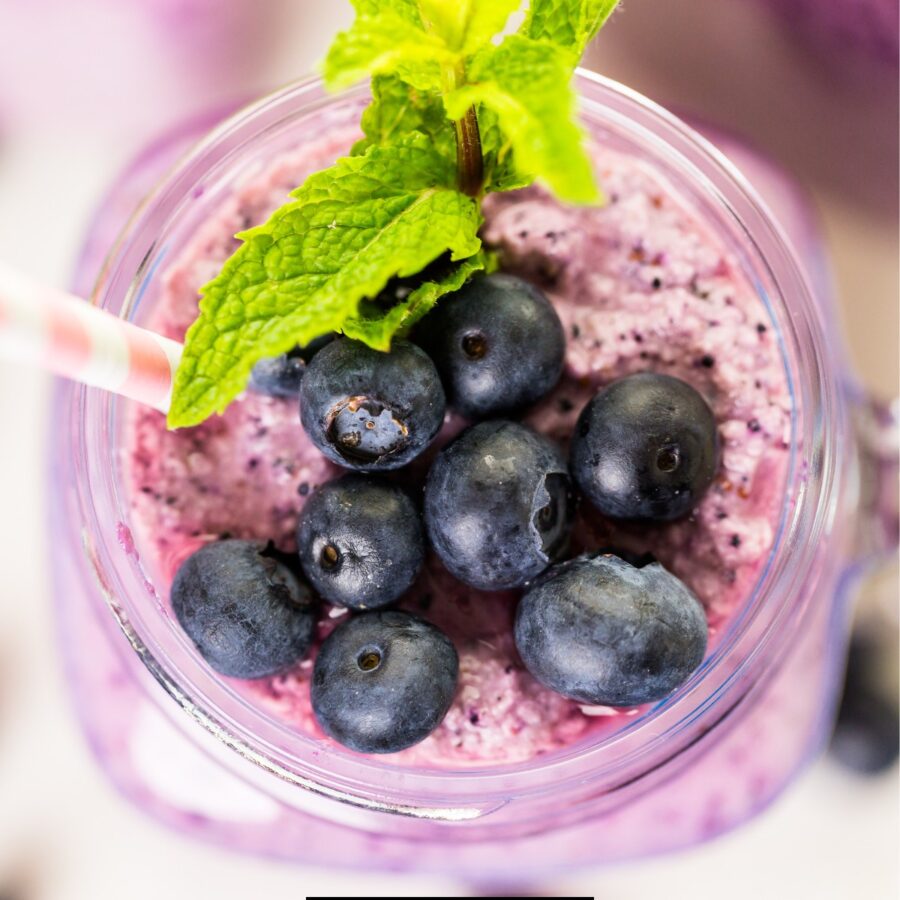
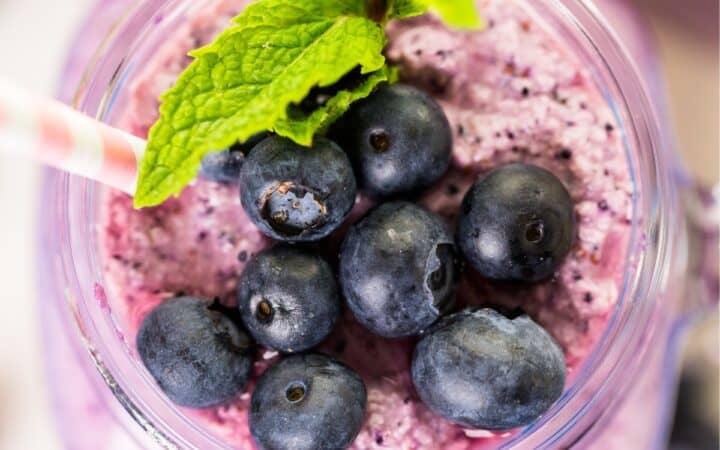
- Serve and Enjoy. Pour the smoothie into a glass and enjoy immediately. Garnish with extra blueberries or a sprinkle of chia seeds for added nutrition.
Tips And Tricks
Making the perfect blueberry smoothie is simple, but these tips will help you get the best results every time:
- Use Frozen Blueberries. They make the smoothie thicker and colder without the need for extra ice.
- Adjust the Thickness. If the smoothie is too thick, add more liquid. If too thin, add more banana or frozen fruit.
- Boost the Nutrition. Add chia seeds, flaxseeds, or protein powder for extra fiber and protein.
- Blend in Stages. Start blending at a lower speed and gradually increase for a smoother texture.
Variations
A blueberry smoothie is a versatile drink that can be customized in many ways. Whether you want to add more protein, make it dairy-free, or boost its nutritional value, here are some tasty variations to try:
- Green - Add a handful of spinach or kale for an extra nutrient boost without changing the flavor.
- Protein Blueberry Smoothie – Blend in a scoop of vanilla protein powder to make it a post-workout recovery drink.
- Nut Butter - Add a tablespoon of almond or peanut butter for extra richness and healthy fats.
- Coconut - Replace almond milk with coconut milk for a tropical twist.
What To Enjoy With A Blueberry Smoothie
A blueberry smoothie is a refreshing and nutrient-packed drink that pairs well with a variety of foods, whether you’re enjoying it for breakfast, a snack, or a post-workout boost. Here are some delicious options to serve alongside it:
- Granola or Oats - Sprinkle some on top for crunch.
- Whole Grain Toast - A slice of avocado or peanut butter toast makes a great complement.
- Egg Muffins - A high-protein option for a balanced breakfast.
- Energy Balls- Perfect for an extra boost of fiber and protein.
How Long Does It Last?
This smoothie is best enjoyed fresh, but you can store leftovers in the refrigerator for up to 24 hours in a sealed container. Shake or stir before drinking, as separation may occur.
Can You Freeze It?
Yes! To freeze a blueberry smoothie, pour it into an ice cube tray or freezer-safe container. When you’re ready to drink your leftovers, blend the frozen smoothie cubes with a little milk for a quick and refreshing smoothie.
More Fruit-Based Recipes
- Crockpot Peach Cobbler
- Baked Apples
- Strawberry Pretzel Salad
- Air Fryer Pineapple
- Keto Blueberry Muffins
- Blueberry Scones
- Peach Muffins
- Mango Smoothie

Blueberry Smoothie Recipe | Easy Antioxidant Smoothie
Ingredients
- ▢ 1 cup Blueberries
- ▢ 1 Banana
- ▢ 1/2 cup Vanilla Greek Yogurt
- ▢ 3/4 cup Unsweetened Almond Milk
- ▢ 1 tbsp Honey
- ▢ 1/2 cup Ice Cubes , optional
Instructions
- Blend the Ingredients . In a high-speed blender, combine blueberries, banana, Greek yogurt, almond milk, honey, and ice cubes.
- Blend Until Smooth. Blend on high for 30–60 seconds, or until the mixture is completely smooth and creamy. If the smoothie is too thick, add a little more almond milk. If it’s too thin, add extra frozen blueberries or ice cubes.
- Taste and Adjust. Taste the smoothie and adjust sweetness if needed by adding more honey. Blend again for a few seconds to incorporate.
- Serve and Enjoy. Pour the smoothie into a glass and enjoy immediately. Garnish with extra blueberries or a sprinkle of chia seeds for added nutrition.
Get support & connect with our community on Facebook!
Nutrition

If you already signed up, you should have received an email with a password to give you unlimited access to our FREE Printable Library. The password is case sensitive. Enter it below and get printing!
Password:
Blueberry Smoothie Recipe | Easy Antioxidant Smoothie
Ingredients
- 1 cup Blueberries
- 1 Banana
- 1/2 cup Vanilla Greek Yogurt
- 3/4 cup Unsweetened Almond Milk
- 1 tbsp Honey
- 1/2 cup Ice Cubes optional
Instructions
- Blend the Ingredients . In a high-speed blender, combine blueberries, banana, Greek yogurt, almond milk, honey, and ice cubes.
- Blend Until Smooth. Blend on high for 30–60 seconds, or until the mixture is completely smooth and creamy. If the smoothie is too thick, add a little more almond milk. If it’s too thin, add extra frozen blueberries or ice cubes.
- Taste and Adjust. Taste the smoothie and adjust sweetness if needed by adding more honey. Blend again for a few seconds to incorporate.
- Serve and Enjoy. Pour the smoothie into a glass and enjoy immediately. Garnish with extra blueberries or a sprinkle of chia seeds for added nutrition.
Blueberry Smoothie Recipe | Easy Antioxidant Smoothie https://twosleevers.com/blueberry-smoothie-recipe/
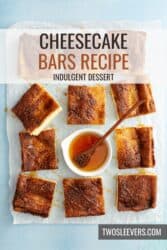
If you’re a fan of creamy, luscious cheesecake but want something more portable, these Cheesecake Bars are the perfect dessert! With a buttery graham cracker crust and velvety smooth filling, these bars are ideal for parties, picnics, or just an indulgent treat.

Why You’ll Love This Delicious Dessert
- Simple to Make . No water bath required—just straightforward ingredients and a simple process.
- Perfect Portions . Bars are easy to slice and serve, making them great for sharing.
- Versatile . Enjoy them plain, or customize with your favorite toppings.
- Creamy & Decadent . The perfect balance of tangy cheesecake and sweet crust.
These Cheesecake Bars are the ideal solution when you’re craving classic cheesecake without the hassle of a full-sized dessert.
What Do Cheesecake Bars Taste Like?
Cheesecake Bars pack all the creamy richness of traditional cheesecake into bite-sized, shareable squares. The graham cracker crust adds a sweet, buttery crunch, perfectly complementing the smooth cheesecake layer.
Ingredients You’ll Need
- Graham Cracker Crumbs - Forms the buttery base for the crust.
- Butter - Holds the crust together and adds richness.
- Granulated Sugar - Sweetens both the crust and filling.
- Cream Cheese - The star of the show—use full-fat for the creamiest texture.
- Eggs - Provide structure and help the cheesecake set.
- Sour Cream - Adds tanginess and enhances the creamy texture.
- Vanilla Extract - Elevates the flavor of the filling.
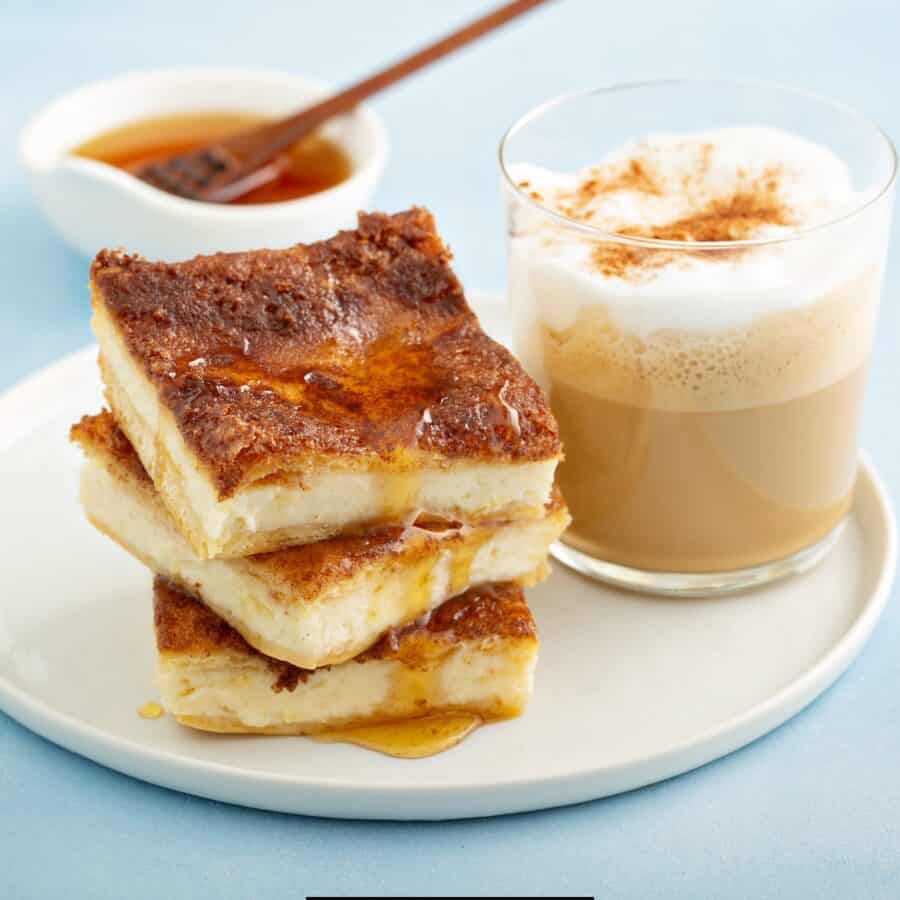
- Optional Toppings - Honey drizzle, fresh berries, chocolate drizzle, or caramel sauce.
How To Make Cheesecake Bars
- Prepare the Crust . Preheat your oven to 325°F. Line a 9x13-inch baking pan with parchment paper. In a bowl, mix graham cracker crumbs, melted butter, and sugar until combined. Press the mixture firmly into the bottom of the prepared pan. Bake the crust for 10 minutes, then let it cool.
- Make the Filling . In a large bowl, beat softened cream cheese and sugar until smooth and creamy. Add eggs, one at a time, mixing well after each addition. Stir in the sour cream and vanilla extract until fully combined.
- Assemble and Bake . Pour the cheesecake filling over the cooled crust, spreading it evenly. Drizzle the top with honey. Bake for 35-40 minutes, or until the edges are set and the center has a slight jiggle. Turn off the oven and let the bars cool inside for 15 minutes with the door slightly ajar.
- Chill and Slice . Transfer the pan to the refrigerator and chill for at least 4 hours, or overnight, before slicing into bars.
Tips And Tricks
Follow these tips for perfect Cheesecake Bars every time:
- Room Temperature Ingredients . Allow cream cheese, eggs, and sour cream to come to room temperature for a smoother filling.
- Don’t Overmix . Overmixing can incorporate too much air, causing cracks.
- Use Parchment Paper . Line the pan for easy removal and clean slicing.
- Cool Gradually . Let the bars cool slowly to prevent cracking.
Variations
Customize your Cheesecake Bars with these delicious twists:
- Chocolate Chip - Fold mini chocolate chips into the filling.
- Berry Swirl - Swirl in raspberry or strawberry jam before baking.
- Salted Caramel - Drizzle with salted caramel sauce and sprinkle with flaky sea salt.
- Oreo - Substitute crushed Oreos for the graham cracker crust.
What To Enjoy With Cheesecake Bars
Cheesecake Bars are perfect on their own but pair beautifully with these accompaniments:
- Whipped Cream - Light and fluffy topping for extra decadence.
- Fresh Fruit - Add a burst of freshness with strawberries, blueberries, or raspberries.
- Coffee or Tea - A warm beverage complements the creamy dessert.
How Do You Cut Cheesecake Bars Cleanly?
Cutting cheesecake bars cleanly can elevate their presentation and make them look professional. Follow these tips and techniques for perfectly sliced bars every time:
- Chill Thoroughly . Ensure your cheesecake bars are well-chilled—at least 4 hours or overnight. This helps them set and prevents the filling from smearing.
- Use a Sharp Knife . A straight-edged knife works best for clean cuts. Avoid serrated knives, as they can create crumbs or uneven edges.
- Heat the Knife . Dip the knife blade into a glass of hot water for a few seconds. The heat helps the blade glide through the creamy cheesecake layer.
- Wipe Between Cuts . After each cut, wipe the knife blade clean with a paper towel or kitchen towel. This prevents buildup on the knife, which can cause smearing.
- Cut with Precision . Position the knife above the bars and press straight down in one smooth motion. Avoid using a sawing motion, which can tear the crust.
Do You Need To Refrigerate Cheesecake Bars After Baking?
Yes, cheesecake bars need to be refrigerated after baking. Cheesecake bars contain perishable ingredients like cream cheese, eggs, and sour cream, which can spoil if left at room temperature for too long.
Can You Freeze Them?
Yes, you can absolutely freeze cheesecake bars! Freezing is a great way to extend their shelf life and enjoy them later without sacrificing flavor or texture. Here’s how to freeze and thaw them properly:
- Cool Completely . Allow the cheesecake bars to cool completely after baking and chilling in the refrigerator. This ensures they set properly and prevents condensation during freezing.
- Pre-Slice the Bars . Slice the cheesecake into individual bars for easy serving later.
- Wrap Individually . Wrap each bar tightly in plastic wrap to prevent freezer burn and protect the creamy texture.
- Use a Freezer-Safe Container . Place the wrapped bars in a freezer-safe airtight container or resealable freezer bag. This adds an extra layer of protection and keeps them organized.
- Label and Freeze . Label the container or bag with the date so you know when they were frozen. Cheesecake bars can be stored in the freezer for up to 3 months.
More Craveworty Cheesecake Recipes
- Mini Cheesecakes
- Instant Pot Mango Cheesecake
- Oreo Cheesecake
- Cheesecake Brownies
- Pumpkin Cheesecake


Cheesecake Bars | Easy And Creamy Cheesecake Bar Recipe
Ingredients
For The Crust
- ▢ 1 1/2 cups Graham Cracker Crumbs
- ▢ 4 tbsp Butter , melted
- ▢ 2 tbsp Granulated Sugar
Cheesecake Bar Filing
- ▢ 16 ounces Cream Cheese , softened
- ▢ 1/2 cup Granulated Sugar
- ▢ 2 Eggs
- ▢ 1/2 cup Sour Cream
- ▢ 1 tsp Vanilla Extract
- ▢ 1/4 cup Honey
Instructions
- Prepare the Crust . Preheat your oven to 325°F. Line a 9x13-inch baking pan with parchment paper. In a bowl, mix graham cracker crumbs, melted butter, and sugar until combined. Press the mixture firmly into the bottom of the prepared pan. Bake the crust for 10 minutes, then let it cool.
- Make the Filling . In a large bowl, beat softened cream cheese and sugar until smooth and creamy. Add eggs, one at a time, mixing well after each addition. Stir in the sour cream and vanilla extract until fully combined.
- Assemble and Bake . Pour the cheesecake filling over the cooled crust, spreading it evenly. Drizzle the top with honey. Bake for 35-40 minutes, or until the edges are set and the center has a slight jiggle. Turn off the oven and let the bars cool inside for 15 minutes with the door slightly ajar.
- Chill and Slice . Transfer the pan to the refrigerator and chill for at least 4 hours, or overnight, before slicing into bars.
