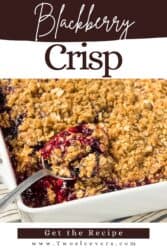
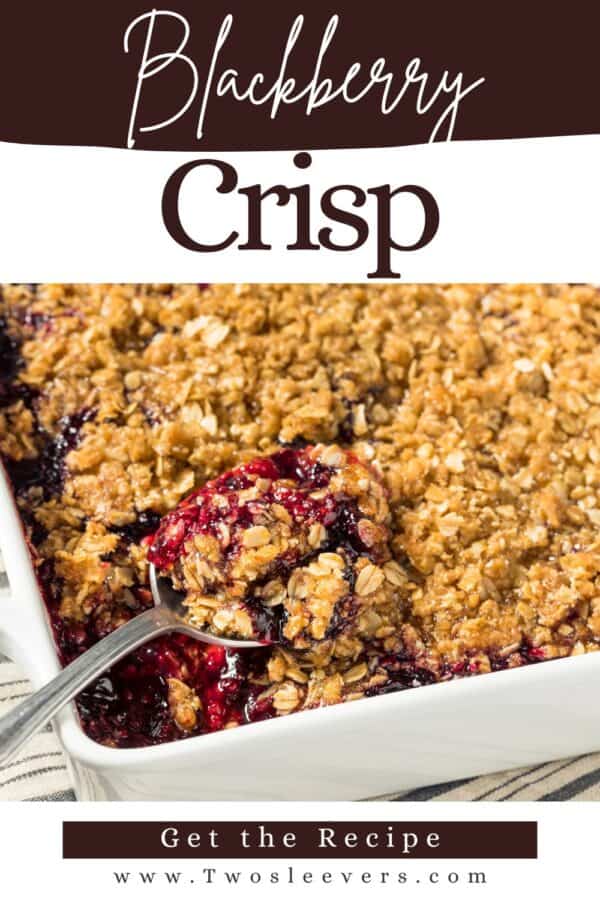
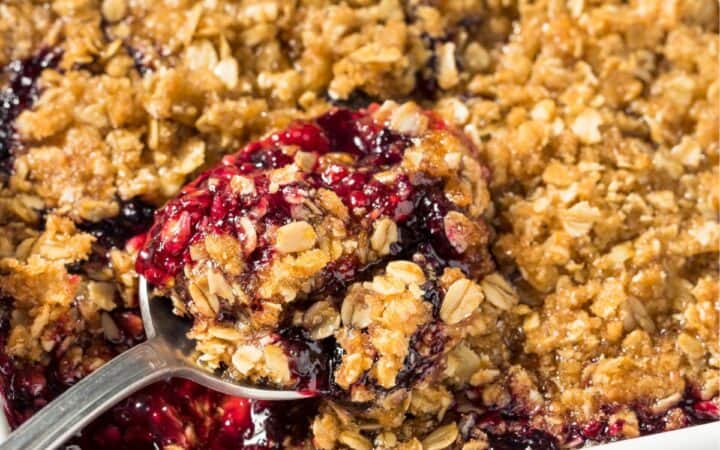
If you love the warm, comforting taste of juicy berries wrapped in a buttery, golden topping, you’re going to fall head over heels for this easy Blackberry Crisp. With a sweet-tart filling and a cinnamon-kissed oat topping, this classic dessert is as simple as it is satisfying.
Why You’ll Love This Delicious Dessert
- Simple Ingredients. If you have berries in your fridge, you likely have everything on hand right now!
- Quick to Make. No pie crusts or fancy tools. Just mix, bake, and enjoy.
- Perfectly Balanced. Sweet, tart, buttery, and crisp in every bite.
- Versatile. Works with fresh or frozen blackberries, and is easy to swap for other berries.
Whether you’re hosting a summer barbecue, planning a cozy fall gathering, or just craving something fruity and comforting, this blackberry crisp will hit the spot.
What Does Blackberry Crisp Taste Like?
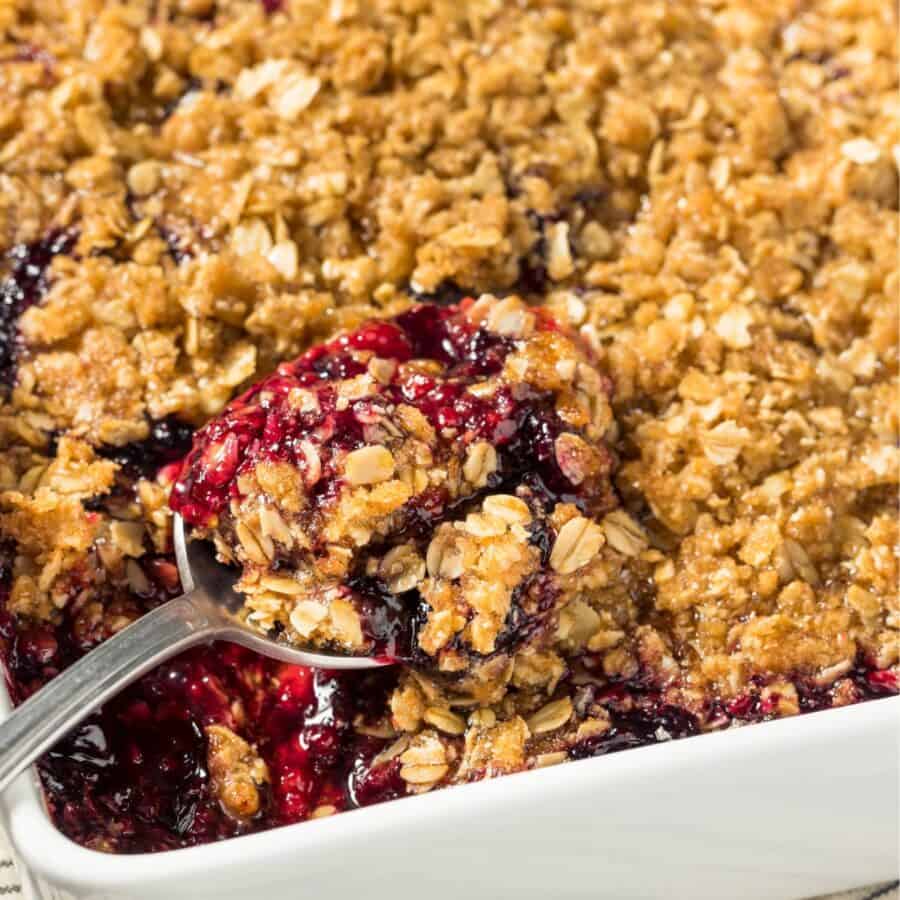
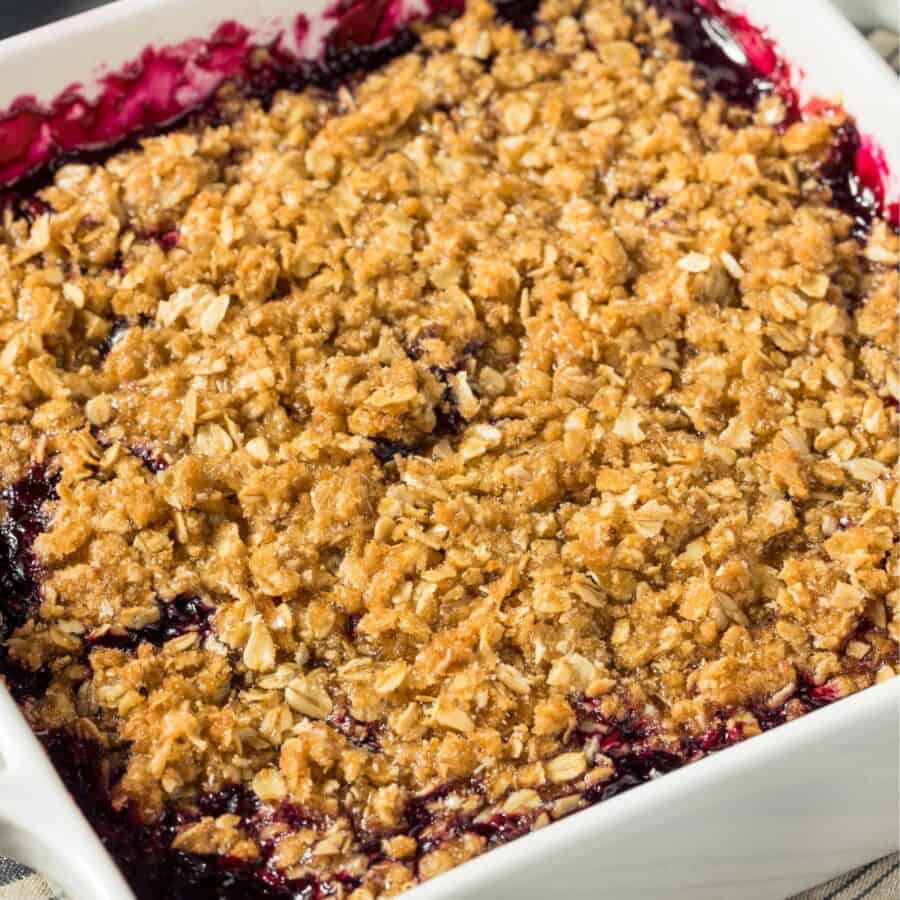
Blackberry crisp is the perfect harmony of flavors and textures: sweet-tart berries softened by baking, a thick syrupy juice, and a crisp, buttery oat topping that’s golden and slightly chewy in the best way.
When served warm with a scoop of vanilla ice cream or a dollop of whipped cream, it’s truly heavenly.
What Is The Difference Between Crisp And Crumble?
The difference between a crisp and a crumble lies primarily in the topping. Both are baked fruit desserts featuring a juicy fruit base, but their toppings set them apart.
A crisp typically includes oats in its topping, which become golden and crunchy during baking, giving it a more textured finish.
In contrast, a crumble has a streusel-like topping made from flour, sugar, and butter (without oats), resulting in a denser, cakier texture once baked.
While the terms are sometimes used interchangeably, especially in casual conversation, the presence or absence of oats is the key distinction.
Ingredients You’ll Need
For The Filling
- 5 Cups Fresh or frozen blackberries - These are the star of the dessert. Their juicy, sweet-tart flavor becomes even more concentrated during baking, creating a rich and vibrant fruit base.
- 1/2 Cup Granulated sugar - Sweetens the blackberries and helps draw out their natural juices as the filling bakes, creating a syrupy, flavorful base.
- 2 TBSP Cornstarch - Thickens the released berry juices during baking, transforming them into a luscious, spoonable sauce without being cloudy or gummy.
- 1 TBSP Lemon juice - Adds brightness and a touch of acidity to cut through the sweetness, balancing the flavor and preventing the filling from tasting flat.
- 1 TBSP Vanilla extract - Adds a warm, sweet depth to the filling and enhances the natural fruitiness of the berries.
- Pinch of salt - Intensifies all the flavors in the filling, subtly enhancing both the sweet and tart elements of the blackberries.
For The Topping
- 3/4 Cup Old-fashioned oats - Form the chewy, rustic backbone of the topping. They crisp up beautifully in the oven and give the dessert its signature texture.
- 3/4 Cup All-purpose flour - Provides structure to the topping, helping it bind together and bake into a golden, crumbly layer over the fruit.
- 1/2 Cup Brown sugar - Adds sweetness along with a hint of molasses richness, deepening the flavor of the crisp and complementing the oats and berries.
- 1/2 tsp Ground cinnamon - Brings a warm spice note that pairs beautifully with the sweet-tart berries, making the dessert feel cozy and comforting.
- 1/4 tsp Salt - Balances the sweetness and enhances the depth of all the other topping ingredients.
- 1/2 Cup Unsalted butter - Essential for creating a buttery, crumbly topping. As it melts during baking, it helps bind the dry ingredients and creates that irresistible golden finish.
How To Make Blackberry Crisp
- Prep the Berries . In a medium bowl, toss the blackberries with sugar, cornstarch, lemon juice, vanilla, and a pinch of salt. Stir gently until combined, then pour into a greased 8x8-inch baking dish.
- Make the Crisp Topping . In another bowl, mix oats, flour, brown sugar, cinnamon, and salt. Add the cold cubed butter and use a pastry cutter or your fingers to cut the butter into the mixture until it resembles coarse crumbs.
- Assemble and Bake . Sprinkle the crisp topping evenly over the blackberries. Bake in a preheated oven at 375°F for 35–40 minutes, or until the top is golden and the berries are bubbling around the edges.
- Cool and Serve . Let the crisp cool for at least 10 minutes before serving to allow the juices to thicken. Top with ice cream or whipped cream, if desired.
Tips And Tricks
If you want your blackberry crisp to come out perfectly every time, these tips and tricks will help you master the recipe:
- Use cold butter for the topping. Cold, cubed butter ensures a crumbly, golden-brown topping. Soft or melted butter can make the topping too greasy or cakey.
- Don’t overmix the topping. Use your fingertips or a pastry cutter to gently work the butter into the dry ingredients until pea-sized clumps form. This gives the crisp its signature texture.
- Choose ripe but firm blackberries. Fresh berries should be plump and firm. If using frozen, don’t thaw them first—this helps prevent excess moisture and soggy filling.
Variations
If you’re looking to switch things up or tailor your blackberry crisp to suit different tastes or ingredients you have on hand, here are some delicious variations to try:
- Mixed Berry - Combine blackberries with blueberries, raspberries, or strawberries for a more complex fruit flavor.
- Apple - Add thinly sliced apples to the filling for extra texture and a fall-inspired twist.
- Peach Blackberry Crisp - Mix in sliced fresh or canned peaches for a sweet, summery spin.
- Nutty Topping - Stir chopped pecans, walnuts, or almonds into the crisp topping for added crunch and richness.
What To Enjoy With Blackberry Crisp
Blackberry crisp is a warm, comforting dessert that pairs beautifully with a variety of sides and toppings to enhance its sweet-tart flavor and rustic charm. Here are some delicious ways to enjoy it:
- Vanilla Ice Cream - The classic pairing; its cool, creamy texture melts into the warm crisp for the perfect bite.
- Whipped Cream - Light and airy, it adds a touch of elegance and softness to the dessert.
- Greek Yogurt - A tangy, protein-rich option that balances the sweetness and adds creaminess.
- Crème Fraîche - Slightly tangy and luxurious, it elevates the dessert with a gourmet twist.
- Caramel Sauce - Drizzled on top for extra richness and a buttery, sweet finish.
- Lemon Curd - A tart contrast that plays well with the blackberry’s natural brightness.
How Long Does It Last?
Blackberry crisp is best served warm the day it’s made, but leftovers can be stored in an airtight container in the refrigerator for up to 3–4 days. Reheat in the oven or microwave before serving.
Can You Freeze It?
Yes! You can freeze baked or unbaked blackberry crisp.
- To Freeze Unbaked - Assemble the crisp in a freezer-safe dish, wrap tightly, and freeze for up to 3 months. Bake from frozen, adding about 10 minutes to the cook time.
- To Freeze Baked - Let it cool completely, wrap, and freeze for up to 2 months. Reheat in the oven until warmed through.
More Fruit-Forward Recipes
- Cherry Pie
- Peach Pie Filling
- Lemon Curd
- Deviled Strawberries
- German Apple Pancakes
Blackberry Crisp Recipe | Easy Blackberry Crisp With Oats
Ingredients
Blackberry Filling
- ▢ 5 cups Blackberries
- ▢ 1/2 cup Granulated Sugar
- ▢ 2 tbsp Cornstarch
- ▢ 1 tbsp Lemon Juice
- ▢ 1 tsp Vanilla Extract
- ▢ 1/8 tsp Kosher Salt
Crisp Topping
- ▢ 3/4 cup Old Fashioned Oats
- ▢ 3/4 cup All Purpose Flour
- ▢ 1/2 cup Brown Sugar
- ▢ 1/2 tsp Ground Cinnamon
- ▢ 1/4 tsp Kosher Salt
- ▢ 1/2 cup Unsalted Butter , cold, cubed
Instructions
- Prep the Berries . In a medium bowl, toss the blackberries with sugar, cornstarch, lemon juice, vanilla, and a pinch of salt. Stir gently until combined, then pour into a greased 8x8-inch baking dish.
- Make the Crisp Topping . In another bowl, mix oats, flour, brown sugar, cinnamon, and salt. Add the cold cubed butter and use a pastry cutter or your fingers to cut the butter into the mixture until it resembles coarse crumbs.
- Assemble and Bake . Sprinkle the crisp topping evenly over the blackberries. Bake in a preheated oven at 375°F for 35–40 minutes, or until the top is golden and the berries are bubbling around the edges.
- Cool and Serve . Let the crisp cool for at least 10 minutes before serving to allow the juices to thicken. Top with ice cream or whipped cream, if desired.
Get support & connect with our community on Facebook!
Nutrition

If you already signed up, you should have received an email with a password to give you unlimited access to our FREE Printable Library. The password is case sensitive. Enter it below and get printing!
Password:

Blackberry Crisp Recipe | Easy Blackberry Crisp With Oats
Ingredients
Blackberry Filling
- 5 cups Blackberries
- 1/2 cup Granulated Sugar
- 2 tbsp Cornstarch
- 1 tbsp Lemon Juice
- 1 tsp Vanilla Extract
- 1/8 tsp Kosher Salt
Crisp Topping
- 3/4 cup Old Fashioned Oats
- 3/4 cup All Purpose Flour
- 1/2 cup Brown Sugar
- 1/2 tsp Ground Cinnamon
- 1/4 tsp Kosher Salt
- 1/2 cup Unsalted Butter cold, cubed
Instructions
- Prep the Berries . In a medium bowl, toss the blackberries with sugar, cornstarch, lemon juice, vanilla, and a pinch of salt. Stir gently until combined, then pour into a greased 8x8-inch baking dish.
- Make the Crisp Topping . In another bowl, mix oats, flour, brown sugar, cinnamon, and salt. Add the cold cubed butter and use a pastry cutter or your fingers to cut the butter into the mixture until it resembles coarse crumbs.
- Assemble and Bake . Sprinkle the crisp topping evenly over the blackberries. Bake in a preheated oven at 375°F for 35–40 minutes, or until the top is golden and the berries are bubbling around the edges.
- Cool and Serve . Let the crisp cool for at least 10 minutes before serving to allow the juices to thicken. Top with ice cream or whipped cream, if desired.
Blackberry Crisp Recipe | Easy Blackberry Crisp With Oats https://twosleevers.com/blackberry-crisp-recipe/
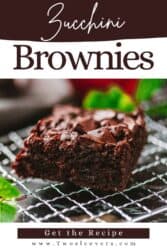
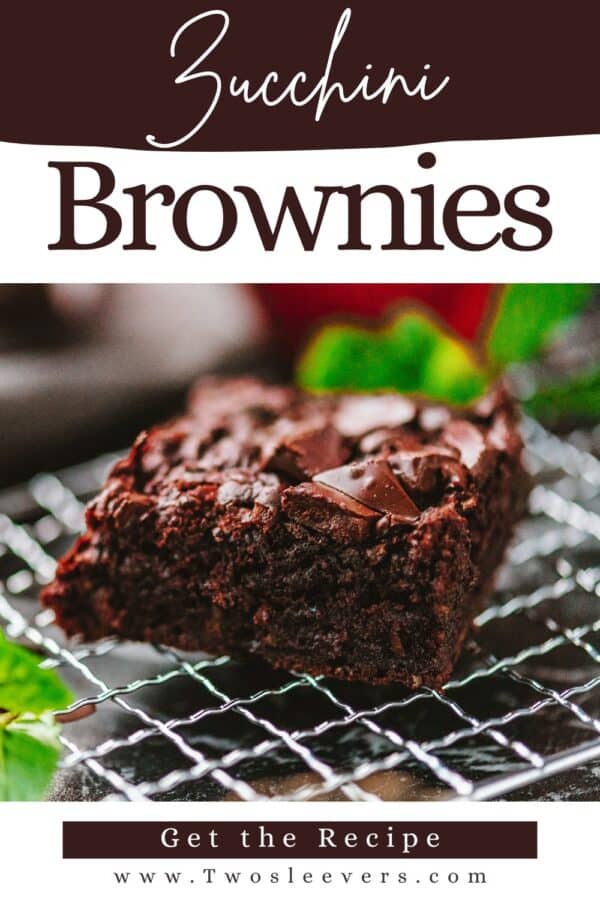
Zucchini Brownies are a fudgy brownie dessert made with shredded zucchini, all-purpose flour, unsweetened cocoa powder, granulated sugar, brown sugar, vegetable oil, vanilla extract, and chocolate chips. It’s quick and works well for a family-friendly treat when you want moist brownies that sneak in veggies without tasting like vegetables. Unlike traditional brownies that rely on lots of extra fat for moisture, this version uses zucchini to keep the brownies soft and fudgy and comes together in one bowl with no mixer needed.
Why You’ll Love This Tasty Treat
- Fudgy & Moist. Packed with chocolate and naturally moist thanks to the zucchini.
- Easy to Make. One bowl and no mixer needed!
- Hidden Veggie Goodness. A great way to sneak veggies into dessert without sacrificing flavor.
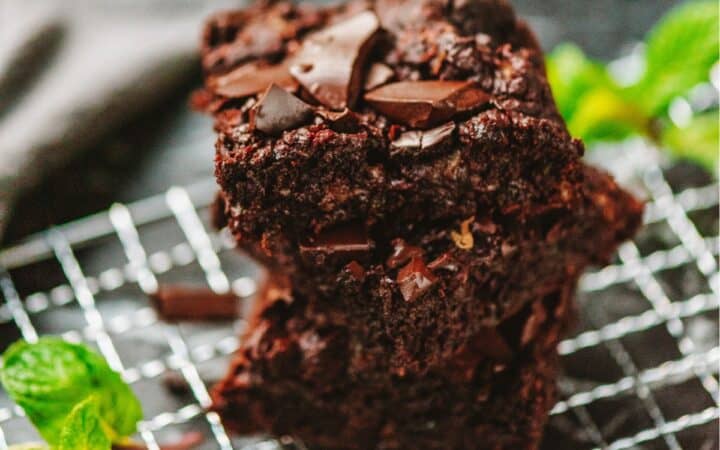
- Perfect Texture. Crackly on top, gooey in the center, these are brownie perfection.
- Crowd-Pleasing. A dessert that both kids and adults love.
Whether you’re baking for a family dessert, a potluck, or just want a chocolate fix, these zucchini brownies will check all the boxes. Don’t be surprised if no one believes they’re made with vegetables!
What Do Zucchini Brownies Taste Like?
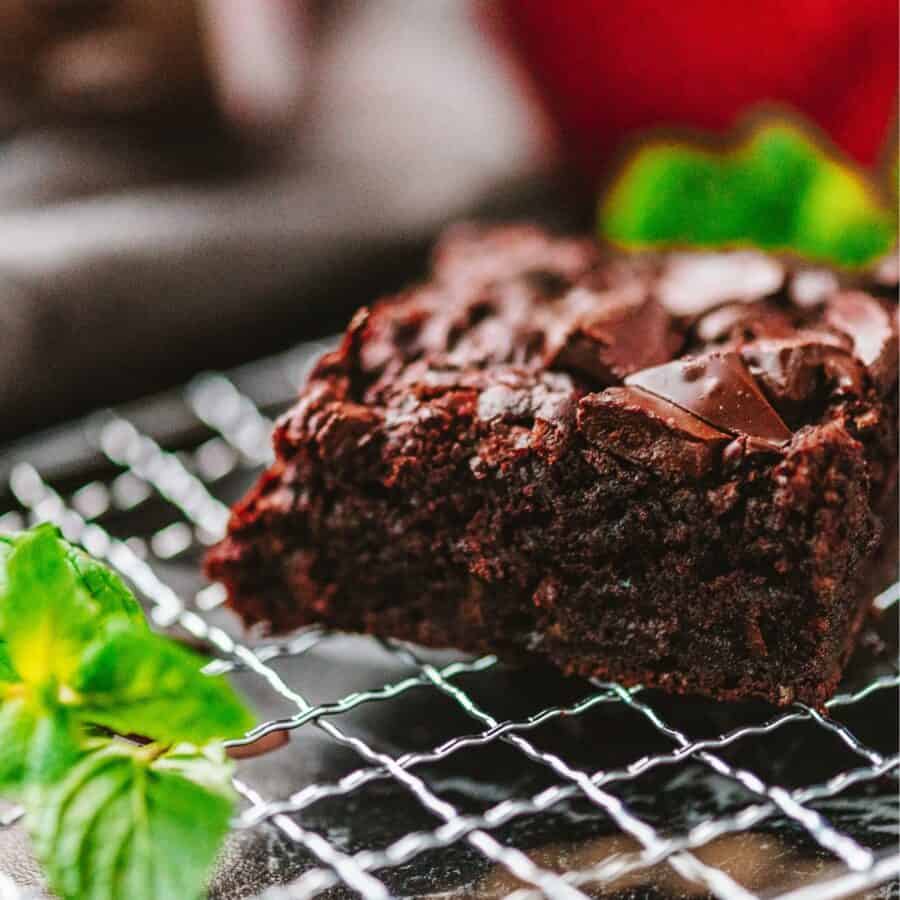
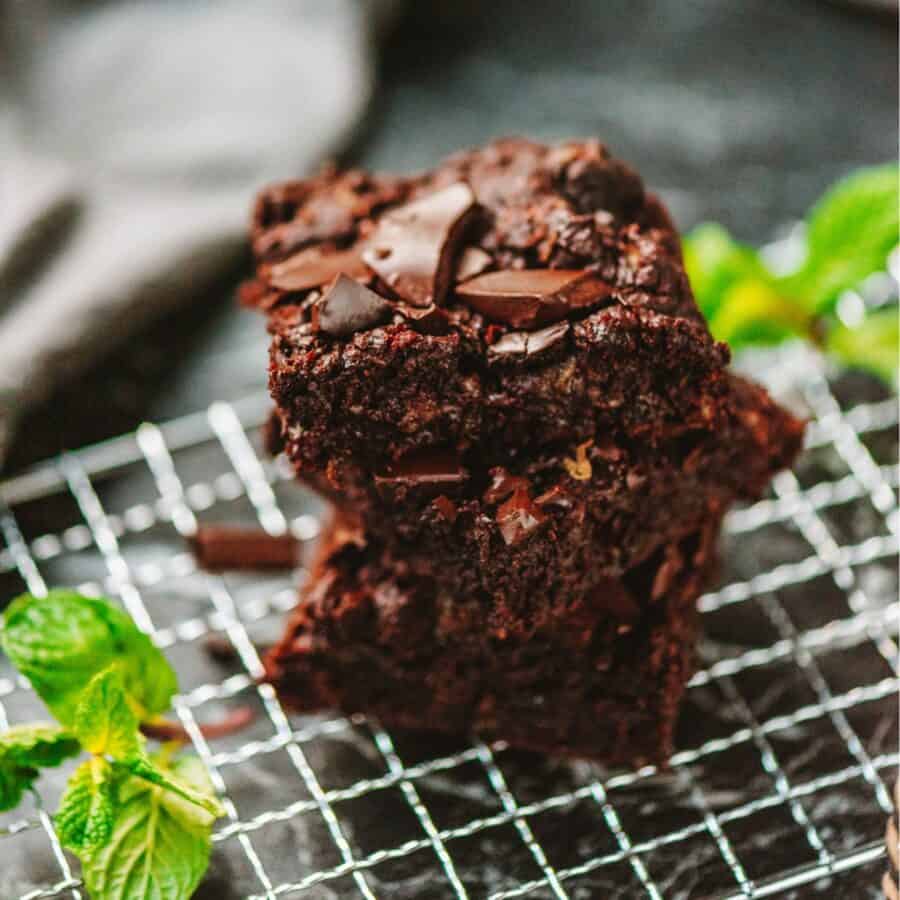
Zucchini brownies are incredibly rich, decadent, and moist, with none of the vegetal flavor you might expect. The zucchini practically melts into the batter while baking, creating a super moist and soft crumb that rivals even the best traditional brownies.
You won’t taste the zucchini, but you’ll appreciate what it does for the texture. The result? Deep, fudgy brownies that are shockingly better than boxed mix.
Are They Healthy?
Zucchini brownies can be a healthier dessert option compared to traditional brownies, but whether they’re truly “healthy” depends on how they’re made and your personal dietary goals.
Zucchini brownies are a smart way to sneak in veggies and slightly lighten up a classic dessert, but they’re still a treat. They’re healthier than regular brownies, but not necessarily healthy overall.
Ingredients You’ll Need
- 2 cups Zucchini - Adds natural moisture to the batter, keeping the brownies soft and fudgy without needing lots of extra fat. The zucchini blends seamlessly, contributing structure without leaving a strong vegetable taste.
- 1 cup All-Purpose Flour - Provides the structure that holds the brownies together while keeping the crumb soft and chewy. Too much would make the brownies dense; just enough ensures balance.
- 1/2 cup Unsweetened Cocoa Powder - Supplies the deep, chocolatey flavor that defines brownies, turning the zucchini base into a decadent treat.
- 1/2 cup Granulated Sugar - Sweetens the brownies and helps create the shiny, crackly crust on top that many brownie lovers crave.
- 1/2 cup Brown Sugar - Adds moisture and caramel-like undertones, giving the brownies extra richness and a fudgy interior.
- 1/2 tsp Baking Soda - Acts as a leavening agent, providing just enough lift to keep the brownies from being overly dense while maintaining a moist texture.
- 1/2 tsp Salt - Balances the sweetness, enhances the cocoa’s depth, and makes the overall flavor more complex.
- 1/2 cup Vegetable Oil - Keeps the brownies moist and tender, ensuring a gooey bite even after a couple of days.
- 2 tsp Vanilla Extract - Adds a warm, aromatic note that enhances the chocolate flavor and ties everything together.
- 1/2 cup Chocolate Chips - Studded throughout the batter, they melt into gooey pockets of chocolate, making each bite extra indulgent.
How To Make Zucchini Brownies
- Prep the Zucchini . Grate the zucchini using a box grater . Don’t peel it. The green flecks disappear during baking. Lightly blot with a paper towel to remove excess moisture, but do not wring it dry. You want the natural moisture to help hydrate the batter.
- Mix the Wet Ingredients . In a large mixing bowl, whisk together the oil, sugars, and vanilla extract until smooth and well combined.
- Add the Dry Ingredients . Stir in the flour, cocoa powder, baking soda, and salt. The mixture may look dry at this point, but don’t worry! The zucchini will bring in the moisture.
- Fold in the Zucchini . Add the grated zucchini and stir until a thick, rich batter forms. The moisture from the zucchini will loosen the mixture into a pourable consistency.
- Add the Chocolate Chips . Fold in the chocolate chips. This step is optional but highly recommended for next-level gooey brownies.
- Bake . Spread the batter into a greased or parchment-lined 8x8-inch baking pan. Bake at 350°F for 30–35 minutes, or until a toothpick inserted into the center comes out with a few moist crumbs (but no wet batter).
- Cool & Slice . Let the brownies cool completely in the pan before slicing. This allows them to set for clean cuts and maximum fudginess.
Tips And Tricks
These tips will help you get the best results from your zucchini brownies every time:
- Don’t squeeze the zucchini too much. Light blotting is enough. You want to keep the moisture to help hydrate the batter.
- Use fresh, small to medium zucchini. These tend to be more tender and less watery than large, overgrown ones.
- Don’t overbake. For the fudgiest texture, bake just until the center is set but still slightly soft.
- Let them cool completely. Brownies continue to set as they cool, and this makes for cleaner slices and a richer texture.
- Add-ins are welcome. Feel free to add chopped nuts, white chocolate chips, or even a swirl of peanut butter.
Variations
Once you master this base recipe, the variations are endless! Here are some tasty ways to change things up:
- Double Chocolate - Add extra chocolate chips or chunks for double the decadence.
- Zucchini Walnut - Stir in ½ cup chopped walnuts for crunch and nuttiness.
- Zucchini Mocha - Add 1–2 teaspoons of instant espresso powder to deepen the chocolate flavor.
- Gluten-Free - Use a 1:1 gluten-free baking flour instead of all-purpose.
- Vegan Option - Swap the egg for a flax egg and use dairy-free chocolate chips.
- Zucchini Blondies - Replace the cocoa powder with extra flour and omit the chocolate for a buttery blondie version.
If you’re looking for our Best Zucchini Recipes to use up your stash, give Zucchini Cake , Lemon Zucchini Bread , or Keto Zucchini Bread a try!
What To Enjoy With Zucchini Brownies
Zucchini brownies are rich enough to stand on their own, but if you’re looking to make dessert even more indulgent, try serving them with:
- A scoop of vanilla ice cream - Classic and always delicious.
- Drizzle of chocolate or caramel sauce - Adds a restaurant-style finish.
- Whipped cream and berries - For a fresh and balanced bite.
- Espresso or coffee - The bold flavor of coffee pairs perfectly with chocolate desserts.
How Long Do They Last?
Zucchini brownies are best enjoyed within a few days of baking, but they store well and can easily be made ahead. At room temperature, they will stay fresh for up to 3 days when kept in an airtight container.
If you refrigerate them, they can last up to 5 days, just be sure to let them come to room temperature or warm them slightly before serving for the best texture.
Can You Freeze Them?
Zucchini brownies also freeze beautifully. Once fully cooled, slice them into individual portions and wrap each one tightly in plastic wrap or foil.
Place the wrapped brownies in a freezer-safe bag or airtight container and freeze for up to 2 months.
To enjoy, thaw them at room temperature or warm them in the microwave for 20–30 seconds for a fresh-from-the-oven taste.
No, you do not have to peel zucchini for zucchini brownies because the skin is thin and bakes up soft, and the cocoa powder and chocolate chips usually hide any green flecks. For the best fudgy one bowl zucchini brownies, just shred the zucchini finely and focus on moisture control by blotting or lightly squeezing if it is very watery. Peel only if you are using an extra large zucchini with tougher skin or you want a perfectly uniform brownie texture.
For zucchini brownies, you should usually not fully squeeze the water out of shredded zucchini because that moisture helps create fudgy brownies. Instead, shred it finely and only blot or lightly squeeze if the zucchini is extremely watery or if your batter looks thin, since too much liquid can cause zucchini brownies to be gummy in the middle. If you are using frozen zucchini, thaw and squeeze it well because it releases far more water than fresh.
To make zucchini brownies more fudgy and less cakey, use finely shredded zucchini for moisture, avoid overmixing, and measure flour carefully so you do not add too much. Do not fully squeeze the zucchini unless it is extremely watery, and bake just until the center is set so you do not dry out the crumb, since overbaking is a common cause of cakey brownies. For extra fudgy one bowl zucchini brownies, use plenty of cocoa powder and chocolate chips, let the brownies cool completely before cutting, and chill them briefly if you want an even denser fudgy texture.
Best Brownie Recipes
- Black Bean Brownies
- Cottage Cheese Brownies
- Vegan Brownies
- Strawberry Brownies
- Peanut Butter Brownies
Zucchini Brownies Recipe | Moist And Fudgy Brownies
Ingredients
- ▢ 1 1/2 cups Zucchini
- ▢ 1 cup All Purpose Flour
- ▢ 1/2 cup Unsweetened Cocoa Powder
- ▢ 1/2 cup Granulated Sugar
- ▢ 1/2 cup Brown Sugar
- ▢ 1/2 tsp Baking Soda
- ▢ 1/2 tsp Kosher Salt
- ▢ 1/2 cup Vegetable Oil
- ▢ 1 1/2 tsp Vanilla Extract
- ▢ 3/4 cup Chocolate Chips
Instructions
- Prep the Zucchini . Grate the zucchini using a box grater. Don’t peel it. The green flecks disappear during baking. Lightly blot with a paper towel to remove excess moisture, but do not wring it dry. You want the natural moisture to help hydrate the batter.
- Mix the Wet Ingredients . In a large mixing bowl, whisk together the oil, sugars, and vanilla extract until smooth and well combined.
- Add the Dry Ingredients . Stir in the flour, cocoa powder, baking soda, and salt. The mixture may look dry at this point, but don’t worry! The zucchini will bring in the moisture.
- Fold in the Zucchini . Add the grated zucchini and stir until a thick, rich batter forms. The moisture from the zucchini will loosen the mixture into a pourable consistency.
- Add the Chocolate Chips . Fold in the chocolate chips. This step is optional but highly recommended for next-level gooey brownies.
- Bake . Spread the batter into a greased or parchment-lined 8x8-inch baking pan. Bake at 350°F for 30–35 minutes, or until a toothpick inserted into the center comes out with a few moist crumbs (but no wet batter).
- Cool & Slice . Let the brownies cool completely in the pan before slicing. This allows them to set for clean cuts and maximum fudginess.
