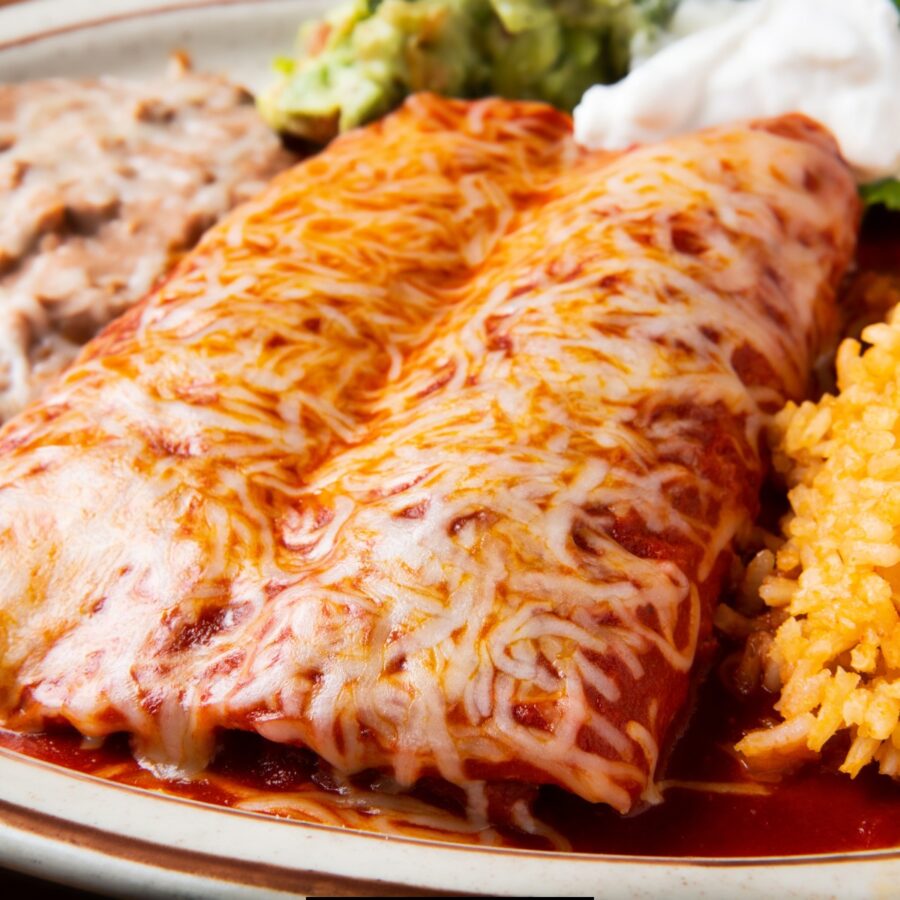
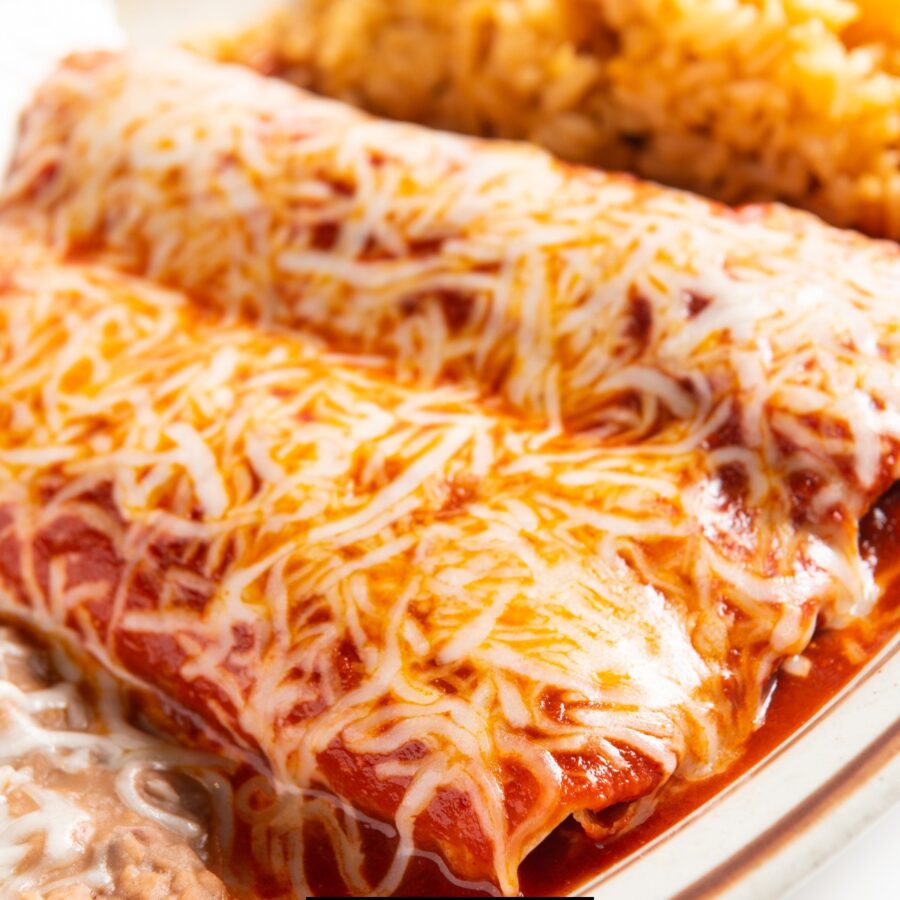
If you are looking for a flavorful, hearty, and satisfying meatless meal, these Black Bean Enchiladas are the perfect choice. Made with black beans, cheese, and a rich enchilada sauce, they are packed with protein and flavor, making them a delicious and nutritious option for vegetarians and meat lovers alike. Whether you are making a weeknight dinner or a meal for a crowd, these enchiladas are easy to prepare and guaranteed to be a hit.
Why You’ll Love This Vegetarian Dish
- Hearty and Satisfying . The combination of black beans, cheese, and tortillas makes for a filling main course .
- Vegetarian-Friendly . A meatless dish that is high in protein and packed with flavor.
- Customizable . Easily adapt the recipe by adding your favorite vegetables, sauces, or extra toppings.
- Easy to Make . Simple ingredients and minimal prep time make this an effortless dish for any night of the week.
- Freezer-Friendly . Make a batch ahead of time and freeze for a quick meal later.
These Black Bean Enchiladas are perfect for anyone who loves Mexican-inspired flavors without the hassle of complicated cooking.
What Do Black Bean Enchiladas Taste Like?
Black bean enchiladas are a flavor-packed, protein-rich, and satisfying dish that is perfect for any meal.
The creamy black bean filling pairs beautifully with the bold, slightly spicy enchilada sauce and melted cheese. They offer a hearty, cheesy bite with just the right amount of seasoning, making them a family favorite.
Are They Healthy?
Black bean enchiladas can be a healthy and balanced meal when made with fresh, wholesome ingredients.
They provide protein, fiber, and essential nutrients while being lower in fat and calories than traditional meat and cheese-heavy enchiladas.
Ingredients You’ll Need
- Black Beans - The star of the filling, black beans provide plant-based protein and a creamy yet hearty texture. They absorb the flavors of the spices and enchilada sauce, making them a satisfying meat alternative.
- Tortillas - The wrap that holds everything together. Use flour tortillas for a softer, more flexible texture or corn tortillas for a more traditional, slightly chewy bite with a hint of sweetness.
- Enchilada Sauce - A rich, flavorful sauce that coats the enchiladas and keeps them moist while baking. It adds depth, spice, and a slightly tangy note that ties all the ingredients together.
- Cheese - A blend of cheddar and Monterey Jack creates a perfectly gooey, melty topping. Cheddar adds a sharp flavor, while Monterey Jack provides a mild, creamy texture.
- Onion - Adds natural sweetness and a mild tang to the filling when sautéed, enhancing the overall depth of flavor.
- Garlic - A bold, aromatic ingredient that intensifies the savory taste of the enchilada filling and sauce.
- Cumin - Brings a warm, earthy spice that pairs perfectly with the black beans and enchilada sauce, giving the dish an authentic Mexican-inspired flavor.
- Chili Powder - Adds a smoky depth and mild heat, giving the enchiladas a flavorful kick without being overly spicy.
- Cilantro - A fresh, bright finishing touch that enhances the overall flavor with a hint of citrusy freshness. It balances out the richness of the cheese and sauce.
- Olive Oil - Used for sautéing the onions and garlic, helping to release their flavors and soften them before adding them to the filling.
Each ingredient works together to create a well-balanced, satisfying, and flavorful enchilada dish that is easy to prepare and sure to be a hit at the dinner table.
How To Make Black Bean Enchiladas
- Prepare the Filling . In a skillet, heat olive oil over medium heat. Add diced onion and garlic, cooking until softened. Stir in the black beans, cumin, chili powder, and a few tablespoons of enchilada sauce. Cook for 2-3 minutes, then remove from heat.
- Assemble the Enchiladas . Spoon the black bean mixture into the center of each tortilla. Sprinkle a generous amount of cheese on top, then roll the tortillas tightly and place them seam-side down in a greased baking dish.
- Add the Sauce . Pour the remaining enchilada sauce evenly over the rolled tortillas, making sure they are well-coated. Sprinkle extra cheese on top for a melty, golden finish.
- Bake to Perfection . Preheat the oven to 375°F and bake the enchiladas for 20-25 minutes, or until the cheese is fully melted and bubbly.
- Garnish and Serve . Remove from the oven and top with fresh cilantro, diced avocado, or a drizzle of sour cream. Serve hot with your favorite sides.
Tips And Tricks
Making Black Bean Enchiladas is easy, but a few simple tricks can take them from good to great. Follow these tips for the best flavor, texture, and presentation:
- Warm the Tortillas Before Rolling . This prevents them from breaking and makes them easier to roll.
- Add Extra Veggies . Bell peppers, corn, or spinach can be added to the filling for more flavor and nutrients.
- Use Homemade Enchilada Sauce . If you have time, making your own sauce enhances the flavor of the dish.
- Make it Spicy . Add diced jalapeños or a pinch of cayenne pepper for a spicy kick.
Variations
Black Bean Enchiladas are already a delicious and satisfying meal, but there are plenty of ways to customize them to match your taste preferences. Whether you’re looking for extra protein, a spicy kick, or a vegan alternative, here are some creative variations to try:
- Vegan - Use dairy-free cheese and a cashew-based sour cream for a vegan-friendly version.
- Black Bean and Sweet Potato - Add roasted sweet potatoes to the filling for a slightly sweet and hearty twist.
- Creamy - Mix cream cheese or Greek yogurt into the filling for a creamier texture.
- Chipotle - Stir in chipotle peppers in adobo sauce for a smoky, spicy flavor.
- Gluten-Free - Use corn tortillas instead of flour tortillas to make this dish gluten-free.
What To Eat With Black Bean Enchiladas
Black Bean Enchiladas are a flavorful and satisfying meal on their own, but pairing them with the right sides can elevate your dining experience. Whether you want something light, crunchy, or extra filling, here are some of the best dishes to serve alongside them:
- Mexican Rice - A classic side that complements the bold flavors.
- Refried Beans - Adds extra protein and a creamy texture.
- Guacamole - A fresh and creamy topping that balances the spiciness.
- Corn Salad - A light and refreshing side dish.
- Chips and Salsa - Perfect for dipping while you wait for the enchiladas to bake.
How Long Do They Last?
Black Bean Enchiladas can be stored in the refrigerator for up to 4 days when kept in an airtight container. The flavors tend to meld together over time, making them even more delicious the next day.
Can You Freeze Them?
For longer storage, these enchiladas freeze well for up to 3 months. To freeze, assemble the enchiladas but hold off on baking. Wrap the dish tightly with plastic wrap and aluminum foil, then freeze.
When ready to eat, thaw them in the refrigerator overnight and bake as directed.
If you have already baked the enchiladas, you can freeze leftovers in individual portions for easy meal prep.
To reheat, warm them in a 350°F oven for 15-20 minutes or microwave them for a few minutes until heated through.
Budget Friendly Meals
- Black Bean Quesadillas
- Cajun Dirty Rice
- Instant Pot Pork Chops and Rice
- Vegetarian Chili
- Spam Fried Rice
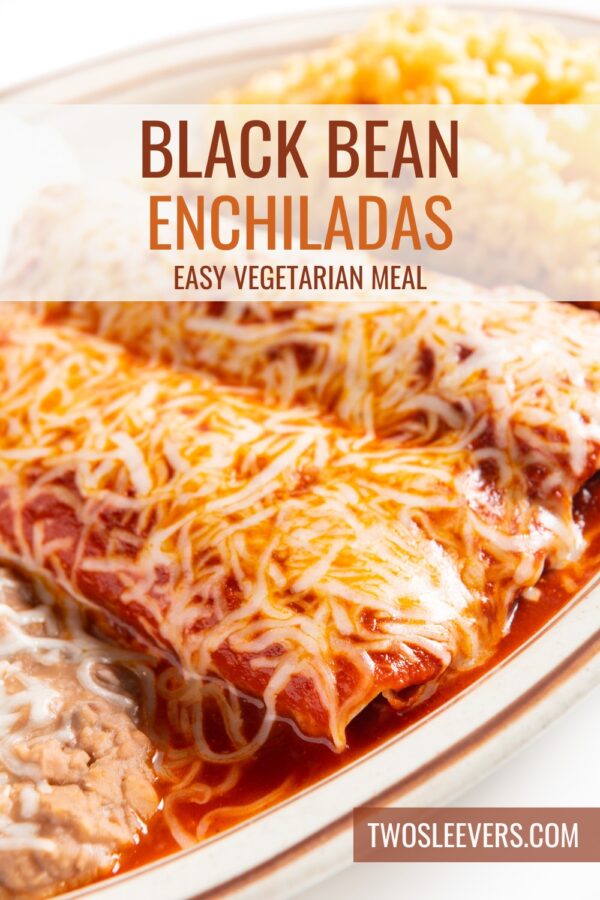

Black Bean Enchiladas | Bean And Cheese Enchilada Recipe
Ingredients
- ▢ 30 ouces Canned Black Beans
- ▢ 6 medium Corn Tortillas
- ▢ 2 cups Enchilada Sauce
- ▢ 1 1/2 cups Monterey Jack Cheese , shredded
- ▢ 1 1/2 cup Cheddar Cheese , shredded
- ▢ 1 onion , diced
- ▢ 2 cloves Garlic , minced
- ▢ 1 tsp Cumin
- ▢ 1 tsp Chili Powder
- ▢ 1 tbsp Olive Oil
- ▢ 1/4 cup Oregano , chopped
Instructions
- Prepare the Filling . In a skillet, heat olive oil over medium heat. Add diced onion and garlic, cooking until softened. Stir in the black beans, cumin, chili powder, and a few tablespoons of enchilada sauce. Cook for 2-3 minutes, then remove from heat.
- Assemble the Enchiladas . Spoon the black bean mixture into the center of each tortilla. Sprinkle a generous amount of cheese on top, then roll the tortillas tightly and place them seam-side down in a greased baking dish.
- Add the Sauce . Pour the remaining enchilada sauce evenly over the rolled tortillas, making sure they are well-coated. Sprinkle extra cheese on top for a melty, golden finish.
- Bake to Perfection . Preheat the oven to 375°F and bake the enchiladas for 20-25 minutes, or until the cheese is fully melted and bubbly.
- Garnish and Serve . Remove from the oven and top with fresh cilantro, diced avocado, or a drizzle of sour cream. Serve hot with your favorite sides.
Get support & connect with our community on Facebook!
Nutrition

If you already signed up, you should have received an email with a password to give you unlimited access to our FREE Printable Library. The password is case sensitive. Enter it below and get printing!
Password:

Black Bean Enchiladas | Bean And Cheese Enchilada Recipe
Ingredients
- 30 ouces Canned Black Beans
- 6 medium Corn Tortillas
- 2 cups Enchilada Sauce
- 1 1/2 cups Monterey Jack Cheese shredded
- 1 1/2 cup Cheddar Cheese shredded
- 1 onion diced
- 2 cloves Garlic minced
- 1 tsp Cumin
- 1 tsp Chili Powder
- 1 tbsp Olive Oil
- 1/4 cup Oregano chopped
Instructions
- Prepare the Filling . In a skillet, heat olive oil over medium heat. Add diced onion and garlic, cooking until softened. Stir in the black beans, cumin, chili powder, and a few tablespoons of enchilada sauce. Cook for 2-3 minutes, then remove from heat.
- Assemble the Enchiladas . Spoon the black bean mixture into the center of each tortilla. Sprinkle a generous amount of cheese on top, then roll the tortillas tightly and place them seam-side down in a greased baking dish.
- Add the Sauce . Pour the remaining enchilada sauce evenly over the rolled tortillas, making sure they are well-coated. Sprinkle extra cheese on top for a melty, golden finish.
- Bake to Perfection . Preheat the oven to 375°F and bake the enchiladas for 20-25 minutes, or until the cheese is fully melted and bubbly.
- Garnish and Serve . Remove from the oven and top with fresh cilantro, diced avocado, or a drizzle of sour cream. Serve hot with your favorite sides.
Black Bean Enchiladas | Bean And Cheese Enchilada Recipe https://twosleevers.com/black-bean-enchiladas/

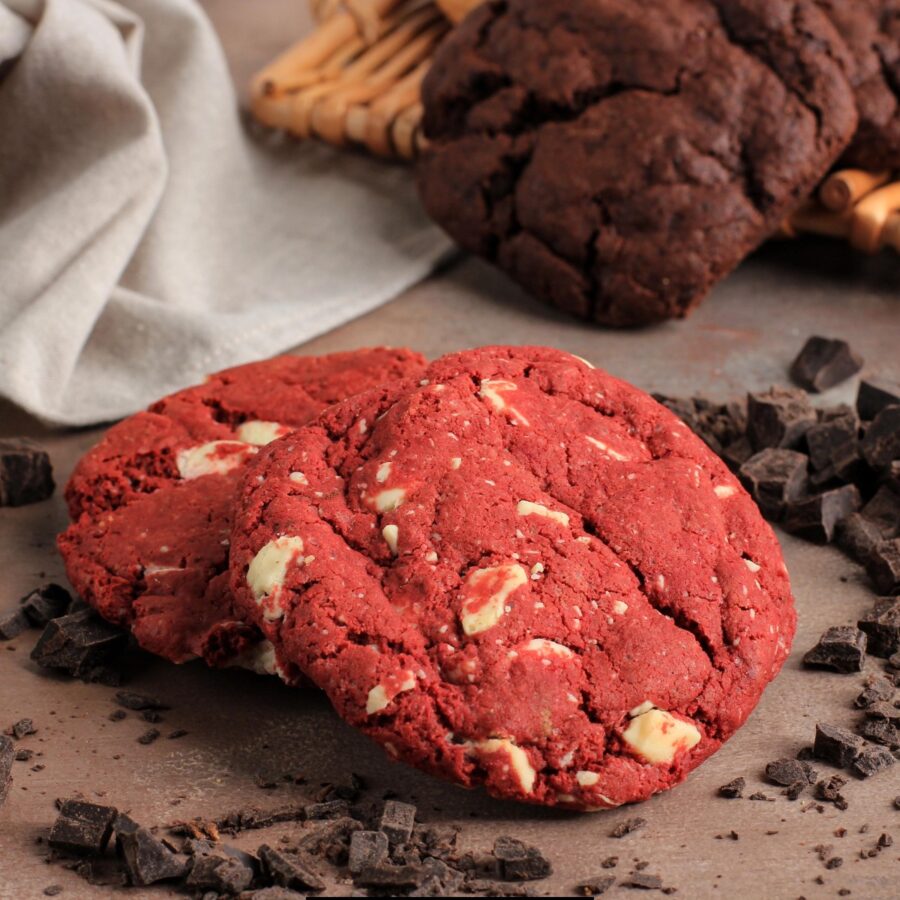
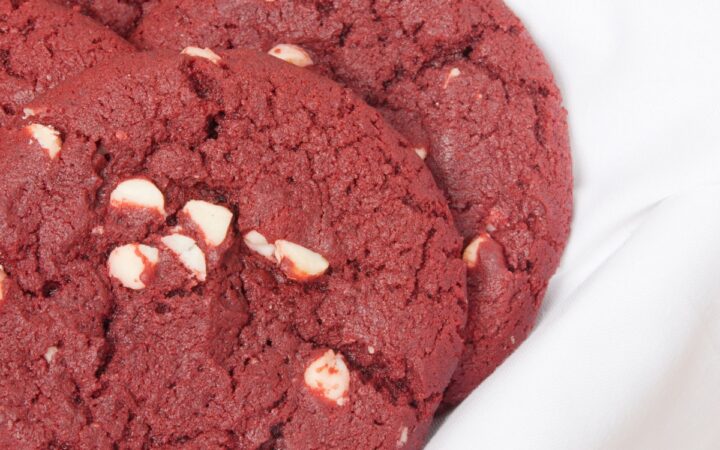
If you love the rich, chocolatey flavor of red velvet cake, these Red Velvet Cookies will be your new favorite treat. With a soft and chewy texture, a hint of cocoa, and a vibrant red color, these cookies are perfect for holidays, Valentine’s Day, or anytime you’re craving something sweet.

Why You’ll Love This Delicious Dessert
- Soft and Chewy. These cookies have a perfect balance of crisp edges and a tender center.
- Rich Chocolate Flavor. A touch of cocoa powder gives them a mild chocolate taste without overpowering the classic red velvet flavor.
- Easy to Make. Simple ingredients and a quick baking time make these cookies a go-to recipe.
- Great for Holidays. Their vibrant red color makes them an ideal dessert recipe for festive occasions.
Once you try these homemade red velvet cookies, you’ll never go back to store-bought versions again.
What Do Red Velvet Cookies Taste Like?
Red velvet cookies have a unique, rich flavor that is a perfect blend of chocolate, vanilla, and a subtle tang. Unlike traditional chocolate cookies, red velvet cookies contain just enough cocoa powder to add depth without being overwhelmingly chocolatey.
The hint of tanginess from buttermilk or vinegar gives them a distinctive taste that sets them apart from regular chocolate or sugar cookies.
Ingredients You’ll Need
- All-Purpose Flour - Provides the structure and stability for the cookies while keeping them soft and tender. It helps balance moisture so the cookies hold their shape without being too dense.
- Cocoa Powder - Gives the cookies their signature mild chocolate flavor. Unlike traditional chocolate cookies, red velvet has just enough cocoa to add depth without overpowering the vanilla and tangy notes.
- Baking Soda - Acts as a leavening agent, helping the cookies rise slightly while maintaining a chewy, soft texture.
- Salt - Enhances the overall flavor balance, bringing out the sweetness and complementing the chocolate and vanilla notes.
- Unsalted Butter - Adds richness, moisture, and a tender texture to the cookies. It also contributes to their slightly crisp edges while keeping the centers soft.
- Granulated Sugar & Brown Sugar - The combination of sugars ensures the cookies are both chewy and flavorful. Granulated sugar helps the cookies spread and creates a crispier edge. Brown sugar adds moisture, chewiness, and a hint of caramel-like depth.
- Egg - Binds the ingredients together and provides structure and stability. It also helps give the cookies their soft and slightly puffy texture.
- Vanilla Extract - Enhances the warm, sweet, and slightly floral aroma, complementing the cocoa and buttermilk.
- Red Food Coloring - The key to achieving the iconic deep red hue. The color also enhances the visual appeal, making red velvet cookies stand out.
- Buttermilk or Vinegar - Adds a slight tangy flavor, a signature trait of red velvet. The acidity also reacts with the cocoa powder, enhancing the red hue and keeping the cookies soft and tender.
- White Chocolate Chips (Optional) - Adds extra sweetness and a creamy contrast against the rich red dough, making the cookies visually stunning and delicious.
Each of these ingredients works together to create soft, chewy, and flavorful red velvet cookies, making them a standout treat.
How To Make Red Velvet Cookies
- Preheat the Oven. Preheat your oven to 350°F and line a baking sheet with parchment paper.
- Mix the Dry Ingredients. In a medium bowl, whisk together the flour, cocoa powder, baking soda, and salt. Set aside.
- Cream the Butter and Sugars. In a large mixing bowl, beat the butter, granulated sugar, and brown sugar until light and fluffy. This takes about 2–3 minutes.
- Add the Wet Ingredients. Mix in the egg, vanilla extract, buttermilk (or vinegar), and red food coloring. Stir until well combined.
- Combine Wet and Dry Ingredients. Gradually add the dry ingredients to the wet mixture, mixing until just combined. Do not overmix, or the cookies may become dense.
- Fold in White Chocolate Chips (Optional). Gently fold in the white chocolate chips if using.
- Scoop and Bake. Use a cookie scoop or spoon to drop tablespoon-sized dough balls onto the lined baking sheet, spacing them about 2 inches apart. Bake for 9–11 minutes, or until the edges are set but the centers look slightly soft.
- Cool and Enjoy. Allow the cookies to cool on the baking sheet for 5 minutes, then transfer them to a wire rack to cool completely.
Tips And Tricks
Making red velvet cookies at home is easy, but following these tips will ensure they turn out soft, chewy, and full of flavor every time. From mixing the dough to baking and storing, these expert tricks will help you get the best results:
- Use Gel Food Coloring. Gel food coloring gives a more vibrant red hue without adding extra liquid.
- Chill the Dough for Thicker Cookies. If you prefer thicker cookies, refrigerate the dough for 30 minutes before baking.
- Do Not Overmix. Overmixing the dough can lead to tough cookies instead of soft and chewy ones.
- Measure Flour Correctly. Spoon the flour into the measuring cup and level it off to avoid using too much.
- Bake Until Just Set. The cookies will continue to firm up as they cool. Take them out when the edges are set but the centers are still soft.
Variations
Red velvet cookies are already a delightful treat, but adding unique flavors and textures can take them to the next level. Whether you want something extra chocolaty, filled with cream cheese, or packed with crunch, here are some fun variations to try:
- Cream Cheese-Filled - Add a cream cheese filling for a gooey surprise in every bite.
- Nutty Red Velvet Cookies - Stir in chopped pecans or walnuts for extra crunch.
- Dark Chocolate - Use dark chocolate chips instead of white for a richer flavor.
- Crinkle Cookies - Roll the dough balls in powdered sugar before baking for a beautiful crackled effect.
- Gluten-Free - Substitute all-purpose flour with a 1:1 gluten-free flour blend.
What To Enjoy With Red Velvet Cookies
Red velvet cookies are rich, soft, and slightly chocolatey, making them perfect on their own or paired with complementary flavors that enhance their sweetness and texture. Whether you want something creamy, warm, or refreshing, here are some delicious ideas to serve with them:
- A glass of cold milk - The classic pairing for soft, chewy cookies.
- Vanilla ice cream - Sandwich two cookies with ice cream for a red velvet ice cream sandwich.
- Hot chocolate or coffee - The rich, chocolatey flavors complement each other perfectly.
- Cream cheese frosting - Spread a little on top for extra decadence.
How Long Do They Last?
Red velvet cookies can be stored at room temperature, in the refrigerator, or frozen, depending on how long you want them to last. When kept in an airtight container at room temperature, they stay soft and fresh for up to 5 days.
To extend their shelf life, you can refrigerate them for up to a week, ensuring they remain chewy and delicious.
Can You Freeze Them?
If you need to store them for a longer period, freezing is the best option. Place the fully cooled cookies in a single layer on a baking sheet, freeze for about an hour, and then transfer them to a freezer-safe bag or airtight container.
Properly stored, frozen red velvet cookies will last up to 3 months.
When you’re ready to enjoy your leftovers, simply let them thaw at room temperature or warm them in the microwave for about 10–15 seconds for a freshly baked taste.
More Of OurBest Cookie Recipes
- Low Carb Chocolate Chip Cookies
- Almond Flour Cookies
- Cottage Cheese Cookies
- Keto Peanut Butter Cookies
- Brownie Mix Cookies

Red Velvet Cookies | The Easiest Red Velvet Cookie Recipe
Ingredients
- ▢ 2 1/2 cups All Purpose Flour
- ▢ 3 tbsp Unsweetened Cocoa Powder
- ▢ 1 tsp Baking Soda
- ▢ 1/2 tsp Kosher Salt
- ▢ 1 cup Unsalted Butter , softened
- ▢ 3/4 cup Granulated Sugar
- ▢ 3/4 cups Brown Sugar
- ▢ 2 Eggs
- ▢ 2 tsp Vanilla Extract
- ▢ 1 tbsp Red Food Coloring
- ▢ 1 tsp White Vinegar
- ▢ 1 1/2 cups White Chocolate Chips
Instructions
- Preheat the Oven. Preheat your oven to 350°F and line a baking sheet with parchment paper.
- Mix the Dry Ingredients. In a medium bowl, whisk together the flour, cocoa powder, baking soda, and salt. Set aside.
- Cream the Butter and Sugars. In a large mixing bowl, beat the butter, granulated sugar, and brown sugar until light and fluffy. This takes about 2–3 minutes.
- Add the Wet Ingredients. Mix in the egg, vanilla extract, buttermilk (or vinegar), and red food coloring. Stir until well combined.
- Combine Wet and Dry Ingredients. Gradually add the dry ingredients to the wet mixture, mixing until just combined. Do not overmix, or the cookies may become dense.
- Fold in White Chocolate Chips (Optional). Gently fold in the white chocolate chips if using.
- Scoop and Bake. Use a cookie scoop or spoon to drop tablespoon-sized dough balls onto the lined baking sheet, spacing them about 2 inches apart. Bake for 9–11 minutes, or until the edges are set but the centers look slightly soft.
- Cool and Enjoy. Allow the cookies to cool on the baking sheet for 5 minutes, then transfer them to a wire rack to cool completely.
