
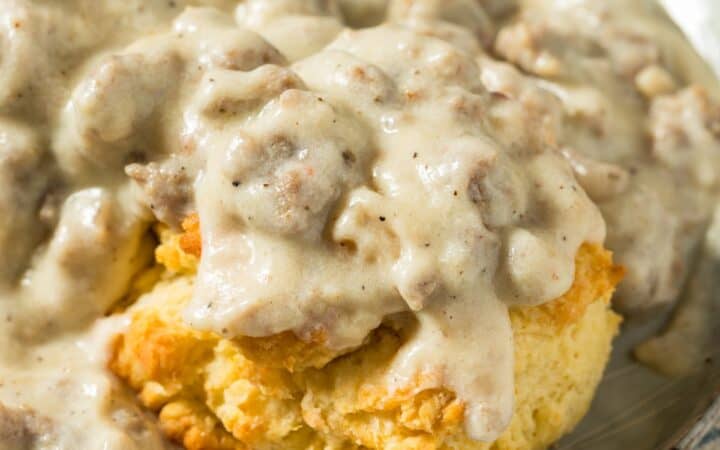
If you’re a fan of comfort food, then you’re in for a treat! Learn how to make the easiest Biscuits and Gravy recipe. You’ll achieve that perfect balance between flaky, buttery biscuits and savory, creamy sausage gravy, creating a dish that’s pure comfort on a plate.

Why Do Southerners Love Biscuits And Gravy?
- Comforting . Perfect for a hearty breakfast or brunch, bringing warmth and satisfaction.
- Simple Ingredients . Uses pantry staples and basic ingredients.
- Versatile . Easily adaptable with various add-ins and toppings.
With this Biscuits and Gravy recipe, you’ve achieved a restaurant-quality dish that will leave your friends and family craving more. Whether you’re hosting a weekend brunch or simply treating yourself to a delicious meal, this recipe is guaranteed to be a hit.
Are Biscuits And Gravy Healthy?
While traditional biscuits and gravy may not be the healthiest option due to their high calorie, fat, and sodium content, there are ways to make this dish healthier without sacrificing too much of its comforting goodness.
By making a few ingredient swaps and enjoying it in moderation, you can still savor this classic comfort food as part of a balanced diet.4o
Ingredients You’ll Need
For the Biscuits
- All-Purpose Flour - The base of the biscuits, provides structure.
- Baking Powder and Baking Soda - Helps the biscuits rise, making them light and fluffy.
- Salt - Enhances the flavor.
- Cold Butter - Creates flaky layers in the biscuits.
- Buttermilk - Adds tanginess and helps achieve a tender texture.
For the Sausage Gravy
- Pork Sausage - The star of the gravy, adding flavor and texture.
- All-Purpose Flour - Thickens the gravy.
- Milk - Creates the creamy base.
- Salt and Pepper - Seasoning to taste.
How To Make Biscuits And Gravy
- Preheat Oven . Preheat your oven to 425°F.
- Mix Dry Ingredients: In a large bowl, combine the flour, baking powder, baking soda, and salt.
- Cut in Butter . Add the cold butter and use a pastry cutter or your fingers to cut it into the flour mixture until it resembles coarse crumbs.
- Add Buttermilk . Gradually add the buttermilk, stirring until just combined.
- Form Biscuits . Turn the dough out onto a floured surface, gently knead, and pat it into a rectangle. Fold it over a few times to create layers, then cut out biscuits using a biscuit cutter.
- Bake . Place the biscuits on a baking sheet and bake for 12-15 minutes, until golden brown.
- Cook Sausage . In a large skillet over medium heat, cook the sausage until browned and cooked through.
- Add Flour . Sprinkle the flour over the cooked sausage and stir to combine, cooking for about 1 minute.
- Add Milk . Gradually add the milk, stirring constantly until the mixture thickens.
- Season . Season with salt and pepper to taste, simmering for a few minutes until the gravy reaches your desired consistency.
- Serve . Split the warm biscuits in half and ladle the sausage gravy over them.
- Garnish . Optional – garnish with chopped fresh parsley for a burst of color and added freshness.

Tips And Tricks
Making Biscuits and Gravy is a delightful endeavor, and a few tips and tricks can help you achieve the best possible results. Here are some pointers to ensure your biscuits turn out flaky and your gravy perfectly creamy:
- Use Cold Butter . Cold butter is crucial for creating flaky layers in the biscuits. Keep it chilled until you’re ready to use it.
- Don’t Overmix . Overmixing the dough can result in tough biscuits. Mix until just combined for the best texture.
- Fold the Dough . Folding the dough over itself a few times helps create flaky layers.
- Cook the Flour . Cooking the flour with the sausage before adding milk ensures a smooth gravy without a raw flour taste.
- Stir Constantly . Stirring constantly while adding the milk helps prevent lumps and creates a smooth gravy.
- Adjust Consistency . If the gravy is too thick, add a bit more milk. If it’s too thin, let it simmer a bit longer to thicken.
Variations
If you’re a fan of Biscuits and Gravy and want to try some creative variations, here are a few delicious ideas to explore:
- Spicy Sausage Gravy - Add a kick of heat to your gravy by using spicy pork sausage or adding a pinch of cayenne pepper to the gravy.
- Cheesy Biscuits - Incorporate shredded cheese into the biscuit dough for a cheesy twist on this classic dish.
- Herb-Infused Gravy - Enhance the flavor of the gravy by adding fresh or dried herbs like thyme, sage, or rosemary.
What To Eat With Biscuits And Gravy
Biscuits and Gravy are a hearty dish that pairs well with a variety of sides and accompaniments. Here are some delicious options to consider serving alongside them:
- Scrambled Eggs - Adds protein and complements the flavors of the biscuits and gravy.
- Fresh Fruit - Provides a refreshing contrast to the rich and savory gravy.
- Hash Browns - Adds a crispy and satisfying element to the meal.
How Long Does It Last?
Cooked Biscuits and Gravy can be stored in the refrigerator in an airtight container for up to 3 to 4 days. For the best bite, they are best enjoyed as soon as possible.
Can You Freeze It?
Yes, you can freeze both biscuits and sausage gravy to extend their shelf life and enjoy them at a later time.
Freezing Biscuits
- Cool Completely . Let the biscuits cool completely.
- Freeze . Place them in an airtight container or resealable freezer-safe bag. Remove as much air as possible to prevent freezer burn.
Freezing Gravy
- Cool Completely . Let the gravy cool completely.
- Freeze . Transfer it to an airtight container or resealable freezer-safe bag. Remove as much air as possible to prevent freezer burn.
Properly frozen biscuits and gravy can last in the freezer for up to 2 to 3 months without significant loss of quality. However, for the best taste and texture, try to enjoy them within a few weeks of freezing.
More Craveworthy Comfort Foods
- Instant Pot Butter Chicken
- Hamburger Steak with Onion Gravy
- Southern Potato Salad
- Instant Pot Mashed Potatoes
- Meatballs and Gravy
- Sausage Balls

Biscuits And Gravy Recipe | Biscuits With Sausage Gravy
Ingredients
For The Biscuits
- ▢ 3 cups All Purpose Flour
- ▢ 1 tbsp Baking Powder
- ▢ 1 tsp Baking Soda
- ▢ 1 tsp Kosher Salt
- ▢ 3/4 cup Unsalted Butter , cold, cubed
- ▢ 1 1/2 cups Buttermilk
For The Gravy
- ▢ 1 pound Ground Breakfast Sausage
- ▢ 1/3 cup All Purpose Flour
- ▢ 4 cups Milk
- ▢ 1 tsp Kosher Salt
- ▢ 1/2 tsp Ground Black Pepper
Instructions
- Preheat Oven . Preheat your oven to 425°F.
- Mix Dry Ingredients. In a large bowl, combine the flour, baking powder, baking soda, and salt.
- Cut in Butter . Add the cold butter and use a pastry cutter or your fingers to cut it into the flour mixture until it resembles coarse crumbs.
- Add Buttermilk . Gradually add the buttermilk, stirring until just combined.
- Form Biscuits . Turn the dough out onto a floured surface, gently knead, and pat it into a rectangle. Fold it over a few times to create layers, then cut out biscuits using a biscuit cutter.
- Bake . Place the biscuits on a baking sheet and bake for 12-15 minutes, until golden brown.
- Cook Sausage . In a large skillet over medium heat, cook the sausage until browned and cooked through.
- Add Flour . Sprinkle the flour over the cooked sausage and stir to combine, cooking for about 1 minute.
- Add Milk . Gradually add the milk, stirring constantly until the mixture thickens.
- Season . Season with salt and pepper to taste, simmering for a few minutes until the gravy reaches your desired consistency.
- Serve . Split the warm biscuits in half and ladle the sausage gravy over them.
- Garnish . Optional – garnish with chopped fresh parsley for a burst of color and added freshness.
Get support & connect with our community on Facebook!

If you already signed up, you should have received an email with a password to give you unlimited access to our FREE Printable Library. The password is case sensitive. Enter it below and get printing!
Password:

Biscuits And Gravy Recipe | Biscuits With Sausage Gravy
Ingredients
For The Biscuits
- 3 cups All Purpose Flour
- 1 tbsp Baking Powder
- 1 tsp Baking Soda
- 1 tsp Kosher Salt
- 3/4 cup Unsalted Butter cold, cubed
- 1 1/2 cups Buttermilk
For The Gravy
- 1 pound Ground Breakfast Sausage
- 1/3 cup All Purpose Flour
- 4 cups Milk
- 1 tsp Kosher Salt
- 1/2 tsp Ground Black Pepper
Instructions
- Preheat Oven . Preheat your oven to 425°F.
- Mix Dry Ingredients. In a large bowl, combine the flour, baking powder, baking soda, and salt.
- Cut in Butter . Add the cold butter and use a pastry cutter or your fingers to cut it into the flour mixture until it resembles coarse crumbs.
- Add Buttermilk . Gradually add the buttermilk, stirring until just combined.
- Form Biscuits . Turn the dough out onto a floured surface, gently knead, and pat it into a rectangle. Fold it over a few times to create layers, then cut out biscuits using a biscuit cutter.
- Bake . Place the biscuits on a baking sheet and bake for 12-15 minutes, until golden brown.
- Cook Sausage . In a large skillet over medium heat, cook the sausage until browned and cooked through.
- Add Flour . Sprinkle the flour over the cooked sausage and stir to combine, cooking for about 1 minute.
- Add Milk . Gradually add the milk, stirring constantly until the mixture thickens.
- Season . Season with salt and pepper to taste, simmering for a few minutes until the gravy reaches your desired consistency.
- Serve . Split the warm biscuits in half and ladle the sausage gravy over them.
- Garnish . Optional – garnish with chopped fresh parsley for a burst of color and added freshness.
Biscuits And Gravy Recipe | Biscuits With Sausage Gravy https://twosleevers.com/biscuits-and-gravy-recipe/

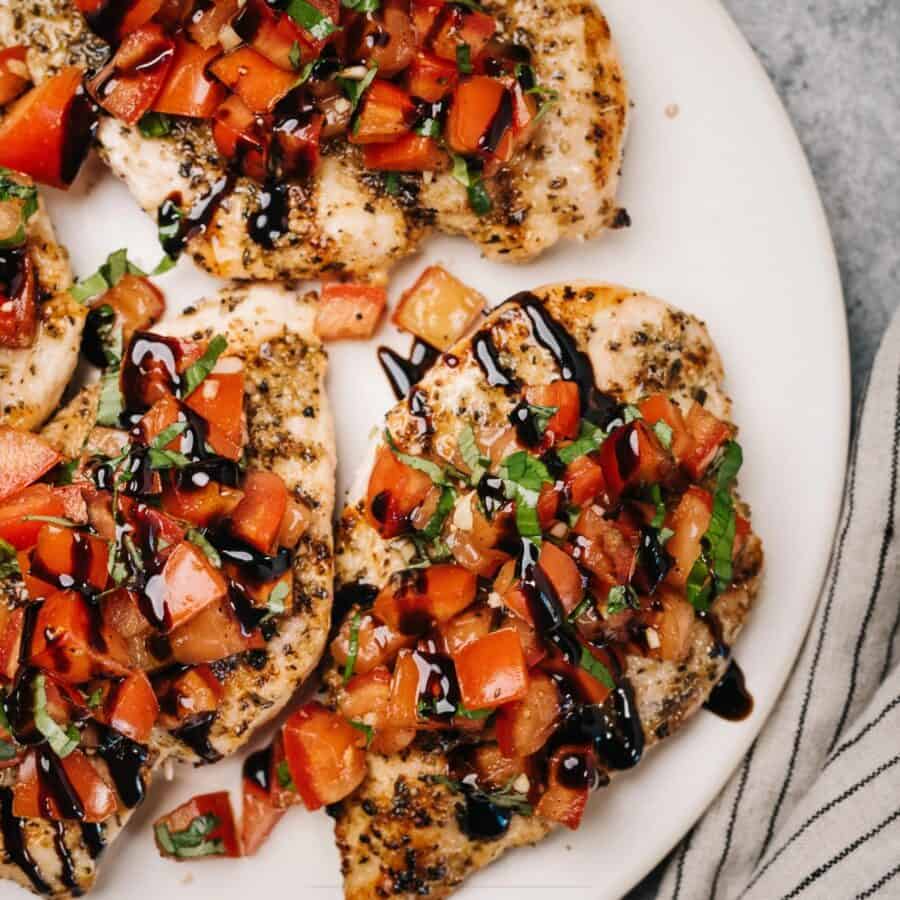
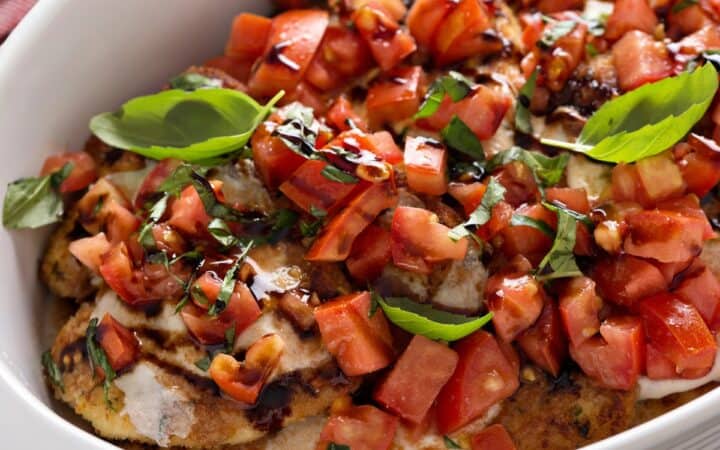
If you’re a fan of the delectable combination of juicy chicken, fresh tomatoes, and basil, you’re in for a treat! Learn how to make the easiest Baked Chicken Bruschetta. You’ll achieve that perfect balance between tender chicken and a vibrant, flavorful topping while indulging in Italian-inspired flavors.
Why You’ll Love This Flavorful Chicken
- Fast. Ready in under 40 minutes with simple ingredients.
- Easy. Bake the chicken, prepare the bruschetta topping, and assemble for a delightful meal.
- Healthy. Packed with fresh ingredients and lean protein!
- Delicious. Bursting with flavors that are absolutely irresistible.
With the convenience of the oven, you’ve achieved a restaurant-quality dish that will leave your friends and family craving more. Whether you’re hosting a dinner party or simply treating yourself to a delicious meal, this Chicken Bruschetta is guaranteed to be a hit.
What Does Chicken Bruschetta Taste Like?
Chicken Bruschetta is absolutely delicious and insanely popular among Italian cuisine enthusiasts. This dish offers a delectable combination of flavors that appeals to a wide range of palates.
The juicy tomatoes, fragrant basil, and tangy balsamic vinegar create a mouthwatering and satisfying eating experience.
What Is Bruschetta Chicken Made Of?
- Chicken Breasts - Boneless, skinless chicken breasts work best for this recipe.
- Tomatoes - Fresh Roma tomatoes, diced for the topping.
- Basil - Fresh basil leaves, chopped for a burst of flavor.
- Garlic - Minced garlic cloves for a punch of flavor.
- Balsamic Vinegar - Adds a tangy and sweet flavor to the bruschetta topping.
- Olive Oil - Enhances the flavor and helps to cook the chicken.
- Salt and Pepper - To taste, for seasoning.
- Mozzarella Cheese -Optional, for a cheesy topping.
How To Make Bruschetta Chicken
- Prepare the Chicken . Start by preheating your oven to 375°F. Season the chicken breasts with salt and pepper on both sides. Place them in a baking dish and drizzle with olive oil.
- Bake the Chicken . Bake the chicken breasts in the preheated oven for 25-30 minutes, or until the chicken is cooked through and no longer pink in the center.
- Make the Bruschetta Topping . While the chicken is baking, prepare the bruschetta topping. In a bowl, combine diced tomatoes, chopped basil, minced garlic, balsamic vinegar, olive oil, salt, and pepper. Toss until well mixed.
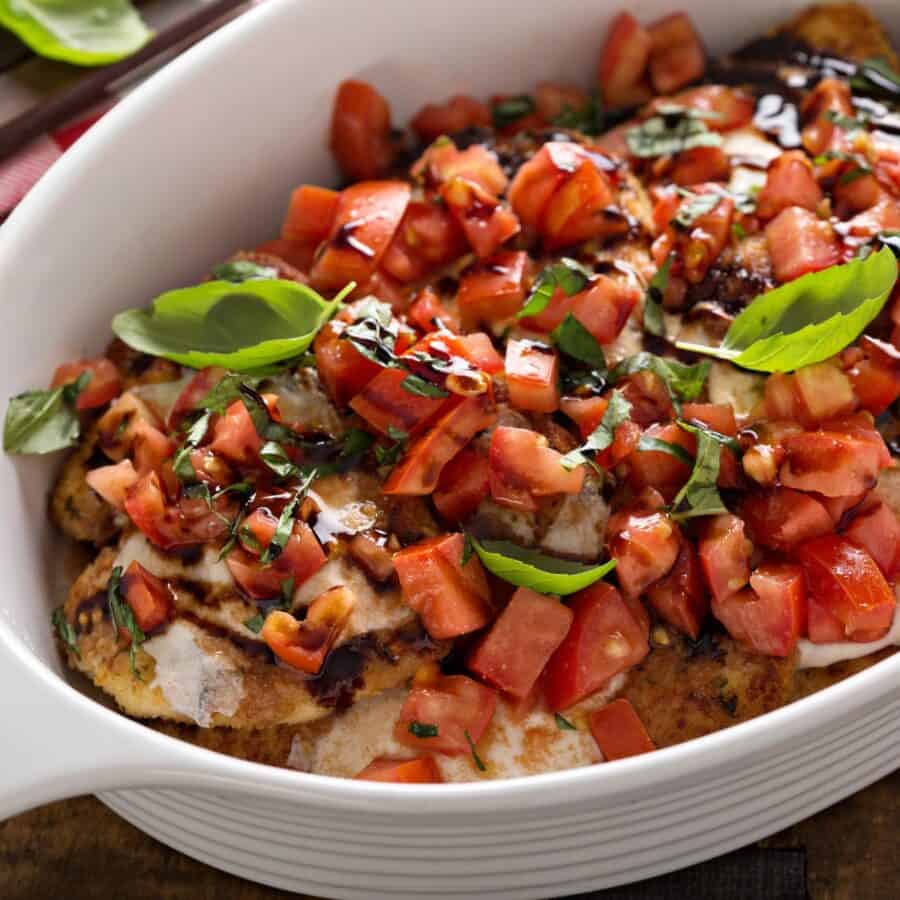
- Assemble the Dish . Once the chicken is baked, remove it from the oven and top each breast with a generous amount of the bruschetta mixture. If using mozzarella cheese, add a slice on top of each chicken breast.
- Broil for Extra Flavor . Return the baking dish to the oven and broil for an additional 3-5 minutes, or until the cheese is melted and bubbly, and the bruschetta topping is slightly caramelized.
- Garnish and Serve . Transfer the Chicken Bruschetta to a serving platter. Garnish with extra chopped basil and a drizzle of balsamic glaze for added flavor and presentation. Serve with a side of pasta or a fresh salad.
Tips And Tricks
Making Chicken Bruschetta is a simple endeavor, and a few tips and tricks can help you achieve the best possible results. Here are some pointers to ensure your chicken turns out juicy, flavorful, and utterly irresistible:
- Use Fresh Ingredients . Fresh tomatoes and basil make a significant difference in the taste of the bruschetta topping.
- Don’t Overcook the Chicken . To keep the chicken moist and tender, use a meat thermometer to check that the internal temperature reaches 165°F.
- Let the Flavors Marinate . Allow the bruschetta topping to sit for a few minutes to let the flavors meld together before topping the chicken.
Variations
If you’re a fan of Chicken Bruschetta and want to try some creative variations, here are a few delicious ideas to explore:
- Caprese- Add fresh mozzarella and a drizzle of balsamic glaze to create a Caprese-inspired bruschetta topping.
- Avocado- Mix diced avocado with the tomatoes and basil for a creamy twist.
- Greek- Add feta cheese, Kalamata olives, and cucumber for a Mediterranean flavor profile.
What To Eat With Bruschetta Chicken
Chicken Bruschetta is a flavorful and savory dish that pairs well with a variety of sides and accompaniments. Here are some delicious options to consider serving alongside it:
- Pasta - Serve with a side of pasta tossed in olive oil and garlic for a complete meal.
- Salad - A fresh green salad with a light vinaigrette complements the rich flavors of the chicken.
- Bread - Serve with a side of crusty bread to soak up the delicious bruschetta topping.
How Long Does It Last?
Cooked Chicken Bruschetta can be stored in the refrigerator in an airtight container for up to 3 to 4 days. The flavors may intensify over time, so for the best bite, they are best enjoyed as soon as possible.
Can You Freeze It?
Yes, you can freeze Chicken Bruschetta to extend its shelf life and enjoy it at a later time. Freezing is a great way to preserve the flavors and texture of the dish.
Properly frozen Chicken Bruschetta can last in the freezer for up to 2 to 3 months without significant loss of quality. However, for the best taste and texture, try to enjoy it within a few weeks of freezing.
More Simple Chicken Dishes
- Chicken Tikka Masala
- Instant Pot Chicken Tacos
- Bourbon Chicken
- Firecracker Chicken
- Instant Pot Butter Chicken
- Chicken Piccata
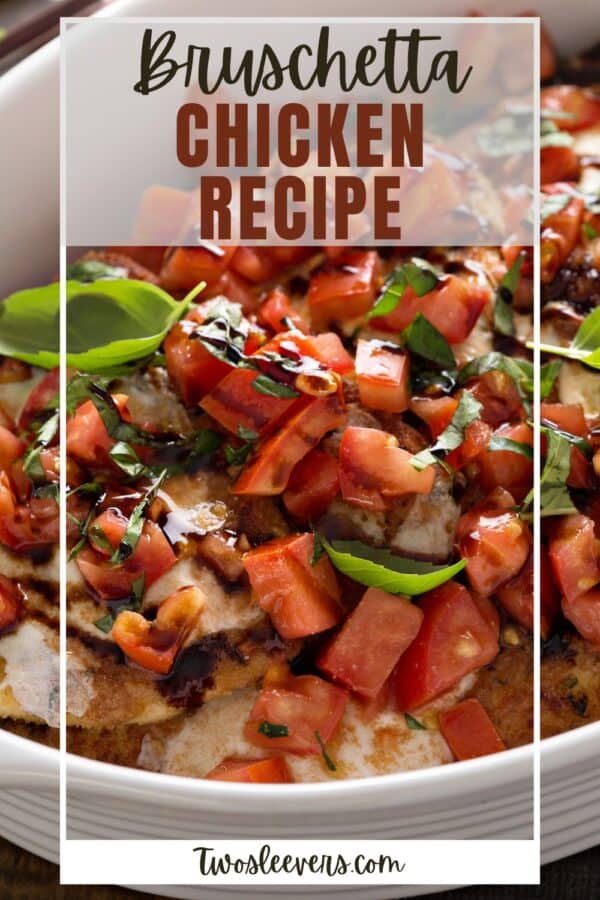
Bruschetta Chicken Recipe | Italian Herbed Chicken Recipe
Ingredients
- ▢ 4 Boneless Skinless Chicken Breasts
- ▢ 1 tbsp Olive Oil
- ▢ 1/2 tsp Kosher Salt
- ▢ 1/4 tsp Ground Black Pepper
- ▢ 3 Roma Tomatoes , diced
- ▢ 2 cloves Garlic , minced
- ▢ 2 tbsp Balsamic Vinegar
- ▢ 1/4 cup Basil , chopped
- ▢ 1/2 cup Mozzarella Cheese , optional
Instructions
- Prepare the Chicken . Start by preheating your oven to 375°F. Season the chicken breasts with salt and pepper on both sides. Place them in a baking dish and drizzle with olive oil.
- Bake the Chicken . Bake the chicken breasts in the preheated oven for 25-30 minutes, or until the chicken is cooked through and no longer pink in the center.
- Make the Bruschetta Topping . While the chicken is baking, prepare the bruschetta topping. In a bowl, combine diced tomatoes, chopped basil, minced garlic, balsamic vinegar, olive oil, salt, and pepper. Toss until well mixed.
- Assemble the Dish . Once the chicken is baked, remove it from the oven and top each breast with a generous amount of the bruschetta mixture. If using mozzarella cheese, add a slice on top of each chicken breast.
- Broil for Extra Flavor. Return the baking dish to the oven and broil for an additional 3-5 minutes, or until the cheese is melted and bubbly, and the bruschetta topping is slightly caramelized.
- Garnish and Serve . Transfer the Chicken Bruschetta to a serving platter. Garnish with extra chopped basil and a drizzle of balsamic glaze for added flavor and presentation. Serve with a side of pasta or a fresh salad.
