
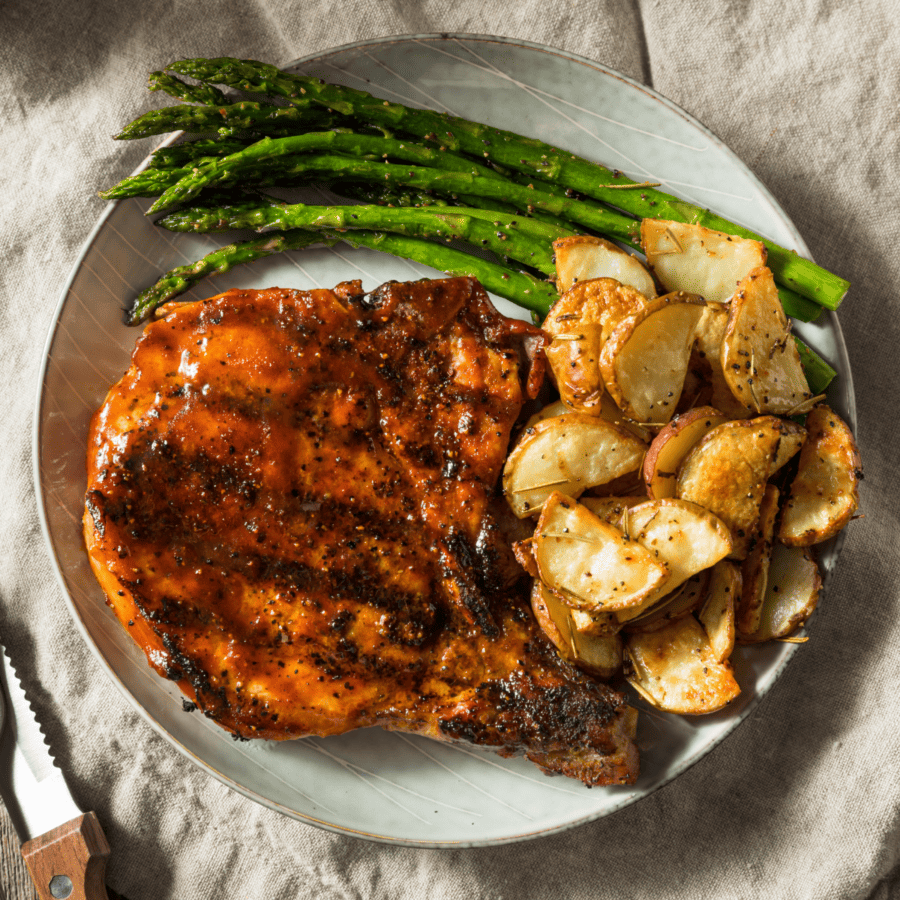
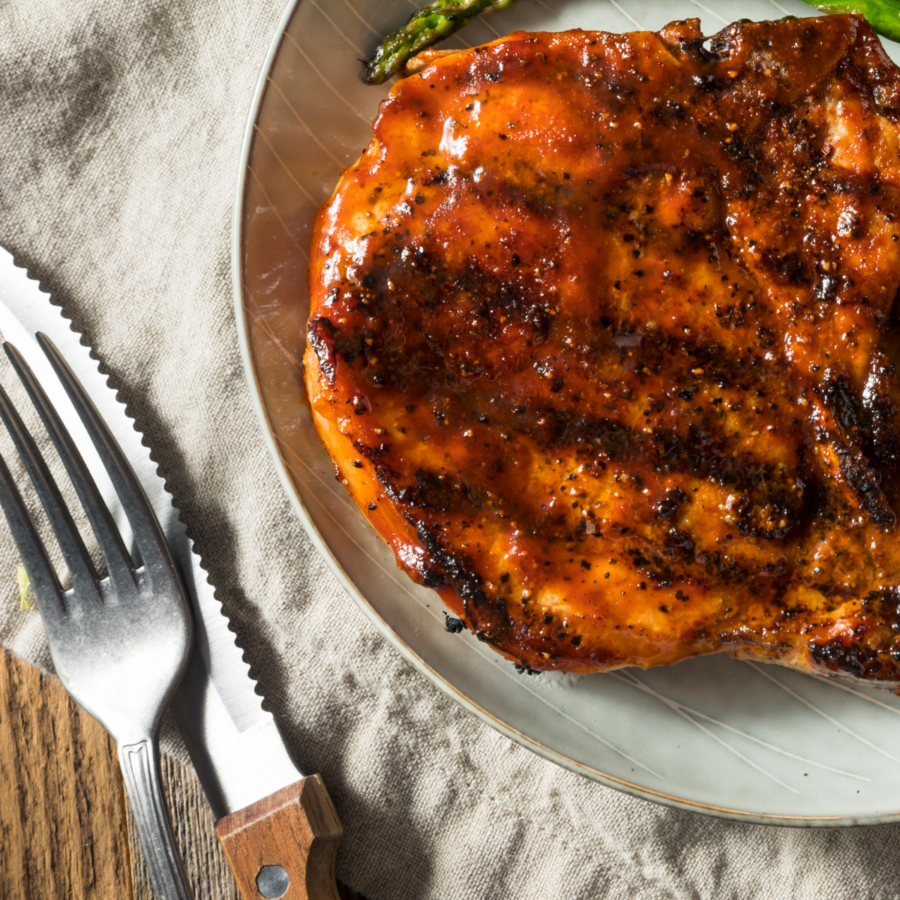
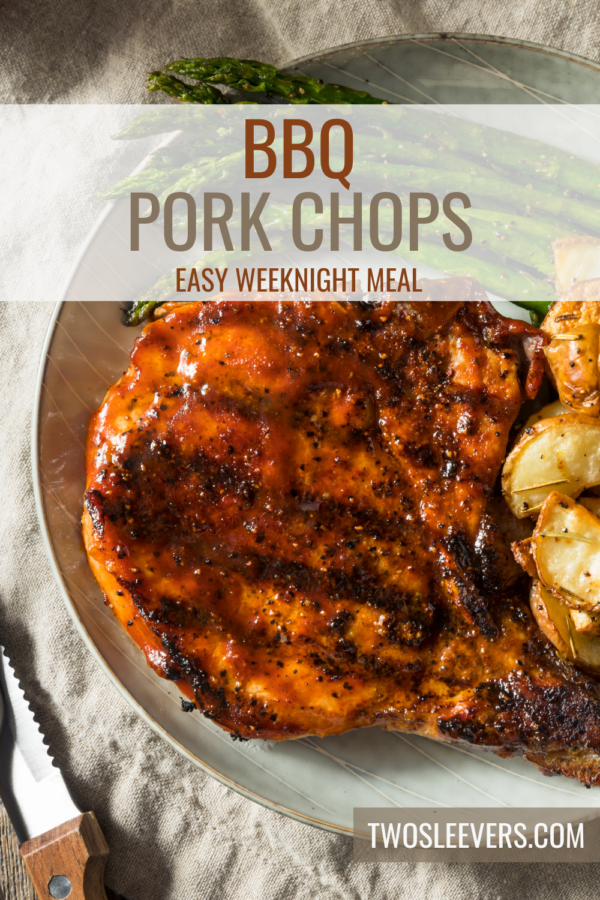
There’s something truly magical about the smoky, savory, and slightly sweet flavor that comes with well-prepared BBQ pork chops. Unlock the secrets to mastering this grilling masterpiece, leaving you with juicy, tender, and finger-licking good pork chops that will impress family and friends alike.
Why Your Family Will Love These Pork Chops
- Fast.
- Easy.
- Versatile.
- High Protein.
With the smoky, tangy flavors of the BBQ sauce combined with the tenderness of the perfectly cooked pork chops, this dish is a true crowd-pleaser. So, invite your loved ones over, fire up the grill, and treat them to this delectable delight.
How Do You BBQ Pork Chops Without Drying Them Out
Barbecuing pork chops without drying them out requires some key techniques and attention to detail. Here are some tips to ensure your BBQ pork chops stay juicy and flavorful:
- Choose the Right Cut . Opt for pork chops with some marbling and fat. Bone-in chops tend to retain more moisture during cooking. Thick-cut chops are also less likely to dry out compared to thin ones.
- Avoid Overcooking . Pork chops can become dry if overcooked. Use a meat thermometer to check the internal temperature. Pork chops are safe to eat at 145F, and they will remain juicy and tender at this temperature.
- Baste with Sauce . If you plan to use BBQ sauce, wait until the last few minutes of grilling to apply it. Basting the pork chops with sauce during the final moments prevents the sugars in the sauce from burning and drying out the meat.
- Let Them Rest . Once the pork chops are done cooking, let them rest for a few minutes before cutting into them. This allows the juices to redistribute, resulting in juicier and more tender meat.
How Long Do You Cook Pork Chops On The BBQ?
The cooking time for pork chops on the BBQ depends on their thickness. As a general rule:
- Thin pork chops (about 1/2 inch thick) : Cook for approximately 4 to 5 minutes per side.
- Medium-thick pork chops (about 3/4 inch to 1 inch thick) : Cook for around 6 to 8 minutes per side.
- Thick pork chops (1 1/4 inches or more) : Cook for about 12 to 15 minutes per side.
Always remember that cooking times may vary depending on the type of grill and the thickness of the pork chops. The use of a meat thermometer is the most reliable method to ensure your pork chops are cooked to your desired level of doneness.
Is It Better To Grill Or Pan Fry Pork Chops?
Whether it’s better to grill or pan-fry pork chops depends on your personal preferences and the flavor and texture you desire. Both cooking methods have their advantages. Here are a few of the most noteworthy:
Grilling Pork Chops
- Flavor - Grilling imparts a smoky and charred flavor to the pork chops, enhancing their taste and adding depth to the dish.
- Juiciness - Properly grilled pork chops can retain their natural juices, resulting in tender and succulent meat.
- Healthier Option - Grilling allows excess fat to drip off the pork chops, making it a healthier cooking method compared to pan-frying.
- Minimal Cleanup - Grilling often involves less cleanup, as you can simply clean the grill grates once you’re done cooking.
Pan-Frying Pork Chops
- Control over Heat - Pan-frying allows you to have more control over the cooking temperature, which can be advantageous for achieving the desired level of doneness.
- Faster Cooking - Pan-frying pork chops generally takes less time than grilling, making it a quicker option for a weeknight meal.
- Even Cooking - In a pan, the pork chops have consistent contact with the cooking surface, ensuring even cooking throughout.
- Variety of Sauces and Pan Sauces - Pan-frying gives you the opportunity to deglaze the pan and create flavorful pan sauces to complement the pork chops.
Ultimately, the decision between grilling and pan-frying comes down to personal preference, available equipment, and the overall cooking experience you desire. Some people prefer the smoky flavor and outdoor experience of grilling, while others enjoy the convenience and control of pan-frying indoors.
Ingredients You’ll Need
Before we dive into the step-by-step process, gather the following ingredients:
- Bone-In Pork Chops- You’ll want to choose some that are about 1 inch thick.
- BBQ sauce- Use your favorite brand or make some homemade sauce.
- Olive Oil
- Honey
- Garlic
- Smoked Paprika
- Onion Powder
- Cumin
- Salt and Pepper
How To Make BBQ Pork Chops
Marinate for Marvelous Flavor. To infuse the pork chops with irresistible flavors, prepare the marinade. In a bowl, combine the BBQ sauce, olive oil, honey, minced garlic, smoked paprika, onion powder, ground cumin, salt, and pepper. Mix well until the marinade is smooth and well combined.
Prepare the Pork Chops. Place the pork chops in a large resealable plastic bag or a shallow dish. Pour the marinade over the pork chops, ensuring each one is thoroughly coated. Seal the bag or cover the dish and refrigerate for at least 1 hour, or ideally, overnight. This allows the flavors to penetrate the meat, resulting in a mouthwatering taste.
Preheat the Grill. Before grilling, preheat your grill to medium-high heat. Ensure the grates are clean and lightly oiled to prevent the pork chops from sticking.
Grill to Perfection. Remove the pork chops from the marinade, shaking off any excess. Discard the remaining marinade. Place the pork chops on the hot grill and cook for about 4-5 minutes per side, depending on the thickness of the chops. To achieve those beautiful grill marks, avoid moving them around too much. Use a meat thermometer to ensure the internal temperature reaches 145F.
Rest and Savor. Once the pork chops reach the desired doneness, remove them from the grill and let them rest for a few minutes. Resting allows the juices to redistribute, ensuring the chops remain juicy and tender.
What To Serve With BBQ Pork Chops
When it comes to serving BBQ pork chops, a well-chosen side dish can take your meal to the next level and create a balanced and satisfying dining experience. Here are some delicious and complementary side dishes that will perfectly accompany them:
- Coleslaw - A classic side for BBQ dishes, coleslaw provides a refreshing and creamy contrast to the rich and savory pork chops.
- Corn on the Cob - Grilled or boiled corn on the cob adds a touch of sweetness and complements the smoky flavors of the pork chops.
- Baked Beans - The sweet and savory flavors of baked beans pair exceptionally well with BBQ pork chops, creating a comforting and delicious combination.
- Potato Salad - Creamy and tangy potato salad is a popular choice for BBQ meals, offering a satisfying and hearty side dish.
- Pasta Salad - A refreshing pasta salad with colorful veggies and a tangy dressing is a great addition to the meal.
How Long Do They Last?
Properly stored in an airtight container, cooked BBQ pork chops can last in the refrigerator for 3 to 4 days.
Can You Freeze Them?
If you want to extend the shelf life of BBQ pork chops, consider freezing them. Wrap the cooked pork chops individually in plastic wrap or aluminum foil to prevent freezer burn. Then, place them in an airtight container or freezer-safe bag. Frozen BBQ pork chops can typically be stored for up to 2 to 3 months.
More Perfect Pork Recipes
- Air Fryer Pork Chops
- Instant Pot Pork Chops with Rice
- Honey Mustard Pork Chops
- Pan Fried Pork Chops and Cabbage
- How to Make Juicy Pork Chops
- Oven Baked Ribs

If you already signed up, you should have received an email with a password to give you unlimited access to our FREE Printable Library. The password is case sensitive. Enter it below and get printing!
Password:
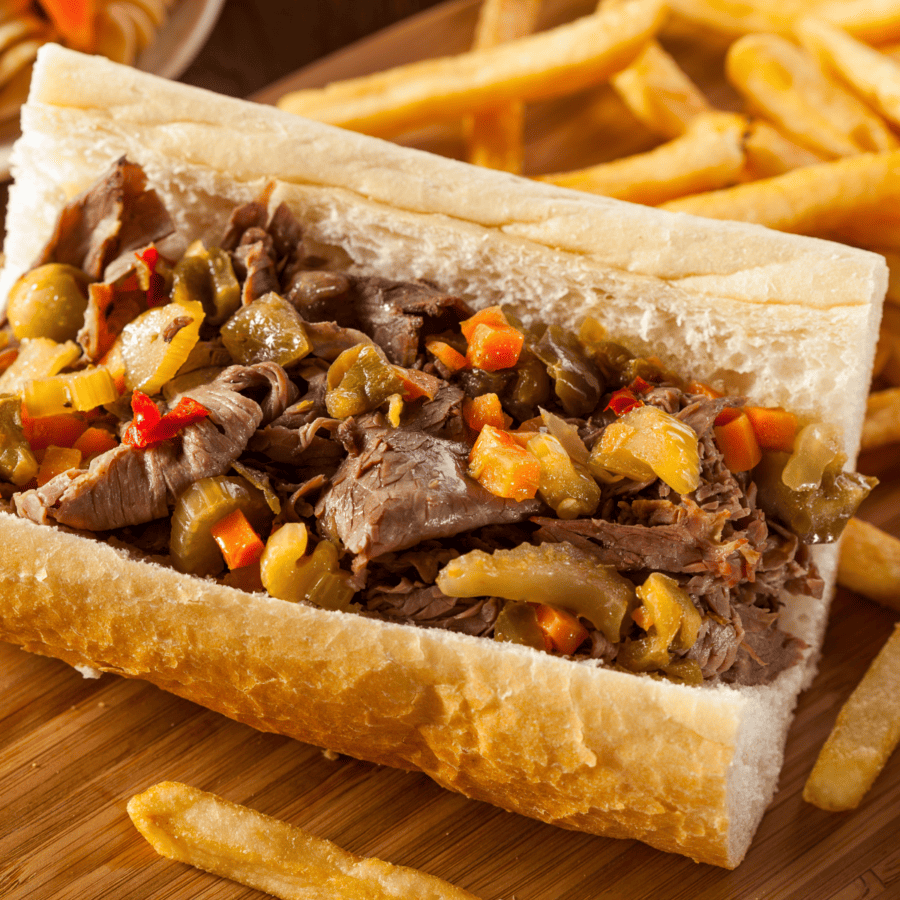
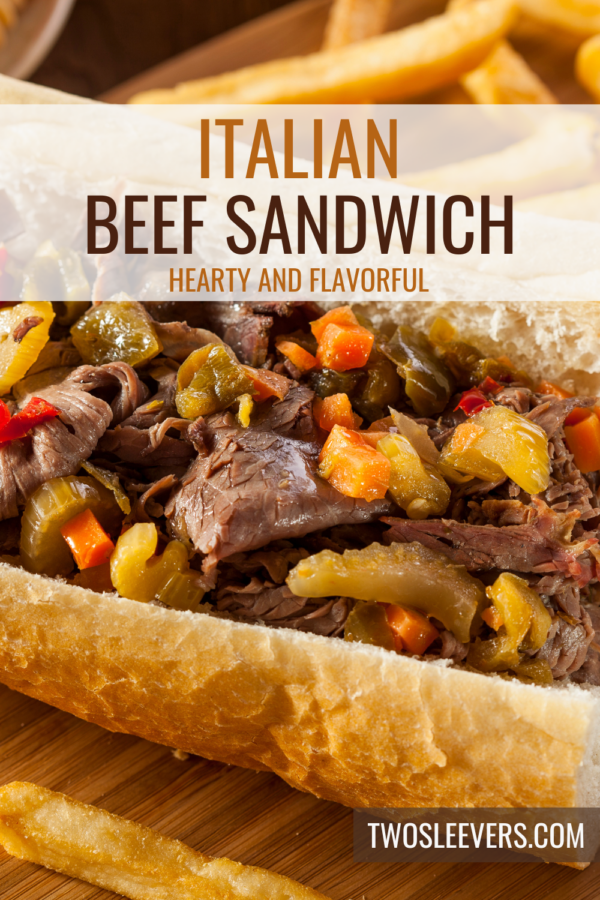
Bursting with savory flavors and tender beef, an Italian Beef Sandwich is a hearty treat that originated in Chicago but have captured the hearts (and taste buds) of food lovers worldwide.
Why This Will Be Your New Favorite Sandwich
- Easy. Slowly braise the beef chuck roast, shred, and top a crusty roll with tender meat, zesty giardiniera, and melty provolone cheese.
- Delicious. Bursting with flavorful braised beef, crunchy pickled vegetables, and creamy provolone cheese.
- Versatile. Use one of the tasty variations below to customize your next Italian Beef Sandwich for the perfect main course .
Whether you enjoy this beef recipe as a comforting weeknight dinner or a show-stopping party treat, this Italian classic is sure to win over friends and family with its hearty, satisfying taste.
What Is The Difference Between An Italian Beef Sandwich And A Philly Cheesesteak?
While both the Italian Beef Sandwich and the Philly Cheesesteak are popular and mouthwatering sandwiches, they have distinct differences in terms of origin, meat used, toppings, and overall flavor profile.
- Origin : Italian Beef Sandwich - It originated in Chicago, Illinois, in the early 20th century. It is deeply rooted in Italian-American culture and was first served at Italian-American weddings and banquets. Philly Cheesesteak - Originated in Philadelphia, Pennsylvania. It emerged in the 1930s when Pat Olivieri, a hot dog vendor, decided to grill some chopped beef on his hot dog grill and added cheese.
- Meat Used - Italian Beef Sandwich - The key ingredient is thinly sliced, slow-cooked beef, typically using cuts like beef chuck roast. The beef is seasoned with a blend of Italian herbs and spices for a rich and flavorful taste. Philly Cheesesteak - The centerpiece of the Philly Cheesesteak is thinly sliced ribeye steak. Traditionally, the beef is cooked on a griddle with onions, often chopped, to create a juicy and savory filling.
- Cheese and Toppings- Italian Beef Sandwich - It is usually served with giardiniera, which provides a tangy and spicy kick. Sweet or hot peppers and melted provolone cheese are also common toppings. Philly Cheesesteak - The classic Philly comes with melted cheese, typically Cheez Whiz, American, or provolone. Additional toppings may include sautéed onions, peppers, and mushrooms.
- Bread - Italian Beef Sandwich - The bread used for an Italian Beef Sandwich is typically a crusty Italian roll, providing a sturdy and chewy base to hold the juicy beef and toppings. Philly Cheesesteak - The Philly Cheesesteak is traditionally served on a long, soft roll. The softness of the roll complements the tender, thinly sliced beef.
What Is The Best Cut Of Meat To Use For Italian Beef?
The best cut of meat to use for Italian Beef is beef chuck roast. Chuck roast is a flavorful and tender cut of beef that comes from the shoulder area of the cow.
It is well-marbled with fat, which helps keep the meat moist and juicy during the slow-cooking process.
What Is An Italian Beef Sandwich Made Of?
- Beef Chuck Roast
- Olive Oil
- Onion
- Garlic
- Oregano
- Basil
- Thyme
- Rosemary
- Marjoram
- Sage
- Salt
- Black Pepper
- Beef Broth
- Dry Red Wine
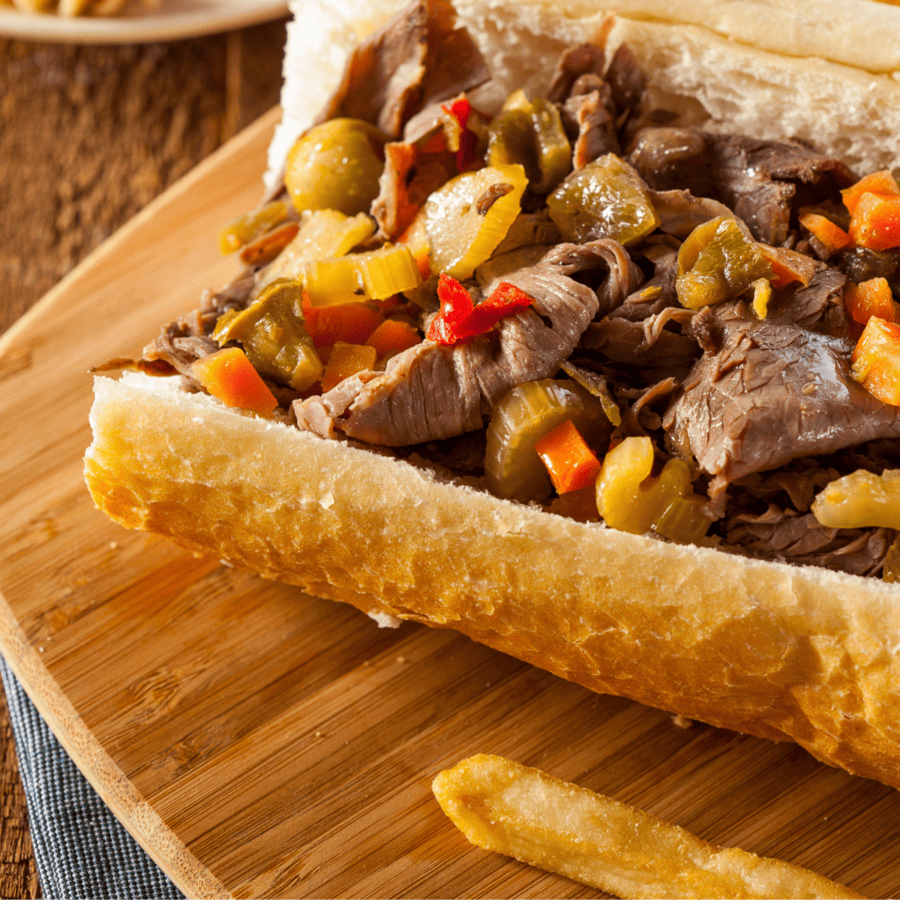
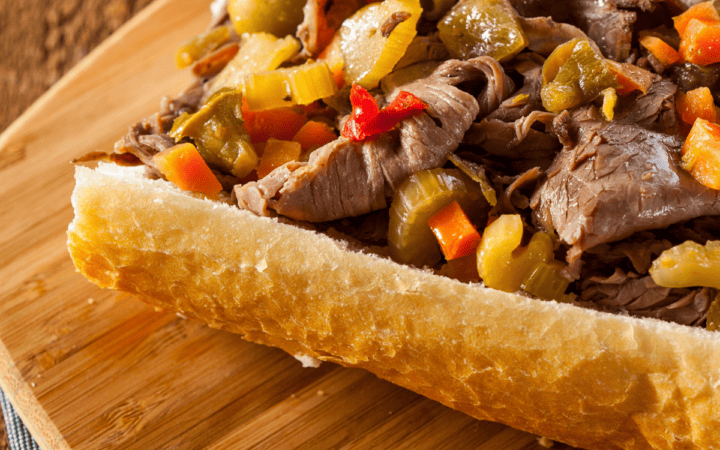
- Giardiniera
- Italian Rolls
- Provolone Cheese
How to Make An Italian Beef Sandwich
- Season and Sear the Beef. First, preheat your oven to 325F. Pat the chuck roast dry and season it with salt and black pepper. In a Dutch oven, heat the olive oil over medium-high heat. Sear the beef until browned and caramelized. Remove the beef from the pot and set it aside.
- Sauté the Aromatics. Then, in the same pot, add the sliced onions and minced garlic. Sauté until the onions are soft and translucent.
- Slow Cook the Beef. Next, return the seared beef to the pot with the onions and garlic. Add the dried oregano, basil, thyme, rosemary, marjoram, and sage. Pour in the beef broth and red wine, covering the beef partially. The liquid should come about two-thirds of the way up the meat. Cover the pot with a tight-fitting lid and transfer it to the preheated oven. Allow the beef to slow-cook for about 3 to 4 hours until it becomes tender and easily shreds with a fork.
- Shred and Flavor the Beef. Remove the pot from the oven and transfer the cooked beef to a cutting board. Using two forks, shred the beef into thin, flavorful strands. Return the shredded beef to the pot, mixing it well with the remaining liquid.
- Assemble the Italian Beef Sandwiches. Then, slice the Italian rolls in half lengthwise. Melt provolone cheese on the bottom halves of the rolls under the broiler for an extra indulgent touch. Pile the succulent Italian beef onto the rolls. Top the beef with giardiniera. Place the top halves of the rolls over the fillings.
- Garnish and Serve. Finally, serve the Italian Beef Sandwiches warm, accompanied by extra giardiniera and the flavorful liquid left from cooking the beef on the side for dipping.
Tips And Tricks
Making Italian Beef Sandwiches at home can be a rewarding and delicious experience. To ensure your Italian Beef turns out tender, flavorful, and authentically scrumptious, follow these tips and tricks:
- Choose the Right Cut of Meat: As mentioned earlier, opt for beef chuck roast for the best results. Its marbling and connective tissues make it perfect for slow cooking, resulting in tender and juicy Italian Beef.
- Season the Meat Generously: Before searing or slow-cooking the beef, season it generously with salt and black pepper. You can also add a sprinkle of garlic powder or onion powder for additional flavor.
- Slice Beef Thinly: Once the beef is cooked and tender, use a sharp knife to thinly slice the meat against the grain. Thin slices will ensure each bite is tender and easy to chew.
What Goes Best With Italian Beef Sandwiches?
Italian Beef Sandwiches pair wonderfully with a variety of delicious sides and accompaniments that enhance the overall dining experience. Here are some classic and tasty options to serve alongside them:
- Coleslaw: A refreshing coleslaw with a tangy dressing can provide a nice contrast to the savory Italian Beef. Its crisp texture and hint of acidity balance out the richness of the beef.
- Fries: Crispy french fries are always a crowd-pleaser. Whether they’re classic potato fries or sweet potato fries, they’re a fantastic option to serve with Italian Beef Sandwiches.
- Mixed Green Salad: A light and refreshing mixed green salad with a simple vinaigrette can provide a fresh contrast to the hearty sandwich.
How Long Does It Last?
If you have leftover Italian Beef Sandwiches, promptly store them in an airtight container or wrap them tightly in plastic wrap and refrigerate. When stored correctly, Italian Beef Sandwiches can last in the refrigerator for 3 to 4 days.
For the best quality and taste, it is recommended to consume them within 2 to 3 days.
Can You Freeze It?
If you want to extend the shelf life of Italian Beef Sandwiches, you can freeze them. To freeze, wrap the sandwiches tightly in plastic wrap or foil and place them in an airtight freezer-safe container or ziplock bag.
When frozen, they can last in the freezer for up to 2 to 3 months.
More Of Our Best Sandwich Recipes
- Italian Chopped Cheese
- Patty Melt
- Breakfast Sliders
- Turkey Pesto Sandwich
- Chicken Parmesan Sandwich
Italian Beef Sandwich | Hearty Beef Sandwich Recipe
Ingredients
- ▢ 3 pounds Beef Chuck Roast
- ▢ 1 tbsp Olive Oil
- ▢ 1 Onion
- ▢ 4 cloves Garlic
- ▢ 1 tsp Oregano
- ▢ 1 tsp Basil
- ▢ 1 tsp Thyme
- ▢ 1 tsp Rosemary
- ▢ 1 tsp Marjoram
- ▢ 1 tsp Sage
- ▢ 1 tsp Salt
- ▢ 1/2 tsp Black Pepper
- ▢ 3 cups Beef Broth
- ▢ 1/2 cup Dry Red Wine
- ▢ 1 cup giardiniera
- ▢ 6 Sanwich Rolls
- ▢ 6 slices Provolone Cheese
Instructions
- Season and Sear the Beef. First, preheat your oven to 325F. Pat the chuck roast dry and season it with salt and black pepper. In a Dutch oven, heat the olive oil over medium-high heat. Sear the beef until browned and caramelized. Remove the beef from the pot and set it aside.
- Sauté the Aromatics. Then, in the same pot, add the sliced onions and minced garlic. Sauté until the onions are soft and translucent.
- Slow Cook the Beef. Next, return the seared beef to the pot with the onions and garlic. Add the dried oregano, basil, thyme, rosemary, marjoram, and sage. Pour in the beef broth and red wine, covering the beef partially. The liquid should come about two-thirds of the way up the meat. Cover the pot with a tight-fitting lid and transfer it to the preheated oven. Allow the beef to slow-cook for about 3 to 4 hours until it becomes tender and easily shreds with a fork.
- Shred and Flavor the Beef. Remove the pot from the oven and transfer the cooked beef to a cutting board. Using two forks, shred the beef into thin, flavorful strands. Return the shredded beef to the pot, mixing it well with the remaining liquid.
- Assemble the Italian Beef Sandwiches. Then, slice the Italian rolls in half lengthwise. Melt provolone cheese on the bottom halves of the rolls under the broiler for an extra indulgent touch. Pile the succulent Italian beef onto the rolls. Top the beef with giardiniera. Place the top halves of the rolls over the fillings.
- Garnish and Serve. Finally, serve the Italian Beef Sandwiches warm, accompanied by extra giardiniera and the flavorful liquid left from cooking the beef on the side for dipping.
Get support & connect with our community on Facebook!
Nutrition
And don’t forget to check out my air fryer cookbooks! Every day easy air fryer , and Air Fryer Revolution .

