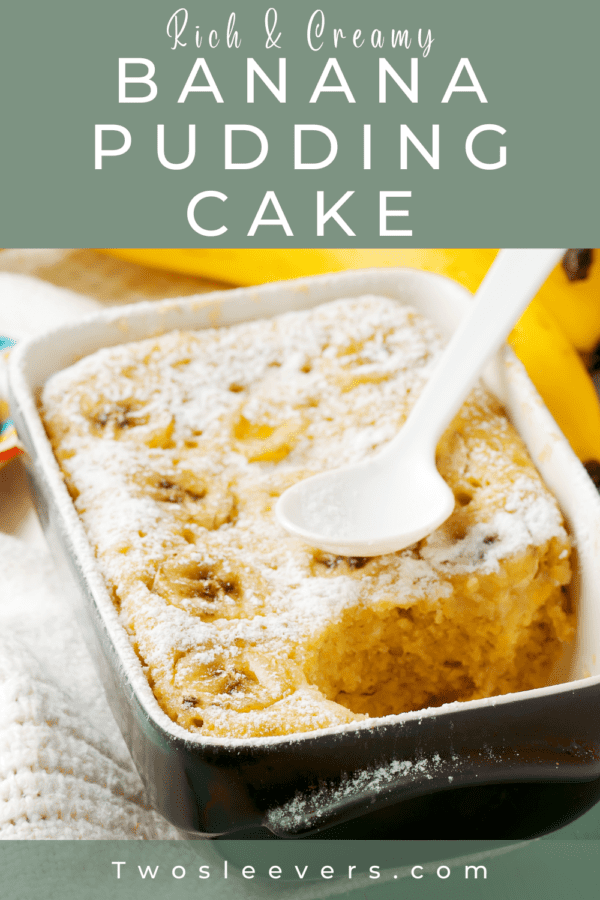
Banana pudding cake is a delicious dessert that combines the classic flavors of banana pudding and vanilla cake. This recipe is easy to follow and is sure to be a hit with your family and friends.

Why This Will Be Your New Favorite Indulgence
- Quick. A dessert that is fast to throw together for a quick treat or unexpected houseguests.
- Easy. Use just a few easy-to-find ingredients for this incredibly simple pour and cook recipe.
- Versatile. It can be served as a simple dessert or dressed up with toppings such as whipped cream, nuts, or chocolate chips. Switch it up with different pudding flavors and can be made with different kinds of cake.
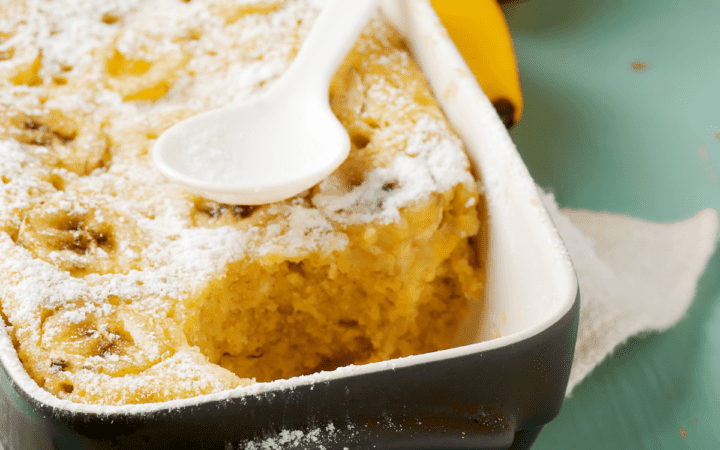
- Delicious. The moist yellow cake, ripe bananas, and creamy vanilla pudding come together to create a dessert that is both comforting and satisfying.
It is a delicious and comforting dessert that is perfect for any occasion. Its combination of flavors, textures, and versatility make it a crowd-pleaser that is sure to be a hit with everyone.
What Does Adding Instant Pudding To A Cake Mix Do?
Adding instant pudding mix to a cake mix can provide a number of benefits.
One benefit is that it can add extra moisture to the cake. Pudding is a creamy mixture that is mostly made of milk, it will help the cake to stay moist for longer and make it softer.
Adding pudding mix to the cake mix can also enhance the flavor of the cake, making it more delicious.
Ingredients To Grab
- Yellow Cake Mix - Acts as the fluffy, sweet base of the cake. Its buttery flavor pairs beautifully with banana and vanilla, while its soft crumb soaks up the pudding added later through the poke holes.
- Vegetable Oil - Adds moisture and richness to the cake, ensuring it stays soft and tender. It also helps keep the texture light and prevents the cake from drying out.
- Eggs - Provide structure and stability to the cake. They bind the ingredients together and contribute to the cake’s rise and soft texture.
- Bananas - Fresh bananas enhance the banana flavor and add natural sweetness and moisture to the cake. They also give the dessert a fruity, nostalgic profile.
- Instant Vanilla Pudding Mix - Poured into the poked holes of the baked cake, this creates a luscious, creamy filling that mimics traditional banana pudding. It adds flavor, moisture, and that signature pudding texture.
- Milk - Used to prepare the pudding. Whole milk is typically best for richness, helping the pudding set thick and creamy so it seeps into the cake without becoming runny.
- Heavy Cream - Whipped into a topping, it adds luxurious, billowy lightness to the finished cake. It balances the sweetness and adds a silky mouthfeel.
- Powdered Sugar - Sweetens the whipped cream without affecting its texture. It also helps stabilize the topping slightly, making it pipeable or spreadable.
- Vanilla Extract - Enhances and deepens the vanilla notes in the whipped cream topping and overall dessert. It adds warmth and rounds out the flavor profile.
- Chopped Pecans - Used as a garnish, they introduce a nutty crunch that contrasts beautifully with the soft cake and creamy pudding. Pecans also add visual appeal and a subtle richness. Each ingredient plays a key role in making this dessert ultra-moist, creamy, and packed with nostalgic banana pudding flavor layered into every bite.
How To Make Banana Pudding Cake
- Preheat and Prep. Preheat your oven to 350 degrees F. Grease and flour a 9x13-inch baking pan.
- Prepare the Cake Mix. Prepare the yellow cake mix according to the package instructions and pour it into the prepared pan.
- Bake the Cake. Bake the cake in the preheated oven for 35-40 minutes or until a toothpick inserted into the center comes out clean.
- Layer the Bananas. Peel and mash the ripe bananas and spread them evenly over the top of the cooked cake.
- Assemble Pudding Mixture. In a medium bowl, whisk together the instant vanilla pudding mix and milk until well combined and thickened. Pour the pudding mixture over the bananas and cake.
- Make the Frosting. In a separate bowl, combine the powdered sugar, heavy cream, and vanilla extract and layer it over the top of the pudding mixture.
- Finish and Serve. Cut the cake, serve, and enjoy!

Tips And Tricks
Banana pudding cake combines the comforting flavors of a classic Southern dessert with the ease of a moist cake. Follow these tips and tricks to ensure your cake turns out rich, flavorful, and irresistibly creamy:
- Use Ripe Bananas . Choose bananas that are speckled or deeply yellow. Their natural sweetness and bold flavor shine through in both the cake and filling.
- Let the Cake Cool Before Assembling . If you’re adding pudding or whipped topping between layers, let the cake cool completely so the filling doesn’t melt or slide off.
- Chill Before Serving . Refrigerating the cake for a few hours or overnight allows the flavors to meld and the pudding to set for a cleaner slice and creamier texture.
- Layer with Sliced Bananas Just Before Serving . To prevent browning, add fresh banana slices just before serving or dip them in lemon juice if assembling ahead of time.
Banana Pudding Cake Variations
- Banana Chocolate Chip - Mix 1/2 cup of chocolate chips into the yellow cake batter before spreading it into the pan. The chocolate chips will melt and create a delicious chocolate swirl throughout the cake.
- Banana Cream Cheese - Spread a layer of cream cheese frosting over the mashed bananas before pouring the pudding mixture over it. The tangy cream cheese flavor will complement the sweet banana and vanilla pudding perfectly.
- Banana Nutella - Spread a layer of Nutella over the mashed bananas before pouring in the mixture. Nutella’s rich chocolate and hazelnut flavor will add a decadent twist to the classic banana pudding cake.
- Banana Coconut - Sprinkle 1/2 cup of shredded coconut over the pudding mixture. The coconut will add a nice texture and tropical flavor to the cake.
- Banana Caramel - Drizzle caramel sauce over the pudding mixture. The caramel will create a gooey, sweet layer on the cake that will be irresistible.
These are just a few ideas, the possibilities are endless, and you can get creative and come up with your own variations of a banana pudding cake. Have fun and enjoy experimenting with different flavors!
How Long Does It Last?
Banana pudding cake will last for about 3-4 days when stored in an airtight container in the refrigerator. The bananas and pudding in the cake can cause it to become mushy if it’s left out at room temperature for too long, so it’s best to keep it refrigerated to maintain its texture and flavor.
How To Freeze It
If you want to extend the shelf life of your banana pudding cake, you can also freeze it. To do this, place the cake in an airtight container or wrap it tightly in plastic wrap and place it in the freezer. Frozen banana pudding cake will last for up to 3 months.
When ready to serve the frozen cake, let it thaw in the refrigerator overnight or place it in the oven at 350 degrees F for 10-15 minutes.
It’s important to note that the whipped cream and nuts (if used) should be added just before serving, as they don’t hold up well in the refrigerator or freezer.
More Delicious Dessert Recipes
- Peach Cobbler Dump Cake
- Keto Apple Pie Filling
- Baked Apples
Banana Pudding Cake | Pudding Cake Recipe
Ingredients
- ▢ 1 box yellow cake mix
- ▢ 3 eggs
- ▢ 1/2 cup vegetable oil
- ▢ 3 bananas
- ▢ 1 box instant vanilla pudding
- ▢ 2 cups milk
- ▢ 2 cups heavy whipping cream
- ▢ 1 cup powdered sugar
- ▢ 1 tsp powdered sugar
Instructions
- Preheat your oven to 350 degrees F. Grease and flour a 9x13 inch baking pan.
- Prepare the yellow cake mix according to the package instructions and pour it into the prepared pan.
- Bake the cake in the preheated oven for 35-40 minutes or until a toothpick inserted into the center comes out clean.
- Peel and mash the ripe bananas and spread them evenly over the top of the cake.
- In a medium bowl, whisk together the instant vanilla pudding mix and milk until well combined. Pour the pudding mixture over the bananas and cake.
- In a separate bowl, combine the powdered sugar, heavy cream, and vanilla extract and blend to create a whipped cream frosting.
- Cut, serve, and enjoy!
Get support & connect with our community on Facebook!
Nutrition
Don’t forget to check out my otherBest-selling Instant Pot Cookbooks!
Indian Instant Pot , Keto Instant Pot, Instant Pot Fast and Easy , Healthy Instant Pot & Vegetarian Instant Pot .


If you already signed up, you should have received an email with a password to give you unlimited access to our FREE Printable Library. The password is case sensitive. Enter it below and get printing!
Password:
Banana Pudding Cake | Pudding Cake Recipe
Ingredients
- 1 box yellow cake mix
- 3 eggs
- 1/2 cup vegetable oil
- 3 bananas
- 1 box instant vanilla pudding
- 2 cups milk
- 2 cups heavy whipping cream
- 1 cup powdered sugar
- 1 tsp powdered sugar
Instructions
- Preheat your oven to 350 degrees F. Grease and flour a 9x13 inch baking pan.
- Prepare the yellow cake mix according to the package instructions and pour it into the prepared pan.
- Bake the cake in the preheated oven for 35-40 minutes or until a toothpick inserted into the center comes out clean.
- Peel and mash the ripe bananas and spread them evenly over the top of the cake.
- In a medium bowl, whisk together the instant vanilla pudding mix and milk until well combined. Pour the pudding mixture over the bananas and cake.
- In a separate bowl, combine the powdered sugar, heavy cream, and vanilla extract and blend to create a whipped cream frosting.
- Cut, serve, and enjoy!
Banana Pudding Cake | Pudding Cake Recipe https://twosleevers.com/banana-pudding-cake/
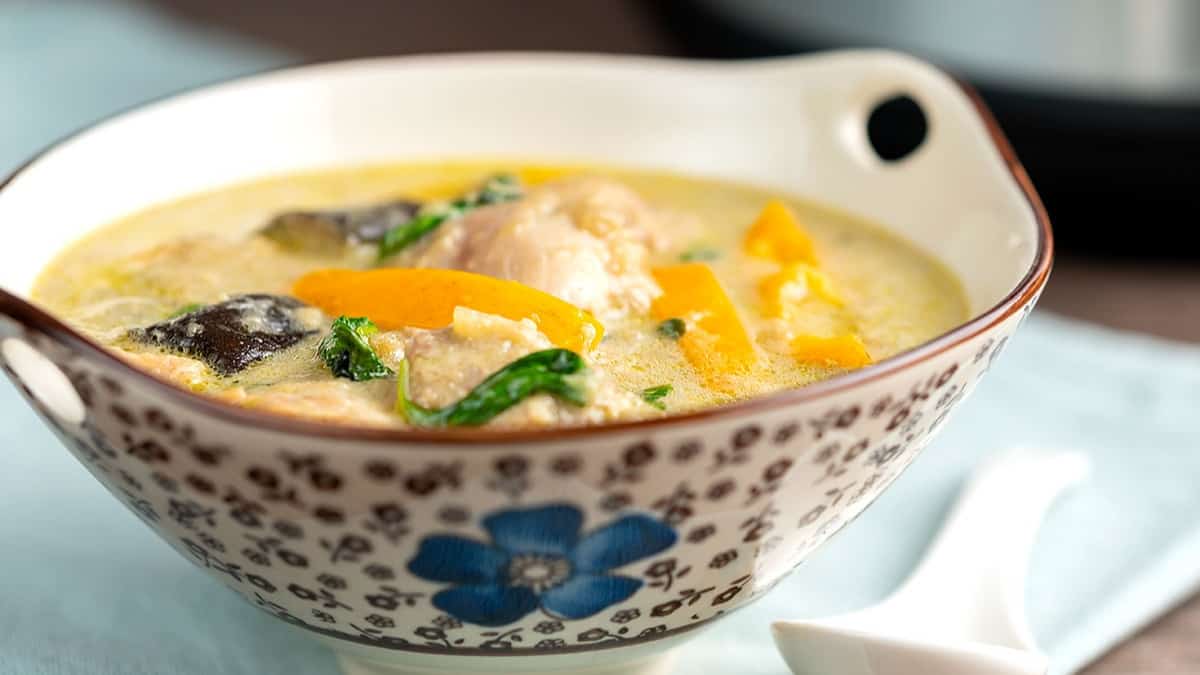
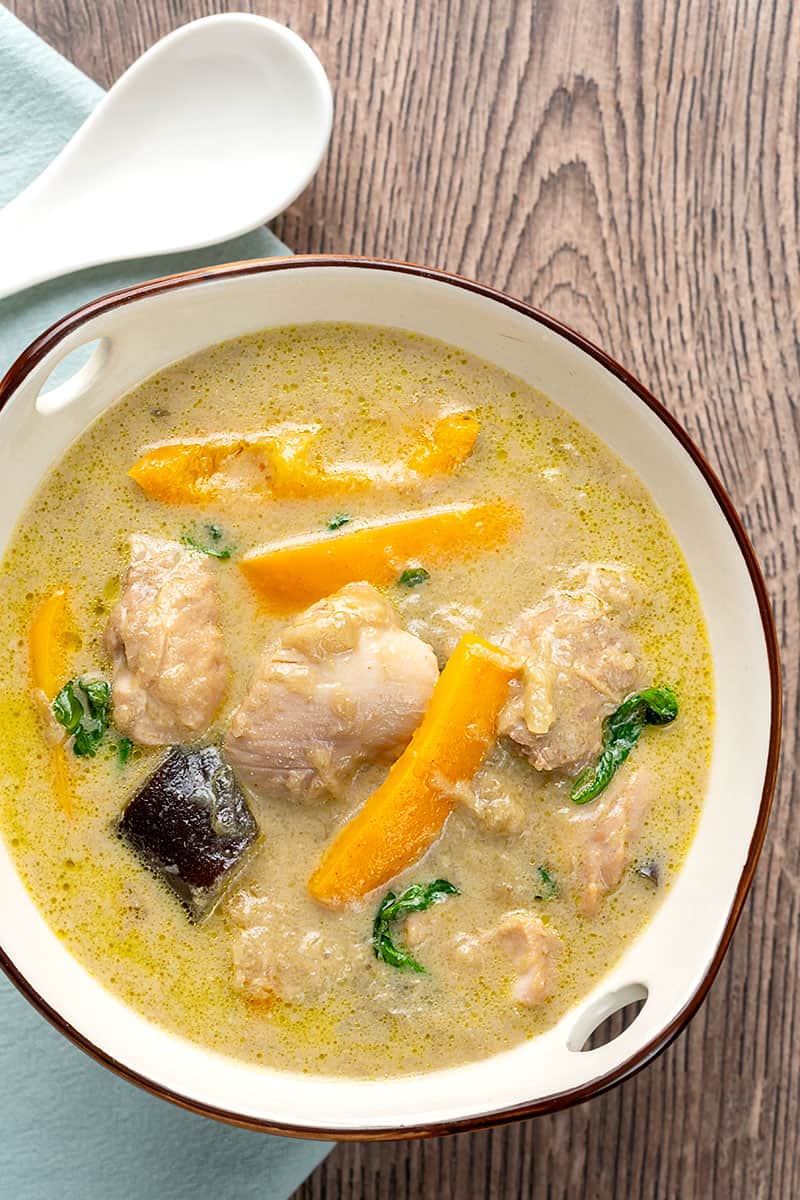
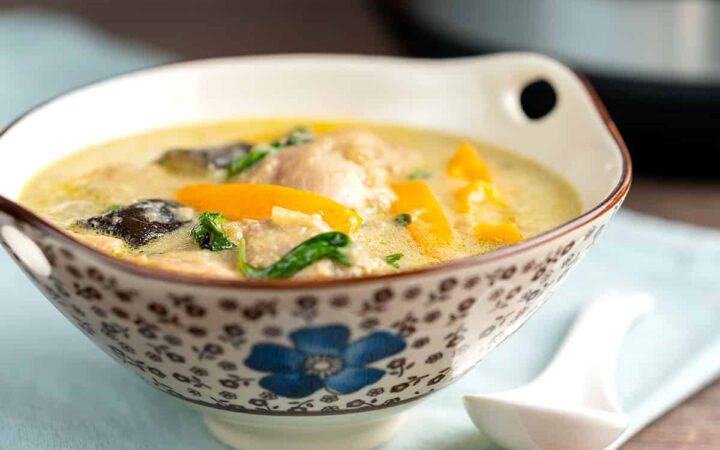
This Green Curry is a perfect, authentic Thai Green Curry recipe with chicken and vegetables. Make a fragrant, aromatic Thai dish in your Instant Pot or Slow Cooker!

Why This Authentic Thai Recipe Is So Great
- Tasty. This Green Curry is absolutely bursting with Thai flavor! It’s spicy without being overbearing, the tender chicken and eggplant add a delightful bite to the dish, and the distinct flavor from the green chiles is incredible.
- Quick. You can have this whole curry dish done in around 30 minutes with a little help from your Instant Pot . Seriously, a deliciously authentic Thai Curry recipe you can make in no time.
- Easy. Not only is this dish done quickly, but it’s quite simple to throw together. I use Maesri Curry Paste to help speed along the process so you don’t have to worry about having to make the paste yourself. A little time heating up the aromatics and curry paste and then cook the Thai curry to perfection, simple as that.
- Instant Pot or Slow Cooker. Want dinner done right away? Make this flavorful chicken recipe quickly by using your Instant Pot . Don’t need dinner finished until later tonight? Make this Thai dish recipe in your slow cooker . You have options, so make it however is best for you!
- Keto-friendly. This recipe only has 11 grams of carbs per serving and can be made even more low carb by making a few simple ingredient substitutions.
Is Thai Red Or Thai Green Curry Hotter?
I’ve learned it’s best to think of curry as a stoplight when you’re using curry paste.
Green=go ahead. It has a little heat but it isn’t too hot to handle.
Yellow= use caution. If you have a low heat tolerance or a sensitive stomach, this may be too much for you.
Red= pump the brakes. This is generally highest on the heat scale and is only for those that like things spicy.
So, Thai Green Curry will pack a smaller punch on the curry heat scale.
Ingredients You’ll Need
- 1 tablespoon Coconut Oil - Used to sauté the aromatics and curry paste, adding a subtle coconut flavor and richness.
- 2 tablespoons Curry Paste - The flavor base of the dish, providing heat, spice, and the signature green curry taste; adjust for preferred spice level.
- 1 tablespoon Minced Ginger - Adds warmth, freshness, and a slightly spicy note that enhances the curry’s complexity.
- 1 tablespoon Garlic - Contributes savory depth and balances the bold spices in the curry paste.
- 1 cup Onions - Adds natural sweetness and body to the sauce as they soften and blend into the curry.
- 1 pound Boneless Skinless Chicken Thighs - The main protein, tender and flavorful, soaking up the curry sauce beautifully.
- 1 can Bamboo Shoots - Adds a mild crunch and traditional Thai texture; can be omitted for a lower-carb version.
- 1/2 cup Water - Helps create steam for pressure cooking and adjusts the curry’s consistency.
- 1 tablespoon Fish Sauce - Brings umami depth and authentic Thai saltiness to the dish.
- 2 tablespoons Soy Sauce - Adds a savory, slightly sweet flavor that enhances the curry’s balance.
- 2 teaspoons Sugar - Balances the spice and acidity, rounding out the flavors.
- 1 teaspoon Salt - Fine-tunes the seasoning, depending on the saltiness of other ingredients.
- 2 cups Eggplant - Absorbs the curry sauce, becoming tender and flavorful.
- 1 Green Pepper - Adds color, mild sweetness, and crisp texture to the curry.
- 1/2 cup Basil Leaves (Thai basil preferred) - Provides a fragrant, slightly licorice-like aroma that brightens the dish.
- 1 cup Full-Fat Coconut Milk - Creates a creamy, rich sauce that balances the spice and ties all the flavors together.
- 1 tablespoon Lemon Juice - Adds a bright, tangy finish that enhances the overall freshness of the curry.
How To Make Instant Pot Thai Green Curry Recipe
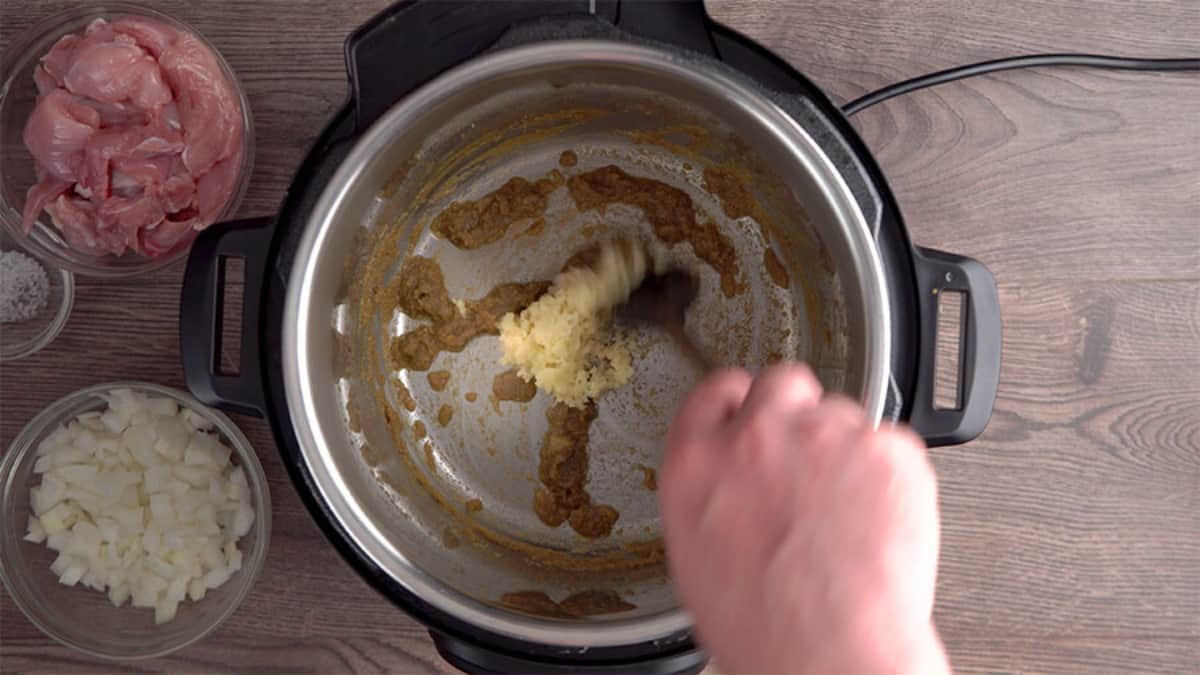
- Sauté. Turn your Instant Pot on Sauté, high, and when it’s hot, add coconut oil. When the oil is hot, add the curry paste and cook this curry paste for 1-2 minutes.
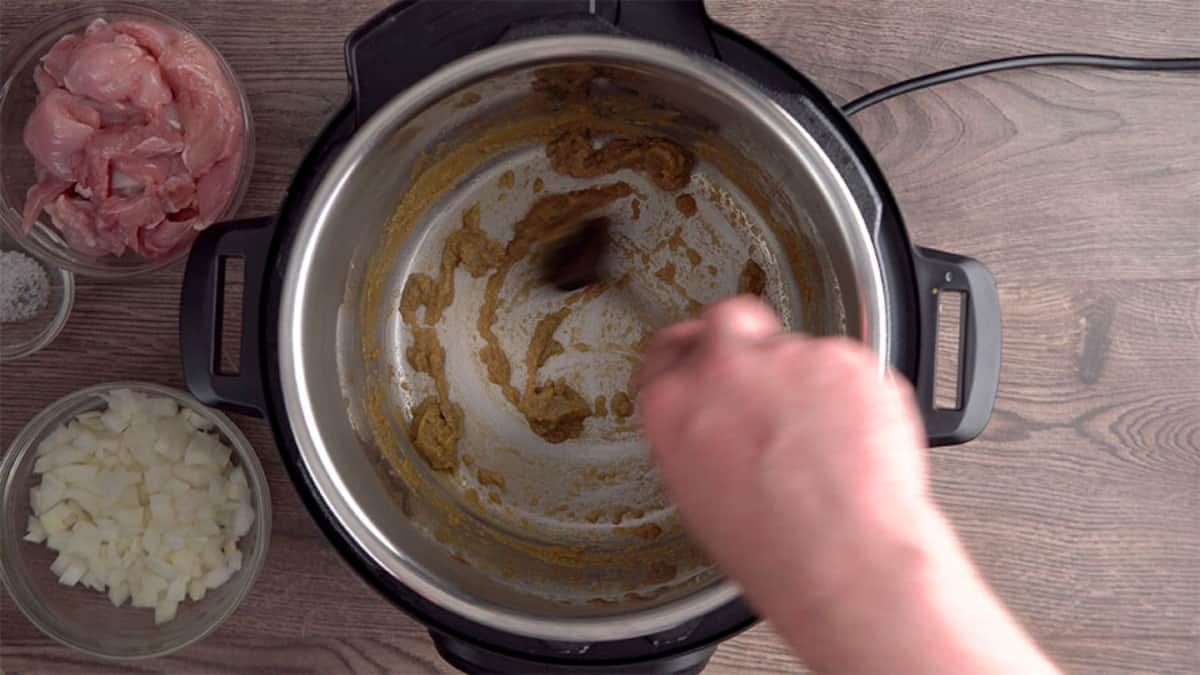
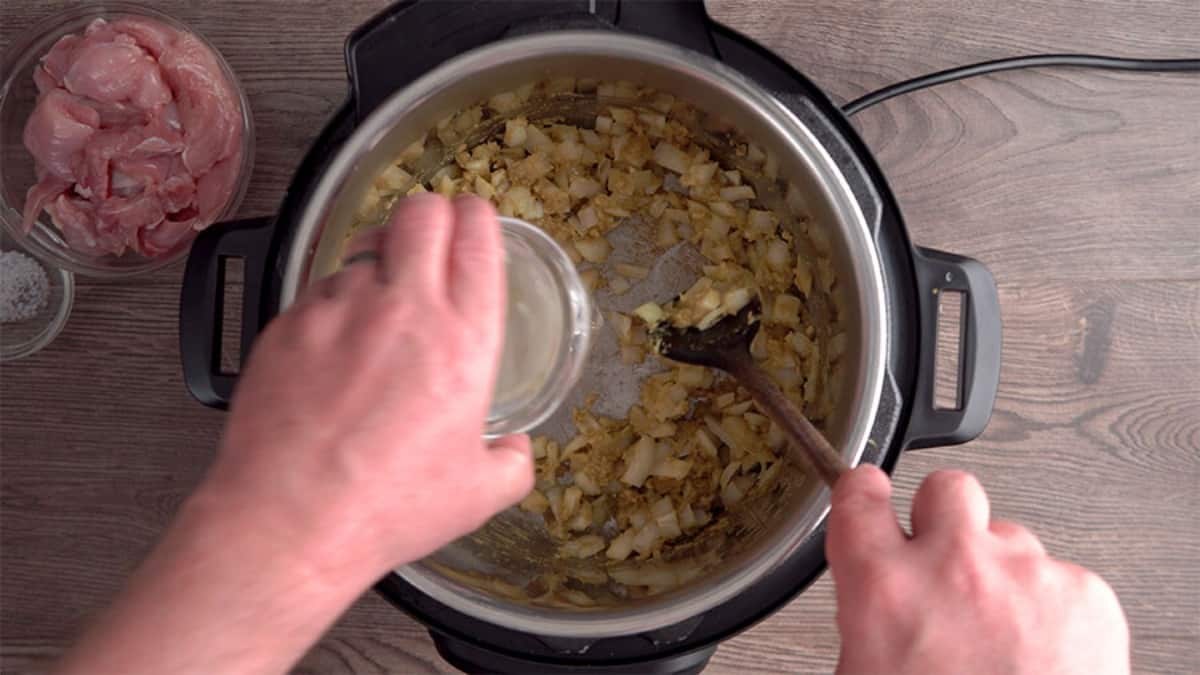
- Stir-fry. Add in minced ginger and garlic and stir-fry for 30 seconds. Add the onions and stir it all together.
- Deglaze. Add ¼ cup water and thoroughly deglaze the pot. Press CANCEL to turn off sauté.
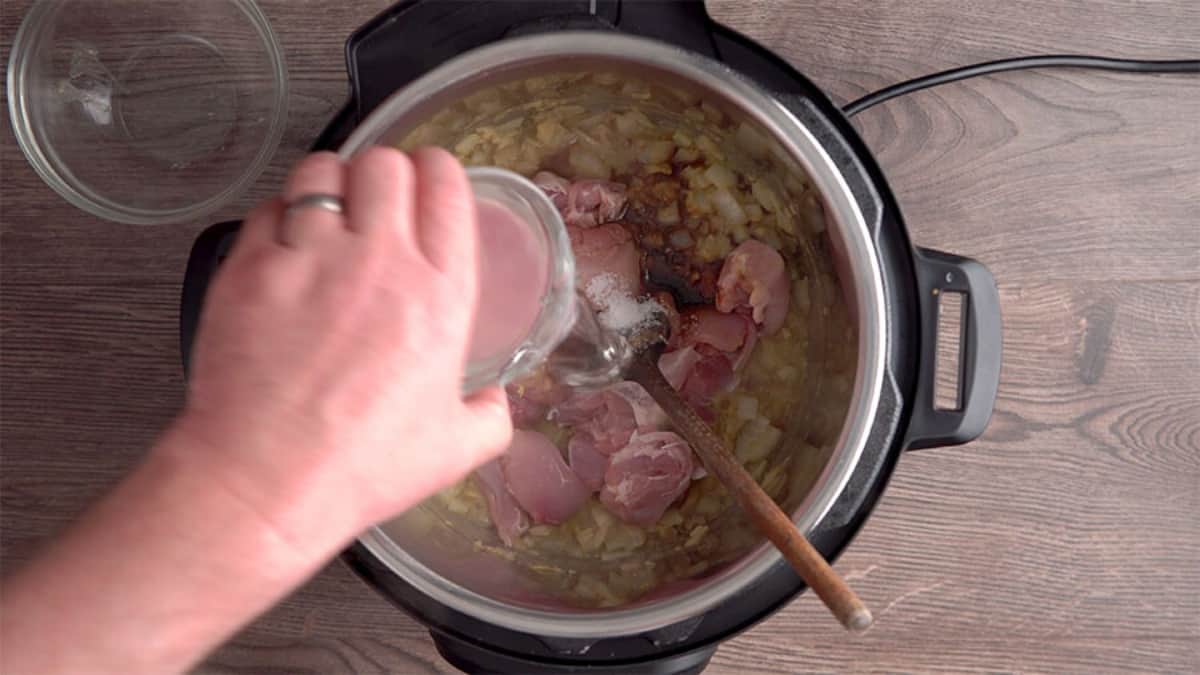
- Add chicken , bamboo shoots, the remaining ½ cup of water, fish sauce, soy sauce, sweetener, and salt and mix well.
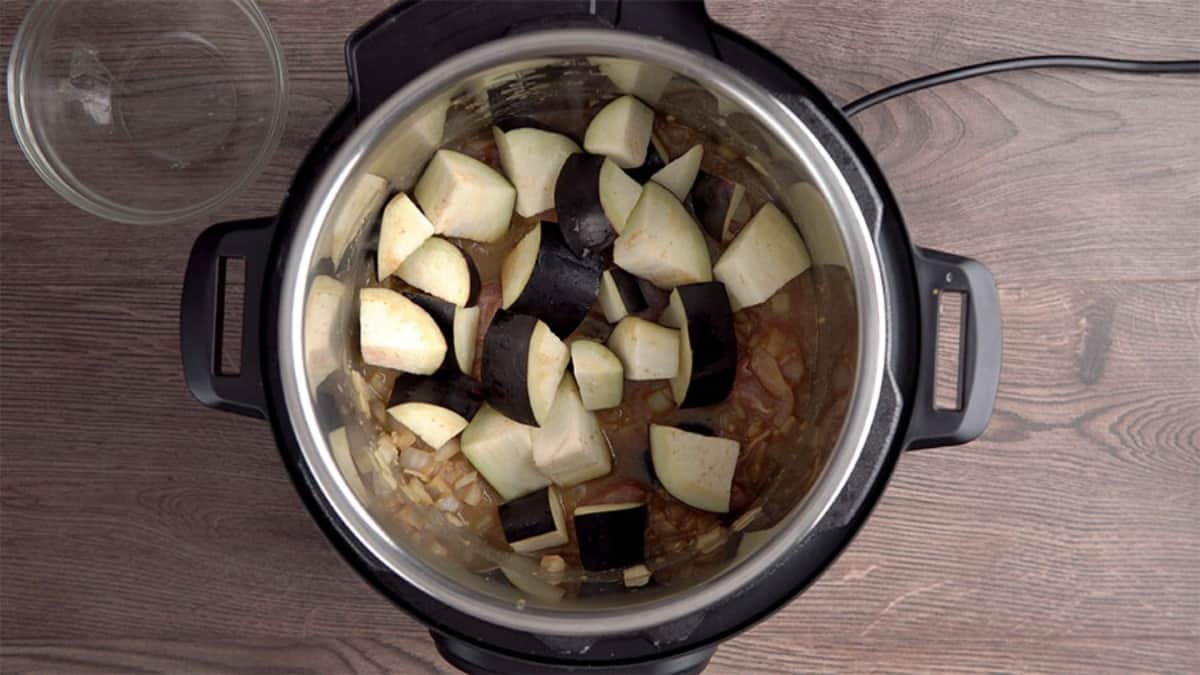
- Place eggplant on top. Do not stir. You are doing this to slow down the cooking of the eggplant while allowing enough time for the chicken to cook.
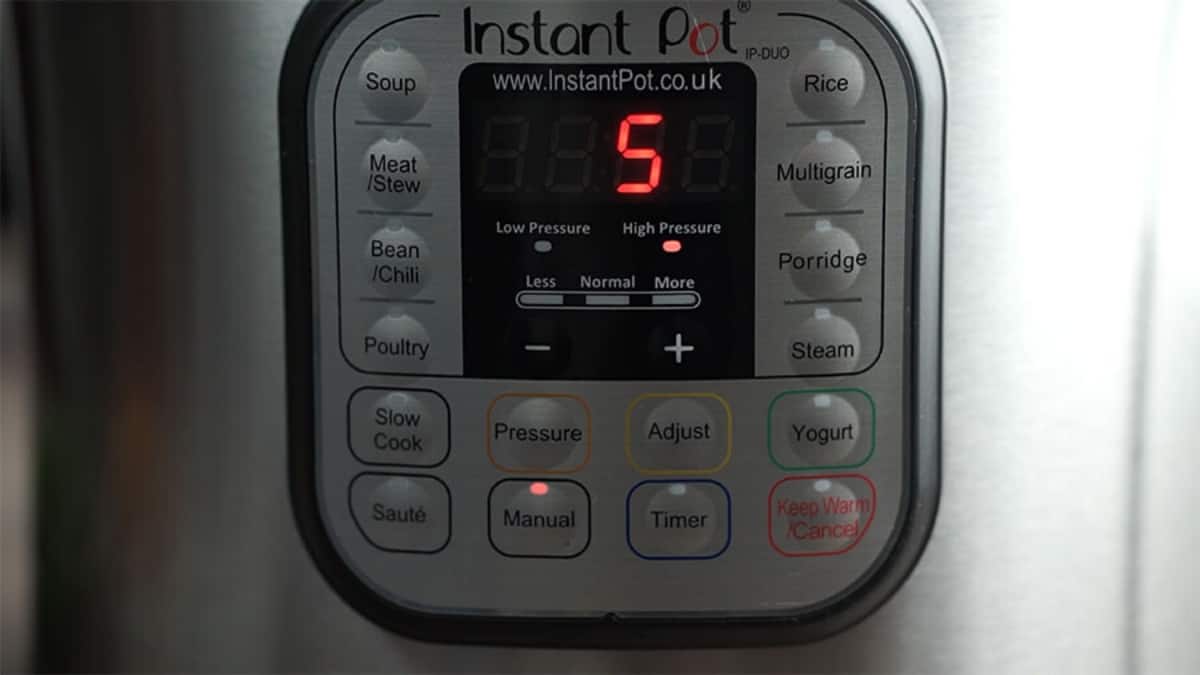
- Cook. Secure the lid on the pot. Set the Instant Pot at High pressure for 5 minutes. When cook time is complete, let pot release pressure naturally for 5 minutes, and then release all remaining pressure.
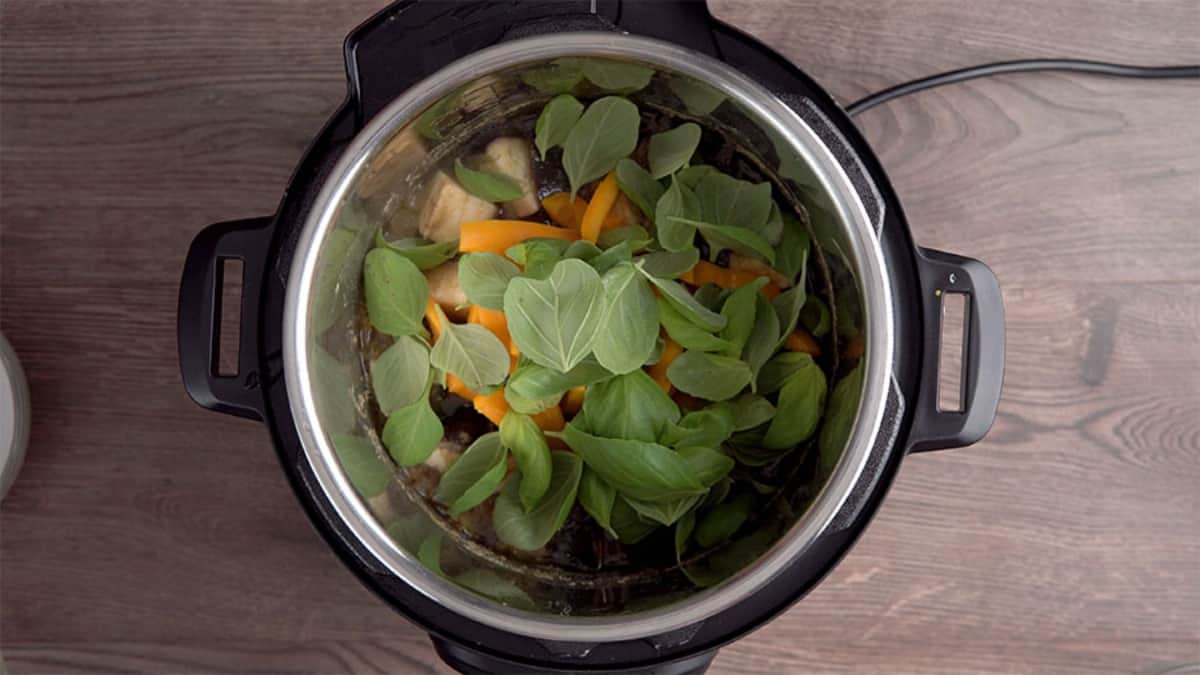
- Sauté. Set the pot on Sauté. Add the bell peppers and basil leaves, and allow them to wilt for 30 seconds. Slowly pour in the coconut milk, stirring to incorporate. Allow the coconut milk to heat through but do not allow it to bubble and boil, as that will cause it to separate.
- Serve. Squeeze in lemon juice and serve with jasmine rice or shirataki noodles for a low carb option.
How To Make Slow Cooker Green Curry
- Sauté. Turn your Instant Pot on Sauté, high, and when it’s hot, add coconut oil. When the oil is hot, add the curry paste and cook this curry paste for 1-2 minutes. This process can also be done on the stovetop if you aren’t using an Instant Pot.
- Stir-fry. Add in minced ginger and garlic and stir-fry for 30 seconds. Add the onions and stir it all together.
- Deglaze. Add ¼ cup water and thoroughly deglaze the pot. Press CANCEL to turn off sauté.
- Add ingredients. Add chicken, bamboo shoots, eggplant, the remaining ½ cup of water, fish sauce, soy sauce, and sweetener to your Instant Pot or slow cooker and mix well.
- Slow cook. Press cancel to turn off the Sauté mode and switch to Slow Cook mode (if using an Instant Pot ). Set your Instant Pot on MEDIUM or your slow cooker on LOW for 8 hours.
How To Use The Slow Cooker Function On Your Instant Pot
I’d heard so much about how people couldn’t get slow cooker recipes to work for them that I was determined to try. Here’s the secret:
- Low = Warm
- Medium = Low on a traditional slow cooker
- High = High on a traditional slow cooker.
Now that you know this, your slow cooker recipes should work out just fine in the Instant Pot . I did this Thai Green Curry recipe on medium because I didn’t want the coconut milk to boil. Also chicken cooks in 3-4 hours on high, and most people aren’t home to turn it off and I wanted to give it the full eight hours to see how it would turn out.
What Does Green Curry Taste Like?
Green curry is widely considered the most popular of Thai curry recipes. It gets its distinct color and flavor from the green curry paste, which is typically made up of green chiles, coriander seeds, lemongrass, ginger, turmeric, kaffir lime leaf, and basil.
This Thai curry recipe is spicy but typically milder than red curry. It’s also sweeter than red curry and has a fresh, brighter taste to it.
Is Green Curry Healthy?
Green curry is rich in vitamins, minerals, and protein. It’s a great source of iron and vitamin A. It’s also fairly low in carbs and can be made even lower carb by subbing sugar for Splenda, leaving out the bamboo shoots and by serving it over shirataki noodles . It’s higher in fat, which is actually perfect for those living a keto lifestyle .
Check out myHow to start a Keto dietpost here for weekly keto meal plan outlines, for information on how to calculate macros, and other great keto tips.
Tips And Tricks
Making Instant Pot Thai Green Curry is an easy way to enjoy bold, restaurant-quality flavors at home with minimal effort. Here are some helpful tips and tricks to make it turn out perfectly every time:
- Use full-fat coconut milk . It gives the curry a rich, creamy texture and helps mellow the spice from the green curry paste.
- Sauté the curry paste first . Cooking the curry paste in coconut oil before adding other ingredients deepens its flavor and releases the aromatic oils.
- Adjust spice levels . Start with less curry paste and add more after pressure cooking if you prefer a milder heat.
- Don’t overcook the vegetables . Add tender vegetables like peppers or basil after pressure cooking to keep them vibrant and crisp.
- Cut chicken evenly . Bite-sized, uniform pieces ensure even cooking and tender results.
Variations
Instant Pot Thai Green Curry is a versatile dish that can easily be customized to suit your taste, dietary needs, or what you have on hand. Here are some delicious variations to try:
- Vegetarian Thai Green Curry - Skip the chicken and fish sauce, and add tofu or chickpeas for plant-based protein. Use soy sauce or tamari for seasoning.
- Seafood Green Curry - Replace chicken with shrimp, scallops, or white fish for a lighter, coastal-inspired version.
- Beef or Pork Curry - Swap chicken for thinly sliced beef or pork for a heartier, more savory option.
If you want to bring more international flavors into your kitchen that are made with the convenience of your slow cooker, give Slow Cooker Chicken Saag , Slow Cooker Butter Chicken , or Crock Pot Chipotle Chicken a try!
How Long Does It Last?
Instant Pot Thai Green Curry typically lasts about 3 to 4 days when stored properly in the refrigerator. Allow the curry to cool completely before transferring it to an airtight container to maintain its freshness and prevent separation of the coconut milk.
When reheating, warm it gently on the stove or in the microwave, stirring occasionally to restore the sauce’s smooth texture.
Can You Freeze It?
For longer storage, you can freeze it for up to 2 months, though the vegetables may soften slightly once thawed.
It’s best enjoyed within a few days for the freshest flavor and creamy consistency.
More Delicious Thai Recipes
- Thai Cashew Chicken - An easy one-pan cashew chicken stir fry.
- Air Fryer Thai Peanut Chicken - An easy yet delicious dish that mixes things up a bit.
- Bang Bang Shrimp - Sweet, spicy and tangy shrimp perfection.
- Air Fried Beef Satay - A super-fast, authentic recipe that requires very little hands-on time.
- Air Fryer Cornish Game Hens Thai Gai Yang - A simple cornish game hen dish you’ll want to make again and again.
- Spicy Basil Beef - A healthy, fast dinner option that’s oh so delicious.
- Thai Green Curry - A perfect, authentic Thai curry with chicken and vegetables.
- Instant Pot Thai Coconut Pandan Custard - A delicious keto treat you can make in your pressure cooker.
- Thai Green Curry Mussels - an easy stove top green curry recipe.
Authentic Thai Green Curry Recipe | Easy Green Thai Curry
Equipment
- Instant Pot
- Slow Cooker
Ingredients
- ▢ 1 tablespoon ( 1 tablespoon ) Coconut Oil
- ▢ 2 tablespoons ( 2 tablespoons ) Curry Paste , (adjust to preferred spice level)
- ▢ 1 tablespoon ( 1 tablespoon ) Minced Ginger
- ▢ 1 tablespoon ( 1 tablespoon ) Garlic
- ▢ 1 cup ( 80 g ) Onions , chopped
- ▢ 1 lb ( 453.59 g ) Boneless Skinless Chicken Thighs , cut into bite size pieces
- ▢ 1 can Bamboo Shoots , small can, optional (omit for low carb)
- ▢ 1/2 cup Water , divided
- ▢ 1 tablespoon ( 1 tablespoon ) Fish Sauce
- ▢ 2 tablespoon ( 2 tablespoon ) Soy Sauce
- ▢ 2 teaspoons ( 2 teaspoons ) Sugar , or Splenda
- ▢ 1 teaspoon ( 1 teaspoon ) Kosher Salt , (if needed)
- ▢ 2 cups ( 164 g ) Eggplant , peeled and chopped into large chunks
- ▢ 1 ( 1 ) Green Pepper , or yellow or orange pepper, chopped
- ▢ 1/2 cup ( 12 g ) Basil leaves , (use Thai basil if you can find it)
- ▢ 1 cup ( 240 g ) Full-Fat Coconut Milk
- ▢ 1 tablespoon Lemon Juice
Instructions
Instant Pot Green Curry
- Turn your Instant Pot on Sauté, high, and when it’s hot, add coconut oil. When the oil is hot, add the curry paste and cook this curry paste for 1-2 minutes.
- Add in minced ginger and garlic and stir-fry for 30 seconds. Add the onions and stir it all together.
- Add ¼ cup water and thoroughly deglaze the pot. Press CANCEL to turn off sauté.
- Add chicken, bamboo shoots, the remaining ½ cup of water, fish sauce, soy sauce, sweetener, and salt and mix well.
- Place eggplant on top. Do not stir. You are doing this to slow down the cooking of the eggplant while allowing enough time for the chicken to cook.
- Secure the lid on the pot. Set the Instant Pot at High pressure for 5 minutes. When cook time is complete, let pot release pressure naturally for 5 minutes, and then release all remaining pressure.
- Set the pot on Sauté. Add the bell peppers and basil leaves, and allow them to wilt for 30 seconds. Slowly pour in the coconut milk, stirring to incorporate. Allow the coconut milk to heat through but do not allow it to bubble and boil, as that will cause it to separate.
- Squeeze in lemon juice and serve with jasmine rice or shirataki noodles for a low carb option.
Slow Cooker Green Curry
- Turn your Instant Pot on Sauté, high, and when it’s hot, add coconut oil. When the oil is hot, add the curry paste and cook this curry paste for 1-2 minutes. This process can also be done on the stovetop if you aren’t using an Instant Pot.
- Add in minced ginger and garlic and stir-fry for 30 seconds. Add the onions and stir it all together.
- Add ¼ cup water and thoroughly deglaze the pot. Press CANCEL to turn off sauté.
- Add chicken, bamboo shoots, eggplant, the remaining ½ cup of water, fish sauce, soy sauce, and sweetener to your Instant Pot or slow cooker and mix well.
- Press cancel to turn off the Sauté mode and switch to Slow Cook mode (if using an Instant Pot ). Set your Instant Pot on MEDIUM or your slow cooker on LOW for 8 hours.
Get support & connect with our community on Facebook!
Nutrition
Don’t forget to check out my otherBest-selling Instant Pot Cookbooks!
Indian Instant Pot , Keto Instant Pot, Instant Pot Fast and Easy , Healthy Instant Pot & Vegetarian Instant Pot .
