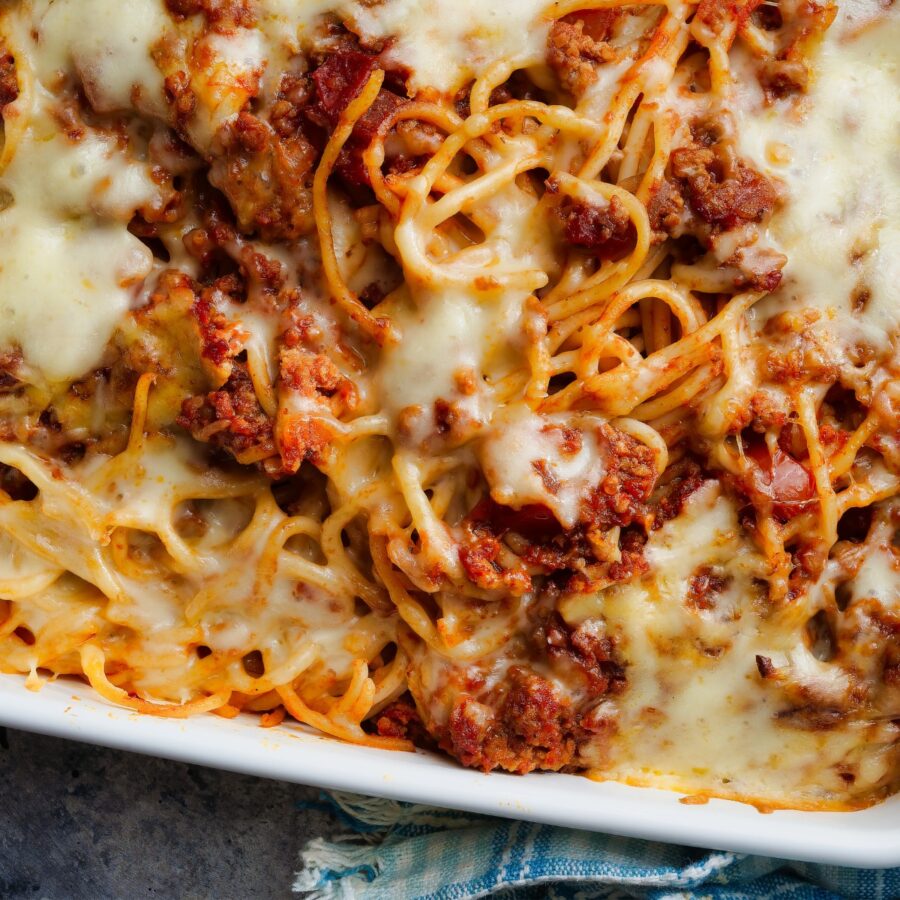
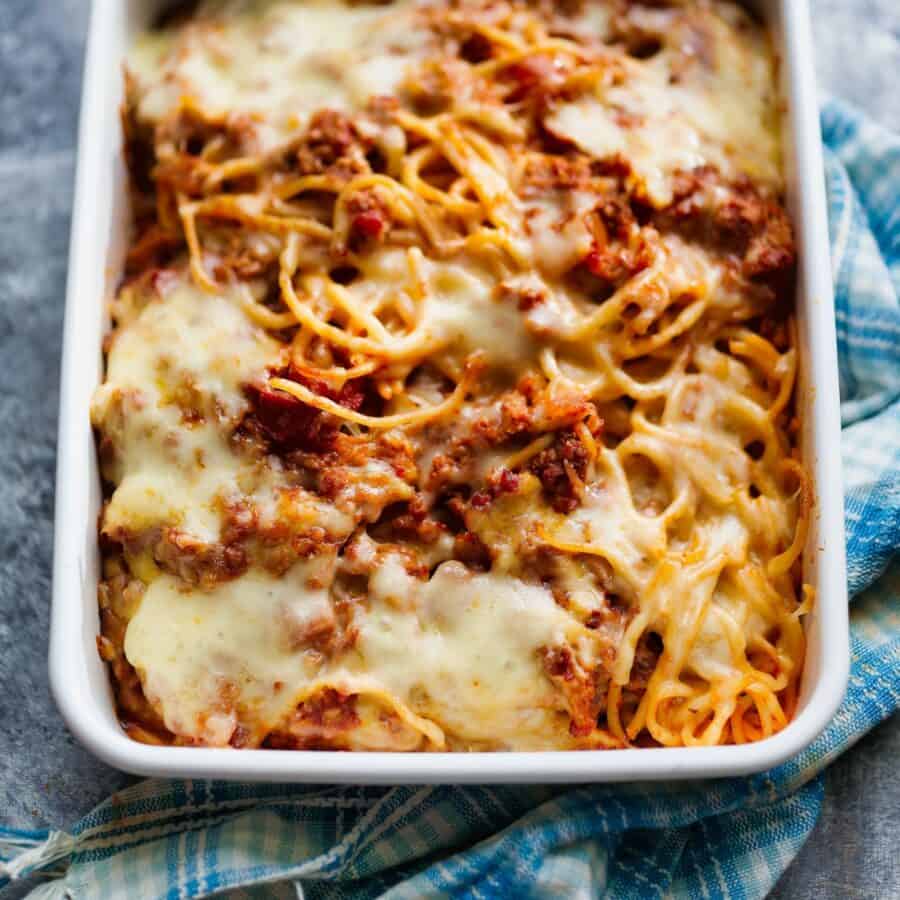
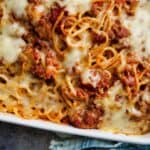
Are you in the mood for a hearty, satisfying, and effortlessly delicious meal? Look no further. Our Baked Spaghetti recipe is a true classic, perfect for family dinners, potlucks, or whenever you’re craving a comforting dish that practically cooks itself.
Why You’ll Love This Easy Dinner Recipe
- Effortless Perfection . Making Baked Spaghetti is a breeze. No need to babysit a pot or pan – assemble, bake, and enjoy. The oven does the work for you!
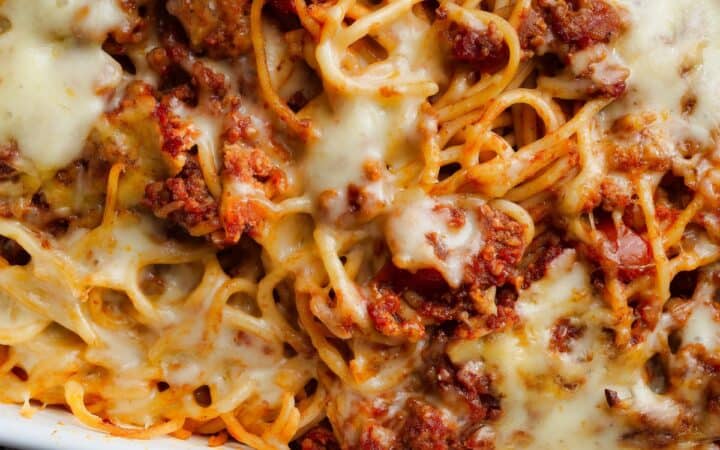
- Classic Comfort . This dish combines the beloved flavors of spaghetti and gooey cheese in every bite. It’s the ultimate comfort food, bringing warmth and nostalgia to your table.
- Versatile and Crowd-Pleasing . Baked Spaghetti is a crowd-pleaser. Customize it with your favorite ingredients, from veggies to different types of cheese, to satisfy even the pickiest eaters.
- Meal Prep Champion . Make a big batch, and you’ll have leftovers that taste even better the next day. Ideal for those busy weeknights when you crave a quick, delicious meal.
Is Baked Spaghetti Better Than Regular?
The choice between Baked Spaghetti and regular spaghetti comes down to personal preference.
Some people enjoy the added richness and textures of baked versions, while others prefer the simplicity and immediacy of traditional spaghetti. It’s a matter of taste, and both options can be delicious in their own right.
How Do You Keep Baked Spaghetti From Drying Out?
To keep baked spaghetti from drying out, you can follow these tips:
- Sufficient Sauce . Ensure that your spaghetti is well-coated in sauce. Use enough sauce to keep the pasta moist, but not swimming in it. The sauce is essential for retaining moisture.
- Cover with Foil . When baking your spaghetti in the oven, start by covering the baking dish with aluminum foil. This helps trap moisture and prevents the top layer from drying out too quickly.
- Don’t Overcook . Avoid overcooking the spaghetti before baking. Undercook it slightly, as it will continue to cook in the oven. This prevents the pasta from becoming too soft and dry during baking.
What Is Baked Spaghetti Made Of?
- Spaghetti - The star of the show, this pasta provides a hearty base.
- Ground Beef - Adds a meaty richness to the sauce.
- Onion and Garlic - The aromatic foundation of the sauce.
- Spaghetti Sauce - Your favorite jar of marinara sauce or homemade sauce if you prefer.
- Italian Seasoning - A blend of herbs that infuse the dish with Italian flair.
- Eggs - They help bind the spaghetti together.
- Parmesan Cheese - For a nutty, savory kick.
- Mozzarella Cheese - The gooey, melty cheese that makes this dish a comfort food classic.
- Fresh Basil - Optional but adds a burst of fresh flavor.
- Salt and Pepper - To season it to perfection.
How To Make Baked Spaghetti
- Cook the Spaghetti . Start by boiling the spaghetti according to the package instructions. This is typically 7-9 minutes. It should be cooked until just al dente, as it will continue to cook in the oven.
- Brown the Beef . While the pasta cooks, brown the ground beef in a skillet over medium-high heat. Add the chopped onions and minced garlic, sautéing for 5-7 minutes, or until they’re aromatic and the beef is no longer pink.
- Sauce It Up . Add your favorite marinara sauce or a homemade one to the browned beef. Sprinkle in the Italian seasoning, then let it simmer for a few minutes to develop its flavors.
- Binding Agent . In a separate bowl, whisk together eggs, grated Parmesan cheese, and a portion of shredded mozzarella. This mixture acts as a binder for the spaghetti.
- Layer and Bake . In a greased baking dish, layer the cooked spaghetti, the egg and cheese mixture, and the meat sauce. Repeat for a delightful spaghetti layer cake. Top with more mozzarella cheese.
- Baking Magic . Bake your masterpiece in an oven preheated to 350F for 15-20 minutes or until the cheese turns golden and bubbly, and the spaghetti is tender. The kitchen fills with the aroma of baked goodness.
- Finishing Touch . Before serving, sprinkle fresh basil over the cheesy top if you like a burst of freshness.
Tips And Tricks
To perfect your Baked Spaghetti, consider these tips and tricks:
- Sauce Consistency . If your sauce is too thin, let it simmer a bit longer to thicken up. A thicker sauce ensures your baked dish isn’t too watery.
- Al Dente Pasta . Don’t overcook the spaghetti before baking. It should be slightly undercooked because it continues cooking in the oven.
Variations
Variety is the spice of life, and Baked Spaghetti offers many opportunities for creativity:
- Vegetarian Delight - Skip the meat or replace it with plant-based alternatives for a vegetarian version.
- Mediterranean Twist - Add kalamata olives, feta cheese, and sun-dried tomatoes for a Mediterranean flavor profile.
- Sausage Sensation - Use Italian sausage instead of ground beef for a zesty kick.
What To Serve With Baked Spaghetti
Wondering what to serve with Baked Spaghetti? Here are some ideas:
- Cauliflower Breadsticks - A classic side that pairs perfectly with saucy pasta dishes.
- Green Salad - A fresh green salad with vinaigrette dressing balances the richness of Baked Spaghetti.
- Roasted Vegetables - Serve with a side of roasted vegetables like asparagus, zucchini, or bell peppers.
How Long Is Leftover Spaghetti Good In The Fridge?
Store leftover Baked Spaghetti in an airtight container in the refrigerator. It will stay fresh for 3-4 days. Reheat portions in the oven or microwave until heated through.
Can You Freeze It?
Yes, Baked Spaghetti freezes wonderfully. Divide it into portions, place in airtight containers, or wrap tightly in aluminum foil or plastic wrap. Store in the freezer for 2-3 months, and you’ll have a homemade meal ready when you need it.
More Perfect Pasta Recipes
- Shrimp Pasta
- Pesto Pasta
- Instant Pot Eggplant Pasta
- Haluski Recipe
- Mushroom Pasta with Mascarpone
Baked Spaghetti Recipe | Easy Baked Spaghetti Casserole
Ingredients
- ▢ 12 ounces Spaghetti Noodles
- ▢ 1 pound Ground Beef
- ▢ 1 Onion , diced
- ▢ 3 cloves Garlic , minced
- ▢ 3 cups Spaghetti Sauce
- ▢ 1 tbsp Italian Seasoning
- ▢ 2 Eggs
- ▢ 1 cup Parmesan Cheese , grated
- ▢ 2 cups Mozzarella Cheese , shredded
- ▢ Fresh Basil , chopped, for garnish
- ▢ 1/2 tsp Kosher Salt
- ▢ 1/4 tsp Ground Black Pepper
Instructions
- Cook the Spaghetti . Start by boiling the spaghetti according to the package instructions. This is typically 7-9 minutes. It should be cooked until just al dente, as it will continue to cook in the oven.
- Brown the Beef . While the pasta cooks, brown the ground beef in a skillet over medium-high heat. Add the chopped onions and minced garlic, sautéing for 5-7 minutes, or until they’re aromatic and the beef is no longer pink.
- Sauce It Up . Add your favorite marinara sauce or a homemade one to the browned beef. Sprinkle in the Italian seasoning, then let it simmer for a few minutes to develop its flavors.
- Binding Agent . In a separate bowl, whisk together eggs, grated Parmesan cheese, and a portion of shredded mozzarella. This mixture acts as a binder for the spaghetti.
- Layer and Bake . In a greased baking dish, layer the cooked spaghetti, the egg and cheese mixture, and the meat sauce. Repeat for a delightful spaghetti layer cake. Top with more mozzarella cheese.
- Baking Magic . Bake your masterpiece in an oven preheated to 350F for 15-20 minutes or until the cheese turns golden and bubbly, and the spaghetti is tender. The kitchen fills with the aroma of baked goodness.
- Finishing Touch . Before serving, sprinkle fresh basil over the cheesy top if you like a burst of freshness.
Get support & connect with our community on Facebook!

If you already signed up, you should have received an email with a password to give you unlimited access to our FREE Printable Library. The password is case sensitive. Enter it below and get printing!
Password:
Baked Spaghetti Recipe | Easy Baked Spaghetti Casserole
Ingredients
- 12 ounces Spaghetti Noodles
- 1 pound Ground Beef
- 1 Onion diced
- 3 cloves Garlic minced
- 3 cups Spaghetti Sauce
- 1 tbsp Italian Seasoning
- 2 Eggs
- 1 cup Parmesan Cheese grated
- 2 cups Mozzarella Cheese shredded
- Fresh Basil chopped, for garnish
- 1/2 tsp Kosher Salt
- 1/4 tsp Ground Black Pepper
Instructions
- Cook the Spaghetti . Start by boiling the spaghetti according to the package instructions. This is typically 7-9 minutes. It should be cooked until just al dente, as it will continue to cook in the oven.
- Brown the Beef . While the pasta cooks, brown the ground beef in a skillet over medium-high heat. Add the chopped onions and minced garlic, sautéing for 5-7 minutes, or until they’re aromatic and the beef is no longer pink.
- Sauce It Up . Add your favorite marinara sauce or a homemade one to the browned beef. Sprinkle in the Italian seasoning, then let it simmer for a few minutes to develop its flavors.
- Binding Agent . In a separate bowl, whisk together eggs, grated Parmesan cheese, and a portion of shredded mozzarella. This mixture acts as a binder for the spaghetti.
- Layer and Bake . In a greased baking dish, layer the cooked spaghetti, the egg and cheese mixture, and the meat sauce. Repeat for a delightful spaghetti layer cake. Top with more mozzarella cheese.
- Baking Magic . Bake your masterpiece in an oven preheated to 350F for 15-20 minutes or until the cheese turns golden and bubbly, and the spaghetti is tender. The kitchen fills with the aroma of baked goodness.
- Finishing Touch . Before serving, sprinkle fresh basil over the cheesy top if you like a burst of freshness.
Baked Spaghetti Recipe | Easy Baked Spaghetti Casserole https://twosleevers.com/baked-spaghetti-recipe/

If you’re a fan of cool, minty, and chocolatey treats, you’re in for a delightful experience with our Homemade Peppermint Patty recipe. These refreshing confections are incredibly easy to make and offer a burst of minty freshness in every bite. Whether you enjoy them as an after-dinner treat or a homemade gift, these patties are sure to satisfy your sweet tooth.

Why You’ll Love This Minty Delight
- Simple Ingredients . You only need a handful of basic ingredients to make these patties, and most of them are probably already in your kitchen.
- No-Bake . No need to turn on the oven for this recipe. It’s a no-bake treat, perfect for all skill levels.
- Customizable . You can coat the peppermint centers with dark, milk, or white chocolate, depending on your preference.
- Homemade Gifts . Make a batch of these and share them with friends and family. They also make fantastic holiday gifts.
What Is The White Stuff In A Peppermint Patty?
The white stuff in a peppermint patty is the peppermint-flavored filling. It’s typically made from a mixture of powdered sugar, softened butter, peppermint extract, light corn syrup, and a small amount of water. This filling is what gives the peppermint patty its distinctive minty flavor and creamy texture.
Ingredients You’ll Need
- Powdered Sugar- The powdered sugar is the primary sweetener and texturizer in the peppermint patty filling. It provides the desired sweetness and helps create a smooth, dough-like consistency for the patty centers.
- Unsalted Butter- The softened unsalted butter contributes to the texture and flavor of the peppermint patty filling. It adds a rich, creamy element to the filling while helping to bind the ingredients together.
- Peppermint Extract- Peppermint extract is the key flavoring ingredient that gives the peppermint patties their signature minty taste. It provides a refreshing and cool flavor to the candy centers.
- Light Corn Syrup- Corn syrup is used to add sweetness and moisture to the filling. It helps maintain a soft, smooth consistency in the patty centers and prevents them from becoming too dry.
- Water- Water is added as needed to adjust the texture of the peppermint patty filling. It’s used to reach the right consistency where the dough is pliable and easy to work with.
- Dark or Milk Chocolate- The dark or milk chocolate is used to coat the peppermint patty centers. It provides a luscious, chocolatey exterior that contrasts with the minty filling. You can choose between dark or milk chocolate based on your personal preference.
- Vegetable Shortening- Vegetable shortening can be added to the melted chocolate when coating the peppermint patties. It helps the chocolate set with a glossy finish and prevents it from becoming too thick. This step is optional but can enhance the appearance of the patties.
These ingredients work together to create the classic combination of mint and chocolate found in peppermint patties, resulting in a sweet, cool, and creamy center covered in a rich chocolate shell.
How To Make A Peppermint Patty
- Create the Peppermint Filling. In a mixing bowl, combine the powdered sugar, softened butter, peppermint extract, and corn syrup. Start with 1 tablespoon of water and mix everything together until you have a soft, pliable dough. If it’s too dry, add a bit more water, a teaspoon at a time.
- Create the Patties and Freeze. Roll the peppermint dough into a log, about 1-inch in diameter. Then, slice it into individual patties, around 1/4-inch thick. Place them on a parchment paper-lined tray and freeze for about 30 minutes.
- Make the Chocolate Shell. In a microwave-safe bowl, melt the chocolate and vegetable shortening (if using) in 30-second intervals, stirring between each interval until smooth.
- Assemble the Peppermint Patties. Using a fork or dipping tool, submerge each frozen peppermint patty into the melted chocolate, ensuring it’s fully coated. Shake off any excess chocolate and place the coated patty back onto the parchment paper.
- Allow to Set. Let the patties sit until the chocolate hardens. You can speed up the process by placing them in the refrigerator for about 15-20 minutes.
- Serve and Enjoy! Once the chocolate has set, your homemade peppermint patties are ready to enjoy! Store them in an airtight container in a cool place.

Tips And Tricks
Making homemade peppermint patties can be a delightful and rewarding experience. Here are some tips and tricks to help you achieve the best results:
- Soften Butter Properly . Soften the unsalted butter at room temperature to avoid any lumps in the filling. Microwave it for just a few seconds if necessary, but be cautious not to melt it completely.
- Gradually Add Liquid . When adding water to the filling mixture, do so gradually. Start with a smaller amount and add more if needed to achieve the right consistency. You want the filling to be smooth but not too wet.
- Chill the Filling . After preparing the filling, allow it to chill in the refrigerator for at least 30 minutes. This will make it easier to work with and shape.
- Use Parchment Paper . When rolling and shaping the filling into patties, place them on parchment paper to prevent sticking. You can also dust your hands with powdered sugar to prevent sticking.
Variations
While the classic peppermint patty recipe is a beloved treat, you can add your own twist and create variations to suit your preferences. Here are some fun variations:
- Chocolate Mint Swirl - Create a marbled effect by mixing dark and white chocolate. After dipping the peppermint filling in dark chocolate, drizzle melted white chocolate over the top for a visually appealing and delicious twist.
- Flavor Infusions - Experiment with different extract flavors to add a unique twist. Try using spearmint, orange, raspberry, or almond extract to create distinctive and flavorful patties.
- Peppermint Crunch - Add some texture to your peppermint patties by mixing crushed candy canes or peppermint candies into the filling. You can also sprinkle extra crushed peppermint on top of the chocolate coating.
Ways To Enjoy Them
Peppermint patties are versatile treats that can be enjoyed in various ways. Here are some delightful ways to savor and enjoy them:
- After-Dinner Mint - Peppermint patties make a perfect after-dinner mint. Keep them on hand to satisfy your sweet tooth and freshen your breath after a meal.
- Coffee or Hot Chocolate Stirrer - Drop a peppermint patty into your hot coffee or hot chocolate and stir until it melts. You’ll infuse your drink with a delightful minty flavor.
- Ice Cream Topping - Crush or chop peppermint patties and sprinkle them over your favorite ice cream. They add a refreshing crunch and a pop of minty sweetness.
- S’mores Upgrade - Substitute a peppermint patty for the traditional chocolate square in your s’mores. The combination of marshmallow, graham cracker, and peppermint patty creates a delicious twist on a classic treat.
How Long Do They Last?
Properly stored in an airtight container, your homemade peppermint patties will last for about 2-3 weeks. If they last that long without being devoured!
Can You Freeze Them?
Yes, you can freeze peppermint patties. Freezing is a great way to extend the shelf life of these treats if you have a surplus or want to enjoy them over a longer period.
Store the container or bag in the freezer. Peppermint patties can be kept frozen for several months, and they will still be safe to eat after that time, but their quality might decline slightly.
More Homemade Candies
- No Bake Peanut Butter Bars
- Keto Gummy Bears
- Raspberry Cream Fat Bombs
- Keto Sweet Cream Truffles
- Chocolate Truffles


Peppermint Patty Recipe | Homemade Peppermint Patties
Ingredients
- ▢ 3 cups Powdered Sugar
- ▢ 2 tbsp Unsalted Butter , softened
- ▢ 1 1/2 tsp Peppermint Extract
- ▢ 2 tbsp Light Corn Syrup
- ▢ 2 tbsp Water
- ▢ 12 ounces Milk Chocolate Chips
- ▢ 1 tbsp Vegetable Shortening , for melting chocolate
Instructions
- Create the Peppermint Filling. In a mixing bowl, combine the powdered sugar, softened butter, peppermint extract, and corn syrup. Start with 1 tablespoon of water and mix everything together until you have a soft, pliable dough. If it’s too dry, add a bit more water, a teaspoon at a time.
- Create the Patties and Freeze. Roll the peppermint dough into a log, about 1-inch in diameter. Then, slice it into individual patties, around 1/4-inch thick. Place them on a parchment paper-lined tray and freeze for about 30 minutes.
- Make the Chocolate Shell. In a microwave-safe bowl, melt the chocolate and vegetable shortening (if using) in 30-second intervals, stirring between each interval until smooth.
- Assemble the Peppermint Patties. Using a fork or dipping tool, submerge each frozen peppermint patty into the melted chocolate, ensuring it’s fully coated. Shake off any excess chocolate and place the coated patty back onto the parchment paper.
- Allow to Set. Let the patties sit until the chocolate hardens. You can speed up the process by placing them in the refrigerator for about 15-20 minutes.
- Serve and Enjoy! Once the chocolate has set, your homemade peppermint patties are ready to enjoy! Store them in an airtight container in a cool place.
