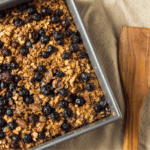
If you’re a fan of the delightful combination of wholesome oats and juicy blueberries, you’re in for a breakfast treat! With a few simple steps and a burst of fruity goodness, you’ll create a tasty Blueberry Baked Oatmeal that will leave you craving more.
Why You’ll Love This Easy Breakfast
- Easy Prep . Simple and quick to prepare, this baked oatmeal is perfect for busy mornings.
- Healthy and Nutritious . Loaded with oats and fresh blueberries, it’s a wholesome and nutritious way to start your day.
- Versatile. Customize with your favorite toppings like nuts, yogurt, or maple syrup.
- Deliciously Filling . With its satisfying texture and natural sweetness, this oatmeal keeps you full and energized.
Blueberry baked oatmeal is a delightful breakfast that combines the wholesomeness of oats with the sweetness of fresh blueberries. Whether you’re looking for a quick weekday breakfast or a leisurely weekend brunch, this dish will satisfy your cravings and fuel your day.
Is Baked Oatmeal Good For You?
Baked oatmeal can be a nutritious and wholesome breakfast option, especially when made with whole ingredients. Here are some reasons why baked oatmeal can be good for you:
- Rich in Fiber . Oats are naturally high in fiber, specifically a type called beta-glucans. This soluble fiber can help with digestion, regulate blood sugar levels, and promote a feeling of fullness, which can assist with weight management.
- Nutrient-Dense . Oats are a good source of essential nutrients such as vitamins (like B vitamins), minerals (including manganese, phosphorus, and magnesium), and antioxidants. These nutrients support overall health and well-being.
- Heart-Healthy . Oats are well-known for their heart-healthy properties. They can help lower LDL cholesterol levels, reducing the risk of heart disease.
- Energy Boost . Baked oatmeal provides a sustained release of energy due to its complex carbohydrates. It’s a great choice for a breakfast that keeps you full and energized throughout the morning.
What’s The Difference Between Baked Oats And Oatmeal?
Baked oats and oatmeal are both delicious breakfast options made primarily from oats, but they differ in their preparation methods and final textures. Here are the key differences between the two:
Texture
- Baked Oats - Baked oats have a firmer, cake-like texture. They are typically made by mixing oats with other ingredients like milk, eggs, sweeteners, and flavorings, then baking the mixture in the oven. The result is a sliceable, almost cake-like dish.
- Oatmeal - Oatmeal has a softer, porridge-like texture. It is made by cooking oats so they absorb the liquid and become creamy.
Cooking Method
- Baked Oats - Baked oats are prepared by mixing all the ingredients together, placing the mixture in a baking dish, and baking it in the oven. It’s a simple “set it and forget it” method.
- Oatmeal - Oatmeal is typically cooked on the stovetop or in the microwave. It requires more hands-on cooking as you need to stir and monitor the oats to prevent sticking or burning.
Cooking Time
- Baked Oats - Baked oats typically require a longer cooking time in the oven, usually around 25-35 minutes.
- Oatmeal - Oatmeal cooks relatively quickly, making this a great option for busy mornings.
What Are The Best Oats To Bake With?
When choosing oats for baking, consider the texture you want to achieve in your final product. Old-fashioned rolled oats are a safe bet for most baking recipes.
If you prefer a softer texture, you can opt for quick-cooking rolled oats. Additionally, always check the recipe you’re using, as it may specify the type of oats required for the best results.
Ingredients You’ll Need
- Old-Fashioned Oats - Rolled oats provide the perfect texture.
- Milk - Opt for dairy or a non-dairy milk of your choice.
- Eggs - Eggs bind the mixture and add richness.
- Maple Syrup - A touch of natural sweetness.
- Brown Sugar - Provides additional sweetness and caramelizes the oats.
- Vanilla Extract - For a pleasant, fragrant aroma.
- Baking Powder - Gives a slight rise and fluffiness.
- Salt - Enhances the flavors.
- Fresh Blueberries - The star of the show!
How To Make Blueberry Baked Oatmeal
- Preheat the Oven . Start by preheating your oven to 350°F. Grease a baking dish or line it with parchment paper for easy removal.
- Mix Wet Ingredients . In a mixing bowl, whisk together the milk, eggs, brown sugar, maple syrup, and vanilla extract.
- Combine Dry Ingredients . In another bowl, mix the oats, baking powder, and a pinch of salt.
- Combine Wet and Dry Mixtures . Pour the wet ingredients into the dry mixture and stir until well combined.
- Add Blueberries . Gently fold in the fresh blueberries, ensuring they’re evenly distributed.
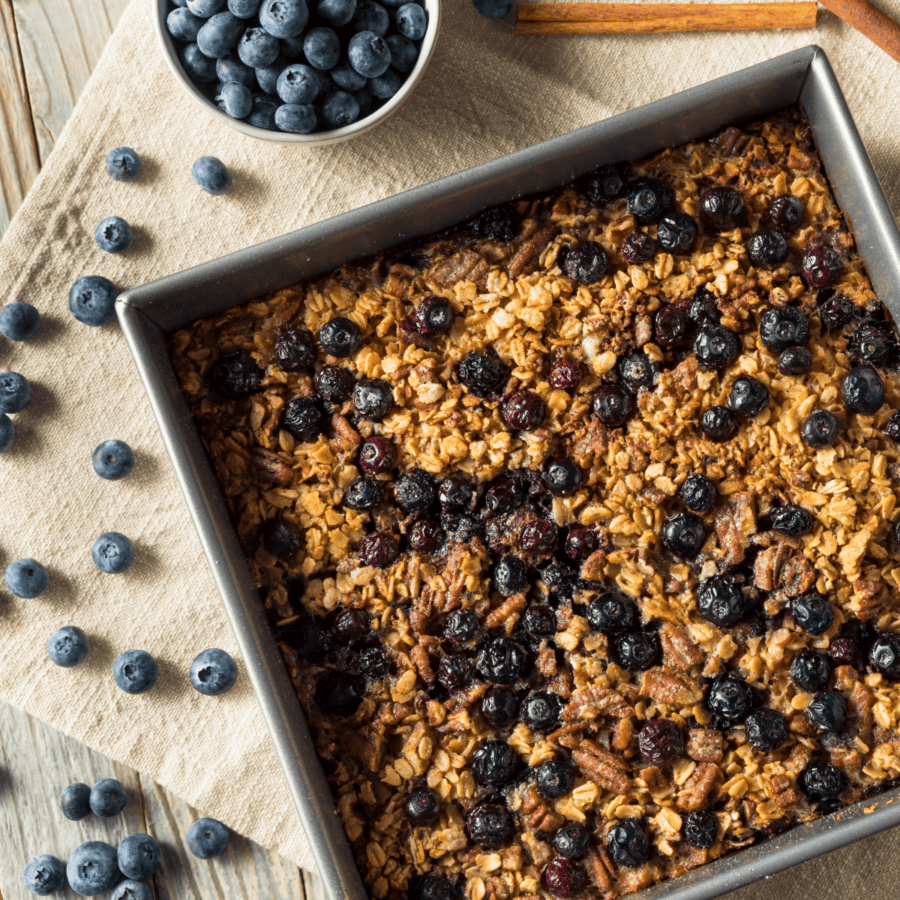
- Bake to Perfection . Pour the mixture into the prepared baking dish, spreading it out evenly. Bake in the preheated oven for 30-35 minutes or until the top is golden brown and the oatmeal is set.
- Serve and Enjoy . Allow the baked oatmeal to cool slightly before serving. Customize with your favorite toppings, like sliced bananas, chopped nuts, a dollop of yogurt, or a drizzle of honey.
Tips And Tricks
Creating the perfect blueberry baked oatmeal is simple, but a few tips can make it even better:
- Fresh or Frozen Blueberries . You can use either fresh or frozen blueberries. If using frozen, there’s no need to thaw them first.
- Make Ahead . Prepare the oatmeal mixture the night before, cover, and refrigerate. In the morning, pop it in the oven for a fresh, hot breakfast without the morning rush.
- Customize Toppings . Get creative with your toppings! Sliced strawberries, chopped pecans, or a sprinkle of cinnamon can add extra flavor and texture.
Variations
Baked blueberry oatmeal is a versatile dish that can be customized to suit your taste preferences. Here are some delicious variations and add-ins to try when making baked blueberry oatmeal:
- Blueberry and Lemon - Add fresh lemon zest or lemon extract to the batter for a refreshing citrus twist. Lemon and blueberry pair wonderfully together.
- Blueberry and Almonds - Sprinkle sliced almonds or almond extract into the batter for a nutty flavor and extra crunch.
- Blueberry and Banana - Mash ripe bananas and fold them into the batter for a natural sweetness and creamy texture.
What To Serve With Baked Oatmeal
Baked oatmeal is a versatile and delicious breakfast dish that can be enjoyed on its own or paired with a variety of complementary foods. Here are some ideas for what to serve with baked oatmeal:
- Yogurt- A dollop of yogurt, whether it’s Greek yogurt, regular yogurt, or dairy-free yogurt, pairs wonderfully with baked oatmeal. It adds creaminess and a hint of tanginess. You can drizzle a bit of honey or maple syrup on top for extra sweetness.
- Nuts and Seeds - Toasted nuts (like almonds, walnuts, or pecans) and seeds (such as chia seeds or flaxseeds) provide a pleasant crunch and extra nutrition. Sprinkle them over your baked oatmeal for added texture and flavor.
- Sausage or Bacon - If you prefer a savory twist, serve baked oatmeal alongside cooked breakfast sausages or crispy bacon. The contrast of sweet and savory flavors can be quite satisfying.
How Long Does It Last?
You can store baked oatmeal in an airtight container in the refrigerator for up to 4-5 days.
Make sure it cools to room temperature before refrigerating it to prevent condensation inside the container, which can make it soggy.
Can You Freeze It?
If you want to extend its shelf life, baked oatmeal can be frozen. Wrap individual portions or the whole dish tightly in plastic wrap or aluminum foil, or place it in an airtight container.
Properly stored, baked oatmeal can last in the freezer for up to 2-3 months.
More Breakfast Recipes
- Breakfast Tacos
- Instant Pot Strata
- Protein Pancakes
- Shrimp And Grits
- Air Fryer Bacon

Baked Oatmeal Recipe | Blueberry Oatmeal Bake Recipe
Ingredients
- ▢ 2 cups Old Fashioned Oats
- ▢ 2 cups Milk
- ▢ 2 Eggs
- ▢ 2 tbsp Maple Syrup
- ▢ 1 tsp Vanilla Extract
- ▢ 1 tsp Baking Powder
- ▢ 1/4 tsp Salt
- ▢ 1/4 cup Brown Sugar
- ▢ 1 1/2 cups Blueberries
Instructions
- Preheat the Oven . Start by preheating your oven to 350°F. Grease a baking dish or line it with parchment paper for easy removal.
- Mix Wet Ingredients . In a mixing bowl, whisk together the milk, eggs, brown sugar, maple syrup, and vanilla extract.
- Combine Dry Ingredients . In another bowl, mix the oats, baking powder, and a pinch of salt.
- Combine Wet and Dry Mixtures . Pour the wet ingredients into the dry mixture and stir until well combined.
- Add Blueberries . Gently fold in the fresh blueberries, ensuring they’re evenly distributed.
- Bake to Perfection . Pour the mixture into the prepared baking dish, spreading it out evenly. Bake in the preheated oven for 30-35 minutes or until the top is golden brown and the oatmeal is set.
- Serve and Enjoy . Allow the baked oatmeal to cool slightly before serving. Customize with your favorite toppings, like sliced bananas, chopped nuts, a dollop of yogurt, or a drizzle of honey.
Get support & connect with our community on Facebook!
Nutrition

If you already signed up, you should have received an email with a password to give you unlimited access to our FREE Printable Library. The password is case sensitive. Enter it below and get printing!
Password:
Baked Oatmeal Recipe | Blueberry Oatmeal Bake Recipe
Ingredients
- 2 cups Old Fashioned Oats
- 2 cups Milk
- 2 Eggs
- 2 tbsp Maple Syrup
- 1 tsp Vanilla Extract
- 1 tsp Baking Powder
- 1/4 tsp Salt
- 1/4 cup Brown Sugar
- 1 1/2 cups Blueberries
Instructions
- Preheat the Oven . Start by preheating your oven to 350°F. Grease a baking dish or line it with parchment paper for easy removal.
- Mix Wet Ingredients . In a mixing bowl, whisk together the milk, eggs, brown sugar, maple syrup, and vanilla extract.
- Combine Dry Ingredients . In another bowl, mix the oats, baking powder, and a pinch of salt.
- Combine Wet and Dry Mixtures . Pour the wet ingredients into the dry mixture and stir until well combined.
- Add Blueberries . Gently fold in the fresh blueberries, ensuring they’re evenly distributed.
- Bake to Perfection . Pour the mixture into the prepared baking dish, spreading it out evenly. Bake in the preheated oven for 30-35 minutes or until the top is golden brown and the oatmeal is set.
- Serve and Enjoy . Allow the baked oatmeal to cool slightly before serving. Customize with your favorite toppings, like sliced bananas, chopped nuts, a dollop of yogurt, or a drizzle of honey.
Baked Oatmeal Recipe | Blueberry Oatmeal Bake Recipe https://twosleevers.com/baked-oatmeal-recipe/

If you’re a fan of fresh produce and the comforting flavors of home-cooked casseroles, you’re in for a treat! Learn how to make the most delicious Zucchini Casserole that will complete any meal.

Why You’ll Love This Tasty Side Dish
- Garden Fresh . This casserole is bursting with the flavors of zucchini, squash, and other garden veggies. It’s a fantastic way to incorporate more vegetables into your diet.
- Comfort Food . With a creamy and cheesy base, this casserole embodies the warmth and comfort of home-cooked meals.
- Versatile . Serve it as a side dish , a vegetarian main course , or even as a hearty brunch option.
- Simple Pleasures . With easy preparation and minimal ingredients, this casserole is perfect for busy weeknights or relaxed weekend gatherings.
Prepare to be enchanted by the vibrant colors and flavors of this delightful vegetable casserole.
Is Zucchini And Squash Casserole Good?
Absolutely! Zucchini and squash casseroles are not only good; they’re downright delicious.
When these garden-fresh vegetables are combined with a creamy sauce and a touch of cheese, the result is a comforting and savory dish that appeals to all ages. It’s the perfect way to showcase the flavors of some of your favorite vegetables in one mouthwatering bite.
Ingredients You’ll Need
- Zucchini
- Yellow Squash
- Onion
- Garlic
- Cheddar Cheese
- Mozzarella Cheese
- Sour Cream
- Mayonnaise
- Eggs
- Dried Oregano
- Dried Basil
- Salt and Black Pepper
How To Make Zucchini Casserole
- Prepare the Vegetables . Start by slicing the zucchini and yellow squash into thin rounds. Finely chop the onion and mince the garlic.
- Saute the Vegetables . In a large skillet, heat a tablespoon of olive oil over medium heat. Add the chopped onion and minced garlic. Saute until they become translucent and fragrant.
- Add Zucchini and Squash . Add the sliced zucchini and yellow squash to the skillet. Cook for about 5-7 minutes, or until they begin to soften. Season with salt, black pepper, dried oregano, and dried basil. Stir occasionally to ensure even cooking.
- Prepare the Casserole Mixture . In a separate mixing bowl, combine the shredded cheddar cheese, grated mozzarella cheese, sour cream, mayonnaise, and eggs. Mix until all ingredients are well combined.
- Combine the Elements . Once the zucchini and squash are tender, remove them from the heat. Let them cool for a few minutes. Then, gently fold the sauteed vegetables into the cheese and sour cream mixture until everything is evenly coated.
- Layer and Bake . Preheat your oven to 350°F. Grease a baking dish (9x13 inches or a similar size). Pour the zucchini and squash mixture into the dish and spread it out evenly.
- Bake to Perfection . Place the casserole in the preheated oven and bake for 25-30 minutes, or until the top is golden brown and the casserole is bubbling around the edges.
- Serve and Enjoy . Remove the casserole from the oven and allow it to cool slightly before serving. It’s best enjoyed warm.

Tips And Tricks
Creating the perfect Zucchini and Squash Casserole is a delightful endeavor. Here are some tips and tricks to ensure your casserole turns out beautifully:
- Uniform Slicing - Slice the zucchini and squash evenly to ensure even cooking and a consistent texture throughout the casserole.
- Saute for Flavor - Sauteing the onions and garlic before adding the zucchini and squash enhances the depth of flavor in the casserole.
- Use Fresh Herbs - If you have fresh basil and oregano on hand, feel free to use them instead of dried herbs. Just chop them finely and add them to the sauteed vegetables.
- Sour Cream and Mayo - The combination of sour cream and mayonnaise creates a creamy and tangy base for the casserole. It’s a key element of the dish’s deliciousness.
Variations
While this Zucchini and Squash Casserole is fabulous as is, you can always customize it to suit your preferences:
- Cheese - Experiment with different cheese varieties, like Monterey Jack, mozzarella, or Swiss, for a unique flavor twist.
- Fresh Herbs - Add a handful of fresh herbs like parsley, thyme, or chives for an extra burst of garden-fresh flavor.
- Protein - If you’d like to turn this side dish into a main course, consider adding cooked chicken, ground beef, or sausage for added protein.
Why Is My Zucchini Casserole Watery?
If your zucchini casserole turns out watery, it’s usually due to excess moisture released by the zucchini during cooking. This can happen for a few reasons, but don’t worry; there are steps you can take to prevent it in the future:
- High Water Content in Zucchini . Some zucchinis have a higher water content than others. While this can vary based on the type and freshness of the zucchini, you can help reduce excess moisture by choosing smaller, firmer zucchinis and removing the seeds if they are large.
- Improper Slicing . If the zucchini slices are too thick, they are more likely to release excess moisture during cooking. Try to slice them thinly and evenly to allow for better moisture distribution.
- Salting and Draining . After slicing the zucchini, you can sprinkle them with a little salt and let them sit for about 10-15 minutes. This will draw out some of the moisture. Afterward, pat the zucchini slices dry with a paper towel before using them in your casserole. Be sure to rinse off the excess salt to avoid an overly salty dish.
If your zucchini casserole is already watery, you can try draining the excess liquid carefully or spooning it out. Then, return the casserole to the oven for a few more minutes to help evaporate any remaining moisture.
What To Serve With Zucchini Casserole
This casserole is versatile and pairs well with a variety of dishes. Here are some ideas:
- Grilled Chicken - Serve it alongside grilled chicken for a complete meal.
- Green Salad - A simple green salad with a light vinaigrette dressing makes for a refreshing side dish.
- Fresh Bread - A loaf of crusty bread or dinner rolls is perfect for mopping up any remaining creamy goodness.
How Long Does It Last?
Store any leftover Zucchini and Squash Casserole in an airtight container in the refrigerator for up to 3-4 days.
Reheat in the oven or microwave until heated through before serving.
Can You Freeze It?
Yes, you can freeze this casserole! Allow it to cool completely, then wrap it tightly in plastic wrap and aluminum foil or place it in an airtight container. It can be frozen for up to 2-3 months.
Thaw it in the refrigerator overnight before reheating it in the oven.
Our Best Zucchini Recipes
- Apple Zucchini Salad
- Roasted Zucchini
- Keto Zucchini Bread
- Zucchini Lasagna
- Zucchini Roll Ups


Zucchini Casserole | Zucchini And Squash Casserole Recipe
Ingredients
- ▢ 2 cups zucchini
- ▢ 2 cups yellow squash
- ▢ 1/2 cup Onion
- ▢ 2 tbsp Garlic
- ▢ 1 cup Cheddar Cheese
- ▢ 1/2 cup Mozzarella Cheese
- ▢ 1/4 cup Sour Cream
- ▢ 1/4 cup Mayonnaise
- ▢ 1 Egg
- ▢ 1 tsp Oregano
- ▢ 1 tsp Dried Basil
- ▢ 1/2 tsp Kosher Salt
- ▢ 1/4 tsp Black Pepper
Instructions
- Prepare the Vegetables . Start by slicing the zucchini and yellow squash into thin rounds. Finely chop the onion and mince the garlic.
- Saute the Vegetables . In a large skillet, heat a tablespoon of olive oil over medium heat. Add the chopped onion and minced garlic. Saute until they become translucent and fragrant.
- Add Zucchini and Squash . Add the sliced zucchini and yellow squash to the skillet. Cook for about 5-7 minutes, or until they begin to soften. Season with salt, black pepper, dried oregano, and dried basil. Stir occasionally to ensure even cooking.
- Prepare the Casserole Mixture . In a separate mixing bowl, combine the shredded cheddar cheese, grated mozzarella cheese, sour cream, mayonnaise, and eggs. Mix until all ingredients are well combined.
- Combine the Elements . Once the zucchini and squash are tender, remove them from the heat. Let them cool for a few minutes. Then, gently fold the sauteed vegetables into the cheese and sour cream mixture until everything is evenly coated.
- Layer and Bake . Preheat your oven to 350°F. Grease a baking dish (9x13 inches or a similar size). Pour the zucchini and squash mixture into the dish and spread it out evenly.
- Bake to Perfection . Place the casserole in the preheated oven and bake for 25-30 minutes, or until the top is golden brown and the casserole is bubbling around the edges.
- Serve and Enjoy . Remove the casserole from the oven and allow it to cool slightly before serving. It’s best enjoyed warm.
Get support & connect with our community on Facebook!
Nutrition
Don’t forget to check out my other Ketocookbooks.
Keto Instant Pot, Keto Fat Bombs, Sweets, & Treats , and Easy keto in 30 minutes.

