
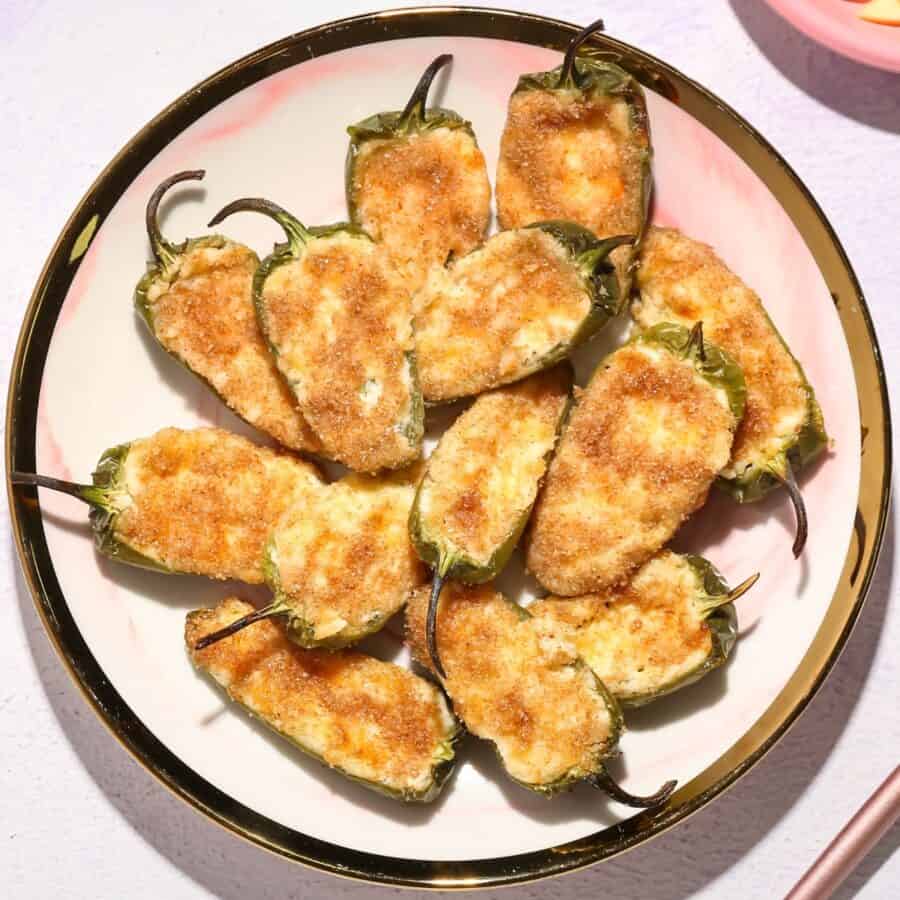
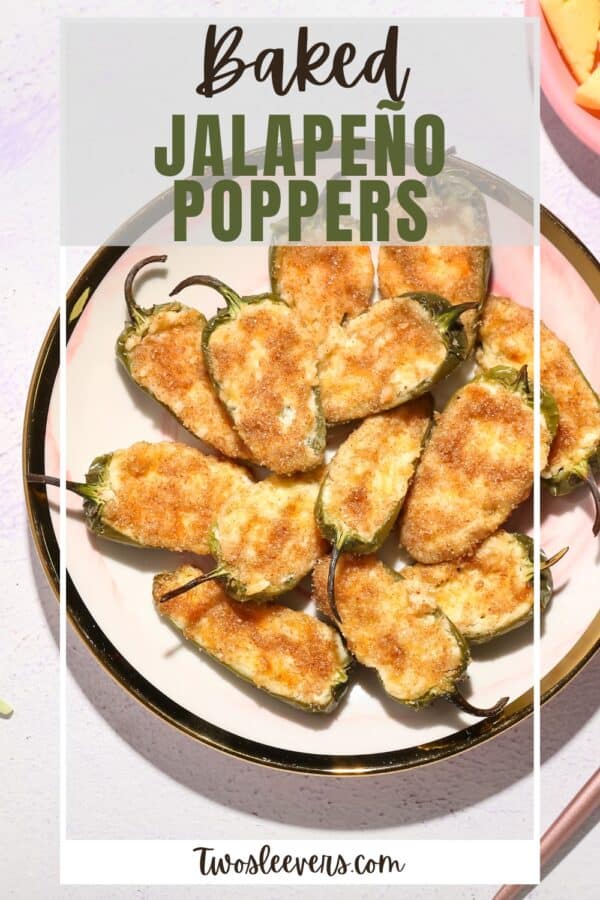
If you’re a fan of crispy, cheesy, and slightly spicy snacks, these Baked Jalapeño Poppers are perfect for you! Learn how to make the easiest, crowd-pleasing jalapeño poppers with a crunchy golden crust and a creamy cheese filling. This recipe brings the heat with a mild kick from the jalapeños balanced by the rich, cheesy goodness inside.
Why You’ll Love This Awesome Appetizer
- Easy . You only need a few simple ingredients to make this flavorful appetizer.
- Baked, not fried . Enjoy a healthier version of this popular snack without sacrificing flavor or crispiness.
- Customizable . You can tweak the filling to make it as cheesy, spicy, or mild as you like.
- Perfect for parties . These are the ideal finger food for any gathering, especially game day!
With the ease of baking, you’ll have a crunchy, golden appetizer in no time. Whether you’re serving them at a party or enjoying them at home, these jalapeño poppers are guaranteed to be a hi
What Do Baked Jalapeño Poppers Taste Like?
Baked Jalapeño Poppers are incredibly delicious, and baking them gives you all the crunch without the extra oil from frying. The combination of spicy jalapeños, creamy cheese, and crispy breadcrumb coating is a match made in heaven.
Are Baked Jalapeño Poppers Healthy?
In moderation, Baked Jalapeño Poppers can fit into a balanced diet, offering flavor and satisfaction without the heaviness of their fried counterparts.
Ingredients You’ll Need
- Fresh Jalapeños - Choose firm, medium-sized jalapeños for easy stuffing.
- Cream Cheese - Provides a smooth, rich base for the filling.
- Cheddar Cheese - Sharp cheddar adds an extra layer of cheesy flavor.
- Garlic Powder - Adds a subtle savory depth.
- Green Onions - Optional, but they give a pop of freshness to the filling.
- Breadcrumbs - For that crispy, golden coating.
- Egg - Helps the breadcrumbs stick to the poppers.
- Salt & Pepper - To taste.
How To Make Baked Jalapeño Poppers
- Prepare the Jalapeños. Start by slicing the jalapeños in half lengthwise. Scoop out the seeds and membranes, depending on how spicy you want the poppers. Rinse and pat dry.
- Make the Filling. In a bowl, mix the cream cheese, shredded cheddar, garlic powder, green onions (if using), salt, and pepper. This will be your cheesy filling for the poppers.
- Stuff the Jalapeños. Using a spoon, fill each jalapeño half with the cheese mixture. Make sure they are evenly filled, but don’t overstuff.
- Coat the Poppers. In a separate bowl, beat the egg. Dip each filled jalapeño into the egg, then roll in breadcrumbs until fully coated.
- Bake to Perfection. Preheat your oven to 375°F. Place the poppers on a baking sheet lined with parchment paper. Bake for 20-25 minutes or until the jalapeños are tender and the breadcrumbs are golden brown.
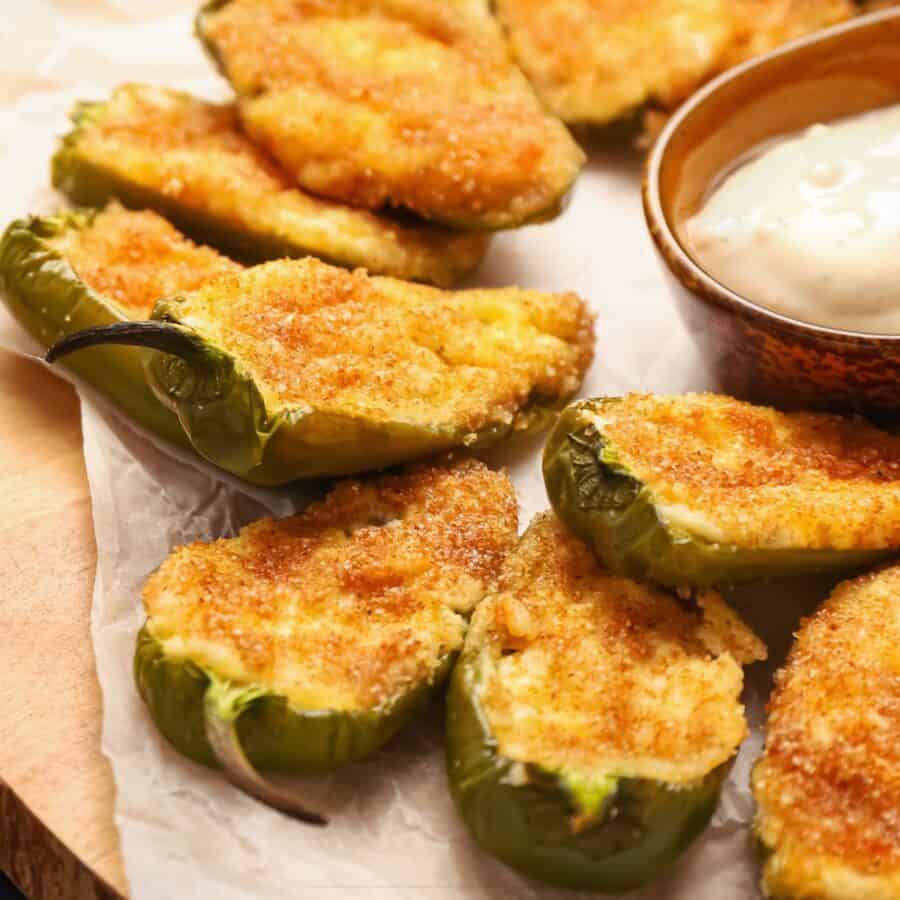
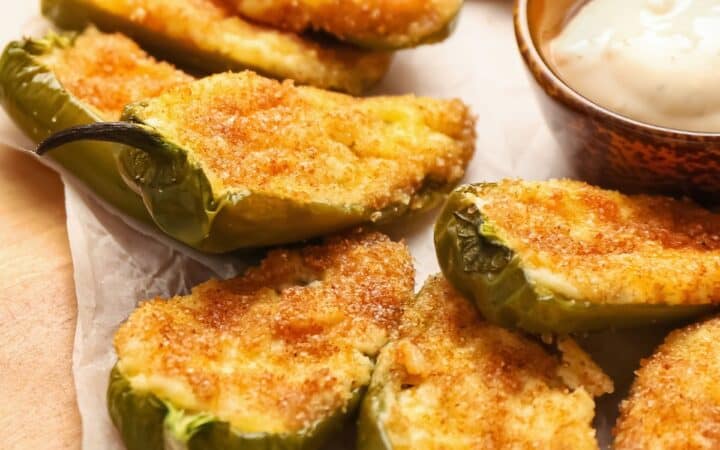
- Garnish and Serve. Let the poppers cool slightly before serving. You can garnish them with fresh cilantro or serve with a dipping sauce like ranch or sour cream.
Tips And Tricks
Making Baked Jalapeño Poppers is straightforward, but here are a few tips to make them extra delicious:
- Wear gloves when handling jalapeños. The oils can cause irritation, so it’s best to wear gloves when cutting and deseeding them.
- Don’t overfill the jalapeños. This will prevent the cheese from spilling out during baking.
- Use panko breadcrumbs. If you prefer an even crispier texture, panko breadcrumbs are a great option.
- Add extra spice. For those who love a spicier kick, mix in some cayenne pepper or chili flakes into the filling.
Variations
If you’re a fan of Baked Jalapeño Poppers, here are a few creative variations to try:
- Bacon-Wrapped- Wrap each stuffed jalapeño in a slice of bacon before baking. The bacon adds an extra layer of flavor and crispiness.
- Spicy Sausage- Add cooked spicy sausage to the cheese filling for a meatier version of this classic appetizer.
- Vegetarian- Swap the cheddar cheese for a blend of cream cheese and feta for a tangy twist.
- Extra Cheesy- Mix in mozzarella with the cheddar for an ultra-cheesy filling.
What To Eat With Baked Jalapeño Poppers
These Baked Jalapeño Poppers pair perfectly with a variety of sides and dips:
- Ranch Dressing - Cool, creamy ranch helps balance the heat of the poppers.
- Sour Cream & Chive Dip - A classic pairing that complements the cheesy filling.
- Guacamole - The smooth, rich avocado pairs wonderfully with the spicy poppers.
- Vegetable Sticks - Serve with crunchy celery and carrot sticks for a refreshing contrast.
How Long Do They Last?
Baked Jalapeño Poppers can be stored in an airtight container in the refrigerator for up to 3 days. To reheat, place them in a preheated oven at 350°F for 5-7 minutes until crispy again.
Can You Freeze Them?
Yes! You can freeze jalapeño poppers to enjoy later. Once they are stuffed and breaded (before baking), place them on a baking sheet and freeze. Once solid, transfer them to a freezer-safe bag. They will last for up to 3 months.
When ready to bake, pop them in the oven straight from the freezer and add a few extra minutes to the baking time.
More Awesome Appetizer Recipes
- Maryland Crab Dip
- Hawaiian Meatballs
- Refried Bean Dip
- Wonton Tacos
- Potato Skins
Baked Jalapeño Poppers | Oven Baked Jalapeno Popper Recipe
Ingredients
- ▢ 6 Jalapenos , sliced lengthwise
- ▢ 4 ounces Cream Cheese
- ▢ 1/2 cup Cheddar Cheese , shredded
- ▢ 1/2 tsp Garlic Powder
- ▢ 2 tbsp Green Onion , sliced
- ▢ 1 cup Green Onion
- ▢ 1 Egg
- ▢ 1/2 tsp Kosher Salt
- ▢ 1/4 tsp Ground Black Pepper
Instructions
- Prepare the Jalapeños. Start by slicing the jalapeños in half lengthwise. Scoop out the seeds and membranes, depending on how spicy you want the poppers. Rinse and pat dry.
- Make the Filling. In a bowl, mix the cream cheese, shredded cheddar, garlic powder, green onions (if using), salt, and pepper. This will be your cheesy filling for the poppers.
- Stuff the Jalapeños. Using a spoon, fill each jalapeño half with the cheese mixture. Make sure they are evenly filled, but don’t overstuff.
- Coat the Poppers. In a separate bowl, beat the egg. Dip each filled jalapeño into the egg, then roll in breadcrumbs until fully coated.
- Bake to Perfection. Preheat your oven to 375°F. Place the poppers on a baking sheet lined with parchment paper. Bake for 20-25 minutes or until the jalapeños are tender and the breadcrumbs are golden brown.
- Garnish and Serve. Let the poppers cool slightly before serving. You can garnish them with fresh cilantro or serve with a dipping sauce like ranch or sour cream.
Get support & connect with our community on Facebook!

If you already signed up, you should have received an email with a password to give you unlimited access to our FREE Printable Library. The password is case sensitive. Enter it below and get printing!
Password:

Baked Jalapeño Poppers | Oven Baked Jalapeno Popper Recipe
Ingredients
- 6 Jalapenos sliced lengthwise
- 4 ounces Cream Cheese
- 1/2 cup Cheddar Cheese shredded
- 1/2 tsp Garlic Powder
- 2 tbsp Green Onion sliced
- 1 cup Green Onion
- 1 Egg
- 1/2 tsp Kosher Salt
- 1/4 tsp Ground Black Pepper
Instructions
- Prepare the Jalapeños. Start by slicing the jalapeños in half lengthwise. Scoop out the seeds and membranes, depending on how spicy you want the poppers. Rinse and pat dry.
- Make the Filling. In a bowl, mix the cream cheese, shredded cheddar, garlic powder, green onions (if using), salt, and pepper. This will be your cheesy filling for the poppers.
- Stuff the Jalapeños. Using a spoon, fill each jalapeño half with the cheese mixture. Make sure they are evenly filled, but don’t overstuff.
- Coat the Poppers. In a separate bowl, beat the egg. Dip each filled jalapeño into the egg, then roll in breadcrumbs until fully coated.
- Bake to Perfection. Preheat your oven to 375°F. Place the poppers on a baking sheet lined with parchment paper. Bake for 20-25 minutes or until the jalapeños are tender and the breadcrumbs are golden brown.
- Garnish and Serve. Let the poppers cool slightly before serving. You can garnish them with fresh cilantro or serve with a dipping sauce like ranch or sour cream.
Baked Jalapeño Poppers | Oven Baked Jalapeno Popper Recipe https://twosleevers.com/baked-jalapeno-popper/

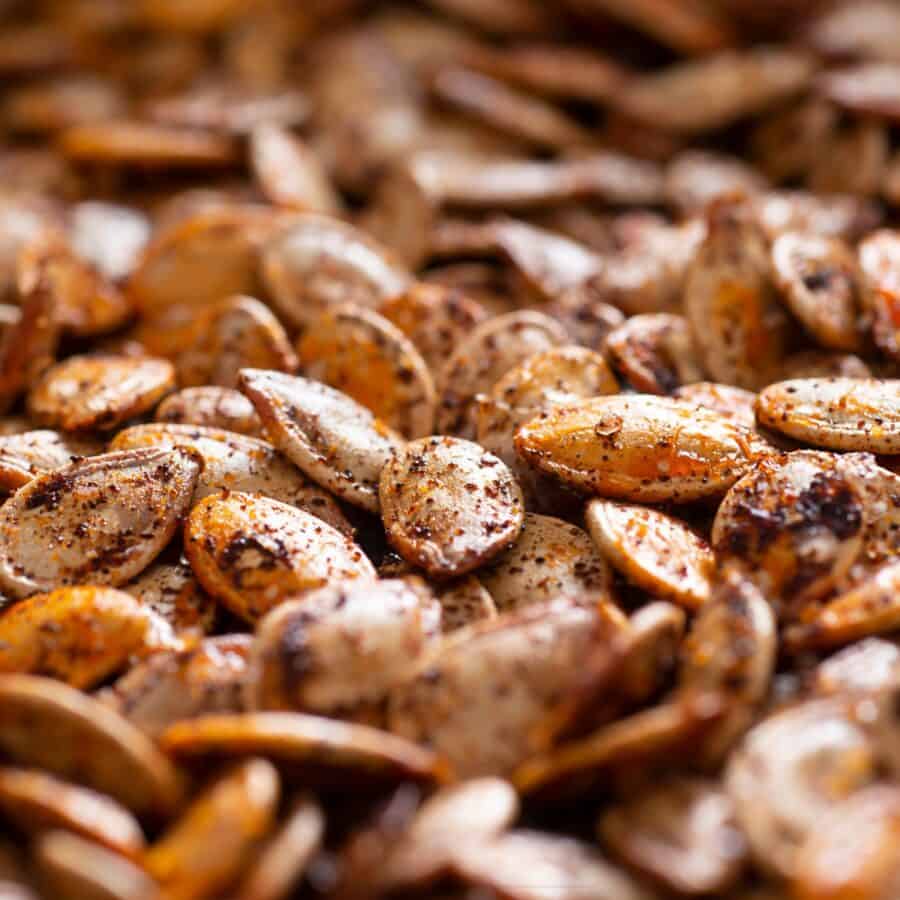
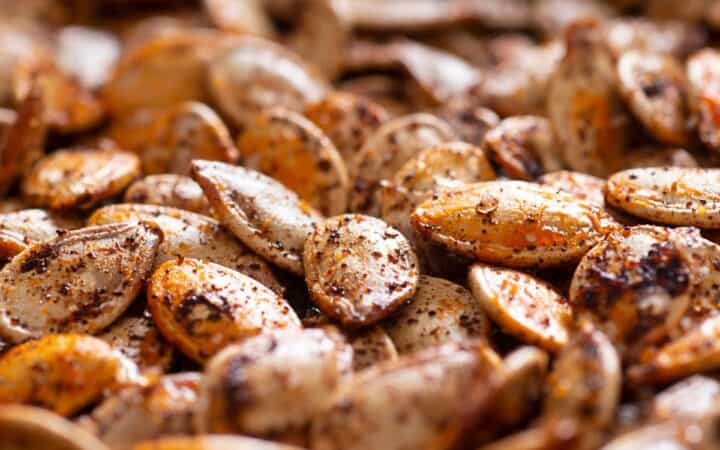
If you love the satisfying crunch of roasted snacks, you’re in for a treat! Learn how to make the easiest Roasted Pumpkin Seeds for a perfectly savory snack that’s great for fall or any time of year. These seeds are simple to prepare and packed with flavor, offering a healthy, homemade alternative to store-bought snacks.
Why You’ll Love This Spectacular Snack
- Quick and Easy . Ready in under an hour with minimal effort.
- Customizable . You can season them any way you like. Try sweet, savory, or spicy!
- Healthy . Pumpkin seeds are packed with nutrients like magnesium, zinc, and omega-3 fatty acids.
- Delicious . Crunchy, salty, and addictive. They’re perfect for snacking or adding to salads and soups.
With just a few ingredients and your oven, you’ll be amazed at how easy it is to transform raw pumpkin seeds into a delicious, crunchy snack. Whether you’re carving pumpkins for Halloween or roasting seeds for a healthy treat, this recipe is sure to be a hit with family and friends!
What Do Roasted Pumpkin Seeds Taste Like?
Roasted pumpkin seeds have a deliciously nutty and slightly earthy flavor. When roasted, they develop a crunchy texture with a hint of saltiness. The natural flavor of the seeds is subtle, but you can enhance them with various seasonings like garlic, paprika, or cinnamon for sweet or savory variations.
Overall, roasted pumpkin seeds offer a satisfying, toasty taste with a crisp bite, making them a perfect snack or topping for salads and soups.
Do You Need To Soak Pumpkin Seeds Before Roasting?
Soaking pumpkin seeds before roasting is optional, but it can offer some benefits. Here’s why you might want to consider soaking them:
- Crispier Texture . Soaking helps to remove some of the pulp and natural enzymes, which can lead to a crispier result when roasted.
- Easier to Digest . Soaking seeds in saltwater can help break down phytic acid, making the seeds easier to digest and increasing nutrient absorption.
- Enhanced Flavor . Soaking in salted water can infuse the seeds with a bit of extra flavor before roasting.
If you’re short on time, you can skip soaking and still achieve delicious roasted pumpkin seeds with a little extra roasting time for optimal crunch.
Are Roasted Pumpkin Seeds Healthy?
Yes! Roasted pumpkin seeds are not only delicious but also incredibly nutritious. They are high in protein, fiber, and heart-healthy fats. Plus, they provide essential minerals like magnesium and zinc, which are great for overall wellness.
Roasting your own at home ensures you control the salt and fat content, making them a perfect snack choice.
Ingredients You’ll Need
- Pumpkin Seeds – Freshly scooped from a pumpkin or store-bought raw seeds.
- Olive Oil – Helps achieve that crispy, roasted texture.
- Salt – For a classic, savory flavor.
- Optional Seasonings – You can add garlic powder, paprika, cinnamon, or even sugar for a variety of flavors.
How To Make Roasted Pumpkin Seeds
- Prep the Seeds . Start by scooping out the seeds from a fresh pumpkin if you’re using them straight from the source. Separate the seeds from the stringy pumpkin flesh and rinse thoroughly under cold water. Pat them dry with a clean towel or paper towels.
- Boil the Seeds (Optional) . For extra crispy seeds, boil them in salted water for about 10 minutes. This helps make the seeds more tender before roasting.
- Season the Seeds . Preheat your oven to 350°F. Toss the clean, dry seeds with olive oil and salt. Spread them in a single layer on a baking sheet lined with parchment paper for easy cleanup.
- Roast the Seeds . Place the baking sheet in the oven and roast for 25-30 minutes, stirring every 10 minutes to ensure even roasting. The seeds are ready when they are golden brown and crispy.
- Cool and Enjoy . Once the seeds are done roasting, let them cool for a few minutes before serving. Store any leftovers in an airtight container.

Tips And Tricks
- Dry the Seeds Thoroughly . After rinsing the seeds, make sure they are completely dry before roasting. Moisture can prevent them from crisping up in the oven.
- Experiment with Flavors . Add your favorite seasonings, such as garlic powder, smoked paprika, or even cinnamon and sugar for a sweet treat.
- Boiling for Crispiness . Boiling the seeds in salted water before roasting ensures an extra crunchy texture. This step is optional but highly recommended for the best results.
- Stir Frequently . Stirring the seeds every 10 minutes while roasting helps them brown evenly and prevents burning.
Variations
If you’re looking for creative ways to season your roasted pumpkin seeds, here are a few delicious options:
- Spicy - Add a pinch of cayenne pepper or chili powder for a spicy kick.
- Sweet Cinnamon Sugar - Toss the seeds with cinnamon and sugar before roasting for a sweet, fall-flavored snack.
- Garlic Parmesan - After roasting, toss the seeds with garlic powder and grated Parmesan cheese for a savory treat.
- Smoky Paprika - Sprinkle smoked paprika over the seeds before roasting to give them a rich, smoky flavor.
What To Enjoy With Pumpkin Seeds
Roasted pumpkin seeds are incredibly versatile and can be enjoyed on their own or as a crunchy topping. Here are a few ways to serve them:
- As a Snack . Enjoy them as a healthy, crunchy snack straight from the oven.
- Salad Topping . Add them to salads for an extra crunch and boost of flavor.
- Soup Garnish . Sprinkle on top of pumpkin soup or butternut squash soup for added texture.
- Trail Mix . Mix with dried fruit, nuts, and chocolate for a custom trail mix.
How Long Do They Last?
Roasted pumpkin seeds can be stored in an airtight container at room temperature for up to a week.
Can You Freeze Them?
Yes, you can freeze roasted pumpkin seeds! Simply allow them to cool completely, then transfer to a freezer-safe container or bag. They will last in the freezer for up to 3 months.
When you’re ready to eat, just thaw them and enjoy them as is, or reheat them in the oven for a few minutes to restore their crispiness.
More Perfect Pumpkin Recipes
- Pumpkin Mousse
- Pumpkin Oatmeal Cookies
- Keto Pumpkin Cheesecake
- Pumpkin Cinnamon Rolls
- Pumpkin Soup
- Pumpkin Puree
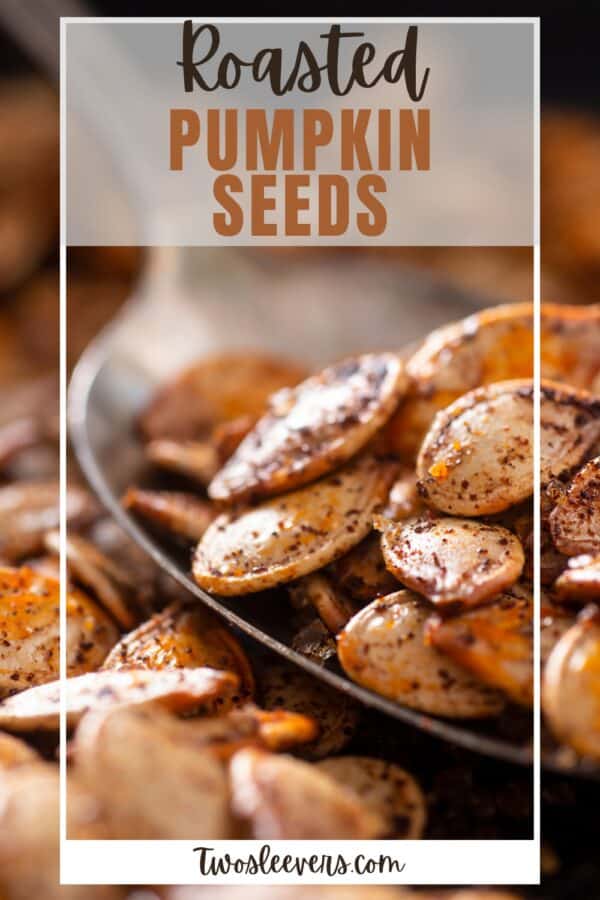
Roasted Pumpkin Seeds | Oven Roasted Pumpkin Seed Recipe
Ingredients
- ▢ 2 cups Pumpkin Seeds
- ▢ 1 tbsp Olive Oil
- ▢ 1/2 tsp Kosher Salt
- ▢ 1/4 tsp Paprika
- ▢ 1/4 tsp Garlic Powder
Instructions
- Prep the Seeds . Start by scooping out the seeds from a fresh pumpkin if you’re using them straight from the source. Separate the seeds from the stringy pumpkin flesh and rinse thoroughly under cold water. Pat them dry with a clean towel or paper towels.
- Boil the Seeds (Optional) . For extra crispy seeds, boil them in salted water for about 10 minutes. This helps make the seeds more tender before roasting.
- Season the Seeds . Preheat your oven to 350°F. Toss the clean, dry seeds with olive oil and salt. Spread them in a single layer on a baking sheet lined with parchment paper for easy cleanup.
- Roast the Seeds . Place the baking sheet in the oven and roast for 25-30 minutes, stirring every 10 minutes to ensure even roasting. The seeds are ready when they are golden brown and crispy.
- Cool and Enjoy . Once the seeds are done roasting, let them cool for a few minutes before serving. Store any leftovers in an airtight container.
