
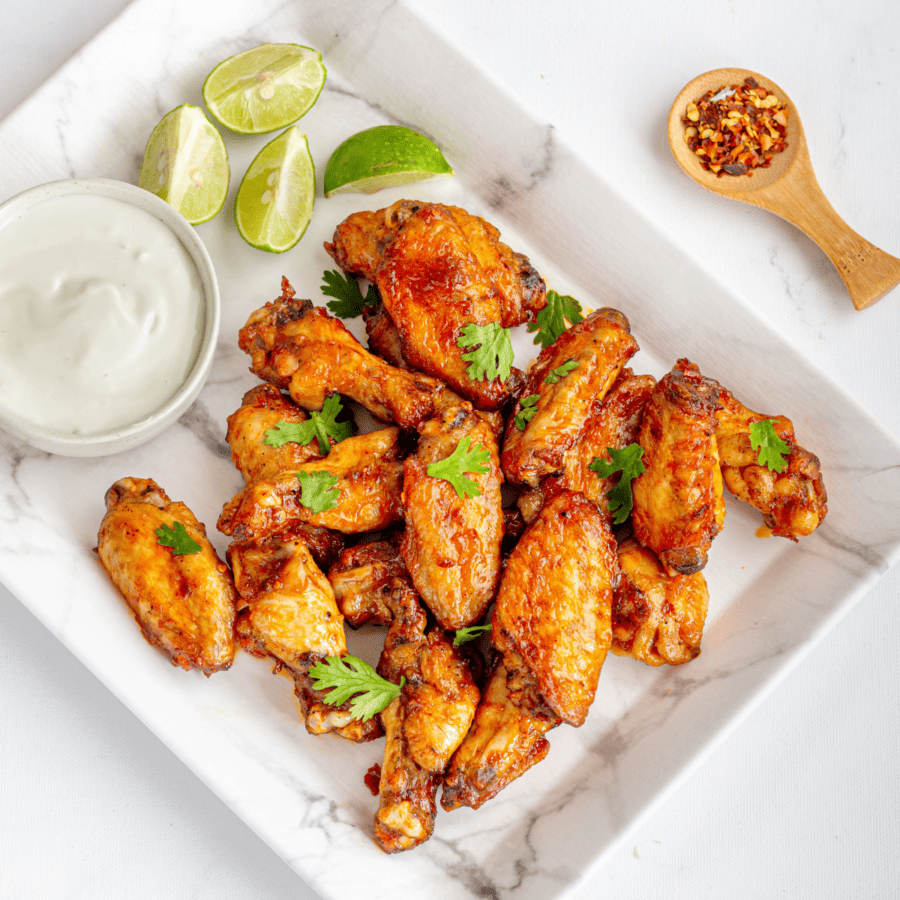
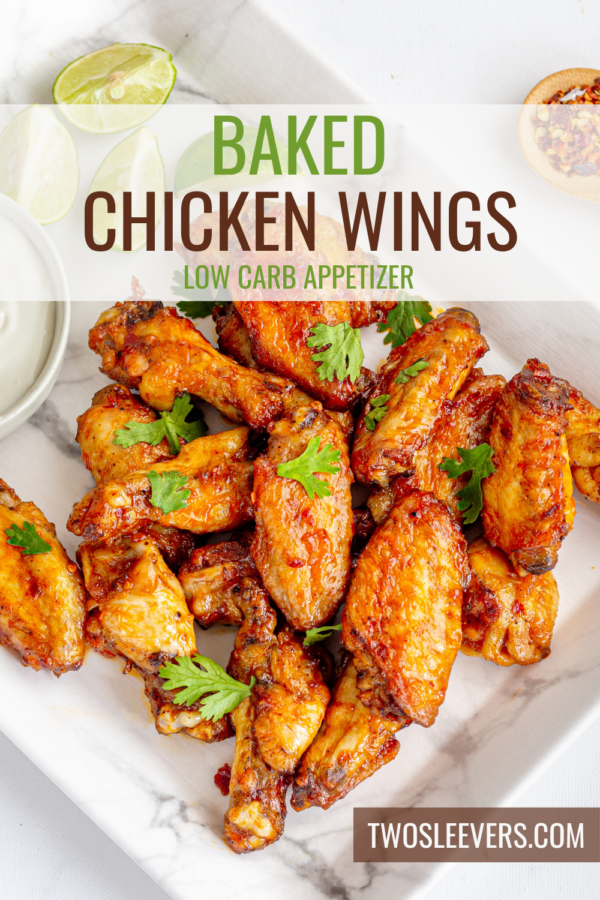
When it comes to finger-licking appetizers, it’s hard to beat the irresistible appeal of crispy chicken wings. While deep frying has traditionally been the go-to method for achieving that crispy exterior, we’re here to unveil a game-changing secret: you can achieve the same, if not better, results with oven baked chicken wings!
Why These Wings Are Irresistible
- Easy. Prepare your chicken wings, bake, and enjoy them perfectly seasoned or with with your favorite sauce.
- Low Carb . Only 7 net carbs per serving make these a great option for anyone living a low carb lifestyle.
- Gluten-Free . Skipping the flour and using baking powder to make these chicken wings crispy makes them a tasty choice for people with gluten allergies.
- Versatile. Toss them in your favorite sauce or dip them in your favorite condiment to customize them for an appetizer or main course that fits your personal preferences.
By following these simple steps and embracing a little patience, you can enjoy finger-licking goodness without the mess and hassle of deep frying.
Next time you’re planning a gathering or craving a satisfying snack, remember this foolproof method for creating the crispiest oven baked chicken wings that will leave your taste buds singing and your guests begging for the recipe.
What Temperature Should You Bake Chicken Wings?
To achieve crispy oven-baked chicken wings, it’s recommended to bake them at a higher temperature. A temperature range of 400°F to 425°F is ideal for baking chicken wings.
This higher temperature helps to render the fat from the skin, allowing it to become crispy and golden brown, while also cooking the meat inside to perfection.
Ingredients You’ll Need
- Chicken Wings
- Salt and Pepper
- Baking Powder
- Paprika
- Garlic Powder
- Onion Powder
How To Make Baked Chicken Wings
- Dry the Wings. Start by drying the chicken wings thoroughly using paper towels. Moisture is the enemy of crispiness, so make sure the wings are as dry as possible before proceeding.
- Prepare the Seasoning. In a bowl, combine baking powder, salt, pepper, and any optional spices or seasonings you prefer. The baking powder will work its magic, helping to draw moisture out of the skin and promoting a crispy texture.
- Coat and Chill. Toss the dry chicken wings in the baking powder mixture, ensuring they are evenly coated. Place the coated wings on a wire rack set on a baking sheet. The wire rack allows for even air circulation around the wings, which helps them become crispy all over. Let the wings rest in the refrigerator, uncovered, for at least an hour. This step further dries out the skin and enhances crispiness.
- Preheat and Bake . Preheat your oven to 425°F. Place the baking sheet with the wire rack and wings into the preheated oven. Bake for 30-40 minutes, flipping the wings halfway through to ensure even cooking and browning.
- Finishing Touches. Once the wings are beautifully golden and crispy, remove them from the oven. Let the wings rest for a few minutes before serving. This allows the juices to redistribute, ensuring tender and juicy meat.
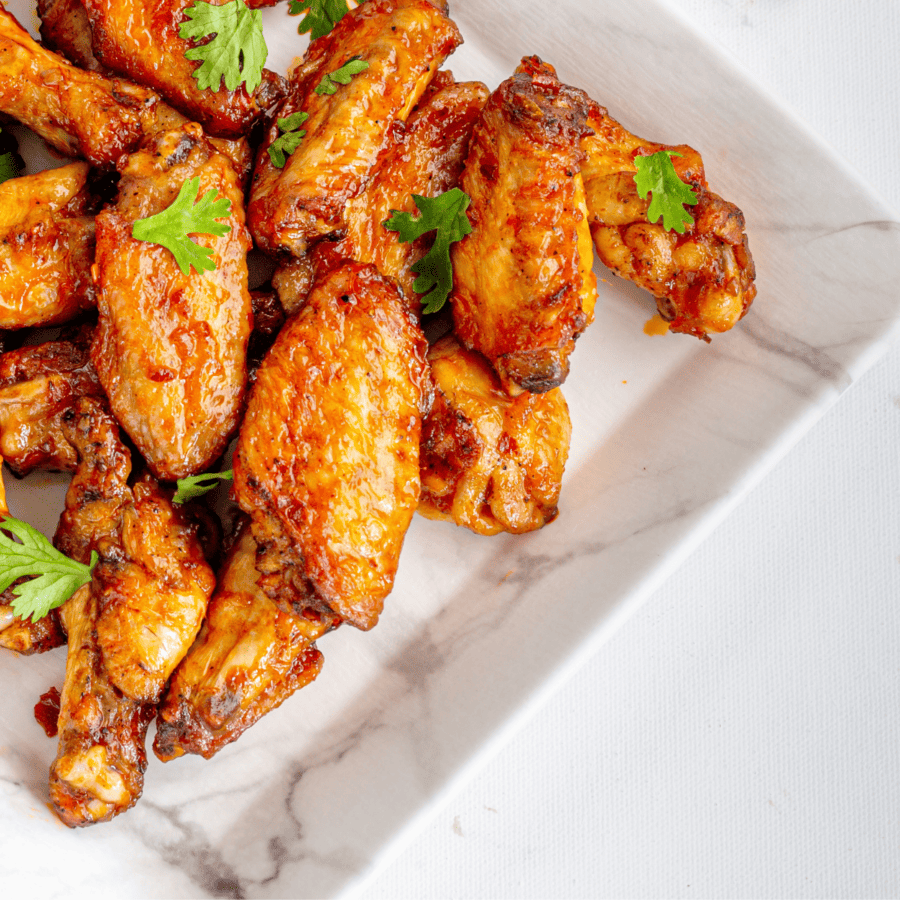
- Serve and Enjoy! Arrange the crispy oven-baked chicken wings on a serving platter. Pair them with your favorite dipping sauces and enjoy the delightful combination of flavors and textures.
Tips And Tricks
Absolutely, achieving the perfect crispy oven baked chicken wings requires attention to detail and a few tricks up your sleeve. Here are some valuable tips and tricks to ensure your chicken wings turn out irresistibly crispy:
- Dry the Wings Thoroughly . Moisture is the enemy of crispiness. Use paper towels to pat the chicken wings completely dry before seasoning or coating them. Removing excess moisture from the skin is crucial for achieving a crispy texture.
- Spacing Matters . Avoid overcrowding the baking sheet. Give the wings some space to ensure they cook evenly and develop that desired crispy exterior. If needed, use multiple baking sheets or batches.
- Baking Powder Magic . Toss the dry wings with a mixture of baking powder, salt, and any desired spices. Baking powder helps to draw out moisture from the skin, resulting in crispiness. Be sure to use baking powder, not baking soda, as baking soda can leave an undesirable taste.
Variations
There’s a world of creativity when it comes to flavor variations for crispy baked chicken wings. Here are some delicious and inventive ideas to take your wing game to the next level:
- Classic Buffalo Wings - Toss your crispy wings in a classic buffalo sauce made from melted butter and hot sauce. Serve with celery sticks and blue cheese or ranch dressing.
- Honey Sriracha Wings - Combine honey and sriracha for a sweet and spicy glaze. Add a touch of soy sauce and garlic for extra depth of flavor.
- Lemon Pepper Wings - Toss the wings in a mixture of lemon zest, black pepper, and a bit of salt for a zesty and aromatic twist.
- Teriyaki Wings - Coat the wings in a homemade teriyaki sauce made from soy sauce, ginger, garlic, and brown sugar. Garnish with sesame seeds and green onions.
- Garlic Parmesan Wings - Toss the wings with melted butter, minced garlic, and grated Parmesan cheese for a rich and savory flavor.
What To Serve With Oven Baked Wings
Chicken Wings are a versatile and crowd-pleasing dish that pairs well with a variety of sides and accompaniments. Here are some delicious options to consider when deciding what to serve with your crispy wings:
- Celery and Carrot Sticks - A classic choice! The cool and crunchy texture of fresh celery and carrot sticks provides a refreshing contrast to the hot and crispy wings. Serve with a side of ranch or blue cheese dressing for dipping.
- Coleslaw - Creamy coleslaw complements the savory flavors of wings and provides a satisfying crunch. Opt for a traditional cabbage-based coleslaw or try a tangy vinegar-based version.
- Potato Wedges - Create a hearty meal by serving wings alongside baked potato wedges or oven-baked French fries. Season the potatoes with your favorite spices for added flavor.
How Long Do They Last?
Cooked chicken wings can be stored in an airtight container in the refrigerator. They can generally last for 3 to 4 days in the fridge. It’s important to refrigerate any leftovers quickly for food safety reasons.
Can You Freeze Them?
If you want to extend their shelf life further, you can freeze oven baked chicken wings. Allow the wings to cool completely before freezing and place them in a freezer-safe container or airtight bag.
Properly frozen chicken wings can last in the freezer for about 2 to 3 months.
More Of OurBest Wing Recipes
- Korean Chicken Wings
- Breaded Chicken Wings
- Cauliflower Buffalo Wings
- Mango Habanero Wings
- Hot Honey Wings
- Sticky Chicken Wings
- Garlic Parmesan Wings
- Lemon Pepper Wings

Baked Chicken Wings | Crispy Chicken Wings Recipe
Ingredients
- ▢ 2 pounds Chicken Wings
- ▢ 1/4 cup Baking Powder
- ▢ 1 tsp Salt
- ▢ 1/2 tsp Black Pepper
- ▢ 1/2 tsp Paprika
- ▢ 1/2 tsp Garlic Powder
- ▢ 1/2 tsp Onion Powder
Instructions
- Dry the Wings. Start by drying the chicken wings thoroughly using paper towels. Moisture is the enemy of crispiness, so make sure the wings are as dry as possible before proceeding.
- Prepare the Seasoning. In a bowl, combine baking powder, salt, pepper, and any optional spices or seasonings you prefer. The baking powder will work its magic, helping to draw moisture out of the skin and promoting a crispy texture.
- Coat and Chill. Toss the dry chicken wings in the baking powder mixture, ensuring they are evenly coated. Place the coated wings on a wire rack set on a baking sheet. The wire rack allows for even air circulation around the wings, which helps them become crispy all over. Let the wings rest in the refrigerator, uncovered, for at least an hour. This step further dries out the skin and enhances crispiness.
- Preheat and Bake . Preheat your oven to 425°F. Place the baking sheet with the wire rack and wings into the preheated oven. Bake for 30-40 minutes, flipping the wings halfway through to ensure even cooking and browning.
- Finishing Touches. Once the wings are beautifully golden and crispy, remove them from the oven. Let the wings rest for a few minutes before serving. This allows the juices to redistribute, ensuring tender and juicy meat.
- Serve and Enjoy! Arrange the crispy oven-baked chicken wings on a serving platter. Pair them with your favorite dipping sauces and enjoy the delightful combination of flavors and textures.
Get support & connect with our community on Facebook!
Nutrition
And don’t forget to check out my air fryer cookbooks! Every day easy air fryer , and Air Fryer Revolution .


If you already signed up, you should have received an email with a password to give you unlimited access to our FREE Printable Library. The password is case sensitive. Enter it below and get printing!
Password:
Baked Chicken Wings | Crispy Chicken Wings Recipe
Ingredients
- 2 pounds Chicken Wings
- 1/4 cup Baking Powder
- 1 tsp Salt
- 1/2 tsp Black Pepper
- 1/2 tsp Paprika
- 1/2 tsp Garlic Powder
- 1/2 tsp Onion Powder
Instructions
- Dry the Wings. Start by drying the chicken wings thoroughly using paper towels. Moisture is the enemy of crispiness, so make sure the wings are as dry as possible before proceeding.
- Prepare the Seasoning. In a bowl, combine baking powder, salt, pepper, and any optional spices or seasonings you prefer. The baking powder will work its magic, helping to draw moisture out of the skin and promoting a crispy texture.
- Coat and Chill. Toss the dry chicken wings in the baking powder mixture, ensuring they are evenly coated. Place the coated wings on a wire rack set on a baking sheet. The wire rack allows for even air circulation around the wings, which helps them become crispy all over. Let the wings rest in the refrigerator, uncovered, for at least an hour. This step further dries out the skin and enhances crispiness.
- Preheat and Bake . Preheat your oven to 425°F. Place the baking sheet with the wire rack and wings into the preheated oven. Bake for 30-40 minutes, flipping the wings halfway through to ensure even cooking and browning.
- Finishing Touches. Once the wings are beautifully golden and crispy, remove them from the oven. Let the wings rest for a few minutes before serving. This allows the juices to redistribute, ensuring tender and juicy meat.
- Serve and Enjoy! Arrange the crispy oven-baked chicken wings on a serving platter. Pair them with your favorite dipping sauces and enjoy the delightful combination of flavors and textures.
Baked Chicken Wings | Crispy Chicken Wings Recipe https://twosleevers.com/baked-chicken-wings/
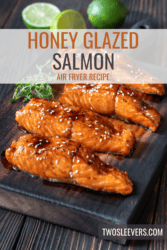
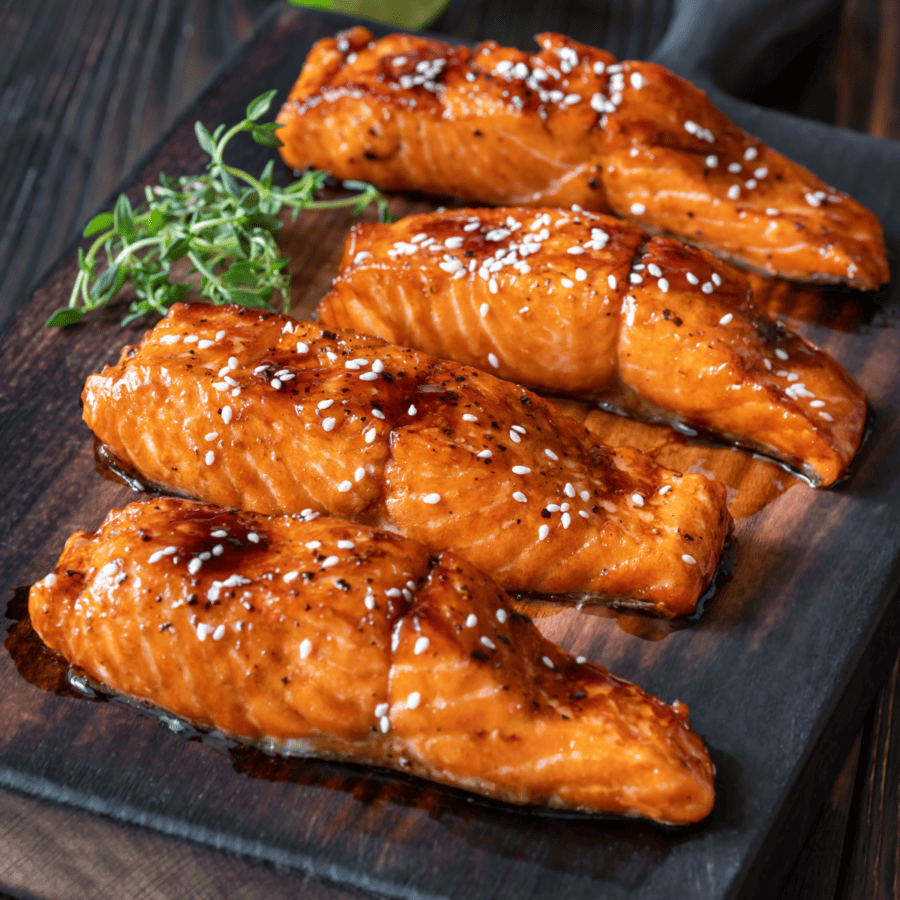
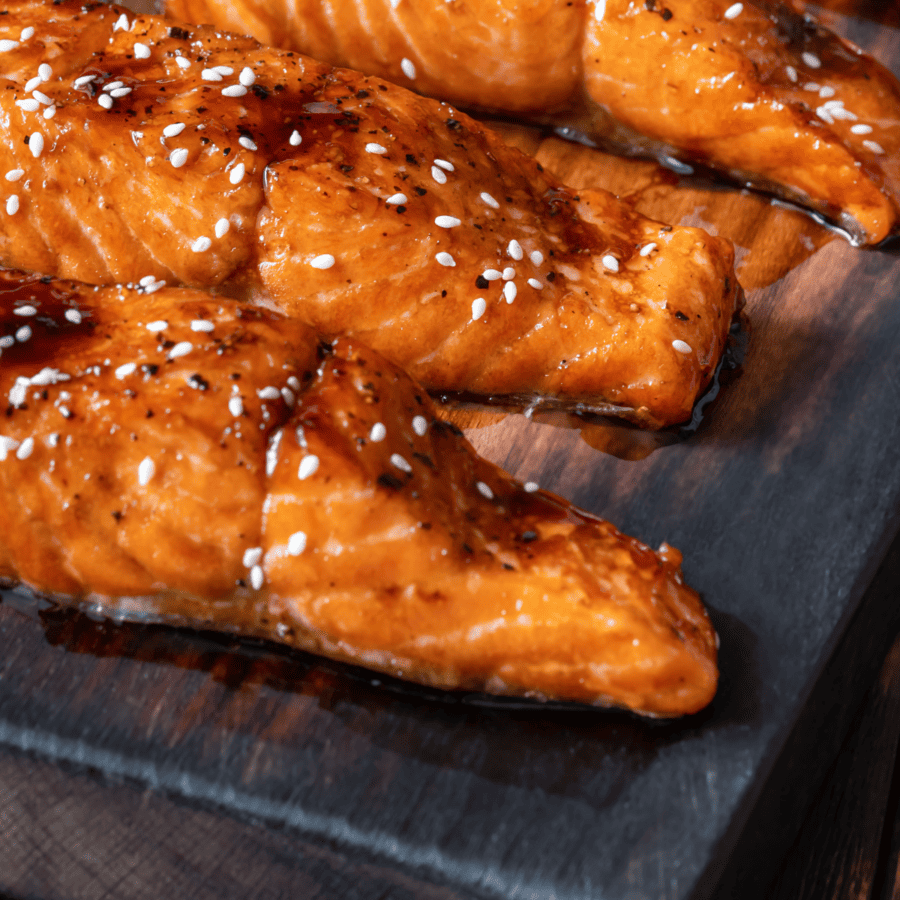
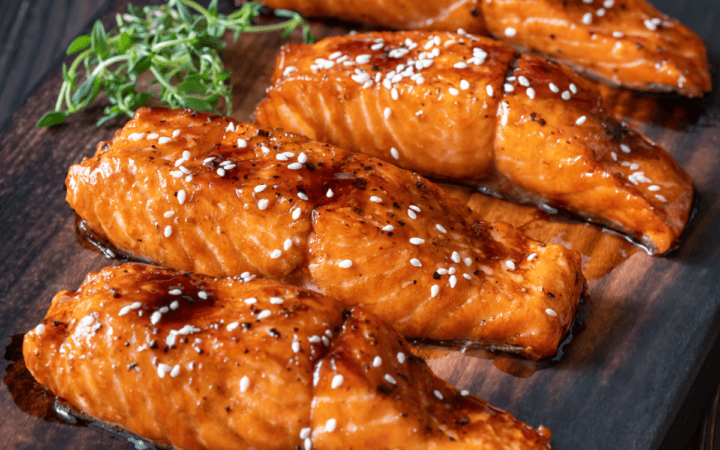
Elevate an already delightful dish by using your air fryer to create a mouthwatering Honey Glazed Salmon that’s both tender and bursting with sweet and savory flavors.
Why You’ll Love This Salmon Recipe
- Fast. Ready in under 30 minutes (not including marinating time) with the help of your air fryer.
- Easy. It’s as simple as marinating your salmon and tossing the filets in the air fryer for an easy weeknight meal.
- Delicious. A delightful blend of sweet and savory for a meal the whole family is sure to love!
The air fryer’s quick cooking time and the delectable honey glaze work together to create tender, moist, and flavorful salmon that will tantalize your taste buds.
Whether you’re hosting a special dinner or looking for a healthy and delicious weeknight meal, this air fryer honey glazed salmon is a wonderful addition to your meal rotation.
Ingredients You’ll Need
To make this flavorful air fryer honey soy glazed salmon, gather the following ingredients before you get started:
- 16 oz Salmon Filets - The star of the dish. Salmon provides a rich, flaky, tender base that pairs beautifully with sweet, savory, and spicy flavors. Its natural oils help keep it moist in the air fryer.
- 3 tbsp Honey - Adds sweetness and helps create a glossy, caramelized glaze on the salmon. Honey thickens as it cooks, giving the salmon that signature sticky-sweet coating.
- 2 tbsp Soy Sauce - Brings savory umami depth and saltiness. Soy sauce balances the sweetness of the honey and helps the glaze soak into the salmon.
- 2 tbsp Olive Oil - Adds richness and helps the salmon stay moist while air frying. It also helps the glaze cling more effectively to the filets.
- 2 tbsp Minced Garlic - Provides bold, aromatic flavor that enhances the savory elements of the glaze. Garlic caramelizes slightly in the air fryer, deepening the flavor.
- 1 tsp Ginger - Adds warm, bright, slightly spicy notes that balance the sweetness of the honey and complement the garlic. Ginger gives the glaze a subtle zing.
- 1/2 tsp Black Pepper - Adds mild heat and depth. It rounds out the glaze and enhances the savory flavor without overpowering the honey.
- 1/2 tsp Red Pepper Flakes - Adds a touch of heat to contrast the sweetness of the honey and elevate the overall flavor. Adjust to taste for spiciness.
- Lemon or Lime - A squeeze of citrus adds brightness and acidity that cuts through the richness of the salmon and sweet glaze. It freshens each bite.
- Green Onion - Provides fresh, crisp, slightly sharp flavor that adds color and balances the sweet-savory glaze.
How To Make Honey Glazed Salmon
- Prepare the Glaze. In a small bowl, whisk together the honey, soy sauce, olive oil, minced garlic, grated ginger, ground black pepper, and red pepper flakes (if using). This delectable glaze will be the key to imparting rich flavor and a beautiful caramelization to the salmon.
- Marinate the Salmon. Place the salmon fillets in a shallow dish or a resealable plastic bag. Pour half of the honey glaze over the salmon, reserving the other half for basting during cooking. Make sure the salmon is evenly coated with the glaze. Cover the dish or seal the bag and refrigerate for at least 30 minutes to allow the flavors to infuse into the salmon.
- Preheat the Air Fryer. Preheat your air fryer to 400F for a few minutes to ensure it’s nice and hot before cooking the salmon.
- Air Fry the Salmon. Remove the salmon from the marinade and shake off any excess liquid. Place the salmon fillets in the air fryer basket, making sure they are not touching. Air fry the salmon for 8-10 minutes, depending on the thickness of the fillets. Baste the salmon with the reserved honey glaze halfway through the cooking time to enhance the flavor.
- Serve and Garnish . Once the salmon is cooked to perfection, remove it from the air fryer basket and transfer it to a serving plate. Garnish with fresh lemon slices and chopped green onions for a burst of freshness and a pop of color.
Tips And Tricks
Making air fryer honey glazed salmon is a delightful and straightforward process, but a few tips and tricks can help you achieve the most flavorful and succulent results.
Here are some handy tips to make it a smashing success:
- Select Fresh Salmon . Choose high-quality salmon fillets with vibrant color and a fresh ocean scent. Look for wild-caught salmon for the best flavor and texture.
- Skin-On or Skinless . You can use either skin-on or skinless salmon fillets for this recipe, depending on your preference. If using skin-on salmon, place the fillets skin-side down in the air fryer basket.
- Avoid Overcooking : Salmon cooks quickly, so keep an eye on it to prevent overcooking. The internal temperature should reach 145°F.
Variations
Honey soy glazed salmon is a versatile dish that lends itself well to various flavor combinations and creative twists. Here are some delightful variations to consider, each adding a unique twist to the classic recipe:
- Soy Ginger Glaze - Replace the Dijon mustard in the honey glaze with soy sauce and grated fresh ginger for an Asian-inspired flavor profile. The umami from the soy sauce and the zing of ginger create a perfect balance with the sweetness of the honey.
- Teriyaki Glaze - Mix honey with soy sauce, mirin (sweet Japanese rice wine), and a splash of rice vinegar for a delectable teriyaki-style glaze. You can also add grated garlic and ginger for an extra punch of flavor.
- Cilantro Lime Glaze - Mix honey with freshly squeezed lime juice and finely chopped cilantro for a refreshing and vibrant glaze that complements the salmon’s natural flavors.
What To Eat With Honey Salmon
Honey glazed salmon is a delectable dish that pairs well with a variety of delicious sides and accompaniments. The sweet and savory flavors of the salmon complement a range of flavors, making it a versatile dish to enjoy with various side dishes.
Here are some mouthwatering options to consider when deciding what to enjoy with it:
- Roasted Vegetables - Serve it with a side of roasted vegetables like asparagus , broccoli , carrots , or Brussels sprouts . The caramelized flavors of the roasted veggies enhance the sweetness of the salmon.
- Sour Cream Mashed Potatoes - Creamy and buttery mashed potatoes are a classic and comforting choice to serve alongside this salmon dish.
- Cauliflower Rice - For a low-carb option, try cauliflower rice seasoned with herbs and a drizzle of olive oil. The light and fluffy texture of cauliflower rice complements the salmon well.
How Long Does It Last?
For the best taste and quality, it is recommended to consume the Honey Glazed Salmon within 3 to 4 days of cooking in an airtight container.
After a few days, the flavors may start to deteriorate, and there is a higher risk of foodborne illness.
Can You Freeze It?
If you find that you won’t be able to consume all of the honey glazed salmon within the recommended storage period, consider freezing the leftovers for longer storage.
Place the cooled salmon in an airtight container or a freezer-safe bag. When properly frozen, it can be kept for up to 2 to 3 months.
More Seafood Recipes
- Instant Pot Low Country Boil
- Thai Green Curry Mussels
- Shrimp Saganaki
- Salmon Croquettes
- Salmon Quinoa Bowl

Honey Glazed Salmon | Air Fryer Honey Glazed Salmon Recipe
Ingredients
- ▢ 16 oz Salmon Filets
- ▢ 3 tbsp Honey
- ▢ 2 tbsp Soy Sauce
- ▢ 2 tbsp Olive Oil
- ▢ 2 tbsp Minced Garlic
- ▢ 1 tsp Ginger
- ▢ 1/2 tsp Black Pepper
- ▢ 1/2 tsp Red Pepper Flakes
- ▢ lemon or lime , For Garnish
- ▢ Green Onion , For Garnish
Instructions
- Prepare the Glaze. In a small bowl, whisk together the honey, soy sauce, olive oil, minced garlic, grated ginger, ground black pepper, and red pepper flakes (if using). This delectable glaze will be the key to imparting rich flavor and a beautiful caramelization to the salmon.
- Marinate the Salmon. Place the salmon fillets in a shallow dish or a resealable plastic bag. Pour half of the honey glaze over the salmon, reserving the other half for basting during cooking. Make sure the salmon is evenly coated with the glaze. Cover the dish or seal the bag and refrigerate for at least 30 minutes to allow the flavors to infuse into the salmon.
- Preheat the Air Fryer. Preheat your air fryer to 400F for a few minutes to ensure it’s nice and hot before cooking the salmon.
- Air Fry the Salmon. Remove the salmon from the marinade and shake off any excess liquid. Place the salmon fillets in the air fryer basket, making sure they are not touching. Air fry the salmon for 8-10 minutes, depending on the thickness of the fillets. Baste the salmon with the reserved honey glaze halfway through the cooking time to enhance the flavor.
- Serve and Garnish . Once the salmon is cooked to perfection, remove it from the air fryer basket and transfer it to a serving plate. Garnish with fresh lemon slices and chopped green onions for a burst of freshness and a pop of color.
Get support & connect with our community on Facebook!
Nutrition
And don’t forget to check out my air fryer cookbooks! Every day easy air fryer , and Air Fryer Revolution .
