
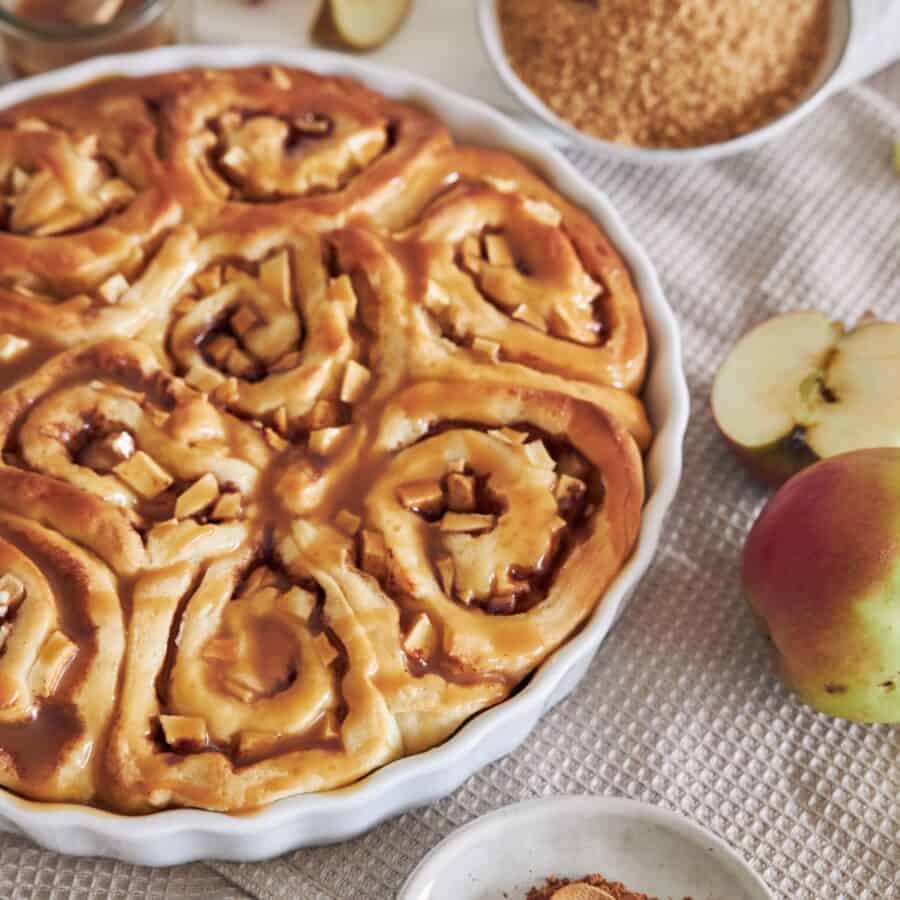
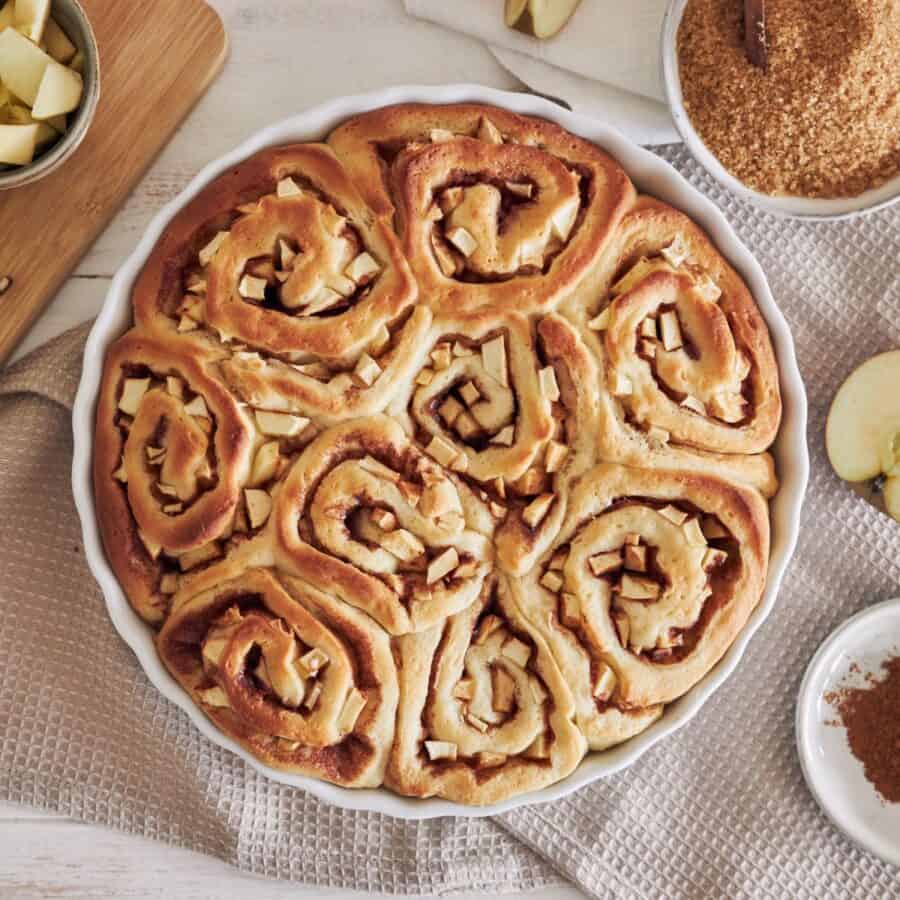
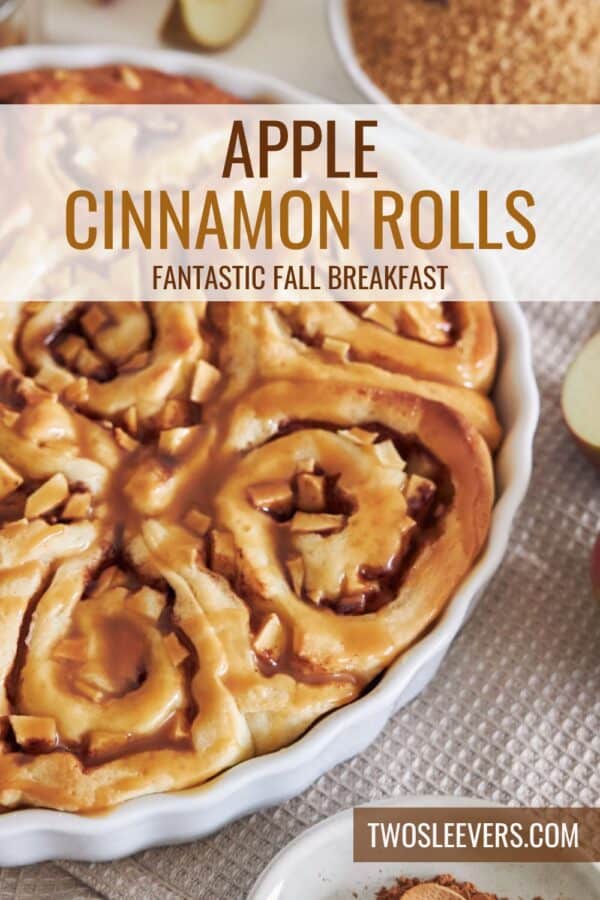
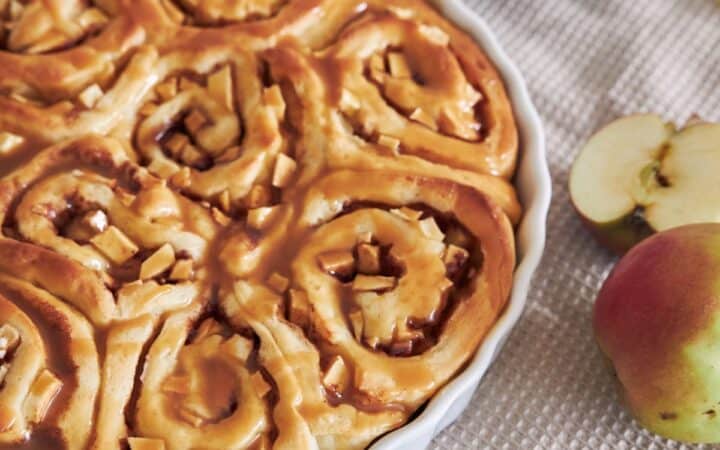
If you’re craving a cozy, delicious treat perfect for fall, these Apple Cinnamon Rolls are exactly what you need! Soft, fluffy dough rolled with sweet cinnamon and filled with juicy apples—each bite is pure comfort. They’re simple to make and will fill your kitchen with the irresistible scent of cinnamon and apples.
Why You’ll Love This Brilliant Bite
- Delicious Fall Flavors . Apple and cinnamon are a match made in heaven, especially when paired in a tender, homemade roll.
- Perfect for Any Occasion . These rolls are a great way to celebrate fall, but they’re also a delicious treat for breakfast, dessert, or a weekend brunch.
- Make-Ahead Friendly . You can prep these cinnamon rolls in advance and bake them fresh when ready.
With their warm flavors and gooey cinnamon apple filling, these Apple Cinnamon Rolls are a crowd-pleaser that will have everyone coming back for seconds!
What Do Apple Cinnamon Rolls Taste Like?
These apple cinnamon rolls have the perfect balance of flavors. The sweet apples add a burst of fruity freshness, while the cinnamon provides warmth and spice.
The soft, buttery dough creates the ideal base, making each bite melt in your mouth. The added drizzle of a creamy icing takes these rolls to the next level of indulgence!
Are Apple Cinnamon Rolls Breakfast Or Dessert?
Apple cinnamon rolls can be enjoyed as both breakfast and dessert !
- For Breakfast : They’re perfect for a sweet morning treat, especially when paired with a cup of coffee or tea. The soft, doughy texture and the warmth of the apples and cinnamon make them an indulgent start to the day.
- For Dessert : Apple cinnamon rolls can easily be transformed into a decadent dessert by serving them warm with a scoop of vanilla ice cream or a drizzle of caramel sauce.
The beauty of these rolls is their versatility—they’re delicious no matter the time of day!
Ingredients You’ll Need
- All-Purpose Flour - The foundation for a light and fluffy dough.
- Milk - Warm milk helps activate the yeast and adds richness to the dough.
- Active Dry Yeast - This helps the dough rise, making your rolls soft and pillowy.
- Sugar - Granulated sugar sweetens the dough and helps activate the yeast.
- Butter - Unsalted butter adds richness to both the dough and the filling.
- Egg - Adds structure and richness to the dough.
- Cinnamon - The star spice of these rolls, providing that warm and cozy flavor.
- Apples - Peeled and diced for a juicy, fruity filling. Granny Smith or Honeycrisp apples work best for their tartness.
- Brown Sugar - Adds sweetness to the cinnamon filling and caramelizes with the apples.
- Caramel Sauce - To drizzle over the cooked cinnamon rolls.
How To Make Apple Cinnamon Rolls
- Prepare the Dough . In a small bowl, warm the milk to about 110°F and sprinkle the active dry yeast over the top. Let it sit for 5 minutes until foamy. In a large mixing bowl, combine the flour, sugar, salt, and egg. Gradually add the milk-yeast mixture and melted butter, mixing until a soft dough forms.
- Knead and Rise . Turn the dough out onto a floured surface and knead for about 8-10 minutes until smooth and elastic. Place the dough in a greased bowl, cover it, and let it rise in a warm place for 1-1.5 hours or until doubled in size.
- Prepare the Apple Filling . While the dough is rising, peel, core, and dice the apples into small pieces. In a skillet, melt the butter and sauté the apples with brown sugar and cinnamon until tender, about 5-7 minutes. Set aside to cool.
- Roll and Fill the Dough . Once the dough has risen, roll it out into a large rectangle on a floured surface. Spread softened butter evenly over the dough, then sprinkle the cinnamon and brown sugar mixture across the surface. Add the cooled apple filling.
- Roll and Cut . Carefully roll the dough from one long edge to the other, creating a log. Slice the log into 9 even rolls using a sharp knife or dental floss.
- Second Rise . Place the rolls into a greased baking dish, cover with a towel, and let them rise for another 30 minutes.
- Bake to Perfection . Preheat your oven to 350°F. Bake the rolls for 25-30 minutes or until golden brown and cooked through. Your kitchen will smell heavenly!
- Top With Caramel . Drizzle the caramel sauce over the warm apple cinnamon rolls once they’re out of the oven.
Tips And Tricks
- Make sure your yeast is fresh . If your yeast doesn’t foam when combined with warm milk, it may be expired. Start with fresh yeast to ensure a good rise.
- Don’t overstuff the rolls . Too much filling can make the rolls difficult to roll and may cause the dough to tear. Use just enough apples and cinnamon sugar for a balanced flavor.
- Room temperature butter . Make sure your butter is soft and spreadable for easy spreading on the dough. Cold butter can tear the dough.
- Fluffy dough tip . Knead the dough well to develop the gluten, which will make the rolls soft and chewy.
Variations
- Caramel Apple - Add a drizzle of homemade caramel sauce over the rolls for an extra decadent treat.
- Pecan - Sprinkle chopped pecans over the cinnamon sugar before rolling for a crunchy addition.
- Maple Icing - Swap out the vanilla extract for maple syrup in the icing for a fall-inspired twist.
- Raisin - Mix in a handful of raisins with the apple filling for extra sweetness.
What To Enjoy With Cinnamon Rolls
These sweet and fluffy rolls are perfect for breakfast, brunch, or even dessert. Here are a few serving ideas:
- Coffee or Tea - The warm spices of the cinnamon pair perfectly with a hot cup of coffee or tea.
- Vanilla Ice Cream - Serve these rolls warm with a scoop of vanilla ice cream for a decadent dessert.
- Fresh Fruit Salad - A light, refreshing fruit salad will balance the richness of the rolls for a perfect brunch combination.
Can You Make Them Ahead Of Time?
Yes! You can prepare the rolls through the second rise and store them covered in the refrigerator overnight. In the morning, let them come to room temperature for about 30 minutes before baking as directed.
How Long Do They Last?
Keep the rolls in an airtight container at room temperature for up to 2 days. For longer storage, refrigerate them for up to 5 days.
Reheat individual rolls in the microwave for 20-30 seconds for a warm, fresh-from-the-oven taste.
Can You Freeze Them?
These rolls freeze well! Wrap each roll individually in plastic wrap and store it in a freezer bag. They will last up to 3 months. Thaw in the fridge overnight before reheating
Our Best Cinnamon Roll Recipes
- Chocolate Cinnamon Rolls
- Pumpkin Cinnamon Rolls
- Blueberry Cinnamon Rolls
- Cinnamon Roll Monkey Bread
- Orange Rolls
Apple Cinnamon Rolls | Apple Filled Cinnamon Roll Recipe
Ingredients
For The Dough
- ▢ 2 3/4 cups All Purpose Flour
- ▢ 3/4 cup Milk , warm
- ▢ 2 1/4 tsp Active Dry Yeast
- ▢ 1/4 cup Granulated Sugar
- ▢ 1/4 cup Unsalted Butter , melted
- ▢ 1 Egg
- ▢ 1/2 tsp Kosher Salt
For The Filling
- ▢ 2 tbsp Unsalted Butter , softened
- ▢ 1 1/2 tsp Ground Cinnamon
- ▢ 1/3 cup Brown Sugar
- ▢ 1 1/2 cups Apples , diced
The Topping
- ▢ 1/2 cup Caramel Sauce
Instructions
- Prepare the Dough . In a small bowl, warm the milk to about 110°F and sprinkle the active dry yeast over the top. Let it sit for 5 minutes until foamy. In a large mixing bowl, combine the flour, sugar, salt, and egg. Gradually add the milk-yeast mixture and melted butter, mixing until a soft dough forms.
- Knead and Rise . Turn the dough out onto a floured surface and knead for about 8-10 minutes until smooth and elastic. Place the dough in a greased bowl, cover it, and let it rise in a warm place for 1-1.5 hours or until doubled in size.
- Prepare the Apple Filling . While the dough is rising, peel, core, and dice the apples into small pieces. In a skillet, melt the butter and sauté the apples with brown sugar and cinnamon until tender, about 5-7 minutes. Set aside to cool.
- Roll and Fill the Dough . Once the dough has risen, roll it out into a large rectangle on a floured surface. Spread softened butter evenly over the dough, then sprinkle the cinnamon and brown sugar mixture across the surface. Add the cooled apple filling.
- Roll and Cut . Carefully roll the dough from one long edge to the other, creating a log. Slice the log into 9 even rolls using a sharp knife or dental floss.
- Second Rise . Place the rolls into a greased baking dish, cover with a towel, and let them rise for another 30 minutes.
- Bake to Perfection . Preheat your oven to 350°F. Bake the rolls for 25-30 minutes or until golden brown and cooked through. Your kitchen will smell heavenly!
- Top With Caramel . Drizzle the caramel sauce over the warm apple cinnamon rolls once they’re out of the oven.
Get support & connect with our community on Facebook!
Nutrition

If you already signed up, you should have received an email with a password to give you unlimited access to our FREE Printable Library. The password is case sensitive. Enter it below and get printing!
Password:

Apple Cinnamon Rolls | Apple Filled Cinnamon Roll Recipe
Ingredients
For The Dough
- 2 3/4 cups All Purpose Flour
- 3/4 cup Milk warm
- 2 1/4 tsp Active Dry Yeast
- 1/4 cup Granulated Sugar
- 1/4 cup Unsalted Butter melted
- 1 Egg
- 1/2 tsp Kosher Salt
For The Filling
- 2 tbsp Unsalted Butter softened
- 1 1/2 tsp Ground Cinnamon
- 1/3 cup Brown Sugar
- 1 1/2 cups Apples diced
The Topping
- 1/2 cup Caramel Sauce
Instructions
- Prepare the Dough . In a small bowl, warm the milk to about 110°F and sprinkle the active dry yeast over the top. Let it sit for 5 minutes until foamy. In a large mixing bowl, combine the flour, sugar, salt, and egg. Gradually add the milk-yeast mixture and melted butter, mixing until a soft dough forms.
- Knead and Rise . Turn the dough out onto a floured surface and knead for about 8-10 minutes until smooth and elastic. Place the dough in a greased bowl, cover it, and let it rise in a warm place for 1-1.5 hours or until doubled in size.
- Prepare the Apple Filling . While the dough is rising, peel, core, and dice the apples into small pieces. In a skillet, melt the butter and sauté the apples with brown sugar and cinnamon until tender, about 5-7 minutes. Set aside to cool.
- Roll and Fill the Dough . Once the dough has risen, roll it out into a large rectangle on a floured surface. Spread softened butter evenly over the dough, then sprinkle the cinnamon and brown sugar mixture across the surface. Add the cooled apple filling.
- Roll and Cut . Carefully roll the dough from one long edge to the other, creating a log. Slice the log into 9 even rolls using a sharp knife or dental floss.
- Second Rise . Place the rolls into a greased baking dish, cover with a towel, and let them rise for another 30 minutes.
- Bake to Perfection . Preheat your oven to 350°F. Bake the rolls for 25-30 minutes or until golden brown and cooked through. Your kitchen will smell heavenly!
- Top With Caramel . Drizzle the caramel sauce over the warm apple cinnamon rolls once they’re out of the oven.
Apple Cinnamon Rolls | Apple Filled Cinnamon Roll Recipe https://twosleevers.com/apple-cinnamon-rolls/

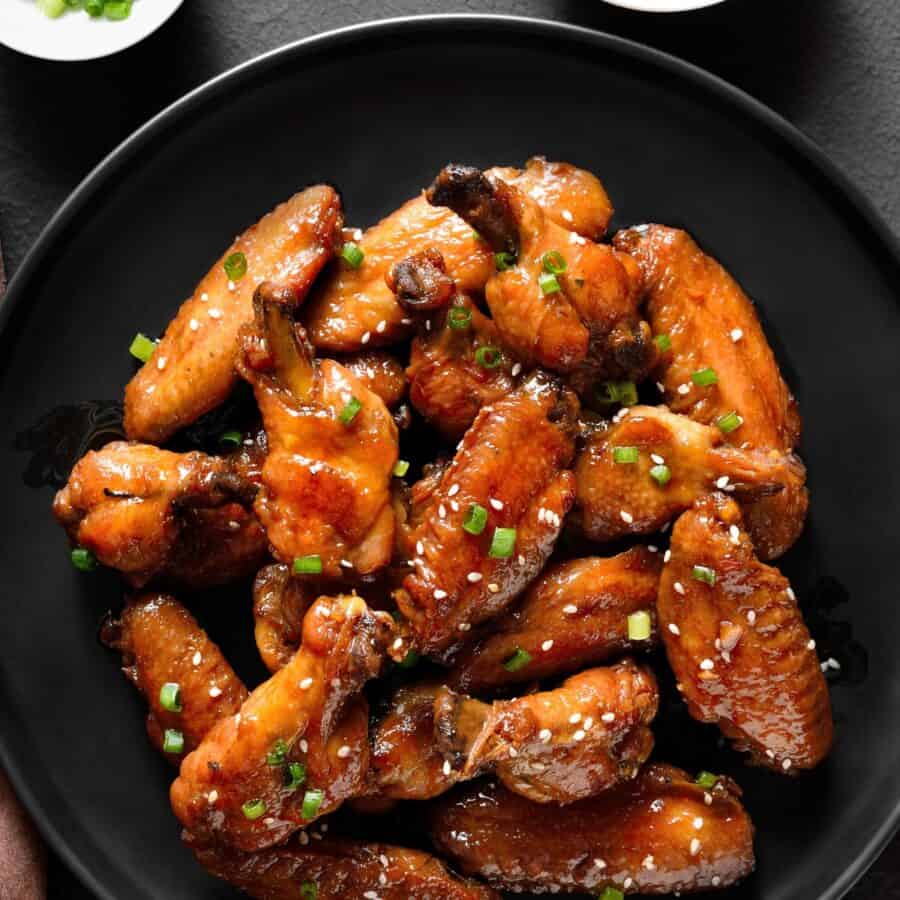
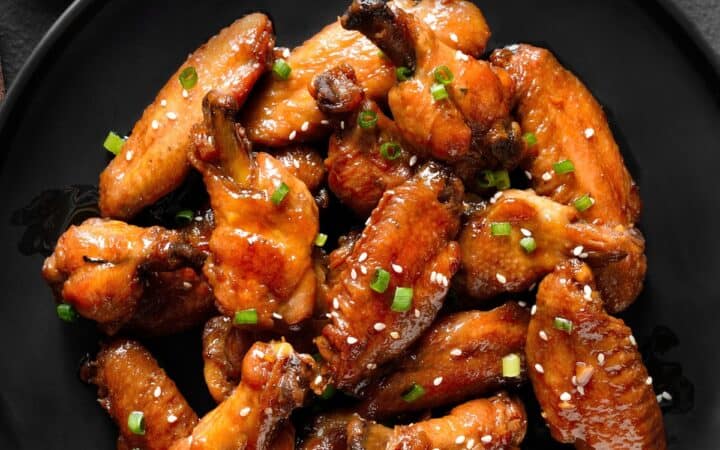
If you’re a fan of tender chicken wings coated in a sweet, sticky glaze, you’re going to love these Oven Baked Sticky Chicken Wings! These wings come out perfectly caramelized on the outside, while still juicy and flavorful inside.
Why You’ll Love This Wonderful Wing Recipe
- Easy to Make. The oven does all the hard work, meaning you get delicious sticky wings with minimal effort!
- Sticky & Sweet. The glaze is perfectly balanced between sweet, savory, and a hint of spice.
- Perfect for Parties. Ideal for sharing as an appetizer at gatherings or as a main course .
- No Frying Necessary. Enjoy that crispy texture without the mess of deep frying.
Whether you’re hosting game day, a family gathering, or just treating yourself, this chicken recipe is a crowd-pleaser that’s super easy to make at home.
Why Are They Called Sticky Chicken Wings?
Sticky chicken wings get their name from the thick, sweet, and savory glaze that coats them during the cooking process. The “sticky” texture comes from ingredients like honey, brown sugar, or soy sauce, which caramelize as the wings bake or cook, creating a deliciously tacky layer.
This sticky glaze clings to the wings, making them flavorful, juicy, and slightly messy to eat — but in the best way possible! It’s that irresistible combination of flavors and textures that makes sticky chicken wings a fan favorite.
What Do Sticky Chicken Wings Taste Like?
Oven baked sticky chicken wings are incredibly delicious and just as good as, if not better than, fried wings. The high heat from the oven helps the skin crisp up, while the sticky glaze adds a perfect coating of flavor.
With the right balance of sweet, savory, and sticky, these wings will leave you licking your fingers in delight.
Ingredients You’ll Need
- 24 Chicken Wings - These are the star of the recipe. Using a mix of drums and flats ensures even cooking and great texture. Wings become wonderfully crispy on the outside while staying juicy inside.
- 1/2 cup Soy Sauce - This adds deep umami, saltiness, and savory backbone to the glaze. It balances the sweetness of the honey and sugar and helps the sauce cling to the wings.
- 1/2 cup Honey - Honey provides thickness, shine, and stickiness. As it cooks, it caramelizes beautifully, giving the wings their glossy, sticky coating and sweet flavor.
- 3 cloves Garlic - Fresh garlic adds bold, aromatic flavor that cuts through the sweetness. It enhances the savory notes of the sauce and adds depth to every bite.
- 1/4 cup Brown Sugar - Brown sugar boosts the caramelization and intensifies the sticky texture. Its molasses undertones make the glaze richer and more complex.
- 2 tbsp Rice Vinegar - This adds acidity to balance the sweet and salty flavors. It prevents the glaze from becoming overly sweet and brightens the overall taste.
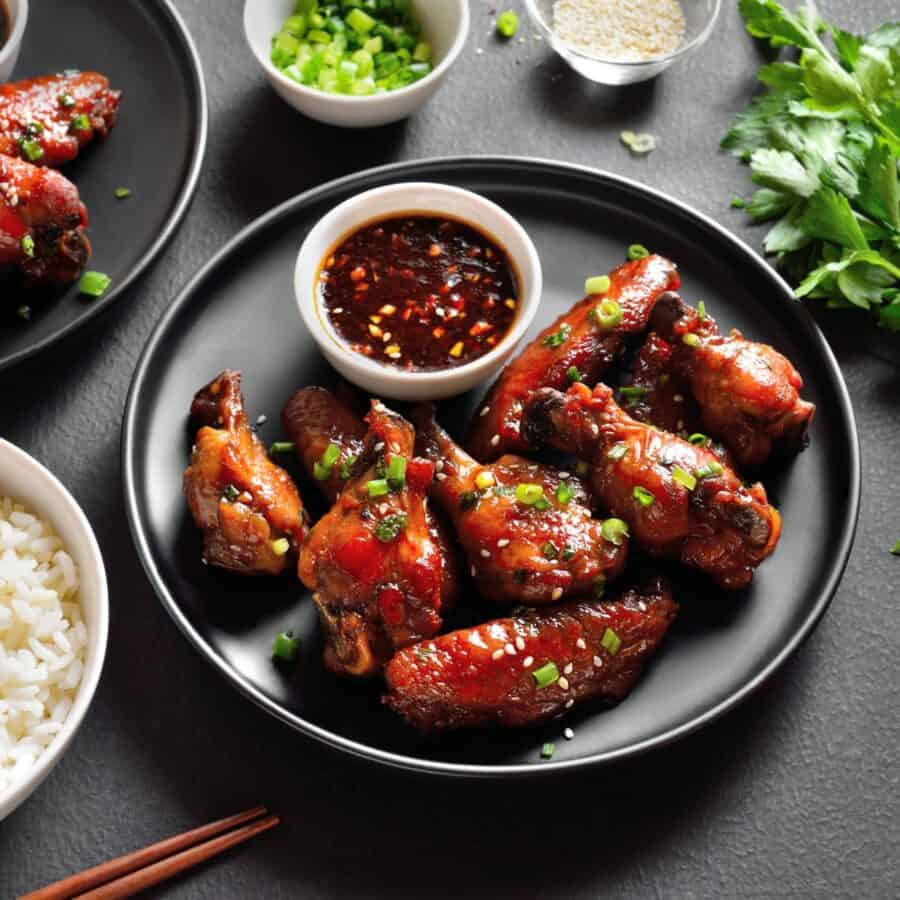
- 1 tbsp Sriracha - Sriracha introduces heat, tang, and a subtle garlic-chili flavor. It doesn’t make the wings overly spicy but gives a warm kick that rounds out the glaze.
- 2 tbsp Olive Oil - Used to lightly coat the wings before baking or air frying. It promotes browning, crispiness, and helps the seasonings adhere to the skin.
- Sesame Seeds - These add a nutty flavor and a pleasant crunch. They also give the wings a classic Asian-inspired finishing touch.
- Green Onion - Green onions bring freshness, color, and a mild onion bite. They balance the richness of the glaze and brighten the presentation.
How To Make Sticky Chicken Wings
- Prep the Wings. Start by patting the chicken wings dry with paper towels to ensure the wings crisp up nicely. Toss the wings in olive oil and season with a bit of salt and pepper.
- Bake the Wings. Preheat your oven to 400°F. Place the wings on a lined baking sheet in a single layer, making sure they aren’t too crowded. Bake for 40-45 minutes, flipping halfway through. The wings should be golden brown and crispy on the outside.
- Make the Sticky Sauce. While the wings are baking, prepare the sticky glaze. In a saucepan over medium heat, combine soy sauce, honey, brown sugar, garlic, ginger, rice vinegar, and sriracha (if using). Let it simmer for 5-10 minutes, stirring occasionally until the sauce thickens.
- Toss the Wings in the Sauce. Once the wings are done baking, toss them in the sticky sauce until they’re fully coated.
- Broil for Extra Stickiness. For an extra sticky finish, place the coated wings back on the baking sheet and broil them for 3-4 minutes. This helps caramelize the glaze, making the wings extra sticky and flavorful.
- Garnish and Serve. Transfer the sticky wings to a serving platter and sprinkle with sesame seeds and chopped green onions for added flavor and texture.
Tips And Tricks
Here are some incredibly helpful tips and tricks for making sticky chicken wings, so you get perfectly caramelized, finger-licking wings every single time.
- Dry the Wings Thoroughly . Drying the wings ensures they get crispy in the oven. Pat them down with paper towels before seasoning.
- Don’t Skip the Flip . Flip the wings halfway through baking to ensure even crisping on all sides.
- Simmer the Sauce . Let the sticky sauce simmer until it thickens. This intensifies the flavors and creates that irresistible sticky texture.
- Broil for Extra Stickiness . After tossing the wings in the sauce, broiling for a few minutes caramelizes the glaze, giving you the perfect finish.
Variations
Here are some incredibly helpful tips and tricks for making sticky chicken wings, so you get perfectly caramelized, finger-licking wings every single time.
- Spicy- Add extra sriracha, red pepper flakes, or cayenne pepper for a fiery kick.
- Sweet & Tangy- Swap the soy sauce for a mix of honey and balsamic vinegar for a sweeter, tangier flavor.
- Asian-Inspired- Add a splash of fish sauce and lime juice to the glaze for an authentic Thai twist.
- Gluten-Free- Use tamari in place of soy sauce for a gluten-free version of these wings.
What To Eat With Sticky Chicken Wings
These sticky wings are versatile and pair well with a variety of side dishes:
- Coleslaw - The tangy crunch of coleslaw perfectly complements the sweetness of the wings.
- Fries or Sweet Potato Wedges - Serve with crispy fries or roasted sweet potato wedges for a hearty meal.
- Vegetable Sticks - Keep it light by serving with fresh carrot and celery sticks.
- Rice - For a more filling option, serve the wings with a side of steamed rice.
How Long Do They Last?
These baked sticky wings are best enjoyed fresh, but you can store leftovers in an airtight container in the refrigerator for up to 3 days. When ready to eat, reheat them in the oven at 350°F until warmed through.
Can You Freeze Them?
Yes, you can freeze the wings after baking. Let them cool completely, then store them in a freezer-safe bag or container for up to 2 months.
To reheat, bake the frozen wings in a preheated oven at 375°F until hot and crispy.
OurBest Wing Recipes
- Korean Chicken Wings
- Breaded Wings
- Mango Habanero Wings
- Baked Chicken Wings
- Hot Honey Wings
- Garlic Parmesan Wings
- Lemon Pepper Wings
- Cauliflower Buffalo Wings

Ingredients
- ▢ 24 Chicken Wings , drums and flats
- ▢ 1/2 cup Soy Sauce
- ▢ 1/2 cup Honey
- ▢ 3 cloves Garlic , minced
- ▢ 1/4 cup Brown Sugar
- ▢ 2 tbsp Rice Vinegar
- ▢ 1 tbsp Sriracha
- ▢ 2 tbsp Olive Oil
- ▢ Sesame Seeds , for garnish
- ▢ Green Onion , sliced, for garnish
Instructions
- Prep the Wings. Start by patting the chicken wings dry with paper towels to ensure the wings crisp up nicely. Toss the wings in olive oil and season with a bit of salt and pepper.
- Bake the Wings. Preheat your oven to 400°F. Place the wings on a lined baking sheet in a single layer, making sure they aren’t too crowded. Bake for 40-45 minutes, flipping halfway through. The wings should be golden brown and crispy on the outside.
- Make the Sticky Sauce. While the wings are baking, prepare the sticky glaze. In a saucepan over medium heat, combine soy sauce, honey, brown sugar, garlic, ginger, rice vinegar, and sriracha (if using). Let it simmer for 5-10 minutes, stirring occasionally until the sauce thickens.
- Toss the Wings in the Sauce. Once the wings are done baking, toss them in the sticky sauce until they’re fully coated.
- Broil for Extra Stickiness. For an extra sticky finish, place the coated wings back on the baking sheet and broil them for 3-4 minutes. This helps caramelize the glaze, making the wings extra sticky and flavorful.
- Garnish and Serve. Transfer the sticky wings to a serving platter and sprinkle with sesame seeds and chopped green onions for added flavor and texture.
