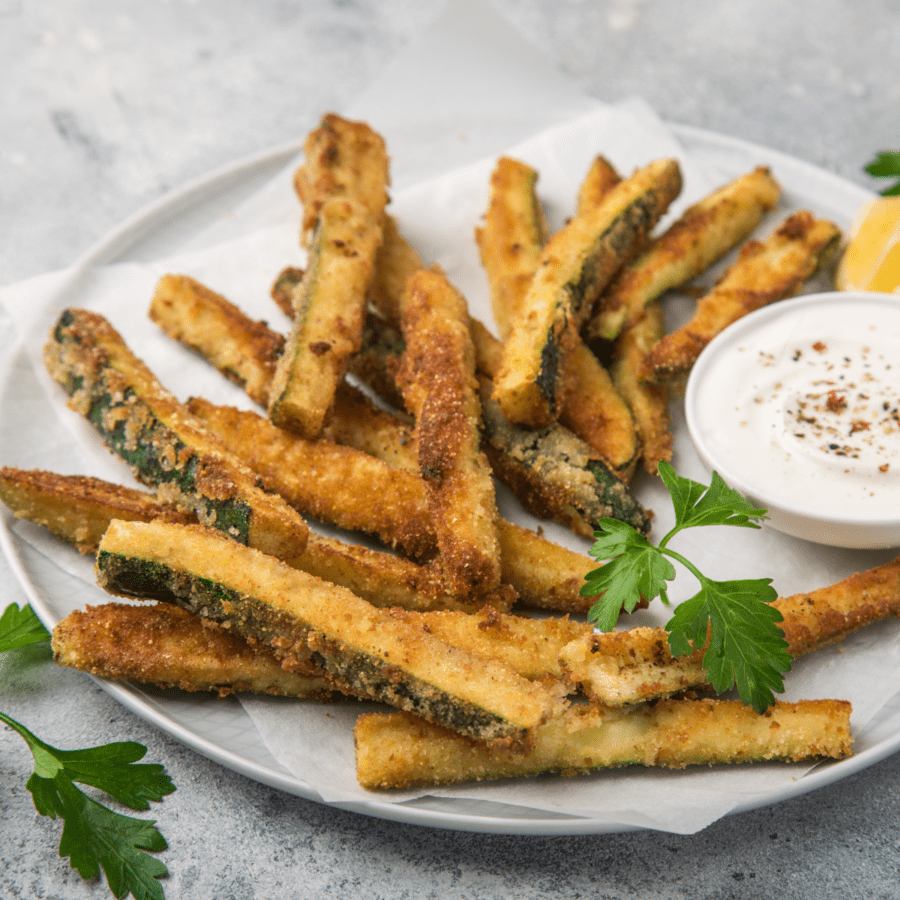
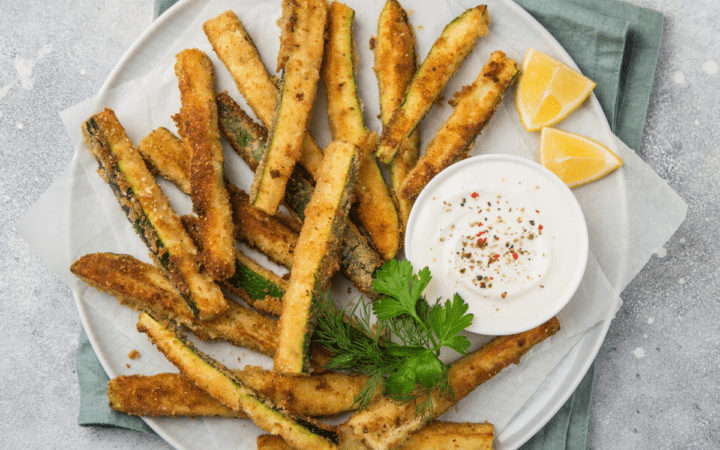
Air Fryer Zucchini Fries are light, crispy, and the perfect low carb side dish. Dunk them in your favorite keto-friendly dipping sauce for a healthy and satisfying bite.

Why You’ll Love These Keto Fries
- Fast. A keto side dish that is ready in under 30 minutes with the help of your air fryer.
- Easy. Chop up the zucchini, bread the zucchini sticks, spray with oil, and air fryer. That’s all there is to it.
- Low Carb . Only net carbs per serving.
- Gluten Free . This recipe uses almond flour to make them not only low in carbs but a great gluten free side dish , snack or appetizer .
Why Are My Zucchini Fries Soggy?
Zucchini have a high water content. Because of this, when you cut in to them, they have a tendency to slowly release some of their liquid.
To avoid having soggy zucchini fries, I would suggest cutting your zucchini into sticks and then place them on a kitchen towel or paper towel to help absorb any of the excess moisture before breading them and cooking them in your air fryer.
How Do You Cut Zucchini Into Fries?
There is no “right” way to cut zucchini fries, but I will tell you how I prefer to go about cutting mine.
- On a cutting board, use a sharp knife and remove about 1/2 an inch from both ends of the zucchini. This should leave you without any rounded ends that tend to be a bit tough or dried out.
- Use the knife to cut the zucchini in half lengthwise.
- Use a large spoon to scrape the middle of the zucchini and remove any large seeds.
- Cut the prepared zucchini halves into strips that resemble the shape of french fries.
What Temperature Do You Cook Zucchini Sticks At In The Air Fryer?
The trick to a sturdy keto fry is to air fry them at a high temperature. This will pull any of the remaining excess moisture out of the zucchini and crisp up the batter.
For the best air fryer zucchini fries, air fry them at 400F.
Ingredients Needed
- Zucchini - Smaller zucchini tend to be more tender and have fewer large seeds than more mature vegetables.
- Almond Flour - Creates a “breading” on the zucchini without the addition of gluten or a high amount of carbs.
- Egg - Helps the almond flour stick to the zucchini sticks.
- Oil - Spray just a little over the top of your air fryer zucchini fries before cooking for a perfectly crispy crust.
- Salt and Pepper - A simple seasoning blend to allow all of the flavor in this dish to come from the freshness of the zucchini.
How To Make Air Fryer Zucchini Fries
If you’re familiar with battering anything, whether it be protein, or vegetables, the process of making these air fryer zucchini fries shouldn’t be too complicated. Even if this is your first time breading anything, you’ll still find the steps below incredibly simple and easy to follow.
- Prepare the zucchini sticks using the instructions provided above.
- In a large bowl, mix together almond flour, salt, and pepper.
- In a separate bowl, scramble an egg.
- Place the dried zucchini sticks in the egg mixture. Remove them from the egg mixture and place them in the almond flour. Roll them around to ensure they are evenly coated.
- Lightly spray the outside of the battered zucchini fries with oil and place them in the air fryer basket.
- Air fry, flipping half way through the cooking time.
- Remove the keto fries from the air fryer basket, serve with your favorite low carb dipping sauce (i love this Keto Ranch Dressing but Big Mac Sauce is another solid choice) and enjoy!
Variations
- Double up the crisp. If you want a more intense crisp in each bite, use a food processor to grind up some pork rinds and mix it in with the almond flour before breading and air frying.
- Kick up the heat. One of my favorite tricks for making food more exciting is to add a punch of heat. To add spice to these air fryer zucchini fries, simply sprinkle some cayenne pepper into your breading along with the salt and pepper.
- Make them cheesy. Cheese makes so many things more delicious, these keto fries are no exception. For a low carb and flavorful addition to traditional zucchini fries, sprinkle some parmesan cheese on before air frying.
What To Serve With Them
Air Fryer Zucchini Fries are incredibly versatile and can be paired well with so many low carb main courses . Here are a few of my favorite proteins to serve alongside these keto fries:
- Juicy Pork Chops
- Sous Vide Steak
- Air Fryer Chicken Tenderloins
- Air Fryer Pork Tenderloin
How Long Do They Last?
While Air Fryer Zucchini Fries are best served fresh and hot, you can make them ahead of time or store any leftovers you may have for later.
For the best bite, I would suggest storing the zucchini fries in an airtight container in the refrigerator for up to 3 days.
The longer they are stored, the more moisture is released. This could cause the breading to come off of the zucchini fries or become soggy. To crisp the breading back up and reheat the keto fries, just place them back in your air fryer at 375F for 2-3 minutes or until they are warmed through.
More Of Our Best Zucchini Recipes
- Roasted Zucchini
- Zucchini Casserole
- Air Fryer Zucchini
- Poblano Zucchini
- Layered Ratatouille

If you love these Air Fryer Zucchini Fries as much as we do, make sure you share them with your friends on Facebook and Instagram! Don’t forget to Pin them so you can make them again later.
Air Fryer Zucchini Fries | Keto Fries
Ingredients
- ▢ 4 Zucchini
- ▢ 3/4 cup Superfine Almond Flour
- ▢ 1 Eggs
- ▢ 1/2 tsp Kosher Salt
- ▢ 1/4 tsp Ground Black Pepper
Instructions
- Prepare the zucchini sticks using the instructions provided above. In a large bowl, mix together almond flour, salt, and pepper.
- In a separate bowl, scramble an egg.Place the dried zucchini sticks in the egg mixture. Remove them from the egg mixture and place them in the almond flour. Roll them around to ensure they are evenly coated.
- Lightly spray the outside of the battered zucchini fries with oil and place them in the air fryer basket.Air fry at 400F for 10-12 minutes flipping half way through the cooking time.
- Remove the keto fries from the air fryer basket, serve with your favorite low carb dipping sauce and enjoy!
Get support & connect with our community on Facebook!
Nutrition
And don’t forget to check out my air fryer cookbooks! Every day easy air fryer , and Air Fryer Revolution .


If you already signed up, you should have received an email with a password to give you unlimited access to our FREE Printable Library. The password is case sensitive. Enter it below and get printing!
Password:

Air Fryer Zucchini Fries | Keto Fries
Ingredients
- 4 Zucchini
- 3/4 cup Superfine Almond Flour
- 1 Eggs
- 1/2 tsp Kosher Salt
- 1/4 tsp Ground Black Pepper
Instructions
- Prepare the zucchini sticks using the instructions provided above. In a large bowl, mix together almond flour, salt, and pepper.
- In a separate bowl, scramble an egg.Place the dried zucchini sticks in the egg mixture. Remove them from the egg mixture and place them in the almond flour. Roll them around to ensure they are evenly coated.
- Lightly spray the outside of the battered zucchini fries with oil and place them in the air fryer basket.Air fry at 400F for 10-12 minutes flipping half way through the cooking time.
- Remove the keto fries from the air fryer basket, serve with your favorite low carb dipping sauce and enjoy!
Air Fryer Zucchini Fries | Keto Fries https://twosleevers.com/air-fryer-zucchini-fries/
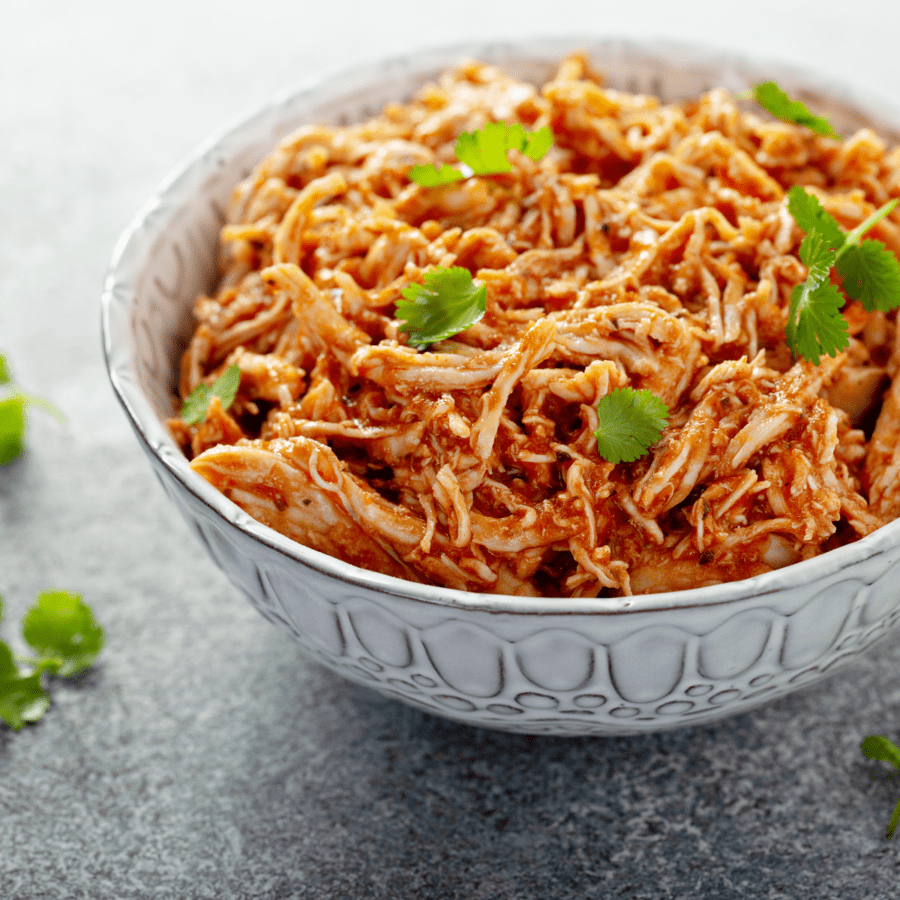
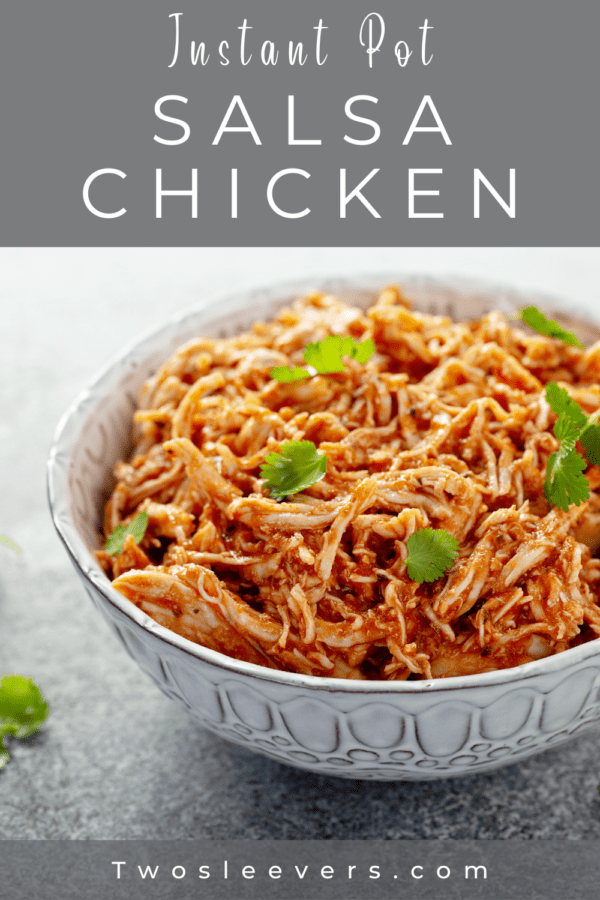
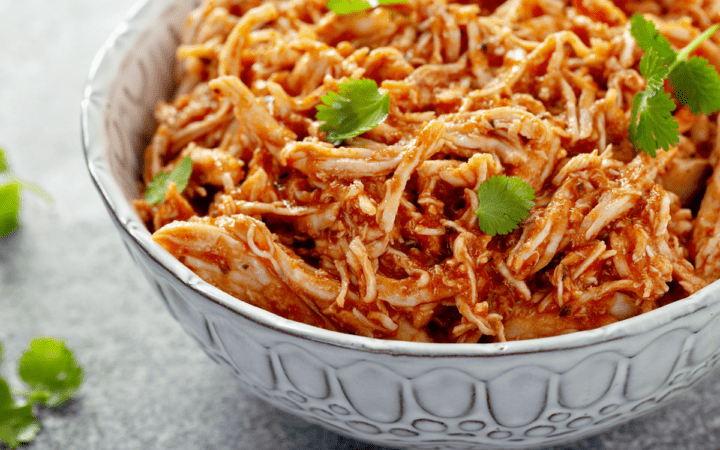
Salsa Chicken is a quick and easy weeknight dinner that the whole family will enjoy. With just a few ingredients and your Instant Pot, you will have a versatile dish that is perfect for meal prep.
Why This Is The Best Way To Make Salsa Chicken
- Fast. A quick weeknight meal that is ready in under 30 minutes with the help of your Instant Pot.
- Easy. This a simple pour and cook recipe that is perfect for beginners.
- Low Carb . Only 7 net carbs per serving.
- Gluten-Free . No need for any specialty ingredients when you use items that are naturally gluten free.
- Minimal Ingredients. Skip the extra trip to the grocery store with this Salsa Chicken recipe that uses only 5 ingredients.
How Do You Cook With Salsa
Believe it or not, salsa is the most popular condiment in the world! Since it is most commonly eaten as a condiment or dip, you may be unsure of the best way to repurpose it for cooking.
Salsa is actually great to use when you’re cooking a meat protein. The acidity from the tomatoes and vinegar help tenderize the meat. The spices and freshness from the tomatoes, onions, and peppers give a robust flavor to anything you’re cooking with it.
When I cook with salsa, I prefer to use it to either create a sauce or use it as a marinade. For this recipe, it creates a flavorful sauce that coats the cooked and shredded chicken.
Ingredients You’ll Need
How often can you find a meal that doesn’t feel rushed that only uses five ingredients to make? This Salsa Chicken recipe is tiny in ingredients, but mighty in flavor!
- Chicken Breast - You can also use chicken thighs for a more affordable option with a higher fat content.
- Salsa - Use your favorite salsa for this recipe. If you’re eating low carb, you will want to use a low sugar salsa.
- Oregano - The three spices used in this recipe are to replicate the flavor of taco seasoning, without using a prepackaged option.
- Cumin
- Garlic Powder
How To Make Salsa Chicken
- Cut the chicken breasts into 1" chunks.
- Place the chicken chunks into the Instant Pot liner.
- Sprinkle the seasonings over the top of the chicken breasts.
- Pour the jar of salsa over the chicken breasts. DO NOT STIR. Stirring can cause the salsa to stick to the bottom of the pan when the pot is coming to pressure and cause a burn warning.
- Secure the Instant Pot lid and cook under high pressure for 10 minutes. All the pressure to naturally release for 10 minutes. Manually release all remaining pressure after the 10 minutes have elapsed.
- Remove the chicken breast chunks from the Instant Pot and shred the chicken.
- Return the shredded chicken to the Instant Pot with the cooked salsa and spices. Set the Instant Pot to saute.
- Stirring frequently, allow the chicken to simmer in the sauce until any excess moisture has reduced and you’re left with a delicious salsa chicken.
- Serve with your favorite side dish or garnish and enjoy!

Variations
If you’re looking for ways to keep Salsa Chicken exciting, here are a few different ways you can enjoy it. With just the switch of base ingredients, you can have a completely different dinner experience.
- Bulk it up. If you’re not watching your carbs, add a can of drained and rinsed black beans and a can of drained and rinsed corn to the salsa chicken after it is done cooking. The residual heat while the sauce is reducing will warm the beans and corn through.
- Make Tacos. Wrap a hearty portion of this salsa chicken in a lettuce or low carb wrap for your next Taco Tuesday celebration.
- Snazz up a salad. While I am a sucker for a delicious Big Mac Salad , sometimes I need to switch it up a bit. Add this shredded chicken to the top of your favorite salad with some keto ranch dressing for a light and flavor-packed meal.
What To Serve With Salsa Chicken
- Instant Pot Rice
- Elote
- A Salad
- Instant Pot Refried Beans
- Instant Pot Mexican Rice
Find this recipe and other great budget-friendly recipes on this list of 7 Days of Budget Friendly Dinners .
How Long Does It Last?
Have a busy week with not a lot of time to cook? This Salsa Chicken is a meal prepper’s dream come true! The salsa keeps the chicken moist and it reheats extremely well.
For the best bite, I recommend storing any leftovers in an airtight container in the refrigerator and enjoying them within 3-4 days of preparing the recipe.
More Instant Pot Chicken Recipes
Salsa chicken is incredibly easy, but it is far from the only simple Instant Pot Chicken recipe I’ve created! If you want even more time saving meal solutions, check out some of these recipes:
- Instant Pot Butter Chicken
- Chicken Biryani
- Chicken Enchilada Casserole
Salsa Chicken | Instant Pot Salsa Chicken Recipe
Ingredients
- ▢ 3 chicken breasts
- ▢ 16 ounces Salsa
- ▢ 1 tsp Ground Cumin
- ▢ 1 tsp Dried Oregano
- ▢ 1 tsp Garlic Powder
Instructions
- Cut the chicken breasts into 1" chunks.
- Place the chicken chunks into the Instant Pot liner.Sprinkle the seasonings over the top of the chicken breasts.
- Pour the jar of salsa over the chicken breasts. DO NOT STIR.
- Secure the Instant Pot lid and cook under high pressure for 10 minutes. All the pressure to naturally release for 10 minutes. Manually release all remaining pressure after the 10 minutes have elapsed.
- Remove the chicken breast chunks from the Instant Pot and shred the chicken.
- Return the shredded chicken to the Instant Pot with the cooked salsa and spices. Set the Instant Pot to saute.
- Stirring frequently, allow the chicken to simmer in the sauce until any excess moisture has reduced and you’re left with a delicious salsa chicken.
- Serve with your favorite side dish or garnish and enjoy!
Get support & connect with our community on Facebook!
Nutrition
Don’t forget to check out my otherBest-selling Instant Pot Cookbooks!
Indian Instant Pot , Keto Instant Pot, Instant Pot Fast and Easy , Healthy Instant Pot & Vegetarian Instant Pot .

