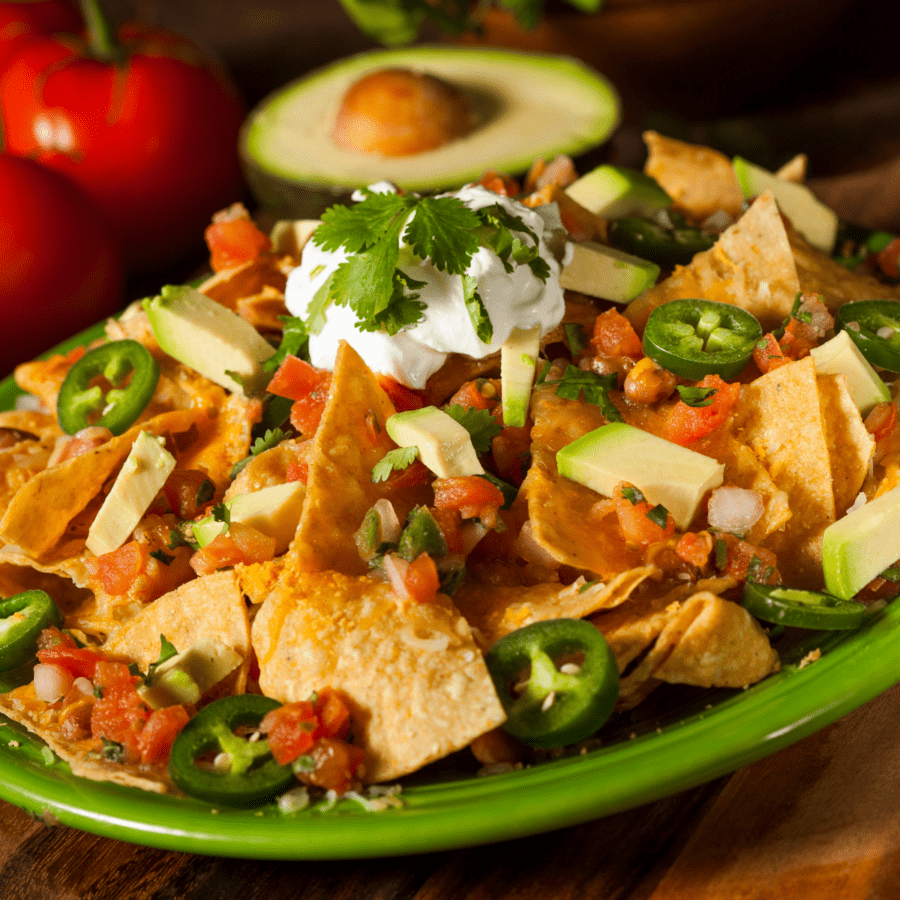
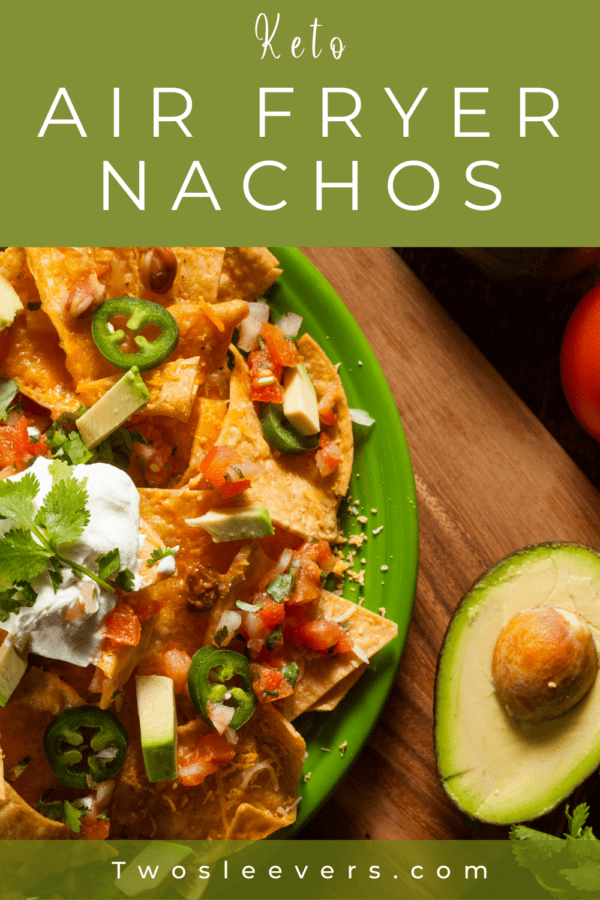
Air Fryer Nachos are fast, easy, and totally family friendly. Dice up some of your favorite veggies to top perfectly crisp tortilla chips and delicious melty cheese for a game time snack or party appetizer everyone will love.

Why You Have To Make These
- Fast. A simple vegetarian meal is done in under 30 minutes with the help of your air fryer.
- Easy. Layer some keto-friendly chips and cheese, air fry, and garnish with flavorful and nutritious toppings.
- Vegetarian . Skipping the meat doesn’t mean you have to skip the flavor with these loaded keto nachos.
- Low Carb . You won’t believe these air fryer nachos only have 12 net carbs per serving!
Can You Heat Nachos In An Air Fryer?
Not only CAN you heat nachos in an air fryer, but you also should! Waiting for the oven to preheat to bake nachos takes entirely too much time and heats up the whole kitchen. Microwaving your nachos makes the chips soggy.
The air fryer nachos are the perfect way to get crispy nachos in a fraction of the time of oven-baked nachos with delicious melty cheese that is just begging to be paired with other fresh toppings.
Will Tortilla Chips Take You Out Of Ketosis?
If you’re wanting to make nachos with traditional tortilla chips, yes, it will throw you out of ketosis. They pack a whopping 17 carbs per 1-ounce serving.
Since most people living a low carb lifestyle strive to stay under 20 net carbs a day, this doesn’t leave much wiggle room for anything else.
For this keto nachos recipe, I used Quest tortilla chips . Not only are they high in protein, but they are also low in carbs. They contain only 4 net carbs per 1-ounce serving.
What Are Keto Nachos Made Of?
- Quest Chips - a high protein, low carb chip that you can find at all major grocery and retail chains.
- Shredded Cheddar Cheese - Shredding your own cheese is lower in carbs than buying pre-shredded cheese.
- Onion - I prefer white onion for my nachos, but red onion is also a flavorful choice.
- Tomato - Diced into tiny pieces so you get a little punch of flavor in every bite.
- Jalapeno - Adds a kick of heat, but can easily be omitted if you’re not a fan of spicy foods.
- Avocado - Provides a healthy fat to balance the protein and fat macros in this recipe.
- Sour Cream - Cools your palate to counteract the heat from the jalapenos.
- Cilantro - Adds freshness to the low carb nachos.
- Lime Juice - For a bright, acidic note to finish.
What Can I Use Instead Of Chips For Nachos?
If you don’t have any Quest tortilla chips in your pantry and don’t feel like running to the grocery store, there are other low carb options you can choose to make tasty low carb nachos in the air fryer.
Here are some more keto options that are equally delicious:
- Pork Rinds
- Cauliflower florets
- Broccoli florets
- Mini bell peppers
- Poblano peppers
- Zucchini slices
How To Make Air Fryer Nachos
Air fryer nachos are such a simple and quick meal or appetizer that are perfect for game day or an after-school snack . Follow the simple instructions below for a fantastically easy treat:
- Place a generous layer of Quest chips in the bottom of a silicone liner or other air fryer safe dish.
- Top the chips with a generous amount of shredded cheese.
- Air fry until the cheese is melted and the chips are toasted.
- While the air fryer nachos are cooking, dice up the onion, tomato, jalapeno, and avocado.
- Plate the cheese-covered tortilla chips and garnish with the diced vegetables. Add a dollop of sour cream and a squeeze of lime juice. Sprinkle with cilantro and enjoy.
Variations
- Switch up the base. No low carb chips? No problem. Use diced up bell peppers, pork rinds, or even cauliflower as your chips. They all taste delicious when roasted in the air fryer long enough to melt your cheese.
- Pick a protein. If you want to bump up the protein in each serving of these air fryer nachos, use some precooked ground beef, leftover rotisserie chicken, or even leftover pulled pork to top your chips and cheese before air frying.
- Add a variety of veggies. Get creative with your produce drawer. Don’t stop with the vegetables I used for my nachos. Feel free to add in some lettuce, additional peppers, scallions, or even olives to jazz up your keto nachos.
What To Serve With Keto Nachos
While these nachos are incredibly tasty and nutritious as they are, sometimes you just want a little something else to serve with them to make it feel like a complete meal.
If you’re looking for other low carb dishes that pair well with your keto nachos, check some of these out:
- Instant Pot Barbacoa
- Carne Guisada
- Stuffed Poblano Peppers
How Long Do Air Fryer Nachos Last?
I try to create recipes that can be enjoyed over multiple meals to minimize the time spent in the kitchen, but this is not one of those. Luckily, with the minimal amount of time it takes to make these Air Fryer Nachos, you won’t even need to save them for later.
With the amount of time it would take to reheat leftover nachos, you can just make them fresh in your air fryer!
More Easy Air Fryer Recipes
- Air Fryer Baked Potatoes
- Air Fryer Bacon
- Keto Chicken Parmesan

Air Fryer Nachos | Keto Nachos Recipe
Ingredients
- ▢ 1 ounce Quest Nacho Cheese Chips
- ▢ 1 Jalapeño Peppers
- ▢ 3 tbsp Onion
- ▢ 3 tbsp Tomatoes
- ▢ 1/2 cup Mexican Blend Shredded Cheese
- ▢ 1/2 Avocado
- ▢ 2 tbsp sour cream
- ▢ 1 tsp Cilantro
- ▢ 1 tsp lime juice
Instructions
- Place a generous layer of Quest chips in the bottom of a silicone liner or other air fryer safe dish.
- Top the chips with a generous amount of shredded cheese. Air fry at 350F for 5 minutes or until the cheese is melted and the chips are toasted.
- While the air fryer nachos are cooking, dice up the onion, tomato, jalapeno, and avocado.
- Plate the cheese-covered tortilla chips and garnish with the diced vegetables. Add a dollop of sour cream and a squeeze of lime juice. Sprinkle with cilantro and enjoy.
Get support & connect with our community on Facebook!
Nutrition
Don’t forget to check out my other Ketocookbooks.
Keto Instant Pot, Keto Fat Bombs, Sweets, & Treats , and Easy keto in 30 minutes.


If you already signed up, you should have received an email with a password to give you unlimited access to our FREE Printable Library. The password is case sensitive. Enter it below and get printing!
Password:

Air Fryer Nachos | Keto Nachos Recipe
Ingredients
- 1 ounce Quest Nacho Cheese Chips
- 1 Jalapeño Peppers
- 3 tbsp Onion
- 3 tbsp Tomatoes
- 1/2 cup Mexican Blend Shredded Cheese
- 1/2 Avocado
- 2 tbsp sour cream
- 1 tsp Cilantro
- 1 tsp lime juice
Instructions
- Place a generous layer of Quest chips in the bottom of a silicone liner or other air fryer safe dish.
- Top the chips with a generous amount of shredded cheese. Air fry at 350F for 5 minutes or until the cheese is melted and the chips are toasted.
- While the air fryer nachos are cooking, dice up the onion, tomato, jalapeno, and avocado.
- Plate the cheese-covered tortilla chips and garnish with the diced vegetables. Add a dollop of sour cream and a squeeze of lime juice. Sprinkle with cilantro and enjoy.
Air Fryer Nachos | Keto Nachos Recipe https://twosleevers.com/air-fryer-nachos/
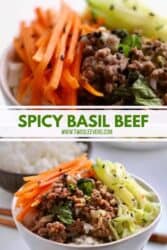
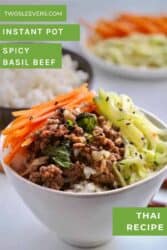
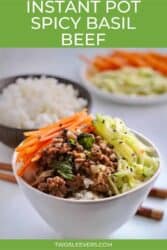
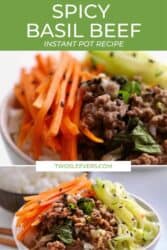
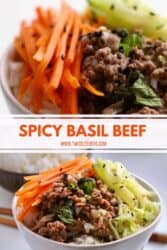
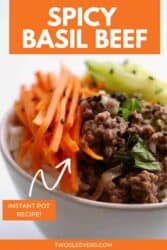
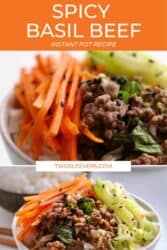


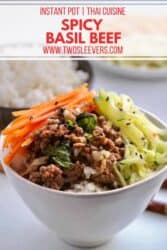
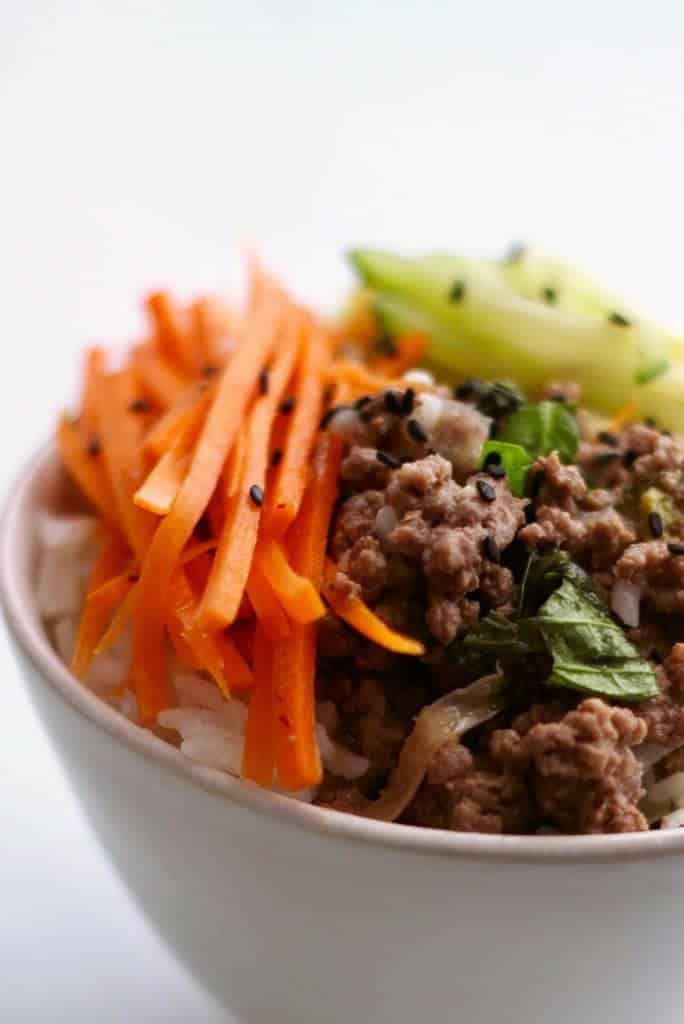
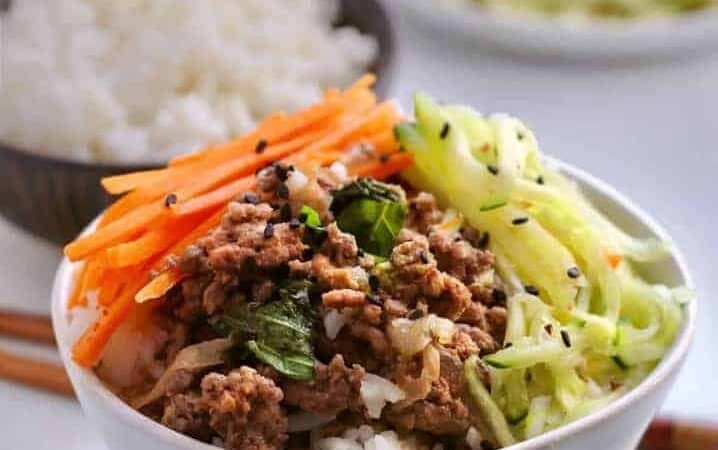
Cook a Spicy Thai Basil Beef along with a pot of rice at the same time in your pressure cooker. Make a quick-pickled salad while they cook, to serve a healthy, fast dinner.
What Makes These Spicy Thai Basil Bowls Great?
- Simple. These basil bowls are basically a combination of ground beef, basil leaves (that are used both cooked as well as fresh) and a handful of sauce ingredients.
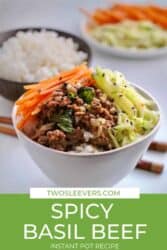
- Cooking. Although I made these Spicy Thai Basil Beef Bowls in the Instant Pot, there’s no reason why you couldn’t do them in on the stovetop.
- Quick Dinner. This Instant Pot recipe is so easy, and cooks in less than 30 minutes!
- Flavor. If you love comfort food, imagine that combined with flavorful herbs, and that’s what you get with these Spicy Thai Basil Beef Bowls!
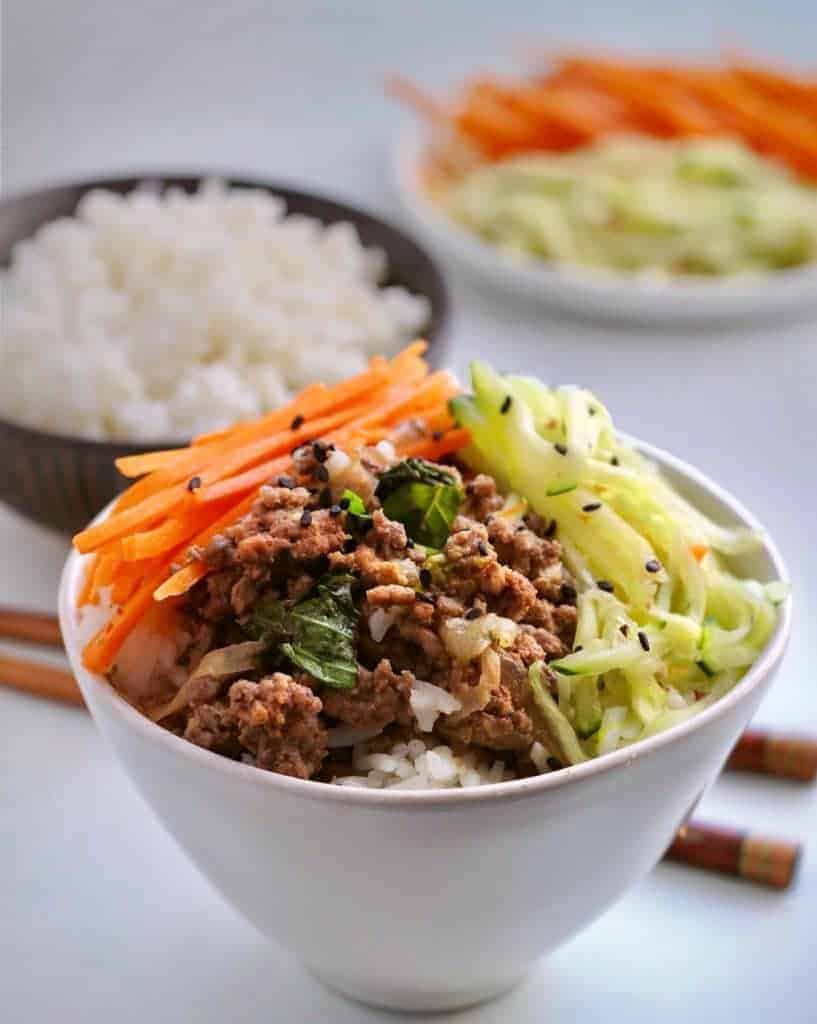
Thai Basil Beef Bowls are a deliciously balanced meal that’s easy to make, full of bold flavors, and perfect for both quick weeknight dinners and make-ahead lunches.
What Do Thai Basil Beef Bowls Taste Like?
Thai Basil Beef Bowls have a bold, savory, and aromatic flavor with just the right touch of heat. The beef is juicy and rich, soaking up the salty umami from soy sauce, while a hint of sweetness from sugar or oyster sauce balances it out.
Fresh Thai basil adds a unique, slightly peppery and anise-like note that brightens the dish and gives it that signature Thai taste. The addition of garlic and chili brings depth and a gentle kick, making every bite vibrant and satisfying.
When served over rice, the flavors meld beautifully into a comforting yet exciting meal that’s both hearty and refreshing.
Are They Healthy?
Thai Basil Beef Bowls can be a healthy and balanced meal when made with fresh ingredients and lean cuts of beef.
The dish is rich in protein, which helps keep you full and supports muscle maintenance, while the addition of fresh herbs, garlic, and chilies adds antioxidants and anti-inflammatory benefits.
Using vegetables such as carrots and cucumbers boosts fiber and vitamins, making the meal more nutrient-dense.
To keep it lighter, you can use lean ground beef or ground turkey, reduce the amount of oil, and serve it over brown rice, cauliflower rice, or quinoa instead of white rice. While sauces like soy sauce can be high in sodium, choosing low-sodium versions or adjusting quantities helps make the dish even healthier.
Overall, Thai Basil Beef Bowls are a flavorful way to enjoy a nutrient-rich, satisfying meal that fits into many balanced diets.
Ingredients You’ll Need
- 1 tablespoon Vegetable Oil - Used to sauté the aromatics and beef, ensuring everything cooks evenly without sticking.
- 5 Garlic Cloves - Infuses the dish with bold, savory flavor and enhances the base of the sauce.
- 1 tablespoon Julienned Ginger - Adds a warm, slightly spicy, and fragrant note that complements the garlic and beef.
- 2 Dried Red Chilies - Bring a touch of heat and depth, giving the dish its characteristic Thai-style spice.
- 1 cup Sliced Onions - Provide sweetness and balance the savory and spicy elements as they caramelize slightly.
- 1 pound -Lean Ground Beef - The main protein, offering rich flavor and satisfying texture while absorbing the sauce beautifully.
- 1 teaspoon Salt - Enhances the natural flavors of the beef and aromatics.
- 1 teaspoon Ground Black Pepper - Adds a mild spice and warmth, rounding out the seasoning.
- 1 cup Basil Leaves - Thai basil adds a peppery, anise-like flavor that defines the recipe. Half is cooked into the beef, while the rest is used fresh for garnish.
- 1/4 cup Water or Chicken Broth - Helps deglaze the pan and blend the sauce ingredients into the beef mixture.
- 1 tablespoon Soy Sauce - Provides umami depth and a savory, salty backbone to the sauce.
- 1 teaspoon Splenda - Balances the saltiness and heat with a touch of sweetness.
- 2 tablespoons Fresh Lime Juice - Adds brightness and acidity; some is mixed into the beef while the rest is drizzled over before serving.
- 1 teaspoon Sesame Oil - Finishes the dish with a subtle nutty aroma and richness.
For The Rice
- 1 cup Jasmine Rice - The classic base for serving.
- 1 cup Water - Cooks the rice to a fluffy, tender texture.
- 1/2 teaspoon Salt - Enhances the flavor of the rice.
Salad
- 1 Carrot - Adds crunch, color, and natural sweetness.
- 1 Cucumber - Provides coolness and freshness to contrast the savory beef.
- 1/4 cup White Vinegar - Creates a quick pickling effect.
- 1/2 teaspoon Salt - Seasons the vegetables and helps draw out excess moisture.
- 1/2 teaspoon Splenda - Balances the vinegar’s acidity for a refreshing, lightly sweet salad.
How To Make Thai Basil Beef
Rice
- Rinse rice and place rice, water and salt into a heat safe pot that will fit inside your pressure cooker.
- Cover this pot with foil or a silicone lid
Beef
- Turn your Instant Pot to Sauté high, and when it is hot, add oil. When the oil is shimmering hot, add ginger, garlic, and chilis. Sauté 30 seconds.
- Add sliced onions and sauté 1 minute
- Add in ground beef and break up lumps. Don’t worry about cooking it at this point. Just make sure it’s not going to cook as one big lump of meat.
- Add 1/2 cup of chopped basil leaves (add more if you like basil, just leave enough to add some fresh leaves at the end).
- Add all the other beef ingredients and mix well.
- Place a steamer rack on top of the beef.
- On the rack, place the covered rice pot.
- Cook on high pressure for 4 minutes and allow it to release pressure for 5 minutes. Release all remaining pressure.
Salad
- While the rice and beef are cooking, julienne the carrots and cucumbers, and mix with vinegar, sugar, and salt. I added red pepper flakes to mine.
Tips And Tricks
Making Thai Basil Beef Bowls at home is simple and rewarding, but a few tips can help you capture that authentic restaurant-style flavor and perfect texture every time. Here’s how to make your dish shine:
- Use Thai basil if possible . Regular basil works in a pinch, but Thai basil has a distinct peppery, anise-like flavor that gives the dish its signature taste.
- Balance the flavors . Thai cooking is all about balance. Taste as you go and adjust lime juice, soy sauce, and sweetness to get the perfect mix of salty, spicy, and tangy.
- Garnish just before serving . Add fresh basil and a squeeze of lime at the end to keep the flavors bright and fresh.
Variations
Thai Basil Beef Bowls are incredibly versatile, and you can easily adapt them to suit your taste, dietary needs, or what you have on hand. Here are some delicious variations to try:
- Ground Chicken or Turkey - Swap out the beef for ground chicken or turkey for a lighter, leaner version with the same bold Thai flavors.
- Vegan Thai Basil Bowl - Replace the meat with crumbled tofu or tempeh and use soy sauce or coconut aminos for a plant-based twist.
- Extra Veggie Boost - Add sliced bell peppers, mushrooms, snap peas, or shredded cabbage to make it more colorful and nutritious.
Can You Make Them Low Carb?
If you’re trying to low carb, then don’t make the rice. Just eat the meat and vegetables. In this case, double up on the cucumber and omit the carrots. This would make an awesome Keto ground beef recipe!
Alternatively, you could make cauliflower rice to serve with these. I don’t buy bagged, but make my own because it’s really simple and tastes so much better.
What To Eat With Thai Basil Beef
Thai Basil Beef Bowls are delicious on their own, but pairing them with the right sides can turn your meal into a complete, flavor-packed experience. Here are some tasty ideas to serve alongside:
- Spring Rolls - Add crunch and freshness with crispy rolls filled with veggies and served with a sweet chili dipping sauce.
- Tom Yum Soup - A light, spicy, and sour soup that complements the rich beef flavors beautifully.
- Stir-Fried Vegetables - A colorful mix of broccoli, bell peppers, and carrots adds nutrition and texture.
How Long Do They Last?
Thai Basil Beef Bowls will last for about 3 to 4 days when stored properly in the refrigerator.
To keep them fresh, store the beef mixture, rice, and salad components separately in airtight containers. This prevents the rice from getting soggy and the fresh vegetables from losing their crunch.
When reheating, warm the beef and rice in a skillet or microwave until hot, then add fresh basil and a squeeze of lime juice just before serving to revive the vibrant flavors.
Can You Freeze Them?
If you’d like to extend their shelf life, you can also freeze the beef portion (without the rice or salad) for up to 2 months. Simply thaw it overnight in the fridge and reheat when ready to enjoy with freshly made rice and salad.
Want More One Pot Instant Pot Recipes?
- Easy Chicken Korma - this is such a flavorful dish and it’s easy!
- Instant Pot Pot Roast - the best pot roast you’ll ever have!
- Instant Pot Red Beans and Rice - all one pot and incredible flavors!
Whether you make these Spicy Thai Basil Beef Bowls in the Instant Pot , or on the stovetop, or even make them as a Keto Ground Beef recipe , you’re going to love how such a flavorful dish can come together so quickly! That’s the joy in homemade Thai Food . Pin this recipe on Pinterest or share it on Facebook to save it.
Thai Basil Beef Recipe | Easy Thai Basil Bowls
Equipment
- Insta
Ingredients
For the Beef
- ▢ 1 tablespoons ( 1 tablespoons ) Vegetable Oil
- ▢ 5 ( 5 ) Garlic Cloves , thinly sliced
- ▢ 1 tablepoon ( 1 tablepoon ) julienned ginger
- ▢ 2 ( 2 ) Dried Red Chilis
- ▢ 1 cup ( 160 g ) Sliced Onions
- ▢ 1 pound ( 453.59 g ) Lean Ground Beef
- ▢ 1 tsp ( 1 tsp ) Kosher Salt
- ▢ 1 tsp ( 1 tsp ) Ground Black Pepper
- ▢ 1 cup ( 24 g ) Basil leaves , divided
- ▢ 1/4 cup ( 62.5 ml ) Water , or chicken broth
- ▢ 1 tablespoons ( 1 tablespoons ) Soy Sauce
- ▢ 1 teaspoon ( 1 teaspoon ) Splenda , or sugar
- ▢ 2 tablespoons ( 4 tablespoons ) fresh lime juice , divided
- ▢ 1 teaspoon ( 1 teaspoon ) Sesame Oil
For the Rice
- ▢ 1 cup ( g ) Jasmine Rice , rinsed and drained
- ▢ 1 cup ( 250 ml ) Water
- ▢ 1/2 teaspoon ( 1/2 teaspoon ) Kosher Salt
For the Salad
- ▢ 1 ( 1 ) Carrots , julienned or coarsely grated
- ▢ 1 ( 1 ) cucumber , peeled and julienned or coarsley grated
- ▢ 1/4 cup ( 63.75 ml ) White Vinegar
- ▢ 1/2 tsp ( 1/2 tsp ) Kosher Salt
- ▢ 1/2 teaspoon ( 1/2 teaspoon ) Splenda , or sugar
Instructions
For the Rice
- Rinse rice and place rice, water and salt into a heat safe pot that will fit inside your pressure cooker.
- Cover this pot with foil or a silicone lid
For the Beef
- Turn your Instant Pot to Sauté high, and when it is hot, add oil. When the oil is shimmering hot, add ginger, garlic and chilis and sauté 30 seconds.
- Add sliced onions and sauté 1 minute
- Add in ground beef and break up lumps. Don’t worry about cooking it at this point. Just make sure it’s not going to cook as one big lump of meat.
- Add 1/2 cup of chopped basil leaves (add more if you like basil, just leave enough to add some fresh leaves at the end).
- Add all the other beef ingredients and mix well.
- Place a steamer rack on top of the beef.
- On the rack, place the covered rice pot.
- Cook on high pressure for 4 minutes and allow it to release pressure for 5 minutes. Release all remaining pressure.
For the Salad
- While the rice and beef are cooking, julienne the carrots and cucumbers, and mix with vinegar, sugar and salt. I added red pepper flakes to mine.
Get support & connect with our community on Facebook!
Nutrition
Don’t forget to check out my otherBest-selling Instant Pot Cookbooks!
Indian Instant Pot , Keto Instant Pot, Instant Pot Fast and Easy , Healthy Instant Pot & Vegetarian Instant Pot .

