
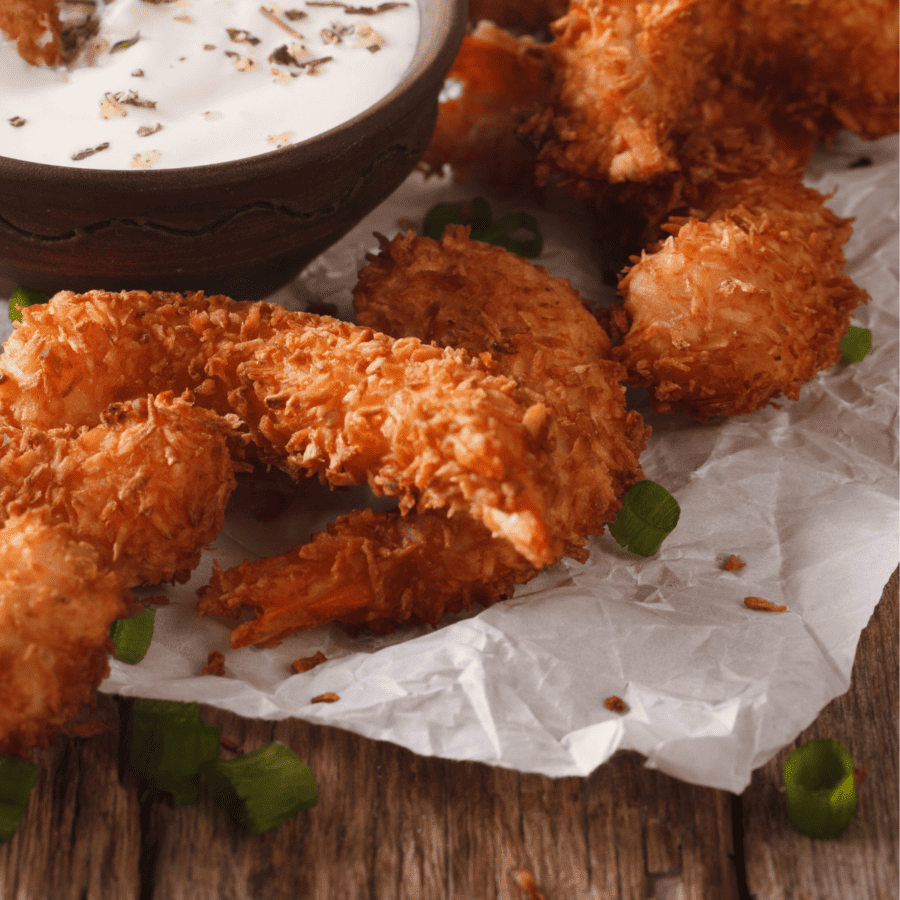
Crunchy on the outside, tender on the inside, and packed with tropical flavors, air fryer coconut shrimp is a meal your whole family is going to fall in love with!

What Makes Coconut Shrimp The Best?
- Fast. Ready in under 30 minutes with the help of your air fryer!
- Easy. Bread your shrimp and toss it in the air fryer. No additional prep work is needed.
- Versatile. Dip these air fryer coconut shrimp in various sauces to keep it exciting.
- Delicious. Sweet, salty, and utterly delicious.
Are Coconut Shrimp Low Carb?
Unfortunately, these air fryer coconut shrimp are not low carb. But you could easily convert them to a low carb recipe.
To make these coconut shrimp low carb, replace the panko with crushed pork rinds and substitute the all-purpose flour for almond flour. The result will be just as delicious, but it will be low in carbs and gluten-free!
Ingredients You’ll Need
Why buy those overpriced frozen coconut shrimp at the grocery store when you can just make your own at home? All you need are a few simple ingredients to make something even better than premade and are ready to enjoy in less time than frozen shrimp!
- Shrimp - Large shrimp, peeled and deveined are what I used for this recipe, but you can use any sized peeled and deveined shrimp. The cooking time will just need to be adjusted for size.
- Shredded coconut - You can use sweetened or unsweetened coconut flakes for the breading.
- All-purpose flour - Almond or coconut flour can be used as a substitute for anyone with gluten allergies.
- Eggs - Are used to help the breading adhere to the shrimp.
- Cooking Spray - For a more tropical taste, try to use a coconut cooking spray to help crisp up the breading in the air fryer.
- Garlic powder
- Paprika
- Salt & Pepper
How To Make Air Fryer Coconut Shrimp
- Preheat your air fryer. Set your air fryer to 400F and let it preheat for a few minutes while you prepare the shrimp.
- Prepare the coating station. In three separate shallow bowls, set up your coating station. In the first bowl, place the flour. In the second bowl, beat the eggs with a fork until well combined. In the third bowl, combine the shredded coconut, garlic powder, paprika, salt, and black pepper.
- Coat the shrimp. Take a shrimp and dip it into the flour, ensuring it’s evenly coated. Shake off any excess flour. Then dip it into the beaten eggs, allowing any excess to drip off. Finally, coat the shrimp with the coconut mixture, pressing gently to adhere to the coconut flakes. Place the coated shrimp on a plate or tray, and repeat the process with the remaining shrimp.
- Air frying the shrimp. Lightly spray the air fryer basket with cooking spray to prevent sticking. Arrange the coconut-coated shrimp in a single layer, leaving space between them for proper air circulation. Depending on the size of your air fryer, you may need to cook the shrimp in batches.
- Air frying time. Cook the shrimp in the preheated air fryer for approximately 8-10 minutes, flipping them halfway through the cooking time. Keep a close eye on the shrimp to ensure they don’t overcook or burn. The shrimp should turn golden brown and become crispy.
- Serve and enjoy. Once the shrimp are cooked to perfection, remove them from the air fryer and transfer them to a serving platter. Garnish with some fresh herbs or a sprinkle of toasted coconut for an extra touch of tropical flair. Serve them hot with your favorite dipping sauce.
What To Serve With Coconut Shrimp
From dipping sauces, to side dishes, there are so many things that pair well with these juicy little shrimp. Here are some of my favorite things to enjoy with them:
Dipping Sauces - Coconut shrimp is often served with dipping sauces that provide a balance of flavors. Some popular options include: Sweet Chili Sauce - The sweet and tangy notes of sweet chili sauce beautifully complement the crispy coconut coating of the shrimp. Mango Salsa - The fruity and refreshing flavors of mango salsa add a tropical twist to the dish, enhancing the coconut shrimp’s overall taste. Pineapple Sauce - Tangy and slightly sweet pineapple sauce pairs perfectly with coconut shrimp, creating a delightful contrast of flavors.
Coleslaw - A creamy coleslaw provides a cool and refreshing contrast to the warm and crispy coconut shrimp. The crunchiness of the coleslaw adds texture to the dish and balances the richness of the shrimp.
Rice or Coconut Rice - Serve your coconut shrimp with a side of steamed rice or coconut rice. The neutral and fluffy rice will complement the bold flavors of the shrimp and help balance the dish.
Green Salad - A simple green salad with mixed greens, cucumber, and cherry tomatoes dressed in a light vinaigrette can serve as a refreshing and healthy accompaniment to the coconut shrimp. The crispness of the salad adds texture and freshness to the dish.
How Long Do They Last?
Coconut shrimp can be stored in the refrigerator for up to 3-4 days. Remember that the texture and crispiness of the shrimp may diminish over time.
For the best quality and flavor, you should enjoy the coconut shrimp within the first 1-2 days after preparation.
Can You Freeze Them?
Yes, you can freeze coconut shrimp to extend their shelf life. Freezing coconut shrimp is a great option if you want to prepare them in advance or have leftovers that you’d like to save for later.
Allow your shrimp to cool to room temperature and place them in a freezer-safe container labeled with the contents and date. Place the container with the coconut shrimp in the freezer. For the best quality, consume the frozen shrimp within 1-2 months.
Other Air Fryer Seafood Recipes
- Keto Shrimp Scampi
- Salmon Croquettes
- Air Fryer Scallops
- Crab Dip
- Bang Bang Shrimp

If you love this Air Fryer Coconut Shrimp recipe as much as we do, make sure you share it with your friends on Facebook and Pinterest so they can try it too!

Air Fryer Coconut Shrimp | How To Make Shrimp In The Air Fryer
Ingredients
- ▢ 1 pound Raw Shrimp
- ▢ 1 cup Unsweetened Shredded Coconut
- ▢ 2 eggs
- ▢ 1/2 cup all purpose flour
- ▢ 1 tsp garlic powder
- ▢ 1/2 tsp paprika
- ▢ 1/2 tsp salt
- ▢ 1/2 tsp black pepper
Instructions
- Preheat your air fryer. Set your air fryer to 400F and let it preheat for a few minutes while you prepare the shrimp.
- Prepare the coating station. In three separate shallow bowls, set up your coating station. In the first bowl, place the flour. In the second bowl, beat the eggs with a fork until well combined. In the third bowl, combine the shredded coconut, garlic powder, paprika, salt, and black pepper.
- Coat the shrimp. Take a shrimp and dip it into the flour, ensuring it’s evenly coated. Shake off any excess flour. Then dip it into the beaten eggs, allowing any excess to drip off. Finally, coat the shrimp with the coconut mixture, pressing gently to adhere to the coconut flakes. Place the coated shrimp on a plate or tray, and repeat the process with the remaining shrimp.
- Air frying the shrimp. Lightly spray the air fryer basket with cooking spray to prevent sticking. Arrange the coconut-coated shrimp in a single layer, leaving space between them for proper air circulation. Depending on the size of your air fryer, you may need to cook the shrimp in batches.
- Air frying time. Cook the shrimp in the preheated air fryer for approximately 8-10 minutes, flipping them halfway through the cooking time. Keep a close eye on the shrimp to ensure they don’t overcook or burn. The shrimp should turn golden brown and become crispy.
- Serve and enjoy. Once the shrimp are cooked to perfection, remove them from the air fryer and transfer them to a serving platter. Garnish with some fresh herbs or a sprinkle of toasted coconut for an extra touch of tropical flair. Serve them hot with your favorite dipping sauce.
Get support & connect with our community on Facebook!
Nutrition
And don’t forget to check out my air fryer cookbooks! Every day easy air fryer , and Air Fryer Revolution .


If you already signed up, you should have received an email with a password to give you unlimited access to our FREE Printable Library. The password is case sensitive. Enter it below and get printing!
Password:

Air Fryer Coconut Shrimp | How To Make Shrimp In The Air Fryer
Ingredients
- 1 pound Raw Shrimp
- 1 cup Unsweetened Shredded Coconut
- 2 eggs
- 1/2 cup all purpose flour
- 1 tsp garlic powder
- 1/2 tsp paprika
- 1/2 tsp salt
- 1/2 tsp black pepper
Instructions
- Preheat your air fryer. Set your air fryer to 400F and let it preheat for a few minutes while you prepare the shrimp.
- Prepare the coating station. In three separate shallow bowls, set up your coating station. In the first bowl, place the flour. In the second bowl, beat the eggs with a fork until well combined. In the third bowl, combine the shredded coconut, garlic powder, paprika, salt, and black pepper.
- Coat the shrimp. Take a shrimp and dip it into the flour, ensuring it’s evenly coated. Shake off any excess flour. Then dip it into the beaten eggs, allowing any excess to drip off. Finally, coat the shrimp with the coconut mixture, pressing gently to adhere to the coconut flakes. Place the coated shrimp on a plate or tray, and repeat the process with the remaining shrimp.
- Air frying the shrimp. Lightly spray the air fryer basket with cooking spray to prevent sticking. Arrange the coconut-coated shrimp in a single layer, leaving space between them for proper air circulation. Depending on the size of your air fryer, you may need to cook the shrimp in batches.
- Air frying time. Cook the shrimp in the preheated air fryer for approximately 8-10 minutes, flipping them halfway through the cooking time. Keep a close eye on the shrimp to ensure they don’t overcook or burn. The shrimp should turn golden brown and become crispy.
- Serve and enjoy. Once the shrimp are cooked to perfection, remove them from the air fryer and transfer them to a serving platter. Garnish with some fresh herbs or a sprinkle of toasted coconut for an extra touch of tropical flair. Serve them hot with your favorite dipping sauce.
Air Fryer Coconut Shrimp | How To Make Shrimp In The Air Fryer https://twosleevers.com/air-fryer-coconut-shrimp/


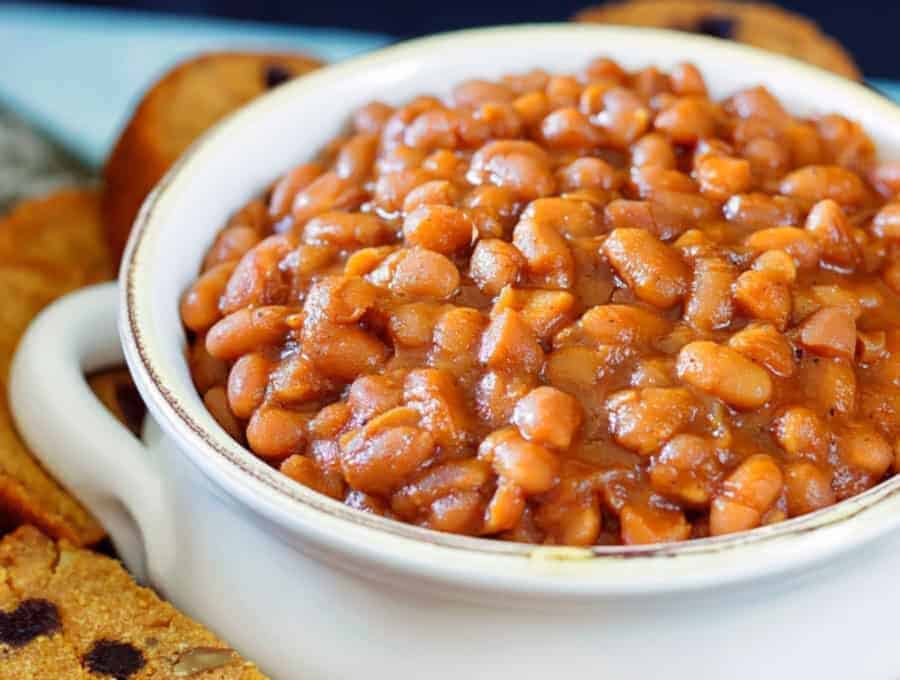
This Instant Pot Baked Beans Recipe has got to be the easiest way to make baked beans! These beans are delectably sweet and make the perfect side dish made in your Instant Pot!
Why These Boston Baked Beans Are SO Good
- Fast. This Instant Pot recipe is made in less than an hour compared to traditional baked beans.
- Easy. A great pour and cook recipe .
- Inexpensive. Pantry ingredients are great to buy on a budget.
- Vegetarian . No bacon or pork like some other popular recipes.
- Leftovers. This makes a large pot of easy baked beans so you can reheat them later for a great quick side dish .
Not only does the Instant Pot dramatically cut down on the cooking time, but it does a wonderful job of infusing the Instant Pot beans with tons of flavor!
It’s one of the main reasons I turn to Instant Pot recipes on a regular basis for cooking dishes like this and let me tell you, this Boston Baked Beans Recipe really must be tasted to be fully appreciated.
Does Cooking Beans In An Instant Pot Reduce Gas?
While it’s possible that cooking beans in an Instant Pot could help reduce the gas produced by beans by breaking down some of the natural sugars inside of the beans, I wouldn’t expect a no-gas bean experience just because you cooked them in your pressure cooker.
If you have a sensitive stomach but aren’t quite ready to give up your Boston baked beans, any bit of relief is worth the effort.
Which Beans Are Used In Baked Beans?
Traditionally, the beans used for baked beans are Navy Beans. That is what I chose to use for this Instant Pot Recipe.
Using these beans ensures a Baked Bean recipe that is not mush and absorbs all of the delicious seasonings in the pressure cooker .
How Long Does It Take To Cook A Pot Of Beans In The Instant Pot?
As I said earlier, one of the reasons I love cooking Beans in my Instant Pot is because of how quickly they can be cooked to perfection compared to other cooking methods.
With the help of your Instant Pot , you can have incredibly flavorful and deliciously seasoned Boston Baked Beans in less than an hour (even including prep time)!
How Much Water Do You Need For A Pound Of Beans In The Instant Pot?
To properly cook the pound of dried navy beans that I used in this recipe, you will need to use one cup of water.
There is also a small amount of thicker liquid in this recipe (such as Worcestershire sauce, mustard, ketchup, and molasses) but the water is what will be used to bring your Instant Pot to pressure to cook the beans.
Ingredients You’ll Need
- 1 cup Water - Provides the necessary liquid for pressure cooking the beans, helping them soften and absorb flavor without becoming too soupy.
- 1 cup Dried Navy Beans - The star of the dish. Soaked navy beans cook evenly and become tender, creamy, and perfect for absorbing the sweet and tangy baked bean sauce.
- 1 cup Onions - Adds sweetness, savory depth, and aromatic flavor as the beans cook. Onions help build the classic baked bean base and blend into the sauce as they soften.
- 1/2 cup Ketchup - Gives the beans their tangy, slightly sweet tomato flavor. Ketchup also helps create a thick, glossy sauce.
- 3 tablespoons Molasses - Provides rich, deep sweetness with a hint of bitterness. It’s essential for that traditional baked bean flavor. Molasses also deepens the color and thickens the sauce.
- 1 tablespoon Prepared Mustard - Balances the sweetness with brightness and acidity. Mustard adds a subtle tang that enhances the overall flavor complexity.
- 1 tablespoon Worcestershire Sauce - Introduces umami and savory depth. Its blend of fermented ingredients adds dimension and enhances the richness of the baked beans.
- 2 Bay Leaves - Bring gentle herbal undertones that infuse the beans as they cook. They add a subtle earthiness that rounds out the flavor.
- 1.5–2 teaspoons Salt - Seasons the beans thoroughly and helps the aromatics release their moisture. Salt enhances every component of the dish and balances sweetness from the molasses and ketchup.
- 1 teaspoon Ground Black Pepper - Adds gentle heat and peppery sharpness. Black pepper lifts the flavors and prevents the beans from becoming overly sweet.
How To Make Instant Pot Baked Beans
- Place water, beans, onion, ketchup, molasses, mustard, Worcestershire sauce, bay leaves, salt, and pepper into the Instant Pot .
- Place the lid on the Instant Pot and cook under high pressure for 30 minutes. Allow the pressure to naturally release for 10 minutes. Then, release all remaining pressure.
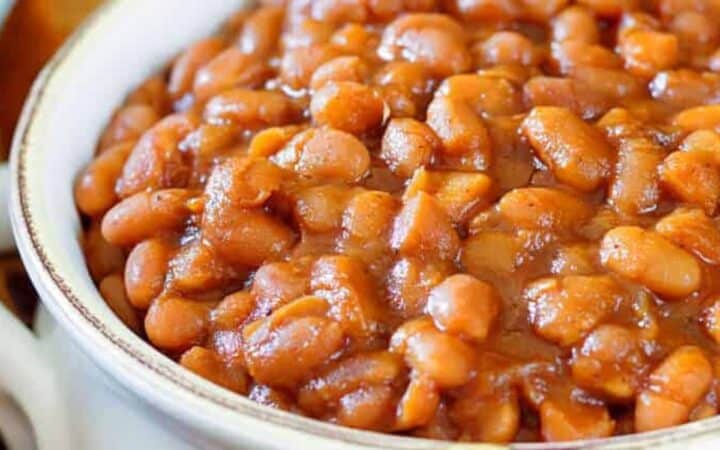
- Open the lid to your Instant Pot. Using the back of a spoon, mash a few of the beans to thicken the texture.
- Serve and enjoy!
Tips And Tricks
Instant Pot baked beans are wonderfully simple, but these tips will help you get the best texture, deepest flavor, and most reliable results from your pressure cooker.
- No need to soak the navy beans overnight before cooking them. If you prefer to soak them overnight, the texture will still be the same, but if you’re on a time crunch you can simply soak them in hot water for an hour before tossing them in your Instant Pot.
- “How do you thicken Boston baked beans?” The trick is to mash some of the beans after cooking them in order to thicken them up. Just mash some up with the back of a spoon and mix it all together.
- I made my recipe meat-free, but you can feel free to add some precooked salt pork or bacon into the mix.
Variations
Instant Pot baked beans are wonderfully versatile, and small changes can dramatically shift the flavor profile, whether you prefer them smoky, spicy, tangy, or lightly sweetened. These variations help you customize the dish to match any style or craving.
- Spicy Baked Beans - Stir in ½–1 teaspoon cayenne pepper, red pepper flakes, or finely chopped jalapeño for a kick of heat.
- Vegetarian Baked Beans - Ensure the Worcestershire sauce is vegetarian-friendly or replace it with soy sauce and a splash of apple cider vinegar.
- BBQ Baked Beans - Add ¼–½ cup of your favorite barbecue sauce for tangy, smoky beans perfect for grilling season.
What To Eat With Instant Pot Baked Beans?
There are tons of great dishes you can pair this baked beans recipe with! Here are a few great options to consider:
- Pressure Cooker Ribs are the perfect match!
- Air Fryer Pork Chops makes some of the juiciest pork chops out there!
- Pair them with my Broccoli Frittata with Ham and Peppers and you’ll have a breakfast you won’t soon forget.
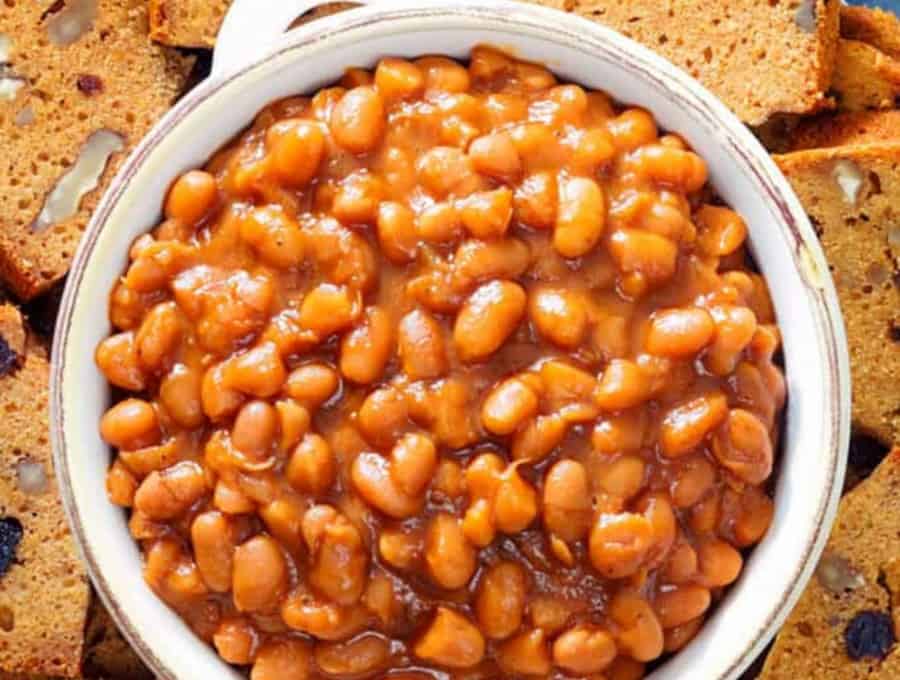
- If you’re going to make my Boston Baked Beans recipe, then you absolutely MUST make my Boston Brown Bread Recipe to go with it!
- Kofta Kababs - A great meat kabab.
- Pork Tenderloin - A great side to this perfect port tenderloin recipe.
How Long Do They Last?
This baked beans recipe makes the perfect side dish for any BBQ, picnic, or potluck. I’ve found myself doubling the recipe more often than I’ve found myself with leftovers.
That being said, Instant Pot Baked Beans can last up to 5 days in an air-tight container in the refrigerator. The longer they sit, the more robust the flavor will become.
Can You Freeze Them?
These beans actually freeze very well, so feel free to make an extra-large batch to freeze and enjoy later!
Just make sure you let the beans cool before putting them in the freezer, as putting hot beans in the freezer can cause the beans to burst or the container they’re in to crack.
Instant Pot Baked Beans Recipe | Easy Boston Baked Beans
Equipment
- Instant Pot
Ingredients
- ▢ 1 cup Water
- ▢ 1 cup Dried Navy Beans , soaked overnight or 1 hour in hot water
- ▢ 1 cup onions, chopped
- ▢ 1/2 cup Ketchup
- ▢ 3 tablespoons Molasses
- ▢ 1 tablespoon Prepared Mustard
- ▢ 1 tablespoon Worcestershire Sauce
- ▢ 2 bay leaves
- ▢ 1.5-2 teaspoons Kosher Salt
- ▢ 1 teaspoon Ground Black Pepper
Instructions
Place water, beans, onion, ketchup, molasses, mustard, Worcestershire sauce, bay leaves, salt and pepper into the Instant Pot .
Close the lid and set the Instant Pot to cook on HIGH PRESSURE for 30 minutes. At the end of the cooking time, allow the pot to rest undisturbed for 10 minutes. Then, release all remaining pressure.
Open the lid, and using the back of a spoon, mash a few of the beans to thicken, and serve.
You do need to soak the navy beans before cooking them, so you can either soak them overnight or soak them in hot water for an hour before you cook them.
You might be wondering, “How do you thicken Boston baked beans?” The trick is to mash some of the beans after cooking them in order to thicken it up. Just mash some up with the back of a spoon and mix it all together.
I made my recipe meat-free, but you can feel free to add some salt pork or bacon into the mix.
These beans actually freeze very well, so feel free to make an extra-large batch to freeze and enjoy later! Just make sure you let the beans cool before putting them in the freezer, as putting hot beans in the freezer can cause the beans to burst or the container they’re in to crack.
Get support & connect with our community on Facebook!
Nutrition
Don’t forget to check out my otherBest-selling Instant Pot Cookbooks!
Indian Instant Pot , Keto Instant Pot, Instant Pot Fast and Easy , Healthy Instant Pot & Vegetarian Instant Pot .

