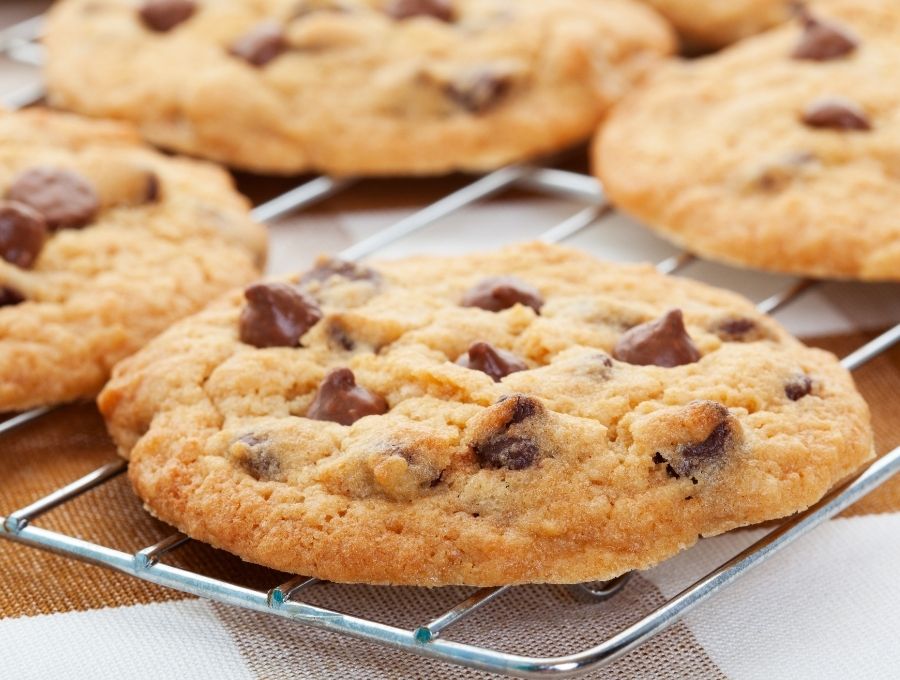
Do you love cookies but hate heating up your whole kitchen just to cure that sweet tooth? These Air Fryer Chocolate Chip Cookies are quick, easy, and incredibly delicious.
Why The Air Fryer Is The Best Way To Make Chocolate Chip Cookies
Chocolate Chip Cookies are one of those sweet treats that are still REALLY good even if they don’t turn out just the way you were expecting.
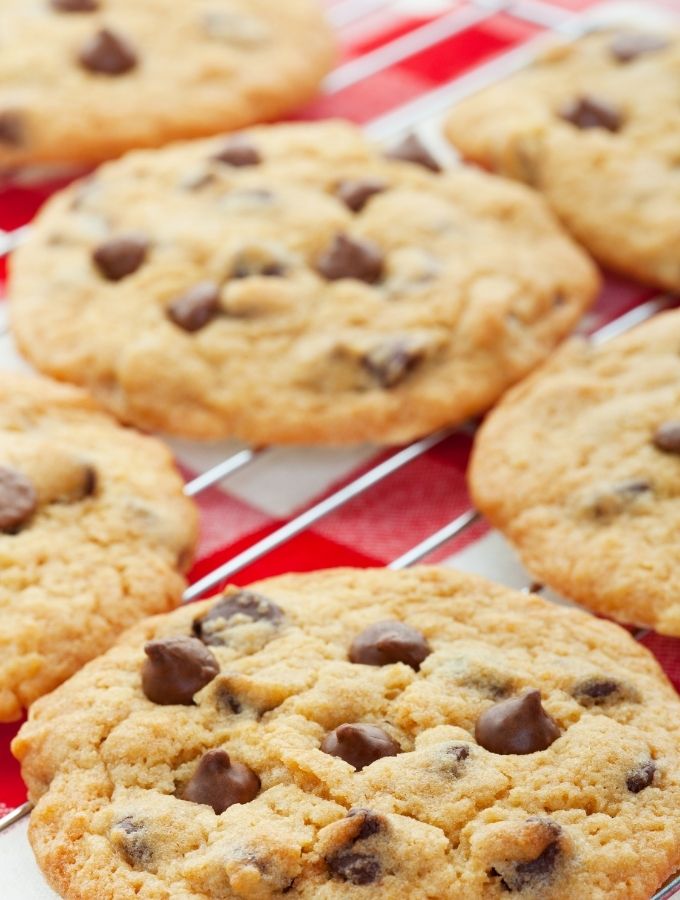
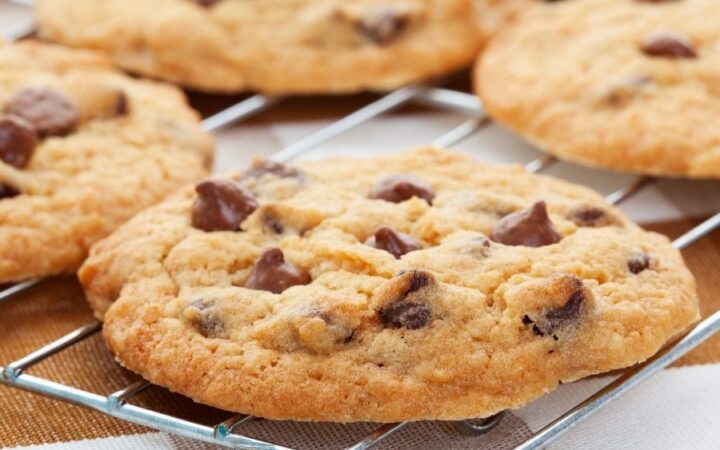
These Air Fryer Chocolate Chip Cookies turn out perfect every time!
Here are some more reasons the air fryer is the best way to make these cookies:
- Fast. These perfectly sweet cookies are ready in less than 30 minutes.
- Easy. Mix the batter, form cookies, cook in your air fryer. That’s it.
- Kid-friendly. With a little adult supervision, the air fryer can be safer to operate with little hands than the oven.
- Delicious. These have all of the traditional flavors you would expect in the perfect chocolate chip cookie.
Things You’ll Need Before You Get Started
The ingredients for this chocolate chip cookie recipe is a fairly standard take on chocolate chip cookies. The magic happens when you use the air fryer to bake them instead of the oven.
Equipment Needed
- Mixing Bowl
- Whisk
- Parchment Paper
- Air Fryer
- Cooling Rack
Ingredients Needed
- Butter
- Granulated Sugar
- Brown Sugar
- Vanilla
- Salt
- Baking Soda
- Baking Powder
- Eggs
- Flour
- Chocolate Chips
How To Make Air Fryer Chocolate Chip Cookies
If you have ever made chocolate chip cookies, you’re probably familiar with how little work is involved. This recipe is no different.
Here are the steps you’ll need to take to make the perfect Air Fried Chocolate Chip Cookies :
To Make The Cookie Dough
- Whisk together the flour, salt, and baking soda
- Cream together the softened butter, granulated sugar, and brown sugar until it is smooth
- Add Vanilla and eggs to the butter and sugar mixture and mix until smooth
- Gently fold 1/3 of the flour mixture into the sugar mixture. Repeat until the contents of both bowls are combined
- Add chocolate chips and mix until they are evenly distributed
- Form tablespoon-sized balls of the dough
To Air Fry
- Heat your air fryer to 350F
- Place a layer of parchment paper or aluminum foil inside your air fryer basket where you will be baking your cookies
- Place your cookie dough balls approximately 2 inches apart on top of the parchment paper
- Gently flatten your cookie dough balls with the palm of your hand or the bottom of a glass so they resemble a cookie shape instead of a ball. They should still be about 1/2" thick
- Cook for 6-8 minutes or until your cookies are beginning to crisp on the edges but are still gooey in the middle
Tips And Tricks
- Switch it up. Feel free to use your favorite sweet morsels (like peanut butter or butterscotch) or add in chopped walnuts or pecans for your perfect cookie combination.
- Let them cool. These cookies are good. Really good. It will be tempting to try to grab them to sneak a bite fresh out of the air fryer, but they will fall apart. Allowing them to rest for 2-3 minutes before removing them from the air fryer basket will keep them all in one piece.
- Make them low carb. I have a delicious Low Carb Chocolate Chip Cookie recipe that is also delicious when made in the air fryer.
Can You Freeze Them?
Do you love having cookies at your fingertips without baking them fresh every time? Do you have a hard time with self-control if you have a dozen cookies in your cookie jar?
Freezing these air fryer cookies is a great solution to your problems! If you want to freeze these cookies after they’re air fried, they stay delicious for up to 4 weeks in the freezer.
Here’s what you need to do to keep them tasting fresh in the freezer:
- Let the air fryer cookies cool completely
- Place a single layer of cookies in a gallon-sized freezer bag
- Layer a piece of parchment paper on top of the cookies
- Place the second layer of cookies on top of the parchment paper
- Repeat until the bag is full or you run out of cookies
- Label the freezer bag with the date and store laying flat in the freezer
Can You Freeze The Dough?
You absolutely can freeze the cookie dough. We actually prefer this to freezing the baked cookies because you get the delicious smell of fresh-baked cookies in your home every time.
Plus, you can decide how many cookies you want to bake. This is great for smaller families or people that try to limit their sweets.
Here’s how we prefer to freeze the dough:
- Roll all of the dough into tablespoon-sized balls
- Place a single layer of cookie dough in a gallon-sized freezer bag
- Layer a sheet of parchment paper on top of the dough balls
- Place an additional layer of dough balls on top of the parchment paper and repeat this process until you run out of room or dough
How To Air Fry Frozen Cookie Dough
Believe it or not, you do NOT have to defrost your cookie dough before you bake it in the air fryer.
To get deliciously gooey cookies after the dough has been frozen, simply keep the cooking temperature the same but increase the cooking time by 2-3 minutes.
More Of OurBest Cookie Recipes
- Thumbprint Cookies
- Cottage Cheese Cookies
- Red Velvet Cookies
- Chocolate Shortbread Cookies
- Salted Caramel Chocolate Chip Cookies
Air Fryer Chocolate Chip Cookies
Equipment
- Measuring Cups
- Measuring Spoons
- Mixing Bowl
- Ninja Air Fryer
Ingredients
- ▢ 2 1/2 cups All-Purpose Flour
- ▢ 1/2 tsp Kosher Salt
- ▢ 1 tsp Baking Soda
- ▢ 1 tsp Baking Powder
- ▢ 3/4 cup softened butter
- ▢ 2 Eggs
- ▢ 3/4 cup Brown Sugar
- ▢ 2 tsp Vanilla extract
- ▢ 12 oz chocolate chips
- ▢ 1/2 cup granulated sugar
Instructions
- Blend together softened butter, sugars, egg, and vanilla in a mixing bowl
- In a separaget bowl, mix flour, salt, baking soda, and baking powder
- Slowly incorporate the flour mixture into the butter and sugar mixture until well blended
- Fold in the chocolate chips
- Heat your air fryer to 350F
- Place a layer of parchment paper or aluminum foil inside your air fryer basket where you will be baking your cookies
- Place your cookie dough balls approximately 2 inches apart on top of the parchment paper
- Gently flatten your cookie dough balls with the palm of your hand or the bottom of a glass so they resemble a cookie shape instead of a ball. They should still be about 1/2" thick
- Cook for 6-8 minutes or until your cookies are beginning to crisp on the edges but are still gooey in the middle
Get support & connect with our community on Facebook!
Nutrition
And don’t forget to check out my air fryer cookbooks! Every day easy air fryer , and Air Fryer Revolution .


If you already signed up, you should have received an email with a password to give you unlimited access to our FREE Printable Library. The password is case sensitive. Enter it below and get printing!
Password:
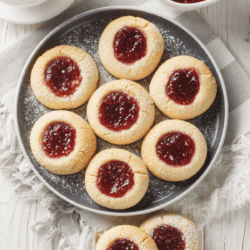
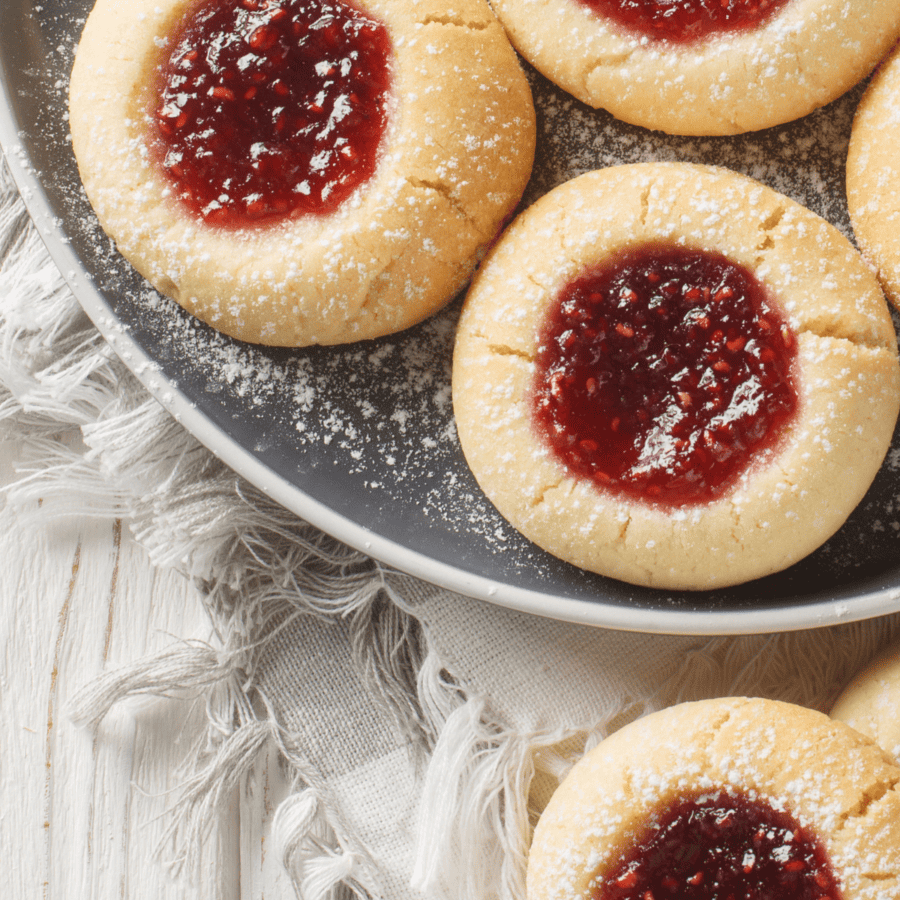
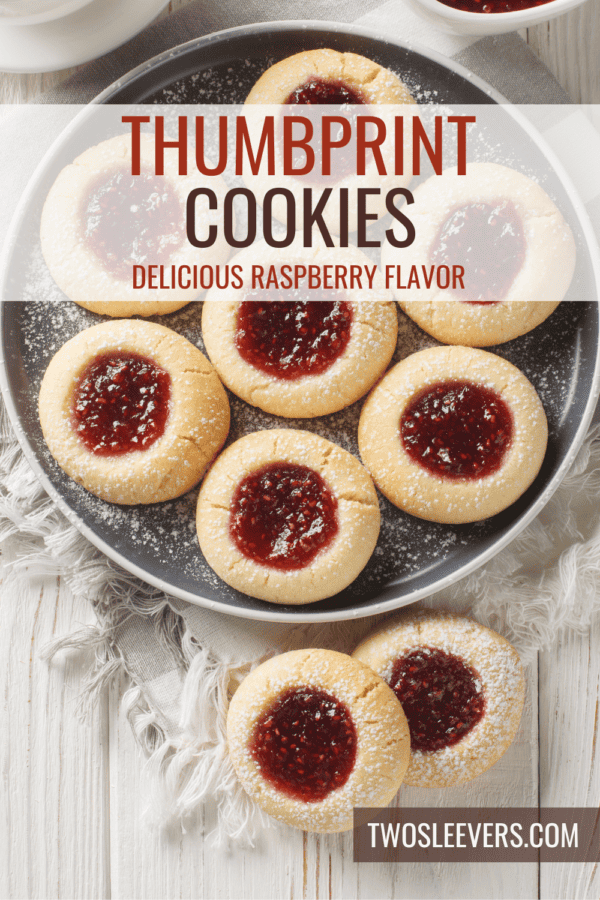
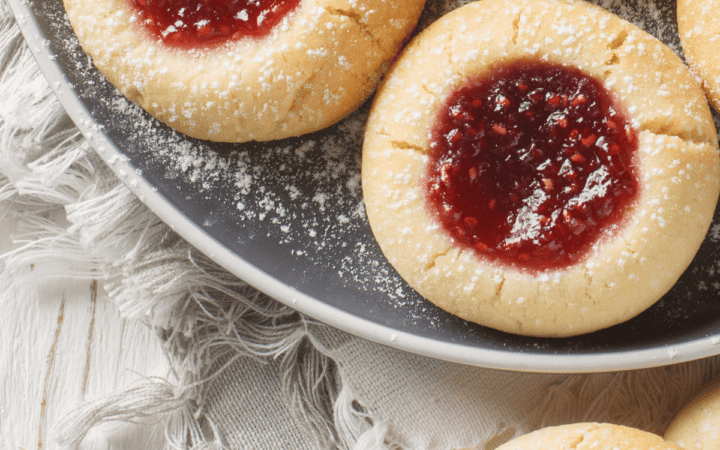
Satisfy your sweet tooth with our delectable Raspberry Thumbprint Cookies recipe. These delightful treats combine the buttery richness of shortbread cookies with a burst of tangy raspberry jam in every bite. Whether you’re baking for the holidays or just craving something sweet, these cookies are a must-try.

Why You’ll Love This Fruit-Flavored Dessert
- Irresistible Flavor . The combination of buttery cookie dough and sweet-tart raspberry jam creates a flavor explosion that’s simply irresistible.
- Easy to Make . Impress your family and friends with this beautiful dessert that is surprisingly easy to whip up. They make a great addition to any cookie platter.
- Versatile . Customize your thumbprint cookies with different fruit jams or preserves to suit your taste preferences. Apricot, strawberry, or blackberry are excellent alternatives to raspberry.
With their delightful crumbly texture and vibrant raspberry centers, these thumbprint cookies are a delightful treat for any occasion.
Why Are They Called Thumbprint Cookies?
Thumbprint cookies are called “thumbprint cookies” because of the distinctive method used to create a well or indentation in the center of each cookie. Typically, a thumb or the back of a spoon is gently pressed into the dough to make this signature thumbprint shape.
Why Do My Thumbprint Cookies Spread?
Ensuring that your thumbprint cookies maintain their shape and don’t overspread during baking requires proper preparation and careful steps. Here are some things to take into consideration before getting started:
- Chilled Dough . After mixing the cookie dough, refrigerate it for about 30 minutes. Chilled dough spreads less while baking, resulting in cookies with a better shape.
- Create Thumbprints Carefully . Use your thumb or the back of a measuring spoon to make an indentation in the center of each cookie. Be gentle to avoid cracking the dough.
- Preheat Your Oven . Make sure your oven is fully preheated to the specified temperature before placing the cookies inside. This helps them set quickly and hold their shape.
Why Is My Thumbprint Cookie Dough Crumbly?
If your thumbprint cookie dough is crumbly, there are several possible reasons for this issue. Here are some common factors and solutions to help you achieve the ideal cookie dough consistency:
- Dry Ingredients Ratio . One of the most common reasons for crumbly cookie dough is an incorrect ratio of dry ingredients, particularly flour. If you added too much flour, the dough can become dry and crumbly. Solution - To fix this, try adding a small amount of liquid (such as milk or water) to the dough, one tablespoon at a time, until it reaches the desired consistency. Be cautious not to overmix, as this can make the cookies tough.
- Overmixing . Overmixing the cookie dough can lead to a crumbly texture. Excessive mixing can develop gluten, which can result in a dry and tough cookie. Solution - Mix the dough only until the ingredients are combined. Overmixing should be avoided. Once the ingredients are integrated, stop mixing.
- Insufficient Binding Agent . The egg or egg yolk in the dough acts as a binding agent. If you didn’t use enough egg or egg yolk, the dough can be crumbly. Solution . Check the recipe and make sure you added the correct amount of eggs or egg yolks. If needed, add an extra yolk or a small amount of beaten egg to improve the dough’s consistency.
- Overworking the Dough . If you knead or handle the dough excessively, it can become crumbly. Thumbprint cookies are typically delicate and should not be overworked. Solution - Handle the dough gently when shaping the cookies. Avoid kneading or pressing it too much.
Ingredients You’ll Need
- Butter - Unsalted butter is the base of these cookies, providing richness and flavor.
- Granulated Sugar - Adds sweetness to the cookie dough.
- Egg Yolk - The yolk contributes to the tender texture of the cookies.
- Vanilla Extract - Infuses a delightful vanilla aroma and flavor.
- All-Purpose Flour - The main dry ingredient for the cookie dough.
- Salt - Enhances the overall flavor of the cookies.
- Raspberry Jam - Fills the thumbprints with fruity goodness.
- Powdered Sugar - For a dusting of sweetness on top.
How To Make Thumbprint Cookies
- Prepare the Cookie Dough . Cream together butter and sugar until light and fluffy. Add egg yolk and vanilla extract, then gradually mix in the flour and salt until the dough forms.
- Chill the Dough . Wrap the cookie dough in plastic wrap and refrigerate it for about 30 minutes.
- Shape and Fill . Roll the dough into small balls and place them on a baking sheet. Make an indentation in each cookie with your thumb or the back of a measuring spoon. Fill each indentation with raspberry jam.
- Bake to Perfection . Bake the cookies in a preheated oven until they’re golden brown around the edges.
- Cool and Enjoy . Allow the cookies to cool on a wire rack. Once cooled, dust them with powdered sugar for an extra touch of sweetness.
Tips And Tricks
Creating the perfect Raspberry Thumbprint Cookies can be a delightful baking experience. Here are some tips and tricks to help you make these delicious cookies with ease and precision:
- Softened Butter . Ensure that your butter is softened to room temperature before using it in the cookie dough. This makes it easier to cream with sugar and results in a smoother dough.
- Chill the Dough . After mixing the cookie dough, wrap it in plastic wrap and refrigerate it for about 30 minutes. Chilled dough is less likely to spread during baking, helping your cookies maintain their shape.
- Consistent Cookie Sizes . Keep the cookie sizes consistent to ensure even baking. Using a cookie scoop can help with this.
Variations
Thumbprint cookies are incredibly versatile, and you can get creative with various flavor combinations and fillings. Here are some delightful variations to try:
- Strawberry- Swap out the raspberry jam for strawberry jam or preserves for a different fruity twist.
- Chocolate- Fill the thumbprints with chocolate ganache or Nutella for a rich and indulgent treat.
- Cherry -Use cherry jam or cherry preserves for a sweet and vibrant filling.
- Cream Cheese and Fruit- Combine cream cheese with your choice of fruit preserves for a creamy and fruity center.
What To Enjoy With Thumbprint Cookies
These cookies are delightful on their own, but you can enhance your serving by pairing them with:
- Tea or Coffee - Enjoy these cookies with a hot cup of tea or coffee for a comforting treat.
- Ice Cream - Serve Raspberry Thumbprint Cookies alongside vanilla ice cream for a decadent dessert.
- Milk - Dunking these cookies in a glass of cold milk is a classic choice.
Should You Refrigerate Thumbprint Cookies?
Thumbprint cookies can be stored at room temperature in an airtight container for a few days, usually up to a week, without the need for refrigeration.
If your thumbprint cookies have a highly perishable filling, such as fresh fruit or dairy-based fillings like cream cheese or custard, it’s advisable to refrigerate them to prevent spoilage and foodborne illnesses.
Can You Freeze Them?
Yes, you can freeze these cookies for up to three months. Make sure they’re well wrapped to prevent freezer burn. Thaw at room temperature before serving.
More Of OurBest Cookie Recipes
- Almond Flour Cookies
- Keto Ginger Cookies
- Low Carb Chocolate Chip Cookies
- Cookie Dough Bites
- Air Fryer Chocolate Chip Cookies
Thumbprint Cookies Recipe | Raspberry Thumbprint Cookies
Ingredients
- ▢ 1/2 cup Unsalted Butter , softened
- ▢ 1/3 cup Granulated Sugar
- ▢ 1 Egg Yolk
- ▢ 1 tsp Vanilla Extract
- ▢ 1 1/4 cup All Purpose Flour
- ▢ 1/4 tsp Salt
- ▢ 1/3 cup Raspberry Preserves
- ▢ Powdered Sugar , for dusting
Instructions
- Prepare the Cookie Dough . Cream together butter and sugar until light and fluffy. Add egg yolk and vanilla extract, then gradually mix in the flour and salt until the dough forms.
- Chill the Dough . Wrap the cookie dough in plastic wrap and refrigerate it for about 30 minutes.
- Shape and Fill . Roll the dough into small balls and place them on a baking sheet. Make an indentation in each cookie with your thumb or the back of a measuring spoon. Fill each indentation with raspberry jam.
- Bake to Perfection . Bake the cookies in a preheated oven until they’re golden brown around the edges.
- Cool and Enjoy . Allow the cookies to cool on a wire rack. Once cooled, dust them with powdered sugar for an extra touch of sweetness.
Get support & connect with our community on Facebook!
Air Fryer Chocolate Chip Cookies
Ingredients
- 2 1/2 cups All-Purpose Flour
- 1/2 tsp Kosher Salt
- 1 tsp Baking Soda
- 1 tsp Baking Powder
- 3/4 cup softened butter
- 2 Eggs
- 3/4 cup Brown Sugar
- 2 tsp Vanilla extract
- 12 oz chocolate chips
- 1/2 cup granulated sugar
Instructions
- Blend together softened butter, sugars, egg, and vanilla in a mixing bowl
- In a separaget bowl, mix flour, salt, baking soda, and baking powder
- Slowly incorporate the flour mixture into the butter and sugar mixture until well blended
- Fold in the chocolate chips
- Heat your air fryer to 350F
- Place a layer of parchment paper or aluminum foil inside your air fryer basket where you will be baking your cookies
- Place your cookie dough balls approximately 2 inches apart on top of the parchment paper
- Gently flatten your cookie dough balls with the palm of your hand or the bottom of a glass so they resemble a cookie shape instead of a ball. They should still be about 1/2" thick
- Cook for 6-8 minutes or until your cookies are beginning to crisp on the edges but are still gooey in the middle
Air Fryer Chocolate Chip Cookies https://twosleevers.com/air-fryer-chocolate-chip-cookies/

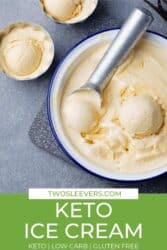


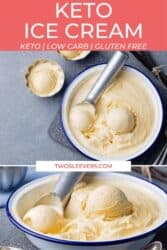

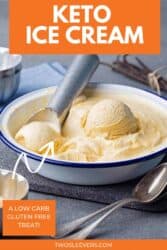


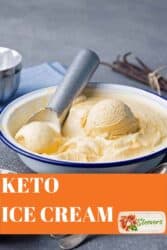

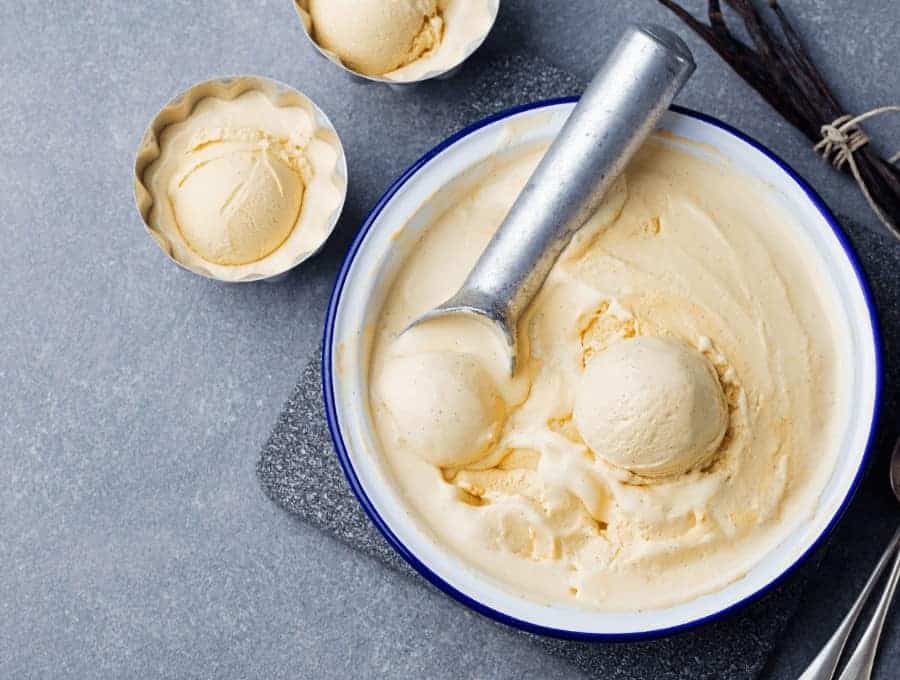
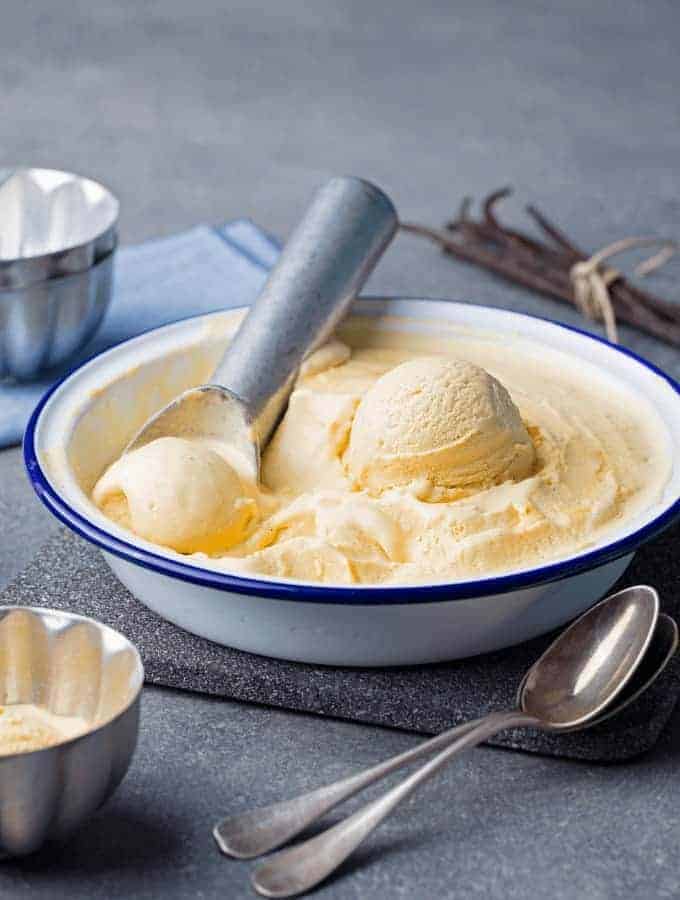
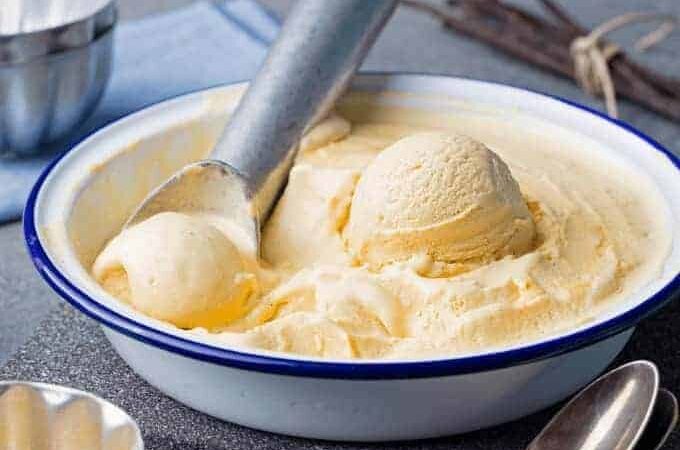
I tried four recipes before I settled on this Keto Ice Cream recipe. The others weren’t inedible by any means, as the empty containers can attest to, but none were this creamy, this smooth, and this delicious. This is going to be the best, easiest low carb ice cream recipe you’ve ever made .
What Makes This The BEST Keto Ice Cream?
- Low Carb . Only 4 net carbs per serving.
- Fast. A quick keto dessert that is ready in l ess than 30 minutes .
- Easy. Mix a few easy-to-find ingredients and toss them in your ice cream maker .
- No Cook. What’s better than a tasty sweet snack that you don’t have to cook?
I just got a new ice cream maker last week , and I’ve been playing with it. I was determined to find a recipe that didn’t require making a custard because I know myself.
I won’t do it and then it will be time to make ice cream and I’ll be about half a day away from having it. So I had to find something that worked without a custard.
The low carb Ice Cream recipe I settled on is borrowed heavily from the Serious Eats Ice Cream recipe with only one minor tweak, which was my addition of xanthan gum, and a sugar-free sweetener.
Not only was this tasty, but I got two different textures from one recipe. When freshly made, the Low Carb Ice Cream is like a soft serve, and very creamy. Once it’s cured for a bit, it’s a lot more like regular ice cream. Two different tastes from the same recipe make it fun.
Is Keto Ice Cream Good?
Heck yeah, it is. Of course, I’m a little biased since this is my recipe. But I have trouble keeping it in my freezer without even my non-Keto friends stealing a bite.
Can You Make Low Carb Ice Cream Without Eggs?
A lot of ice cream recipes use eggs as an ingredient. Since I’m all about #ruthlessefficiency I wanted a recipe that omitted the cooking step. Plus, the faster it’s ready to eat, the better. Am I right? For that reason, I decided that a Keto ice cream recipe without eggs was the one for me.
Will Keto Ice Cream Kick You Out Of Ketosis?
When indulging in low-carb ice cream, you need to be cautious of your portion size.
As with any other food when eating a keto lifestyle, you need to enjoy it in moderation. If you track your macros to keep them within a healthy limit you can easily enjoy this Keto Icecream without being kicked out of ketosis.
Ingredients You’ll Need
Keto ice cream is all about creamy indulgence without the sugar crash, and each ingredient plays a special role in keeping it smooth, scoopable, and delicious:
- 2 cups heavy cream - Provides the rich, velvety base and high fat content that creates classic ice cream creaminess while keeping carbs low.
- 1 cup whole milk - Lightens the texture slightly so the ice cream isn’t too dense, while still adding creaminess and helping it churn well.
- 1/3 cup Truvia - Acts as the keto-friendly sweetener, bringing the sweetness we crave without the sugar or extra carbs.
- 2 tablespoons whole milk powder - Boosts richness and helps prevent icy texture by adding milk solids that keep the ice cream smooth.
- 1/4 teaspoon xanthan gum - A magical little stabilizer that prevents ice crystals and improves scoopability—especially important in keto ice cream.
- 1–2 teaspoons vanilla extract - Adds fragrant, sweet flavor and rounds out the dairy richness with that classic vanilla ice cream aroma and taste.
How To Make This Keto Ice Cream Recipe
- Mix all ingredients well
- Put into the ice cream maker and swirl for 30 minutes
- OPTIONAL: top with my delicious Keto Granola for a nice crunch!
Tips And Tricks
Keto ice cream can be wonderfully creamy and decadent, but without sugar to help with texture, it needs a little extra care to stay scoopable and smooth. Here are some helpful tips to make your low carb ice cream perfect every time:
- Don’t skip the stabilizer . Xanthan gum keeps the texture silky and prevent the dreaded icy bite.
- Fat is your friend . Heavy cream adds richness and softness. Lean into that creamy goodness!
- Sweeten smartly . Erythritol-based sweeteners can make ice cream harder, so combine with allulose or Truvia for a softer scoop.
- Don’t over-churn . Stop when it’s just thickened to avoid turning it into butter (delicious, but not the goal here).
Variations
Low-carb ice cream is like a blank frozen canvas. Once you master the creamy keto base, you can swirl, sprinkle, and infuse your way into endless flavor without the sugar. Here are some fun variations to keep every scoop exciting:
- Chocolate Fudge - Add unsweetened cocoa powder and a ribbon of sugar-free fudge sauce for deep, swoon-worthy richness.
- Strawberry Cheesecake - Blend in sugar-free strawberry puree and cubes of keto cheesecake for dessert-within-a-dessert magic.
- Peanut Butter Cup - Swirl in sugar-free peanut butter and sprinkle chopped keto chocolate bars. Dreams do come true.
What To Enjoy With Low Carb Ice Cream
Keto ice cream is a dessert superstar on its own, but pairing it with the right low-carb treats turns it into a complete celebration. Here are some delicious ideas to enjoy alongside your frosty creation:
- Keto Brownies or Blondies - Warm and fudgy meets cold and creamy, the ultimate dessert power couple.
- Almond Flour Cookies - Use them as dippers or make a mini ice cream sandwich.
- Toasted Nuts - Pecans, almonds, or hazelnuts add crunch, richness, and extra healthy fats.
- Sugar-Free Chocolate Sauce - Drizzle a glossy ribbon of chocolate decadence over the top.
- Fresh Berries - Strawberries, raspberries, or blackberries add tart contrast and gorgeous pops of color.
How Long Does It Last?
Homemade keto ice cream lasts about 2–3 weeks in the freezer when stored in an airtight, freezer-safe container.
Because it doesn’t contain sugar, which helps keep traditional ice cream soft, it can firm up more over time, so let it sit at room temperature for a few minutes before scooping.
For the best texture and flavor, enjoy it within the first couple of weeks while it’s still at peak creaminess.
Want MoreKeto Friendly Desserts?
- Keto Cookies
- Low Carb Chocolate Chip Cookies
- No Bake Chocolate Peanut Butter Bars
- High Protein Jello Mousse
- French Silk Pudding
- Coconut Macaroons
Keto Ice Cream Recipe | No Cook Low Carb Ice Cream
Equipment
- CUISINART ICE CREAM MAKER
Ingredients
- ▢ 2 cups ( 476 g ) Heavy Cream
- ▢ 1 cup ( 244 g ) Whole Milk
- ▢ 1/3 cup ( 0.33 g ) Truvia
- ▢ 2 tablespoons ( 2 tablespoons ) Whole Milk Powder
- ▢ 1/4 teaspoon ( 0.25 teaspoon ) Xanthan Gum
- ▢ 1-2 teaspoons ( 1 teaspoons ) vanilla extract
Instructions
- Mix together sweetener, dry milk powder, and xanthum gum, and whisk well to avoid lumps.
- Pour in the milk, cream, and vanilla extract and mix until the sweetener is dissolved.
- Pour into ice cream maker and churn until set.
- it tastes a lot creamier when fresh, and a lot more like ice cream when it’s been allowed to cure in the freezer. Try it both ways and see which you prefer.
Get support & connect with our community on Facebook!
Nutrition
Don’t forget to check out my other Ketocookbooks.
Keto Instant Pot, Keto Fat Bombs, Sweets, & Treats , and Easy keto in 30 minutes.

