


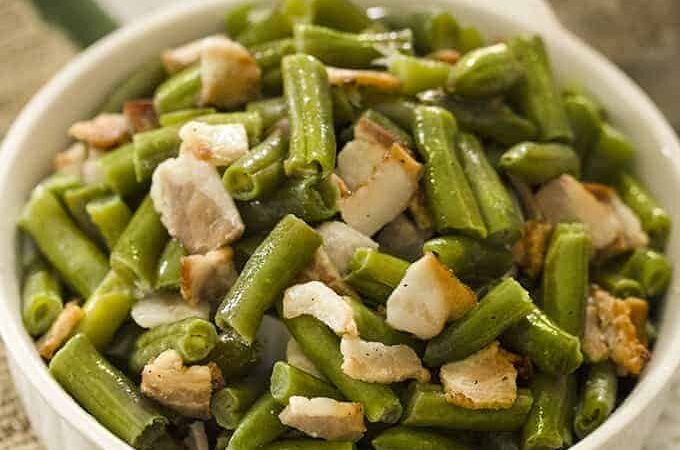
I’m sure that as soon as you read that word “bacon” in this Air Fried Green Beans recipe, you got just as excited as I did. Bacon is such a tasty ingredient to add to many recipes like these Air Fryer Green Beans with Bacon.
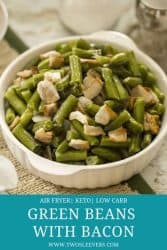
Air Fryer Green Beans with Bacon | Air Fryer Recipe
I love my veggies however, it’s nice to mix things up and add new flavors. These Air Fryer Green Beans and Bacon are still a healthier dish without having to go all out with a ton of extra ingredients.
You may have seen my recipe for the Instant Pot version of this dish . I’m a gadget geek, so I like to figure out recipes using other gadgets to make my favorite recipes, so if one appliance is being used I can always use another one.
I can’t decide which version of these Green Beans with Bacon I like better!
Why Are These Bacon Green Beans So Good?
- Fast. Done in under 30 minutes in your air fryer .
- Easy. No prep work for this recipe. Just grab frozen green beans and bacon when it’s time to eat.
- Low Carb . Only 4 net carbs per serving.
- Tasty. There’s bacon. Do I really need to say more?
These Air Fried Green Beans with Bacon are at the top of my list because they’re so easy and quick to make.
Can You Make Frozen Green Beans In The Air Fryer?
Yes, you can. In fact, I used frozen green beans in this recipe. I like recipes that require almost no planning. Frozen green beans and bacon –zero planning but great taste.
I find the air fryer does a great job of defrosting the beans as you go, and I do think they actually taste better, and moister than fresh green beans in an air fryer.
The fresh ones can sometimes taste a little dry to me after they’ve been air fried. But the moisture content in frozen ones seems to do a wonderful, steaming/cooking job that I just love.
Ingredients You’ll Need
- Frozen Cut Green Beans - You can use any variety of green beans for this recipe.
- Bacon - I like to dice my bacon into small chunks so they crisp up more.
- Water - This helps the frozen green beans cook through in a shorter amount of time.
- Kosher Salt - You’ll need just a pinch or two. The bacon gives a salty flavor to the green beans.
- Ground Black Pepper - This adds just a touch of spice and flavor to the air fryer green beans.
How To Make Green Beans With Bacon
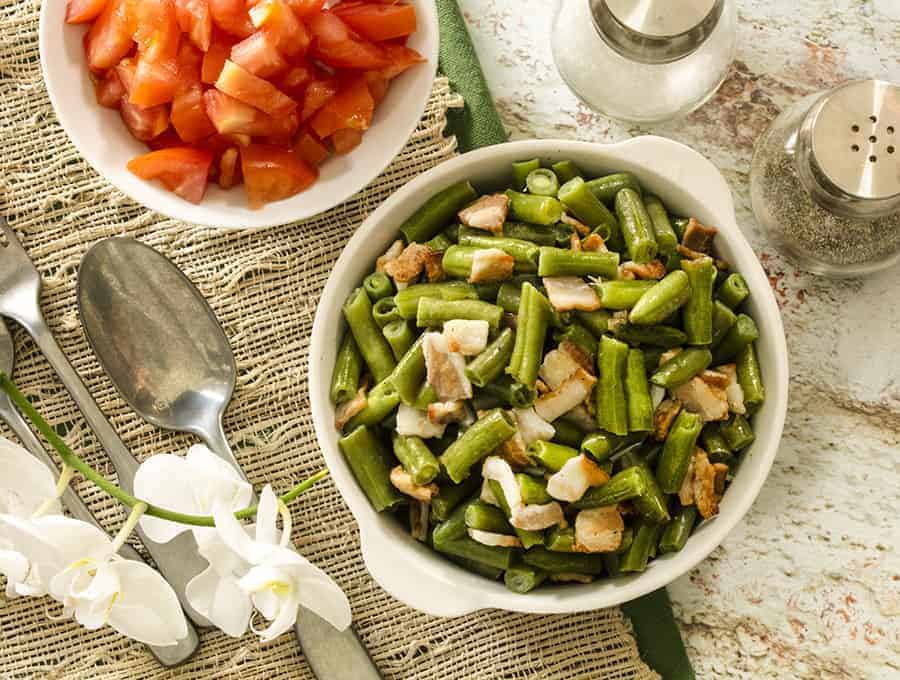
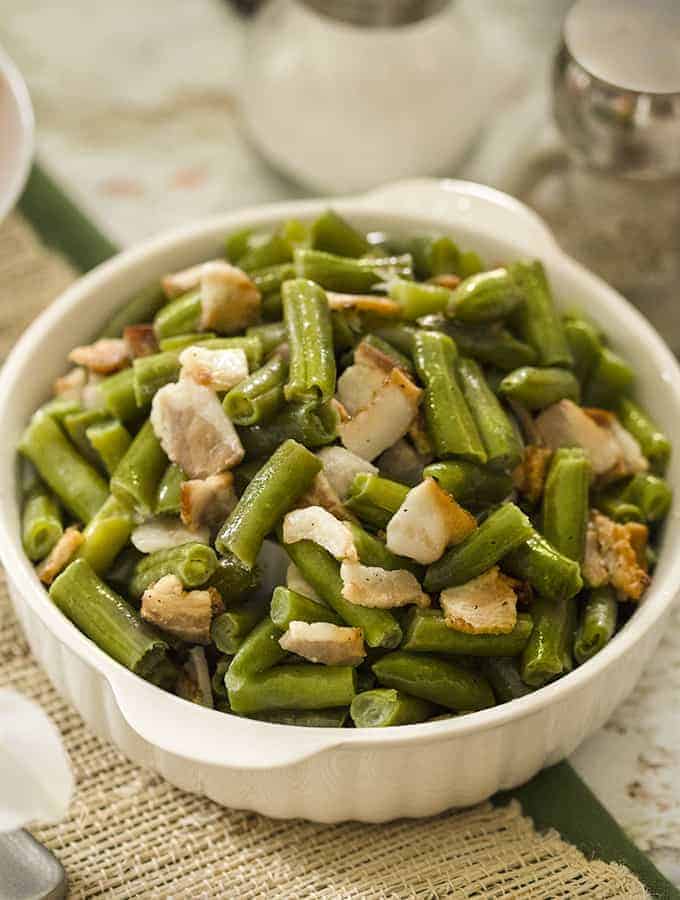
- Place the frozen green beans, onion, bacon, and water in a 6 x 3-inch heatproof pan.
- Place the pan in the air fryer basket for 15 minutes.
- Raise the air fryer temperature to 400°F for 5 minutes.
- Remove from the air fryer and cover the pan.
- Let it rest for 5 minutes and serve.
Tips and Tricks for Making Air Fryer Green Beans
- I find that frozen vegetables often cook up better in an air fryer if you’re looking for moist, tender beans.
- If you want crispy beans, you should start with fresh beans rather than frozen ones.
- You can also substitute cooked sausage for the bacon.
- If you use lean chicken sausage, then you may have to spray the beans with a little oil to get the best “air fried” texture from them.
I enjoy using the fattier pieces of the bacon for this Air Fryer Green Beans with Bacon dish .
All that flavor seeps out and soaks into the green beans making the entire dish full of the perfect flavor. All this talk of delicious side dishes makes me want to go make it right now.
How Long Do They Last?
For the best results, try to enjoy these air fried green beans within 4-5 days of preparing them. The longer they sit in the refrigerator, the softer the texture will become. Make sure you store them in an air-tight container to lock in the moisture.
Want MoreAir Fryer Recipes?
- Cheesy Potatoes
- Keto Chicken Tenders
- Cauliflower Buffalo Wings
- Taco Meatballs
- Sesame Ginger Broccoli
- Fruit Hand Pies
- Roasted Green Beans
I have no doubt you’ll love this keto air fryer recipe as much as I have.
If you do like this Air Fried Green Beans recipe as much as I do, make sure you share it with your friends on Facebook and Pinterest to make again soon.
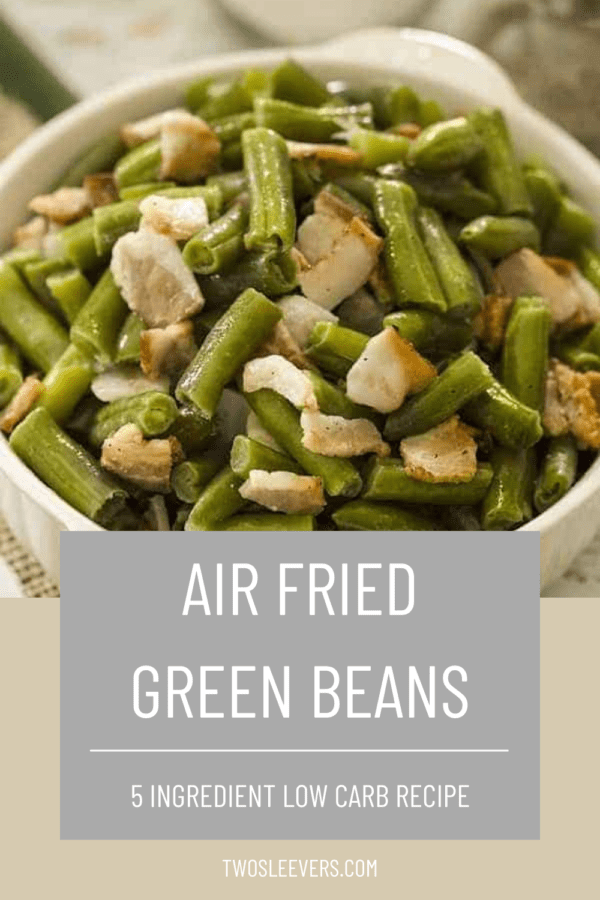
Air Fryer Green Beans with Bacon
Equipment
- PHILLIPS AIR FRYER
- 6 x 3 FAT DADDIO BAKING PAN
Ingredients
- ▢ 3 cups ( 330 g ) Frozen Cut Green Beans
- ▢ 3 slices ( 3 slices ) Bacon , diced
- ▢ 1/4 cup ( 62.5 ml ) Water
- ▢ 1 teaspoon ( 1 teaspoon ) Kosher Salt
- ▢ 1 teaspoon ( 1 teaspoon ) Ground Black Pepper
Instructions
Place the frozen green beans, onion, bacon, and water in a 6 x 3 inch heatproof pan.
Place the pan in the air fryer basket. Set air fryer to 375°F for 15 minutes.
Raise the air fryer temperature to 400°F for 5 minutes. Add salt and pepper to taste and toss well.
Remove from the air fryer and cover the pan. Let it rest for 5 minutes and serve.
I find that frozen vegetables often cook up better in an air fryer if you’re looking for moist, tender beans.
If you want crispy beans, you should start with fresh beans rather than frozen.
You can also substitute cooked sausage for the bacon.
If you use a lean chicken sausage, then you may have to spray the beans with a little oil to get the best “air fried” texture from them.
Get support & connect with our community on Facebook!
Nutrition
And don’t forget to check out my air fryer cookbooks! Every day easy air fryer , and Air Fryer Revolution .


If you already signed up, you should have received an email with a password to give you unlimited access to our FREE Printable Library. The password is case sensitive. Enter it below and get printing!
Password:

Air Fryer Green Beans with Bacon
Ingredients
- 3 cups Frozen Cut Green Beans
- 3 slices Bacon diced
- 1/4 cup Water
- 1 teaspoon Kosher Salt
- 1 teaspoon Ground Black Pepper
Instructions
Place the frozen green beans, onion, bacon, and water in a 6 x 3 inch heatproof pan.
Place the pan in the air fryer basket. Set air fryer to 375°F for 15 minutes.
Raise the air fryer temperature to 400°F for 5 minutes. Add salt and pepper to taste and toss well.
Remove from the air fryer and cover the pan. Let it rest for 5 minutes and serve.
I find that frozen vegetables often cook up better in an air fryer if you’re looking for moist, tender beans.
If you want crispy beans, you should start with fresh beans rather than frozen.
You can also substitute cooked sausage for the bacon.
If you use a lean chicken sausage, then you may have to spray the beans with a little oil to get the best “air fried” texture from them.
Air Fryer Green Beans with Bacon https://twosleevers.com/air-fryer-green-beans/
This Instant Pot Lasagna Recipe made with zucchini is so good you won’t even be able to tell that it’s low carb or gluten free ! Thanks to your Instant Pot, it’s easy to make as well.

Can You Make Lasagna In The Instant Pot?
I use my Instant Pot a lot. So much so, in fact, that I’ve found ways to convert my favorite recipes into Instant Pot recipes . I also like to turn some of my favorite recipes into Keto-friendly meals because that’s how my husband and I maintain our weight loss.
This Keto Zucchini Lasagna Recipe was an absolute hit in my house, and I can’t think of a better cooking method for it than my Instant Pot.
We didn’t miss the noodles in this recipe at all, and it was very filling. The flavors are fantastic, the texture was great, and it’s loaded with cheesy goodness like every good lasagna should be. Not to mention lasagna is all very easy and simple when you don’t have to cook and layer noodles.
I use a springform pan to make this dish like I do a lot of recipes in my Instant Pot, and it works really well for this Zucchini Lasagna. It not only holds everything together well, but makes it really easy to cut and serve to my guests as well.
You will also need a tall trivet or steamer rack for this.
Ingredients You’ll Need
- Low Sugar Marinara Sauce - You can also use my homemade marinara sauce for this.
- Zucchini - Cut this into long, thin slices.
For Meat Layer
- Onions- These can be chopped or diced depending on your personal preference.
- Minced Garlic
- Italian sausage- Use either mild or hot. I prefer the extra flavor kick hot Italian sausage gives to this Instant Pot Lasagna recipe.
For Cheese Layer
- Ricotta chees e- Adds the creamy cheese layer that you know and love in lasagna.
- Shredded mozzarella cheese - Makes it melty and utterly delicious.
- Shredded parmesan cheese
- Eggs - Helps bind the ricotta and Italian sausage so the filling isn’t runny and unruly.
- Garlic
- Italian Seasoning - Is perfectly spiced to add a traditional Italian flavor to this low carb dish.
- Ground Black Pepper
Why Use Zucchini?
Zucchini is a naturally low-carb food. In addition to that, when you use a mandolin slicer to slice the zucchini into long thin slices, it masks itself as noodles (maybe even enough to get your kids to eat some). It also absorbs the flavors around it easily and cooks quickly too. So, why not zucchini?
Even if your guests aren’t eating a low-carb diet, they’d still enjoy this Zucchini Lasagna Recipe. Vegetables in lasagna is no new thing, and you hardly miss the pasta in this dish with all the cheese and lovely sausage.
How To Make Instant Pot Lasagna with Zucchini
When many people think of preparing lasagna, they assume it will be a very time-consuming dish. That is simply not the case if you follow my easy steps and use your Instant Pot to decrease the amount of time it has to cook.
As long as you can slice zucchini, layer some meat, cheese, and marinara sauce, and follow some super simple instructions, you can have an Instant Pot Lasagna done in a flash!
- Using a mandolin, slice the zucchini into long, thin slices.
- Spray a springform pan with oil and arrange the zucchini in slightly overlapping layers.
- Spread a small amount of the marinara sauce on top of the zucchini.
- Mix the onions, garlic, and Italian sausage. Spread this mixture evenly on top of the zucchini layer.
- Add the rest of the marinara sauce and spread it evenly on top of the meat and cheese mixture.
- Mix together the ricotta and mozzarella and some of the Parmesan cheese.
- Evenly arrange the cheese mixture on top of the meat.
- Top with the remaining Parmesan cheese.
- Cover the pan with foil or a silicone lid to reduce condensation that may form on the top of your lasagna.
- Add two cups of water to the inner liner of the Instant Pot. Place a steamer rack in the pot and the covered lasagna bake on the steamer rack.
- Cook on high pressure for 20 minutes and allow a 10 minute natural release.
- Once it is finished cooking in the Instant Pot you can choose to crisp the top layer of cheese with an air fryer lid or place it in the broiler. This step is not necessary, it just adds additional texture and eye appeal to your Instant Pot Lasagna.
Tips and Tricks
Use a metal springform pan . If you use glass, you will have to adjust the timing on this.
Wrap the bottom of the springform pan in foil if yours leaks. I have linked to this springform pan, but honestly, I have had several of these, some of which have leaked and others haven’t. So if your pan leaks, add a sheet of foil at the bottom. You will then also need to increase cook time by 5 minutes or so since the foil will retard heat transfer.
You can either create a sling made from foil that will help you lift out the lasagna afterward or you can use silicone mitts.
I prefer silicone mitts as the regular cloth ones take on the steam from the pressure cooker as you open it, get damp, and then get hot very quickly. The silicone mitts are also easy to throw into the dishwasher for cleaning.
You can choose to broil the top of your lasagna afterward. If you have a Ninja Foodi this is very easy.
You can also do the same thing with a Mealthy Crisp Lid to brown the top of the lasagna.
Due to the moist environment in a Pressure Cooker, you will likely have some condensation on the top of your lasagna. You can either ignore this because after all–deliciousness–or you could cover it with foil to keep the moisture off. By now you know what I’m going to say–if you cover with foil, add a few minutes of cook time!
You could also just dab this moisture off with a paper towel before broiling.
Notice I do NOT ask you to precook the meat. Pressure cooking will cook that meat for you, and here once again, is #ruthlessefficiency at work.
Use a metal springform pan . If you use glass, you will have to adjust the timing on this.
How Long Does It Last?
Both zucchini and ricotta cheese have a high moisture content, so these leftovers do not last quite as long as a traditional lasagna made with pasta. For best results, try to enjoy your Instant Pot Lasagna within 3 days of preparing it.
This recipe only makes 4 servings and is incredibly tasty, so finishing it in a few days really isn’t that hard to do.
What Do You Serve With Instant Pot Lasagna?
This Zucchini lasagna offers everything you could want in a well-balanced meal all in one pan, but adding something on the side to make it more filling (as long as it fits within your daily macros) is never a bad idea.
Here are a few of my favorite things to serve with this Instant Pot Lasagna:
- Tabouli with Hemp Hearts
- AntiPasto Salad
- Baked Cauliflower with Cheese
Our Best Zucchini Recipes
- Zucchini Boats
- Zucchini Pancakes
- Keto Zucchini Lasagna
- Zucchini Soup
- Zucchini Roll Ups


Zucchini Lasagna Recipe
Ingredients
- ▢ 1 cup Low Sugar Marinara Sauce
- ▢ 1 Zucchini , sliced into long, thin slices
For Meat Layer (Mix all ingredients together in a bowl)
- ▢ 1 cup onions, chopped , diced
- ▢ 1 teaspoon Minced Garlic
- ▢ 1/2 pound bulk hot or mild italian sausage
For Cheese Layer (Mix all ingredients together in a bowl)
- ▢ 1/2 cup ricotta cheese
- ▢ 1/2 cup shredded mozzarella cheese
- ▢ 1/2 cup shredded parmesan cheese
- ▢ 1 Eggs
- ▢ 1/2 teaspoon Garlic , minced
- ▢ 1/2 teaspoon Italian Seasoning
- ▢ 1/2 teaspoon Ground Black Pepper
Instructions
Using a mandolin, slice the zucchini into long, thin slices.
Spray a 7-inch springform pan with oil and arrange the zucchini in overlapping layers in the bottom of the pan.
Place 1/4 cup of marinara sauce on top of the zucchini and spread evenly.
In a large bowl, mix the onions, garlic, and Italian sausage. Layer the meat on top of the zucchini and spread evenly.
Pour the rest of the marinara sauce and spread it evenly.
Rinse the bowl you used earlier, and mix together the ricotta and mozzarella and 1/4 of a cup of the Parmesan cheese.
Spread the cheese mixture on top of the meat.
Top with the remaining Parmesan cheese.
To recap, the layer are so: zucchini, sauce, meat, sauce, cheese mix, Parmesan cheese.
Cover the pan with foil or a silicone lid.
In the inner liner of the instant pot, place 2 cups of water in the instant pot. Place a steamer rack in the pot. Place the covered lasagna bake on the steamer rack.
Cook on high pressure for 20 minutes. Allow the pot to rest undisturbed for 10 minutes and then release all remaining pressure.
At this point you can either broil it in a hot oven to brown the top, or serve as is by unclasping the sides of the springform pan.
Use a metal springform pan. If you use glass, you will have to adjust the timing on this.
Wrap the bottom of the springform pan in foil if yours leaks. I have linked to this springform pan, but honestly, I have had several of these, some of which have leaked and others haven’t. So if your pan leaks, add a sheet of foil at the bottom. You will then also need to increase cook time by 5 minutes or so since the foil will retard heat transfer.
You can either create a sling made from foil that will help you lift out the lasagna afterward or you can use silicone mitts.
I prefer silicone mitts as the regular cloth ones take on the steam from the pressure cooker as you open it, get damp, and then get hot very quickly. The silicone mitts are also easy to throw into the dishwasher for cleaning.
You can choose to broil the top of your lasagna afterward. If you have a Ninja Foodi this is very easy.
You can also do the same thing with a Mealthy Crisp Lid to brown the top of the lasagna.
Due to the moist environment in a Pressure Cooker, you will likely have some condensation on the top of your lasagna. You can either ignore this because after all–deliciousness–or you could cover it with foil to keep the moisture off. By now you know what I’m going to say–if you cover with foil, add a few minutes of cook time!
You could also just dab this moisture off with a paper towel before broiling.
Notice I do NOT ask you to precook the meat. Pressure cooking will cook that meat for you, and here once again, is #ruthlessefficiency at work.
Note that you can reduce carbs even more by using a low-sugar marinara sauce.
You can also cut onions down to 1/2 cup and get even more carb savings.
Get support & connect with our community on Facebook!
Nutrition
Want MoreOne Pot Instant Pot Recipes?
- Instant Pot Butter Chicken is an easy 30-minute dinner and you can make rice on top of it, as the video shows.
- Pressure Cooker Rice and Dal is a great vegetarian rice dinner.
- This Lebanese Lentil and Rice dish is another great Vegetarian Instant Pot recipe .
- Instant Pot Indian Khichadi is comfort food in a bowl!
- Instant Pot Risotto with Shrimp is another one-pot comfort meal.
- Buffalo chicken casserole for the days you want low carb recipes
- You might also like low carb Chicken Biryani that uses riced cauliflower.
- Chicken and Mushrooms are a great combo.
- My kids love Instant Pot Pork Chops with Rice and Vegetables
- Zucchini Lasagna - You won’t even miss the pasta.
- Haluski Recipe - A wonderful cabbage and noodles recipe.
